Tutorial: Device Update for Azure IoT Hub using the package agent on Ubuntu Server 22.04 x64
Device Update for Azure IoT Hub supports image-based, package-based, and script-based updates.
Package-based updates are targeted updates that alter only a specific component or application on the device. They lead to lower consumption of bandwidth and help reduce the time to download and install the update. Package-based updates also typically allow for less downtime of devices when you apply an update and avoid the overhead of creating images. They use an APT manifest, which provides the Device Update agent with the information it needs to download and install the packages specified in the APT manifest file (and their dependencies) from a designated repository.
This tutorial walks you through updating Azure IoT Edge on Ubuntu Server 22.04 x64 by using the Device Update package agent. Although the tutorial demonstrates installing the Microsoft Defender for IoT, by using similar steps you could update other packages, such as the IoT Edge itself or the container engine it uses.
The tools and concepts in this tutorial still apply even if you plan to use a different OS platform configuration. Finish this introduction to an end-to-end update process. Then choose your preferred form of updating an OS platform to dive into the details.
In this tutorial, you'll learn how to:
- Download and install the Device Update agent and its dependencies.
- Add a tag to your device.
- Import an update.
- Deploy a package update.
- Monitor the update deployment.
Prerequisites
If you haven't already done so, create a Device Update account and instance. Configure an IoT hub.
You need the connection string for an IoT Edge device.
If you used the Simulator agent tutorial for prior testing, run the following command to invoke the APT handler and deploy over-the-air package updates in this tutorial:
sudo /usr/bin/AducIotAgent --register-content-handler /var/lib/adu/extensions/sources/libmicrosoft_apt_1.so --update-type 'microsoft/apt:1'
Prepare a device
Use the automated Deploy to Azure button
For convenience, this tutorial uses a cloud-init-based Azure Resource Manager template to help you quickly set up an Ubuntu 22.04 LTS VM(Virtual Machine). It installs both the Azure IoT Edge runtime and the Device Update package agent. Then it automatically configures the device with provisioning information by using the device connection string for an IoT Edge device (prerequisite) that you supply. The Resource Manager template also avoids the need to start an SSH session to complete setup.
To begin, select the button:
.
Fill in the available text boxes:
- Subscription: The active Azure subscription to deploy the virtual machine into.
- Resource group: An existing or newly created resource group to contain the virtual machine and its associated resources.
- Region: The geographic region to deploy the virtual machine into. This value defaults to the location of the selected resource group.
- DNS Label Prefix: A required value of your choosing that's used to prefix the hostname of the virtual machine.
- Admin Username: A username, which is provided root privileges on deployment.
- Device Connection String: A device connection string for a device that was created within your intended IoT hub.
- VM Size: The size of the virtual machine to be deployed.
- Ubuntu OS Version: The version of the Ubuntu OS to be installed on the base virtual machine. Leave the default value unchanged because it is set to Ubuntu 22.04-LTS already.
- Authentication Type: Choose sshPublicKey or password based on your preference.
- Admin Password or Key: The value of the SSH Public Key or the value of the password based on the choice of authentication type.
After all the boxes are filled in, select the checkbox at the bottom of the page to accept the terms. Select Purchase to begin the deployment.
Verify that the deployment is completed successfully. Allow a few minutes after deployment completes for the post-installation and configuration to finish installing IoT Edge and the device package update agent.
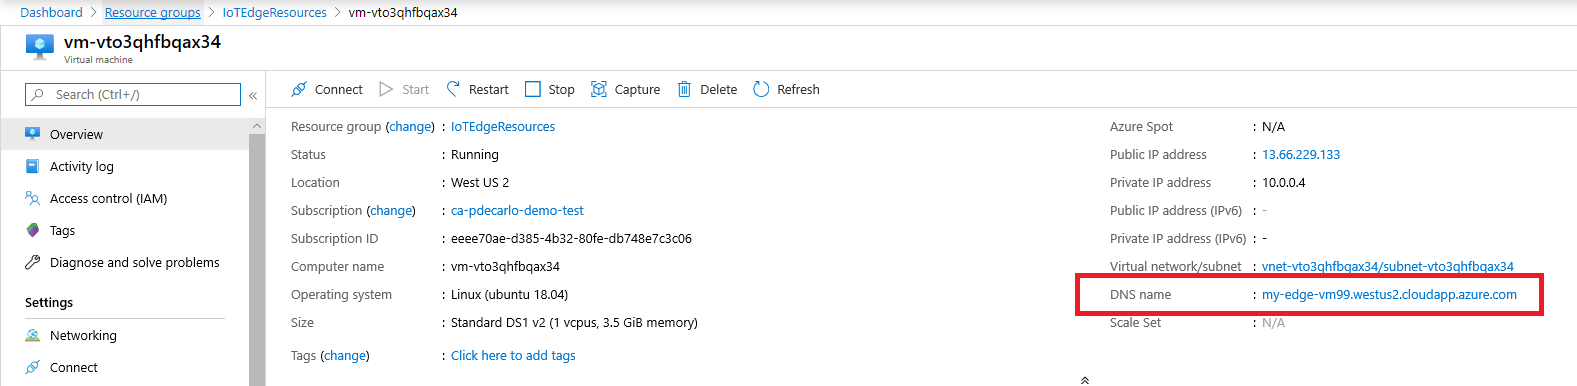
A virtual machine resource should be deployed into the selected resource group. Note the machine name, which is in the format
vm-0000000000000. Also note the associated DNS name, which is in the format<dnsLabelPrefix>.<location>.cloudapp.azure.com.You can obtain the DNS name from the Overview section of the newly deployed virtual machine in the Azure portal.
Tip
To SSH into this VM after setup, use the associated DNS name with the following command:
ssh <adminUsername>@<DNS_Name>.Install the Device update agent on the VM.
sudo apt-get install deviceupdate-agentOpen the configuration details (See how to set up configuration file here with the command below. Set your connectionType as 'AIS' and connectionData as empty string. Note that all values with the 'Place value here' tag must be set. See Configuring a Device Update agent.
sudo nano /etc/adu/du-config.jsonRestart the Device Update agent.
sudo systemctl restart deviceupdate-agent
Device Update for Azure IoT Hub software packages are subject to the following license terms:
Read the license terms before you use a package. Your installation and use of a package constitutes your acceptance of these terms. If you don't agree with the license terms, don't use that package.
Add a tag to your device
Sign in to the Azure portal and go to the IoT hub.
On the left pane, under Devices, find your IoT Edge device and go to the device twin or module twin.
In the module twin of the Device Update agent module, delete any existing Device Update tag values by setting them to null. If you're using Device identity with Device Update agent, make these changes on the device twin.
Add a new Device Update tag value, as shown:
    "tags": {
        "ADUGroup": "<CustomTagValue>"
    },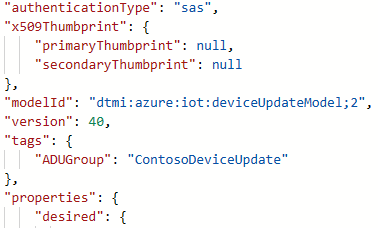
This screenshot shows the section where the tag needs to be added in the twin.

Import the update
Go to Device Update releases in GitHub and select the Assets dropdown list. Download
Tutorial_IoTEdge_PackageUpdate.zipby selecting it. Extract the contents of the folder to discover a sample APT manifest (sample-defender-iot-apt-manifest.json) and its corresponding import manifest (sample-defender-iot--importManifest.json).Sign in to the Azure portal and go to your IoT hub with Device Update. On the left pane, under Automatic Device Management, select Updates.
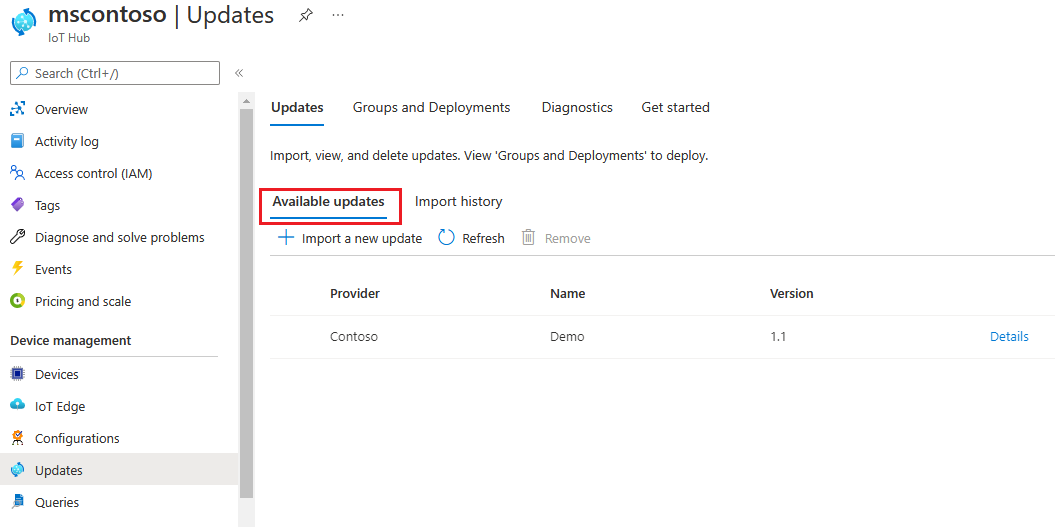
Select the Updates tab.
Select + Import New Update.
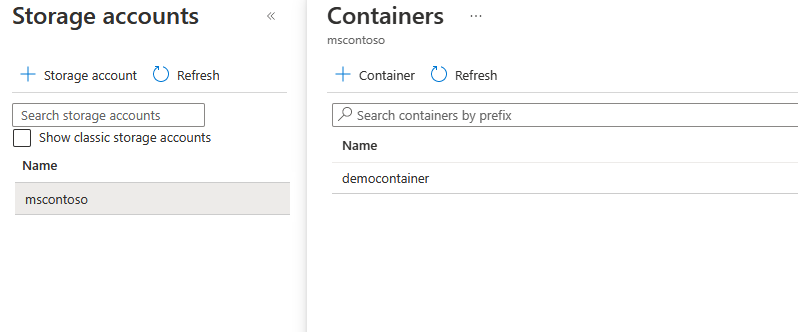
Select + Select from storage container. Select an existing account or create a new account by using + Storage account. Then select an existing container or create a new container by using + Container. This container is used to stage your update files for importing.
Note
We recommend that you use a new container each time you import an update to avoid accidentally importing files from previous updates. If you don't use a new container, be sure to delete any files from the existing container before you finish this step.
In your container, select Upload and go to the files you downloaded in step 1. After you select all your update files, select Upload. Then select the Select button to return to the Import update page.

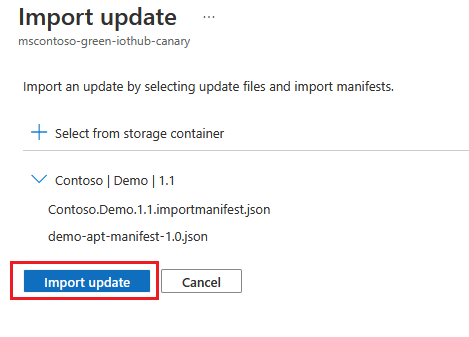
This screenshot shows the import step. File names might not match the ones used in the example.
On the Import update page, review the files to be imported. Then select Import update to start the import process.
The import process begins, and the screen switches to the Import History section. When the Status column indicates that the import succeeded, select the Available updates header. You should see your imported update in the list now.


For more information about the import process, see Import an update to Device Update.
View device groups
Device Update uses groups to organize devices. Device Update automatically sorts devices into groups based on their assigned tags and compatibility properties. Each device belongs to only one group, but groups can have multiple subgroups to sort different device classes.
Go to the Groups and Deployments tab at the top of the page.
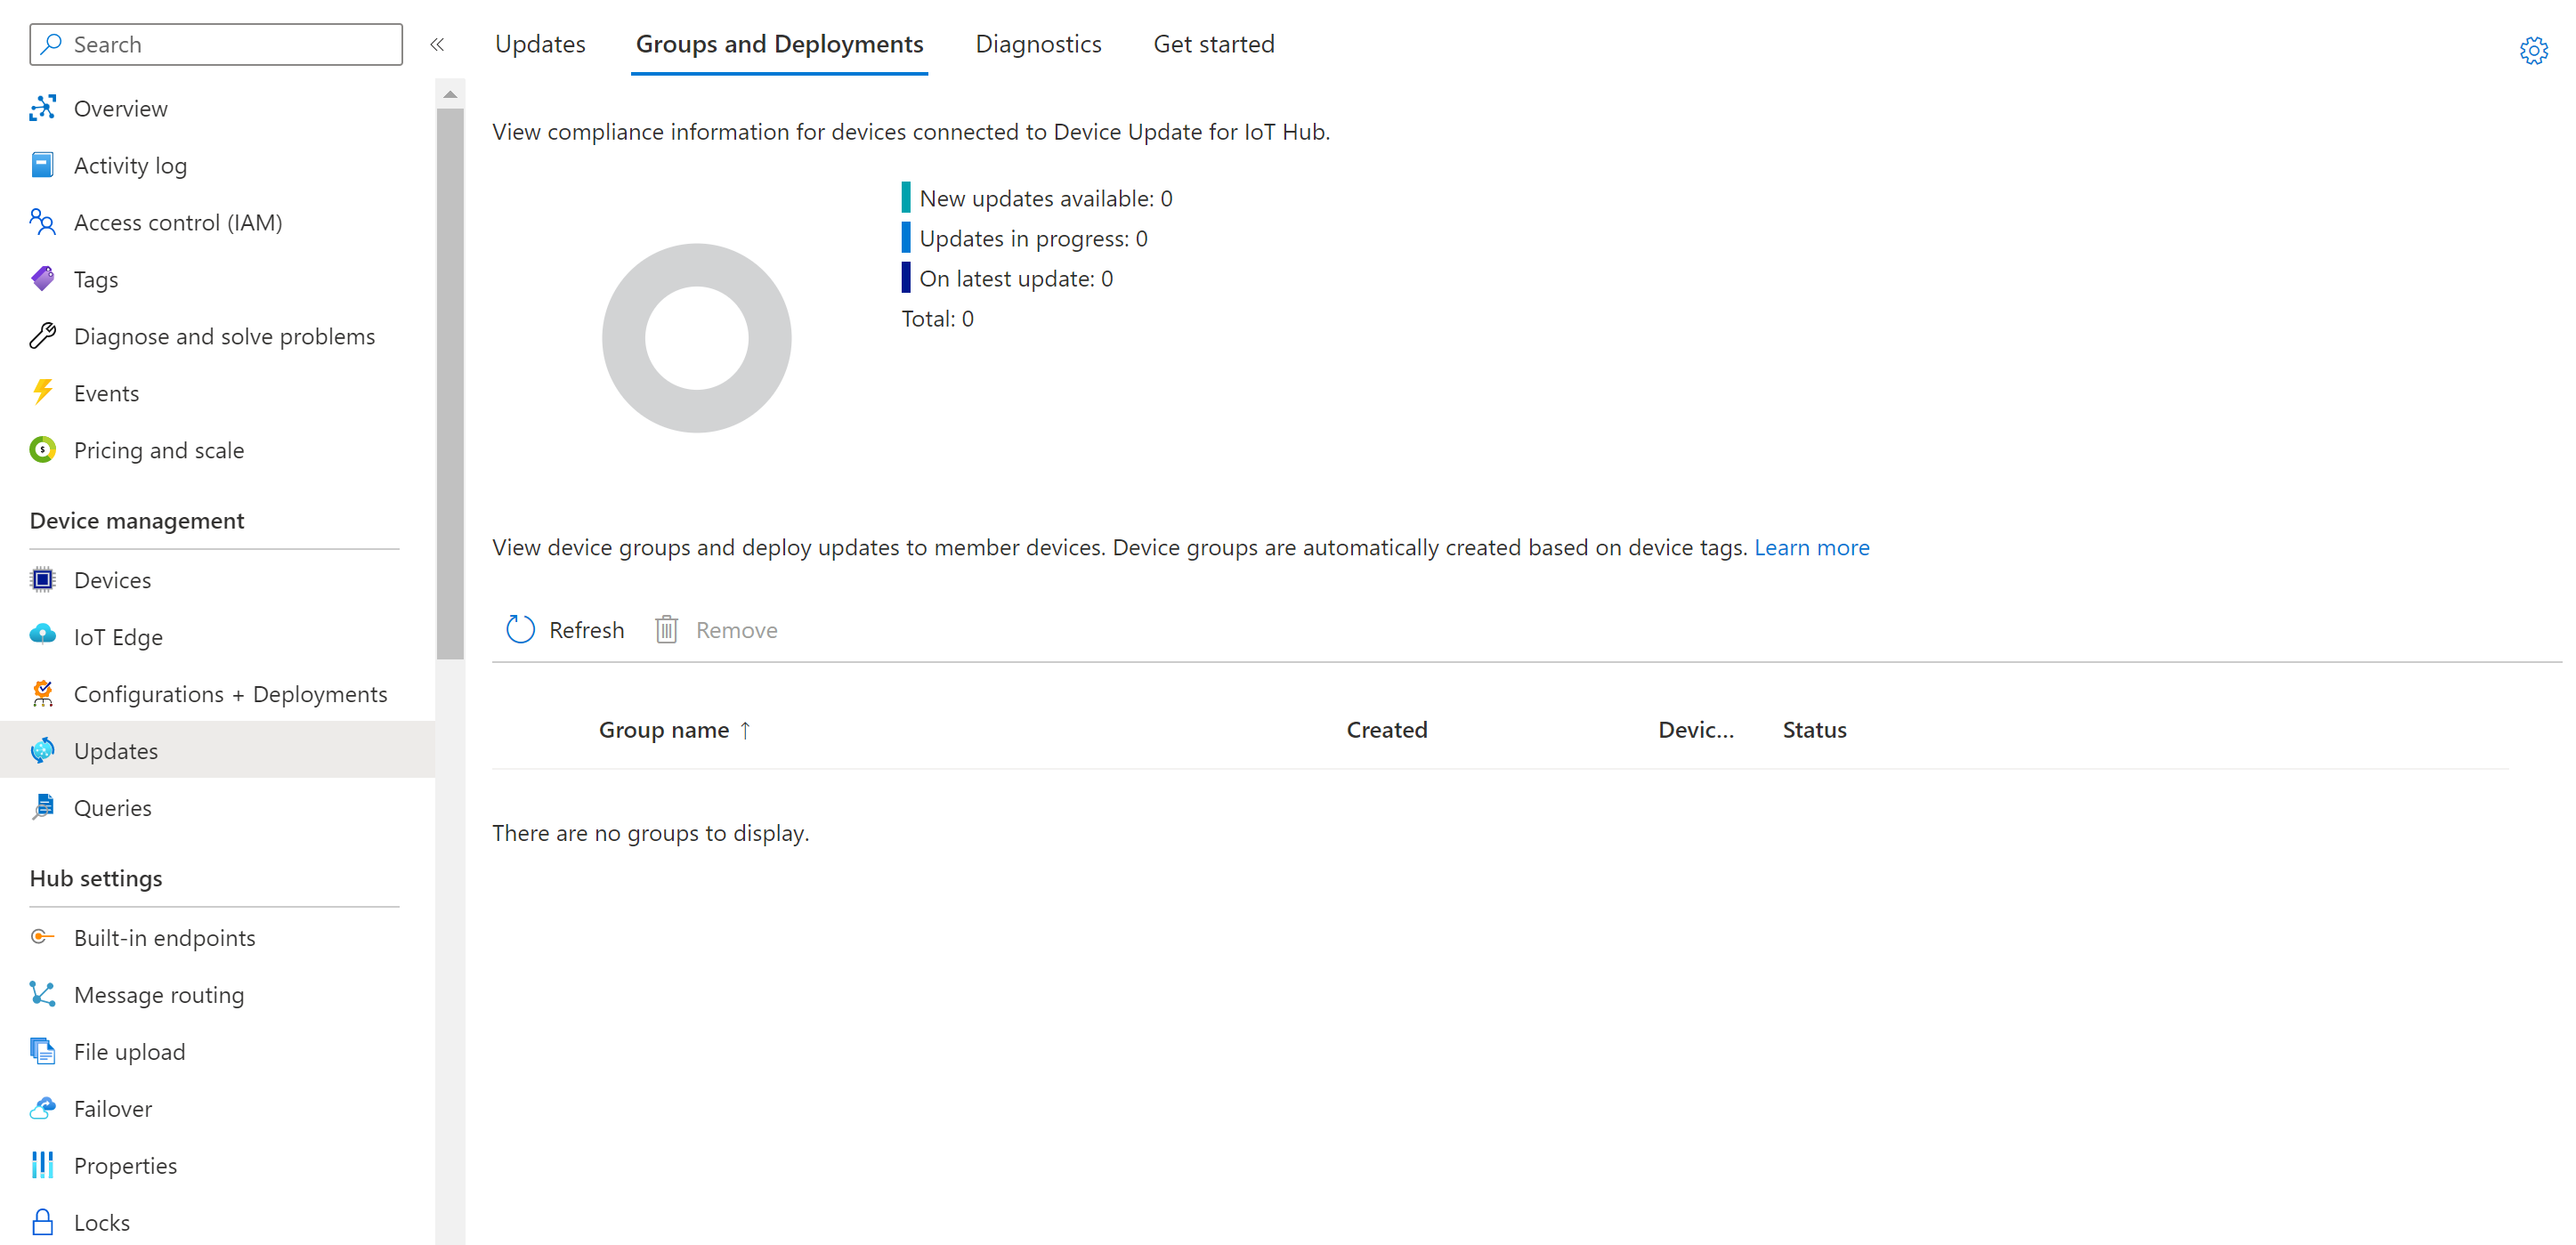
View the list of groups and the update compliance chart. The update compliance chart shows the count of devices in various states of compliance: On latest update, New updates available, and Updates in progress. Learn about update compliance.
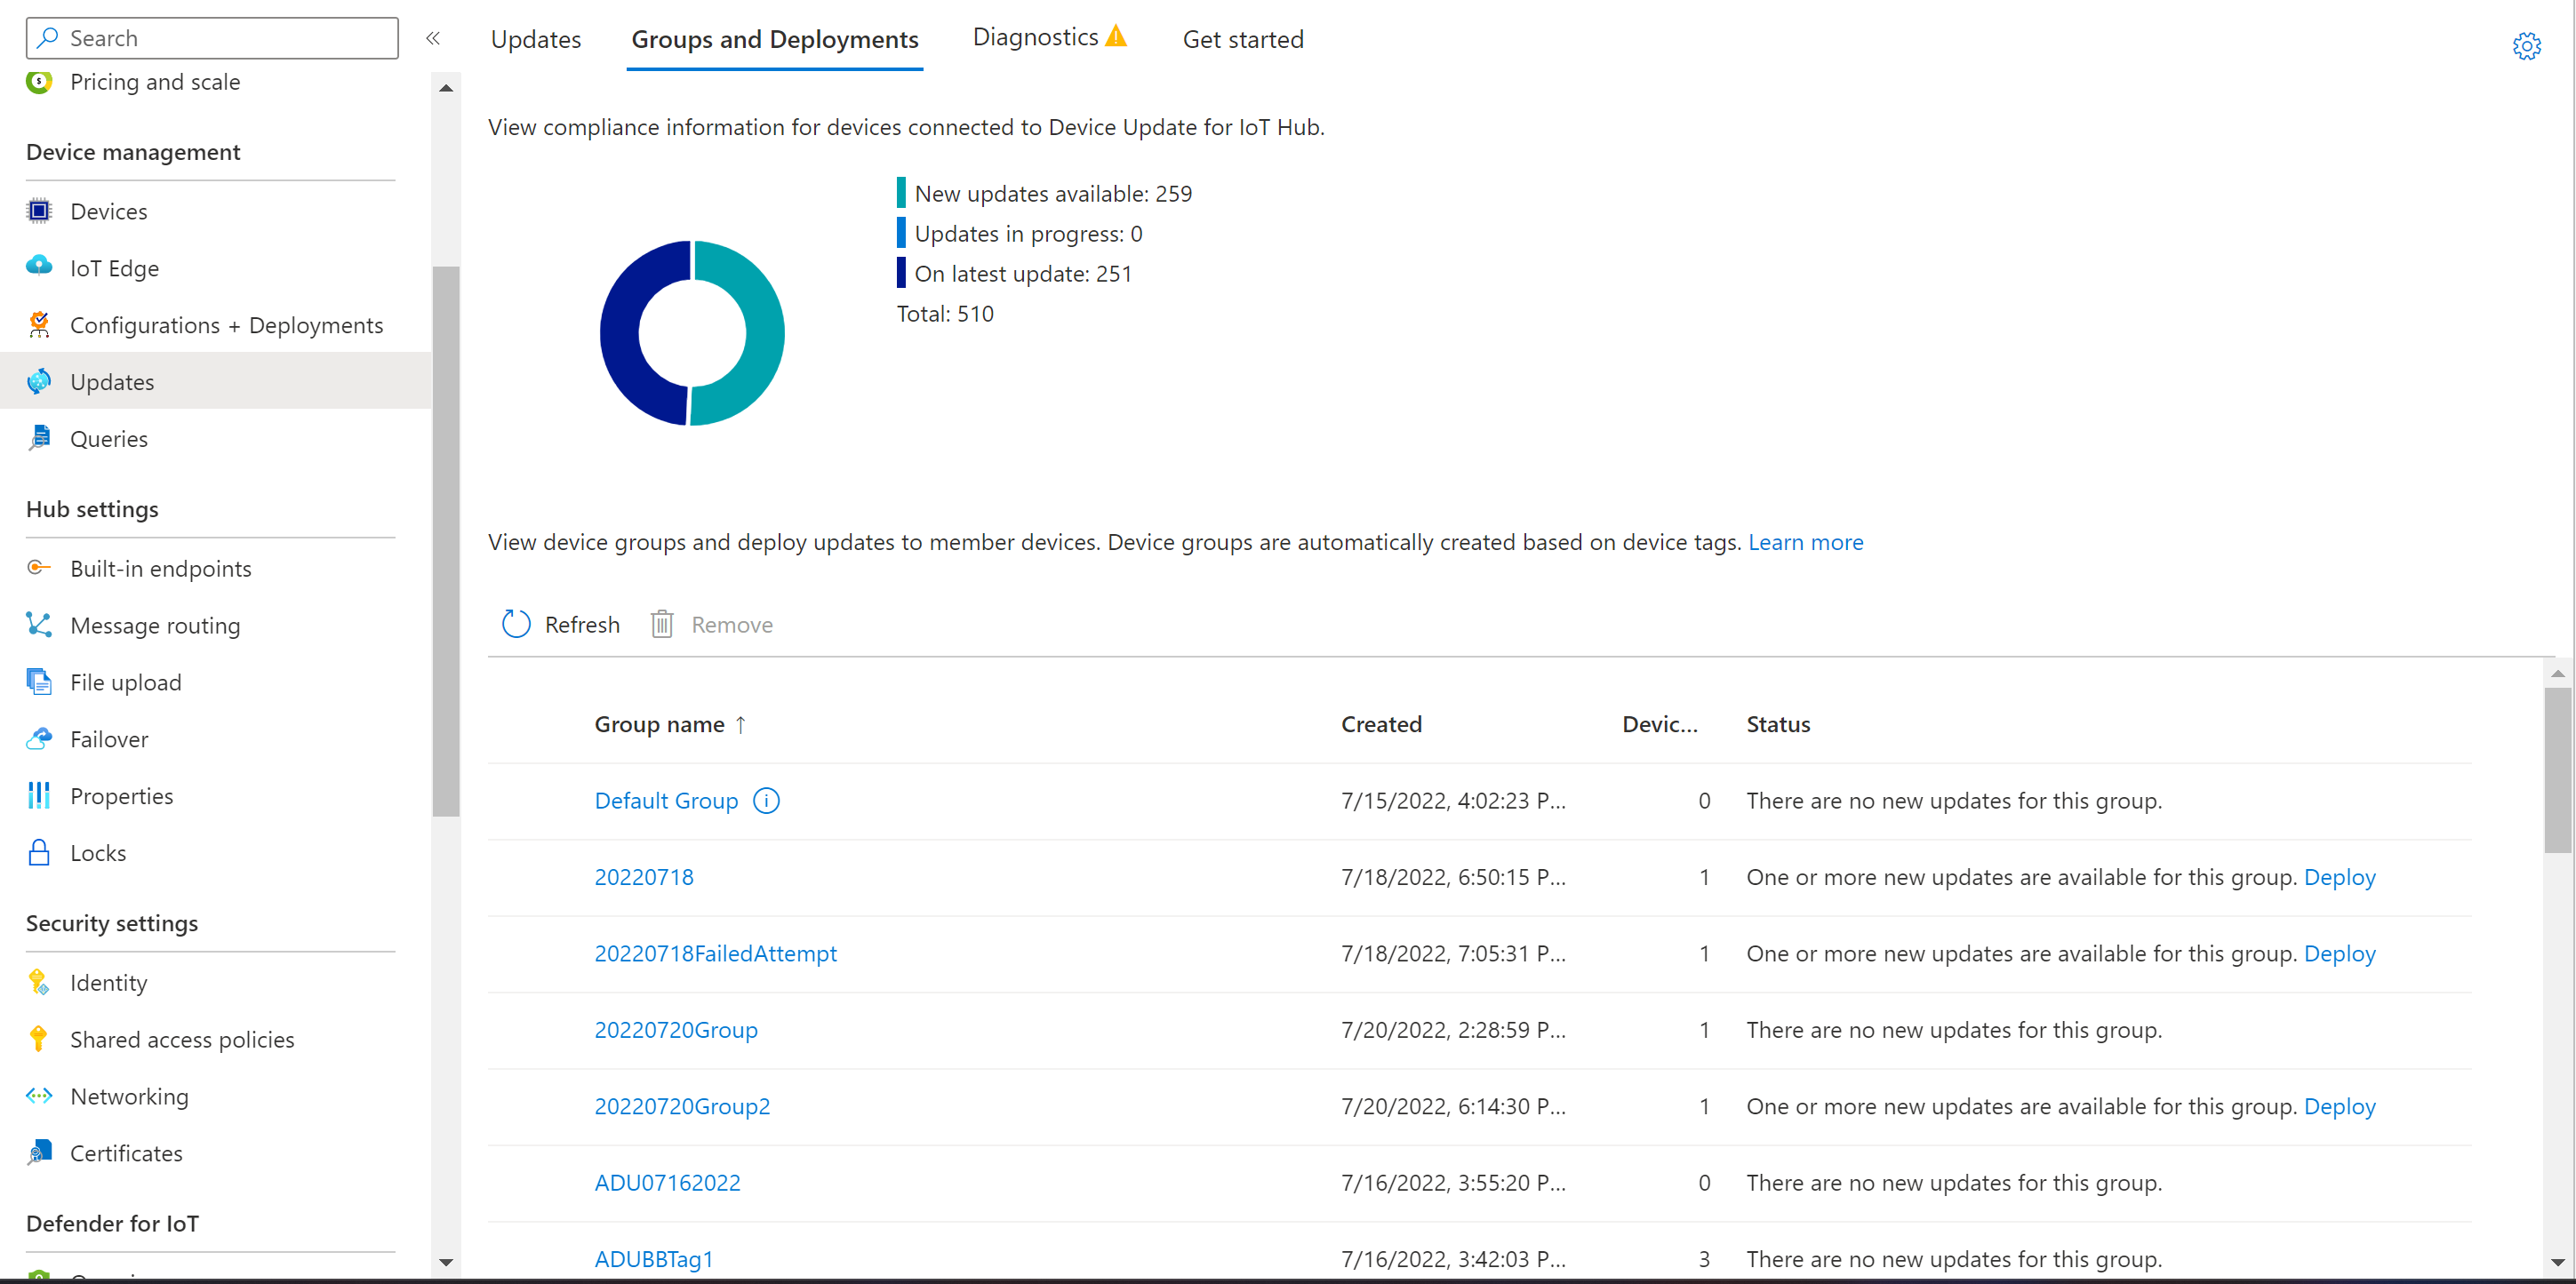
You should see a device group that contains the simulated device you set up in this tutorial along with any available updates for the devices in the new group. If there are devices that don't meet the device class requirements of the group, they'll show up in a corresponding invalid group. To deploy the best available update to the new user-defined group from this view, select Deploy next to the group.


For more information about tags and groups, see Manage device groups.
Deploy the update
After the group is created, you should see a new update available for your device group with a link to the update under Best update. You might need to refresh once.
For more information about compliance, see Device Update compliance.
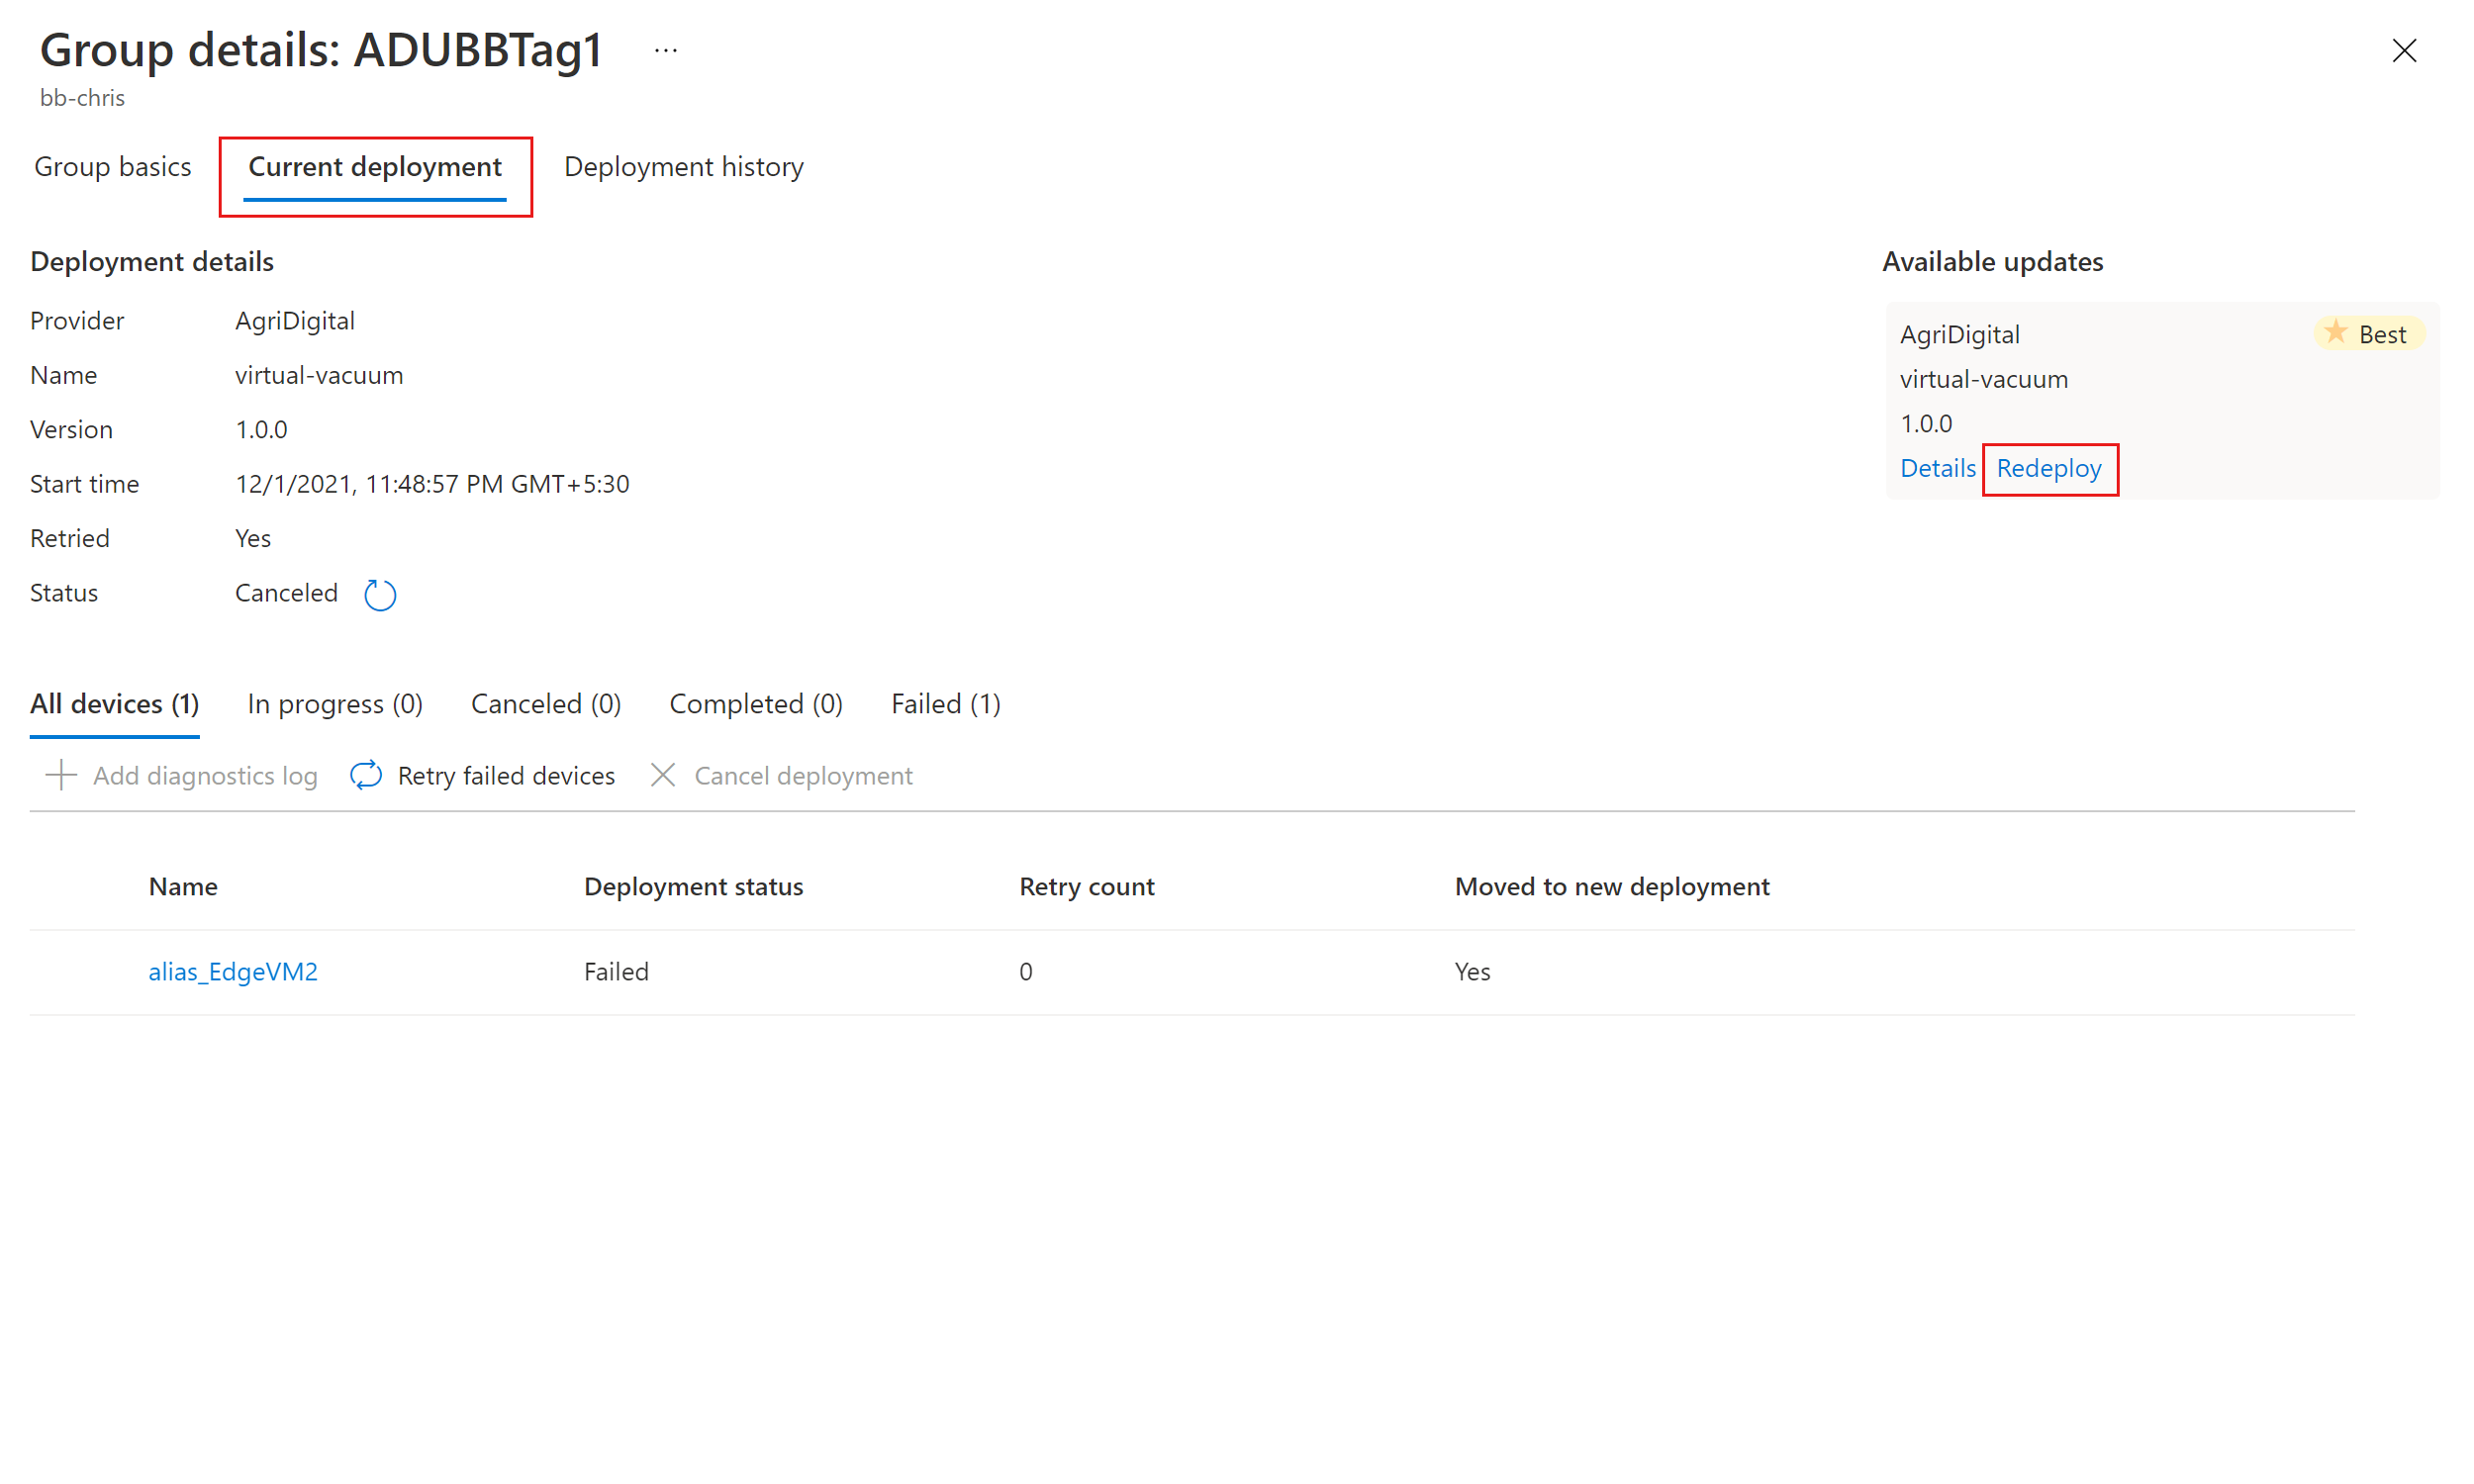
Select the target group by selecting the group name. You're directed to the group details under Group basics.
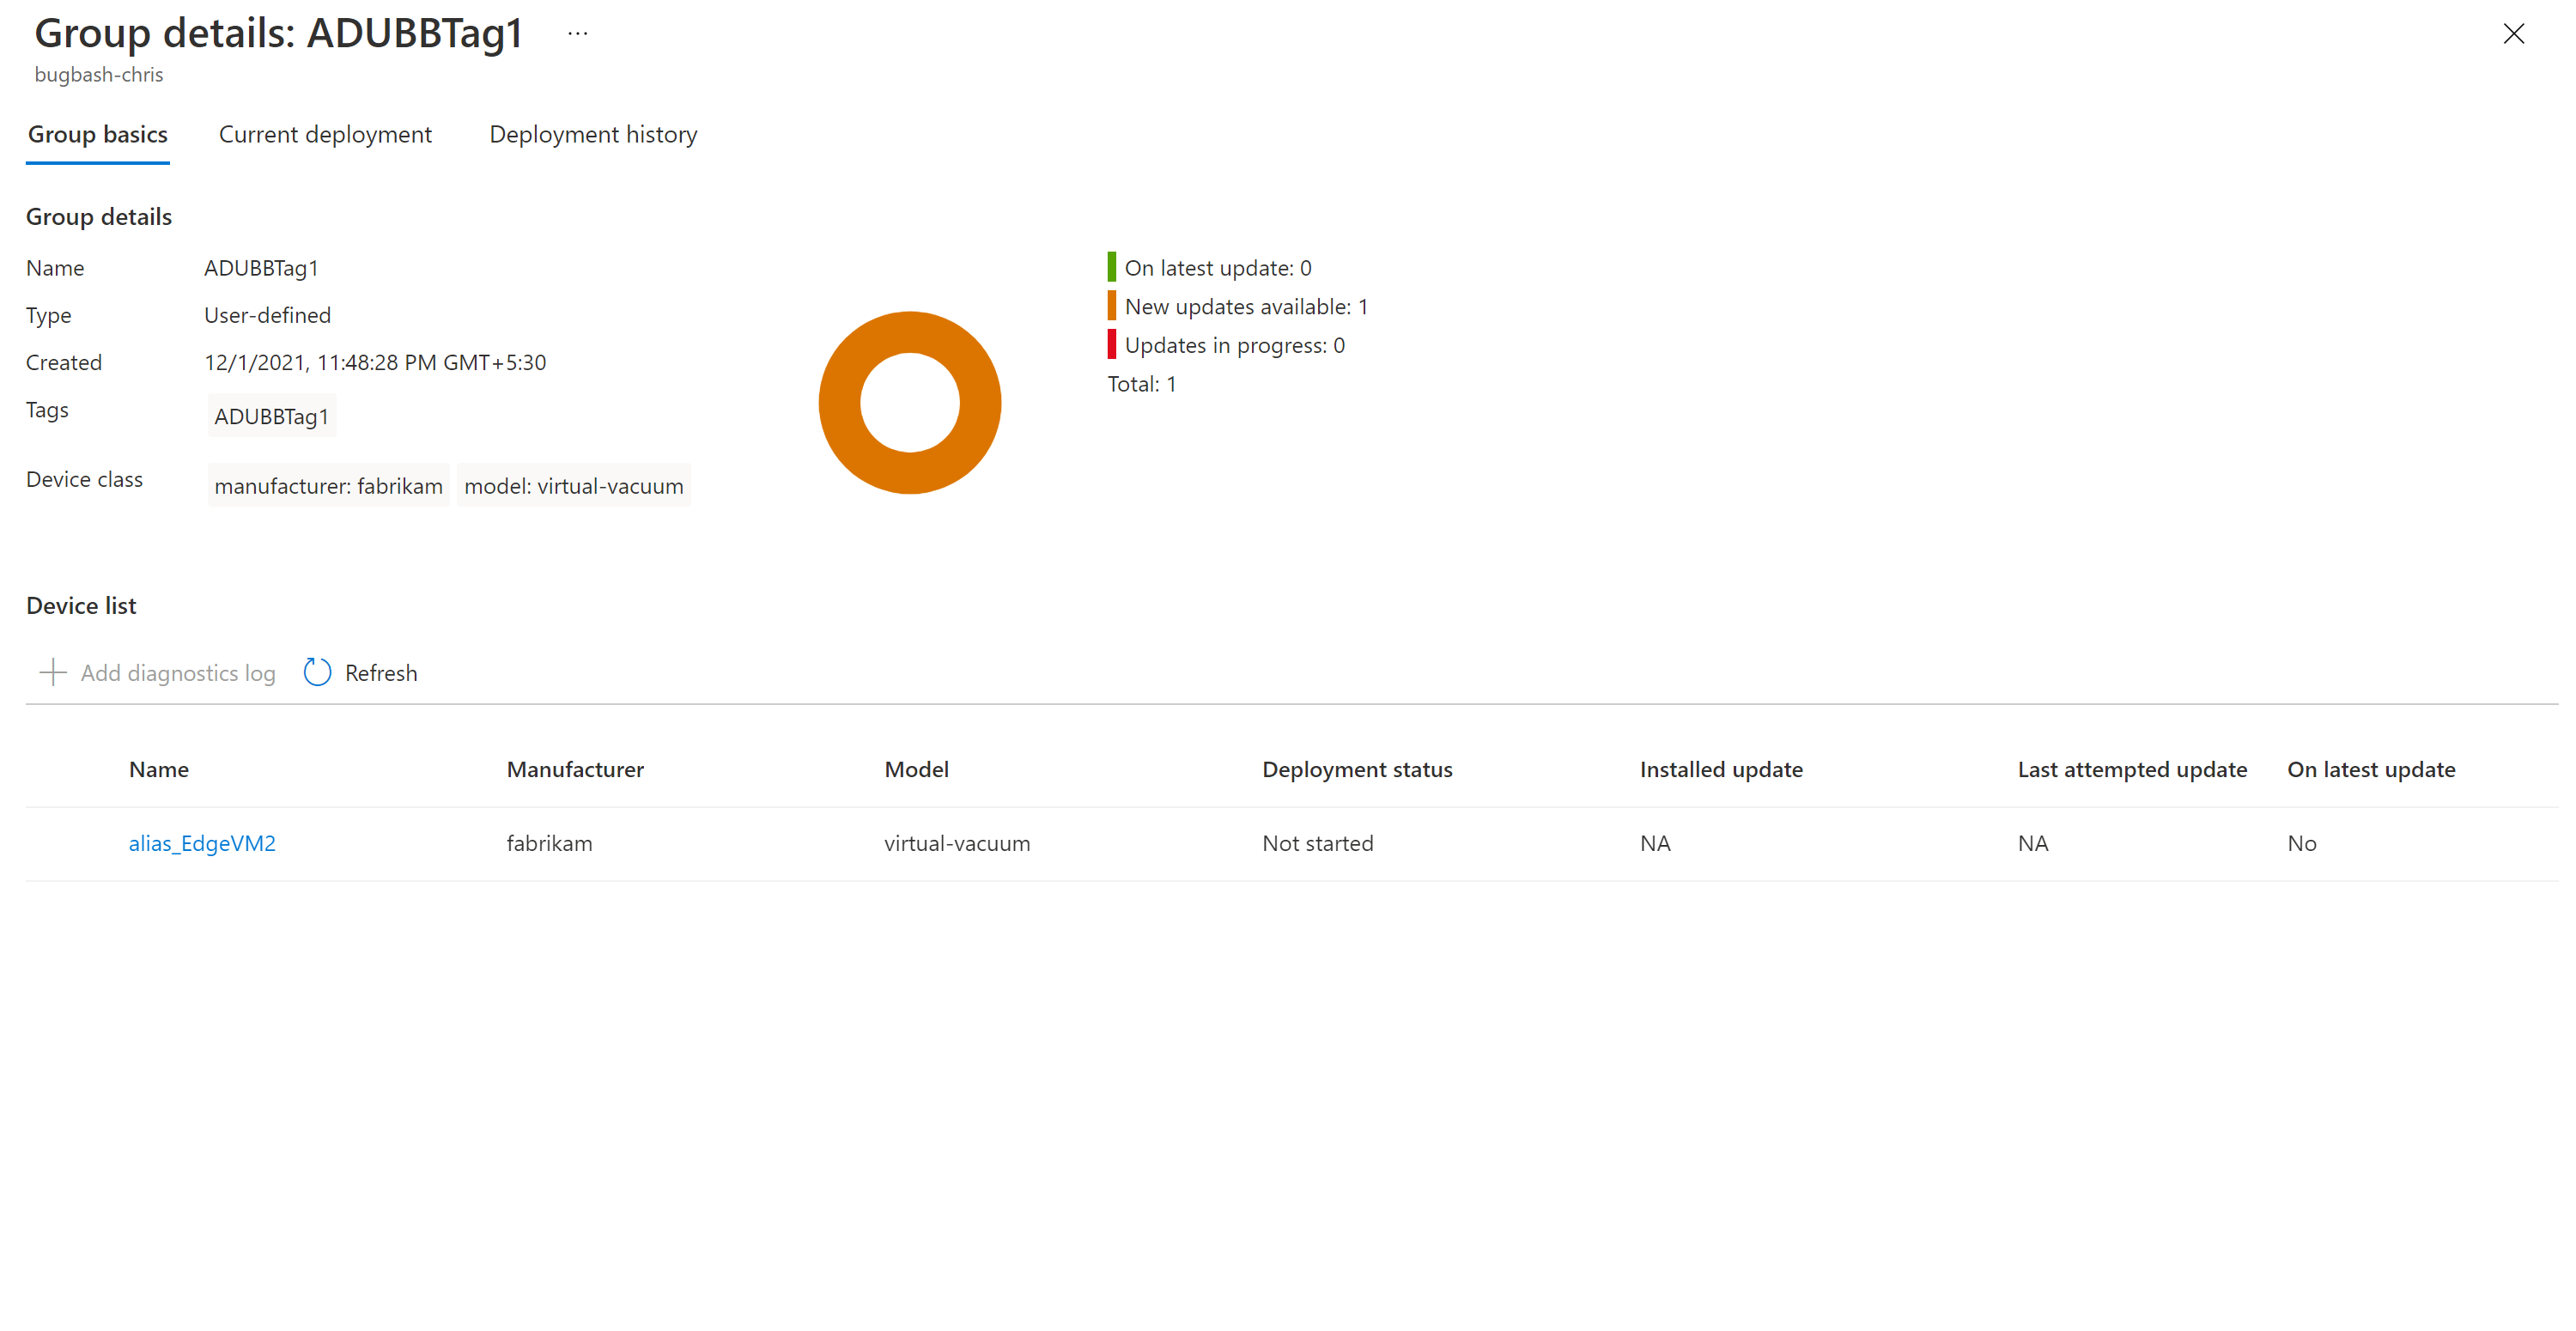
To initiate the deployment, go to the Current deployment tab. Select the deploy link next to the desired update from the Available updates section. The best available update for a given group is denoted with a Best highlight.
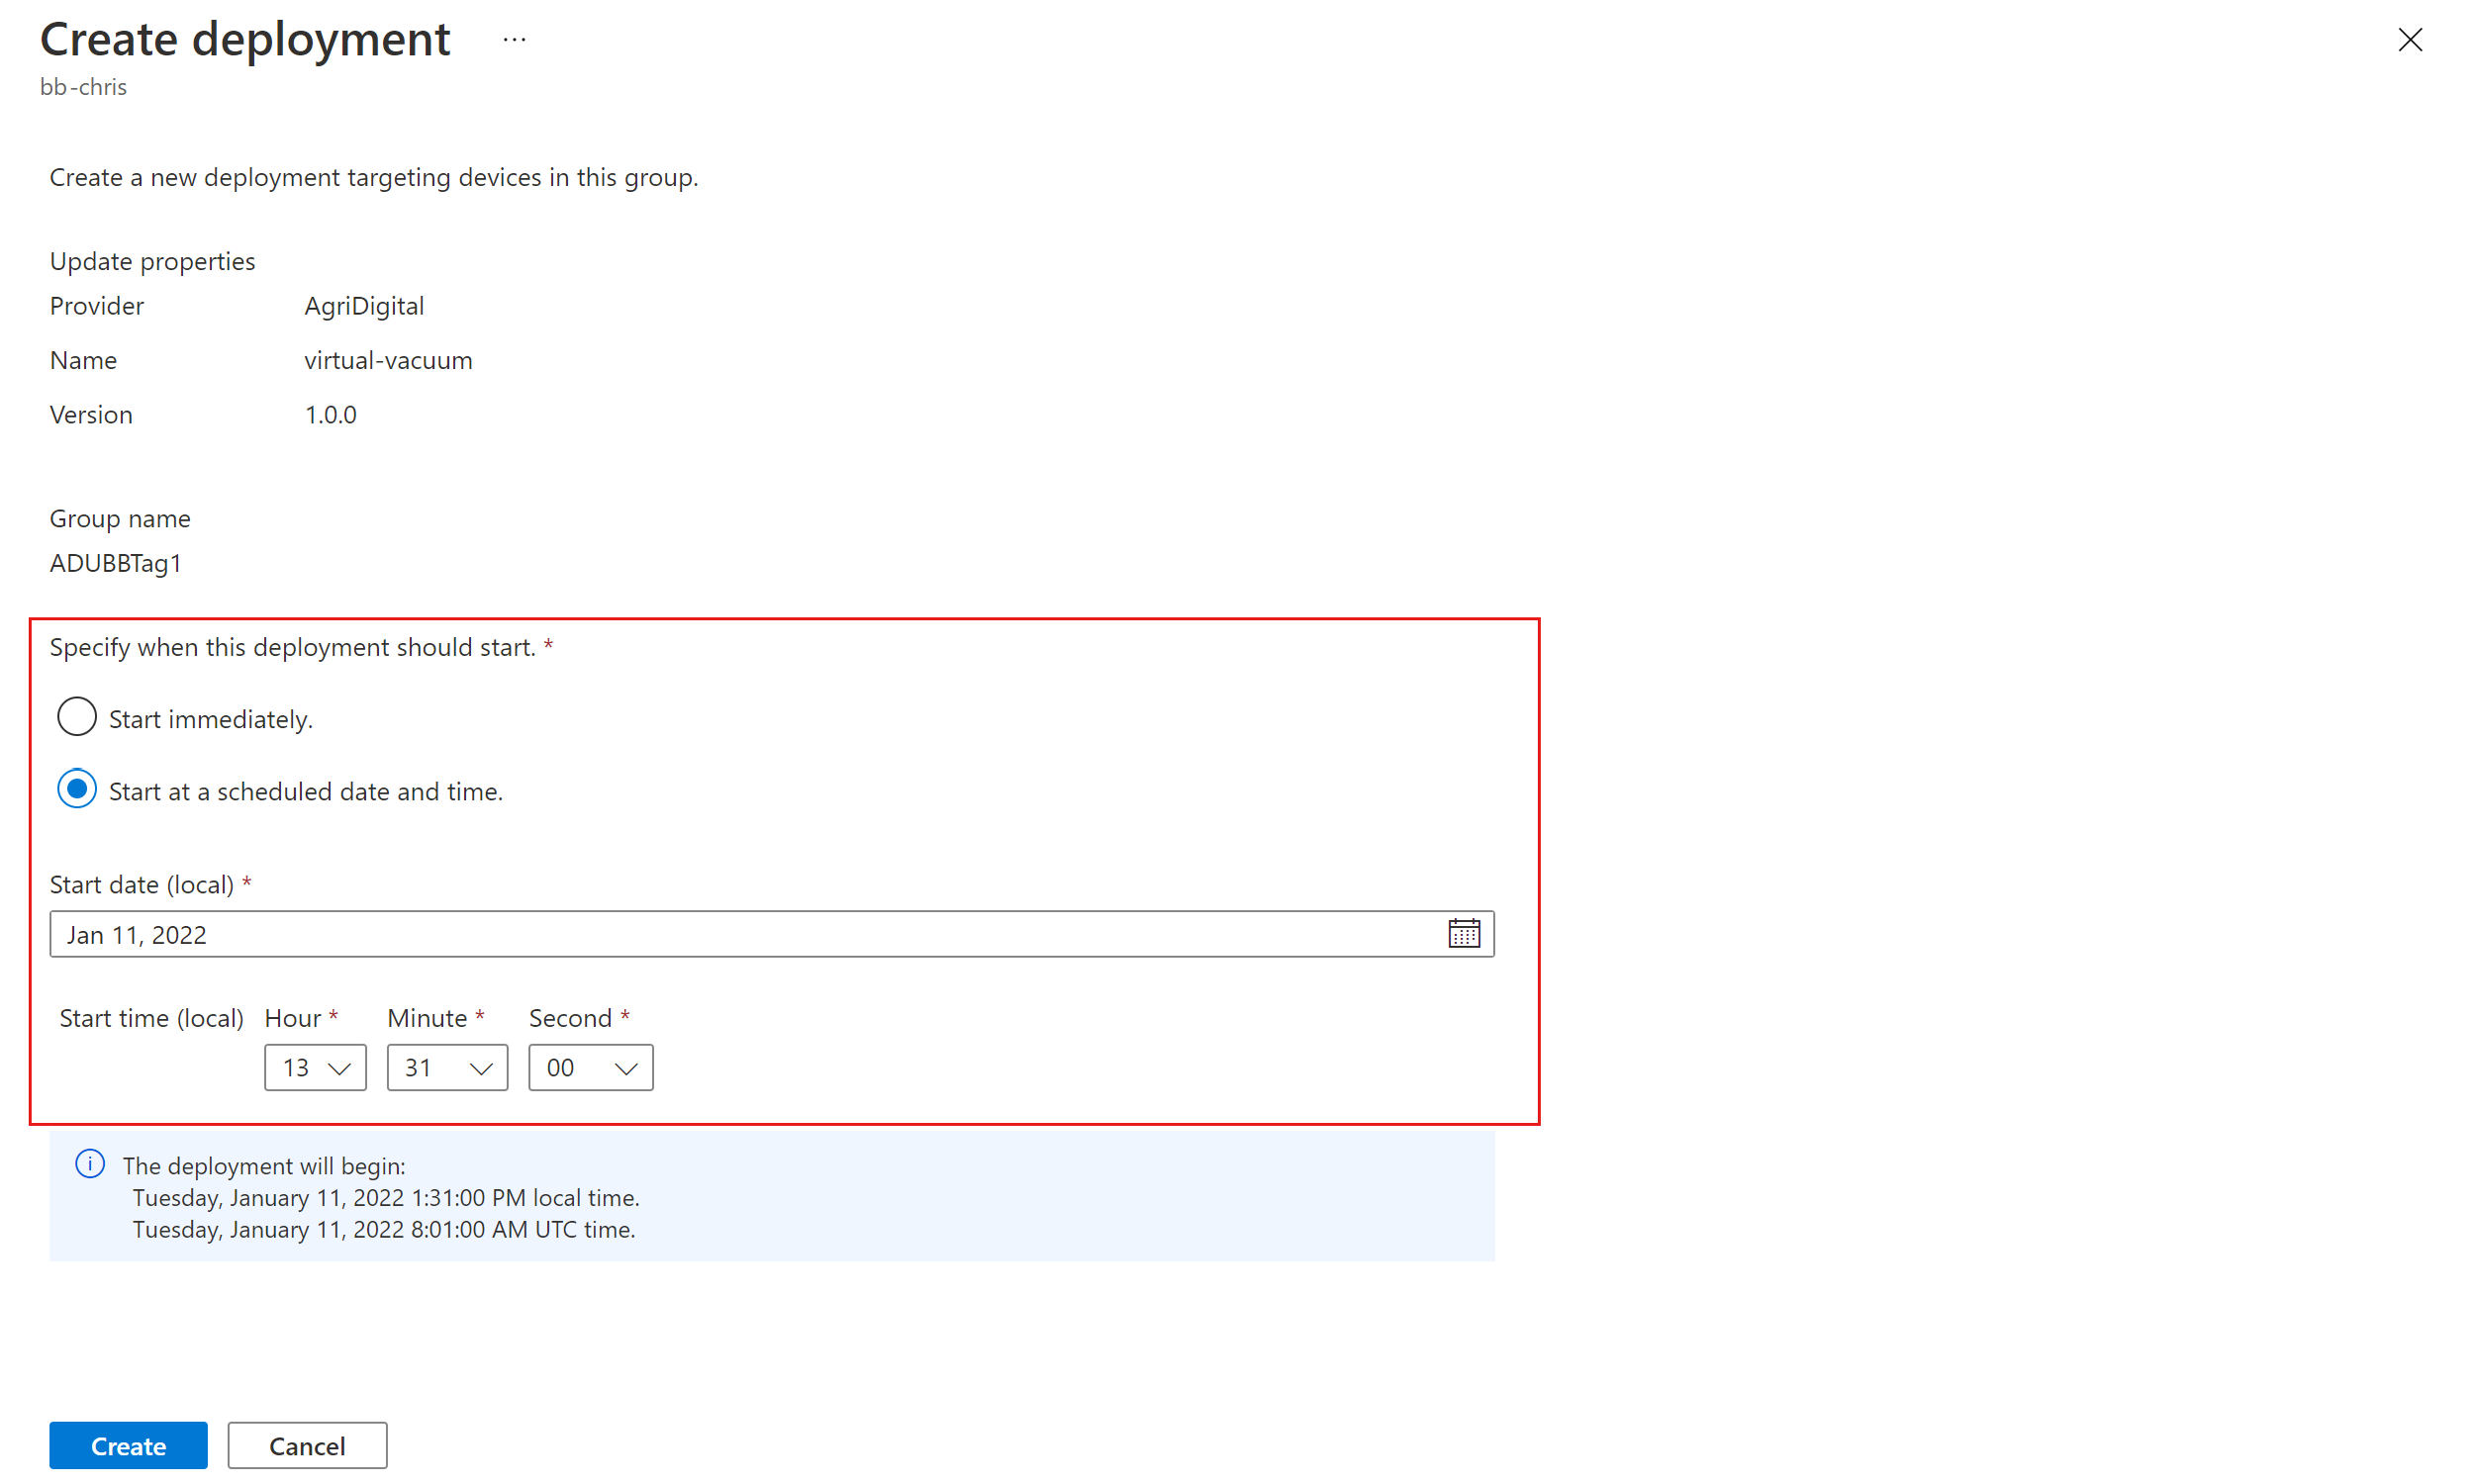
Schedule your deployment to start immediately or in the future. Then select Create.
Tip
By default, the Start date and time is 24 hours from your current time. Be sure to select a different date and time if you want the deployment to begin earlier.
Under Deployment details, Status turns to Active. The deployed update is marked with (deploying).
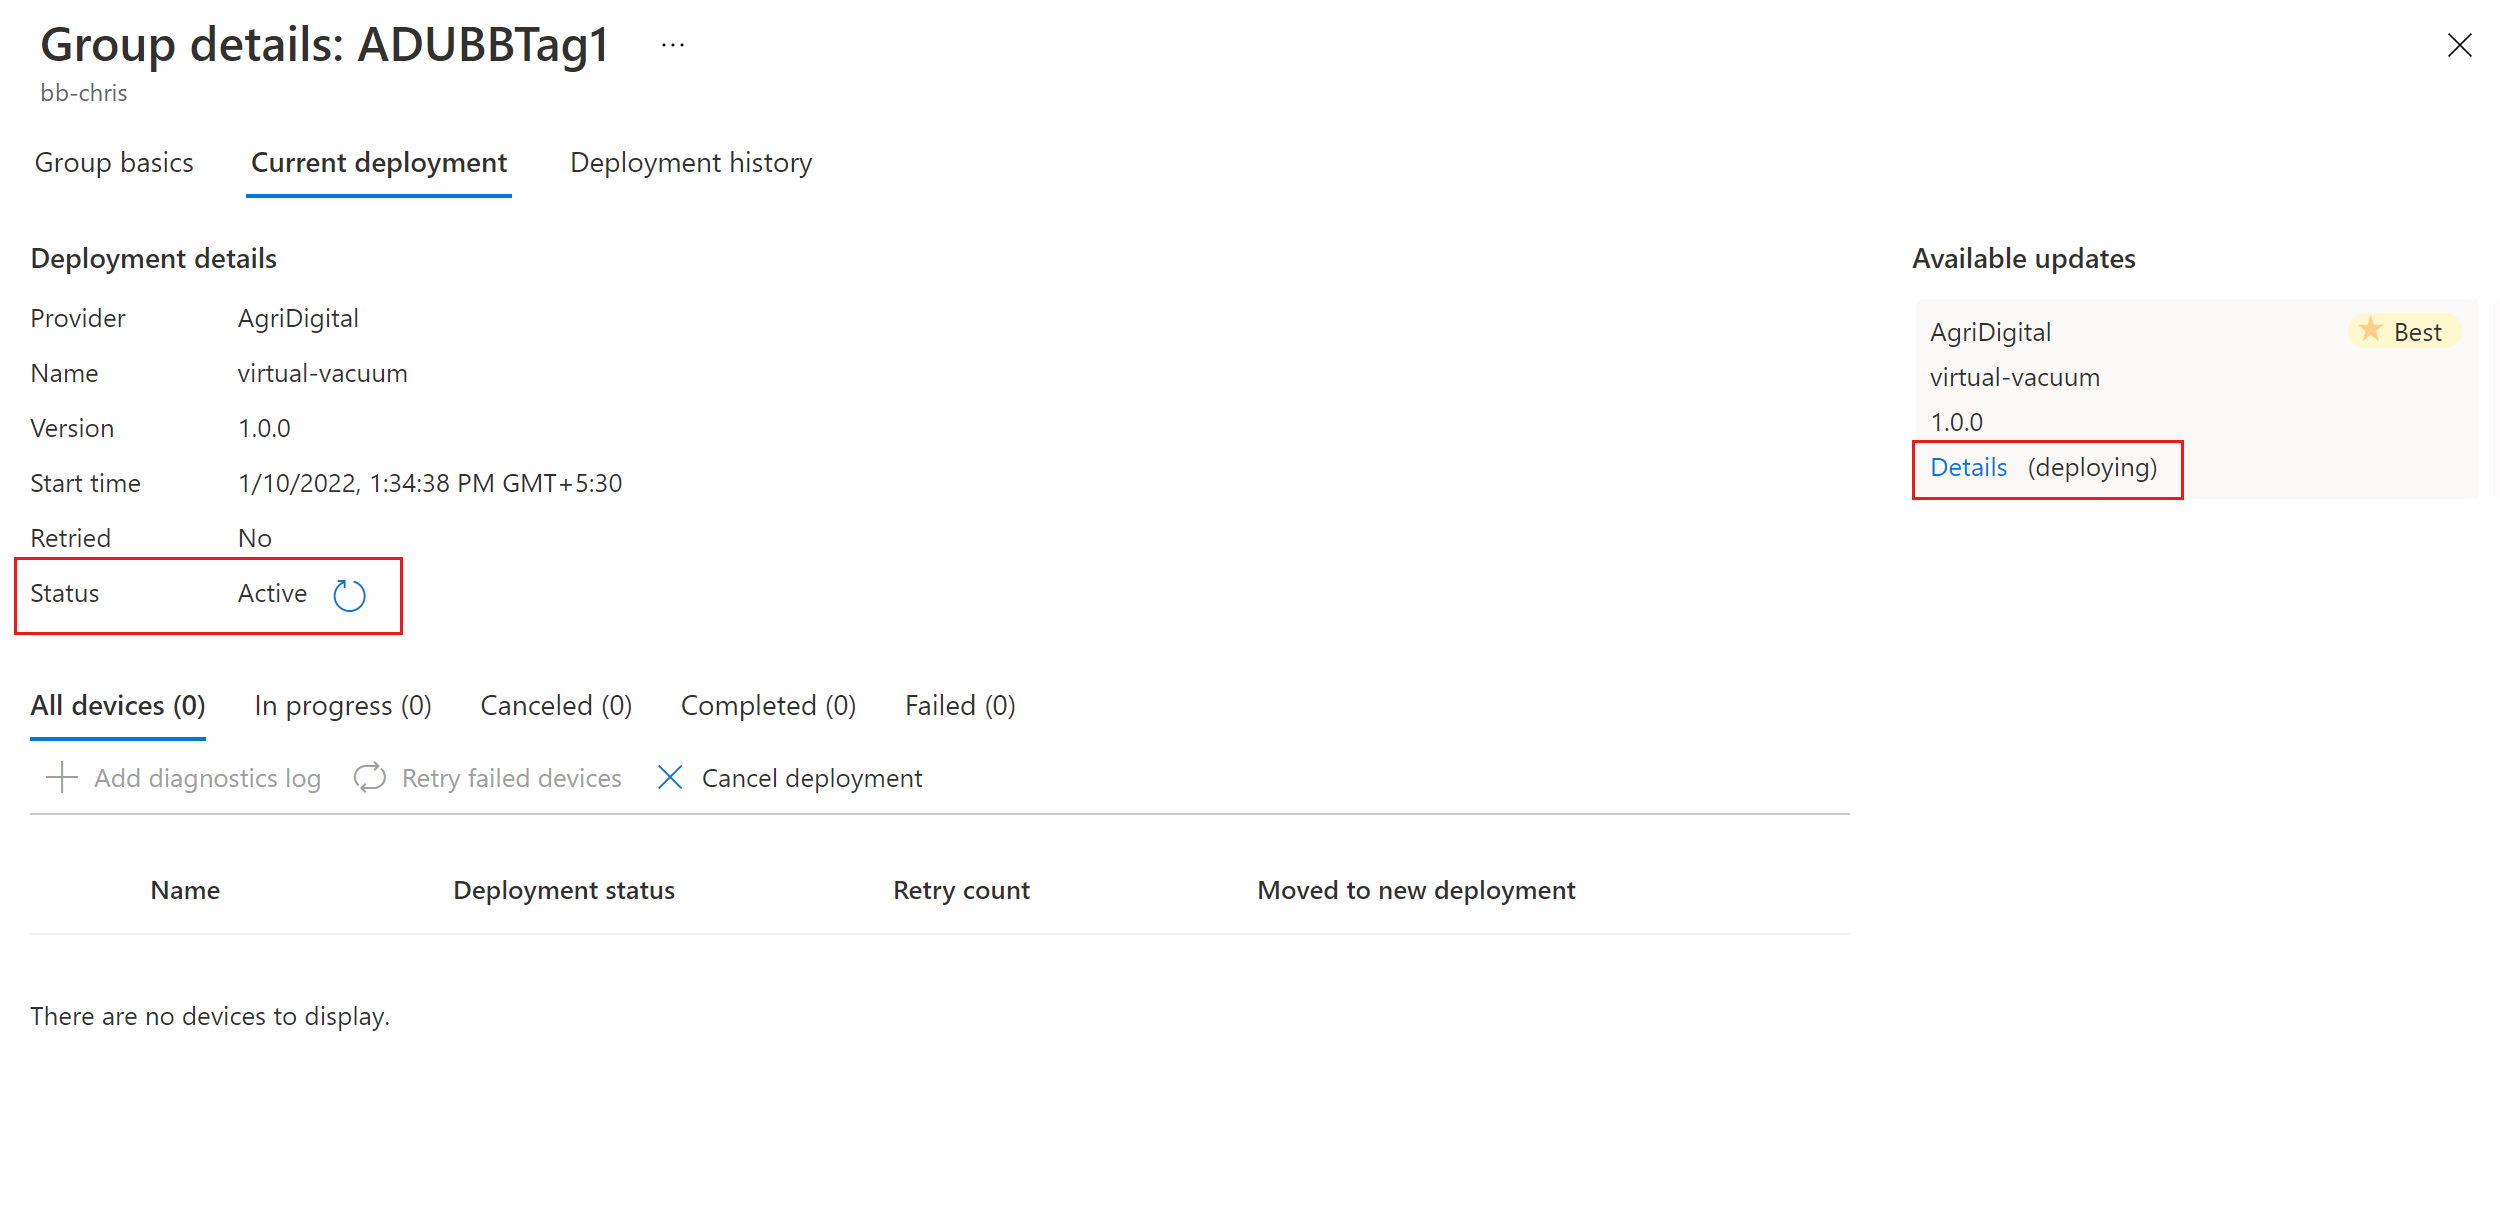
View the compliance chart to see that the update is now in progress.
After your device is successfully updated, you see that your compliance chart and deployment details are updated to reflect the same.


Monitor the update deployment
Select the Deployment history tab at the top of the page.
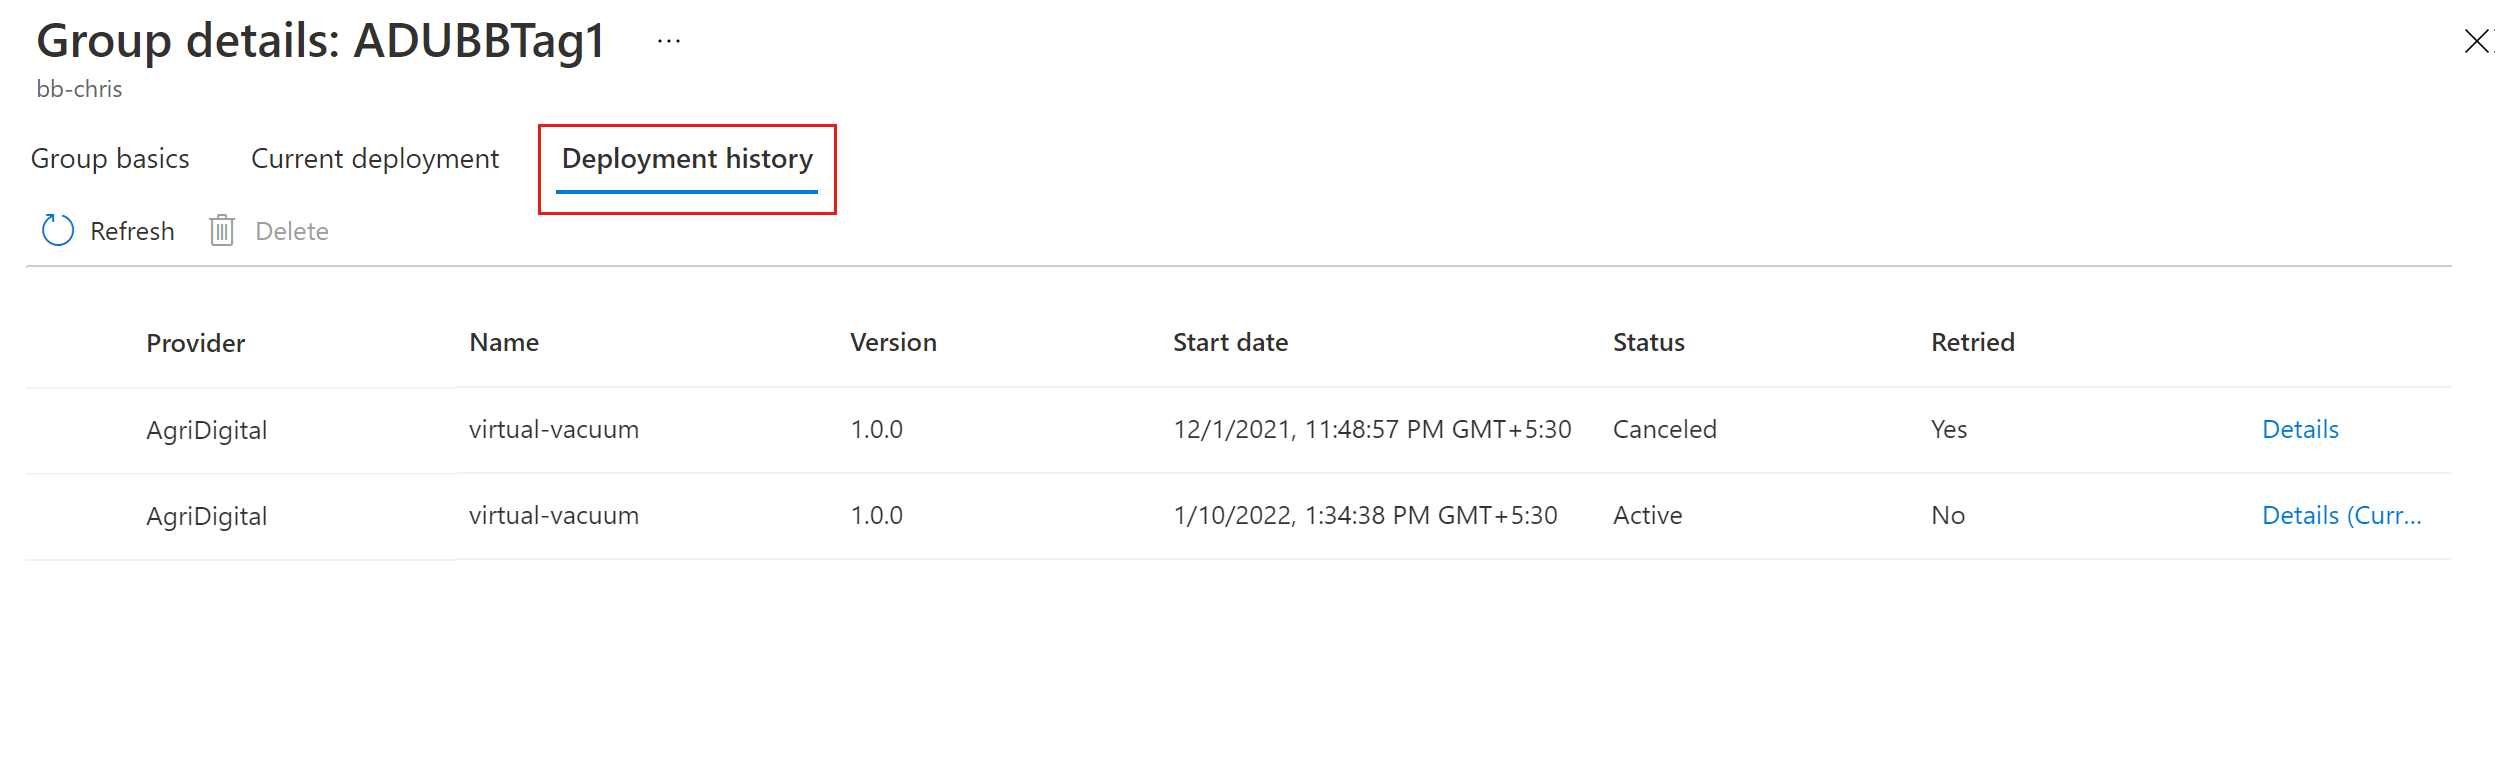
Select the details link next to the deployment you created.
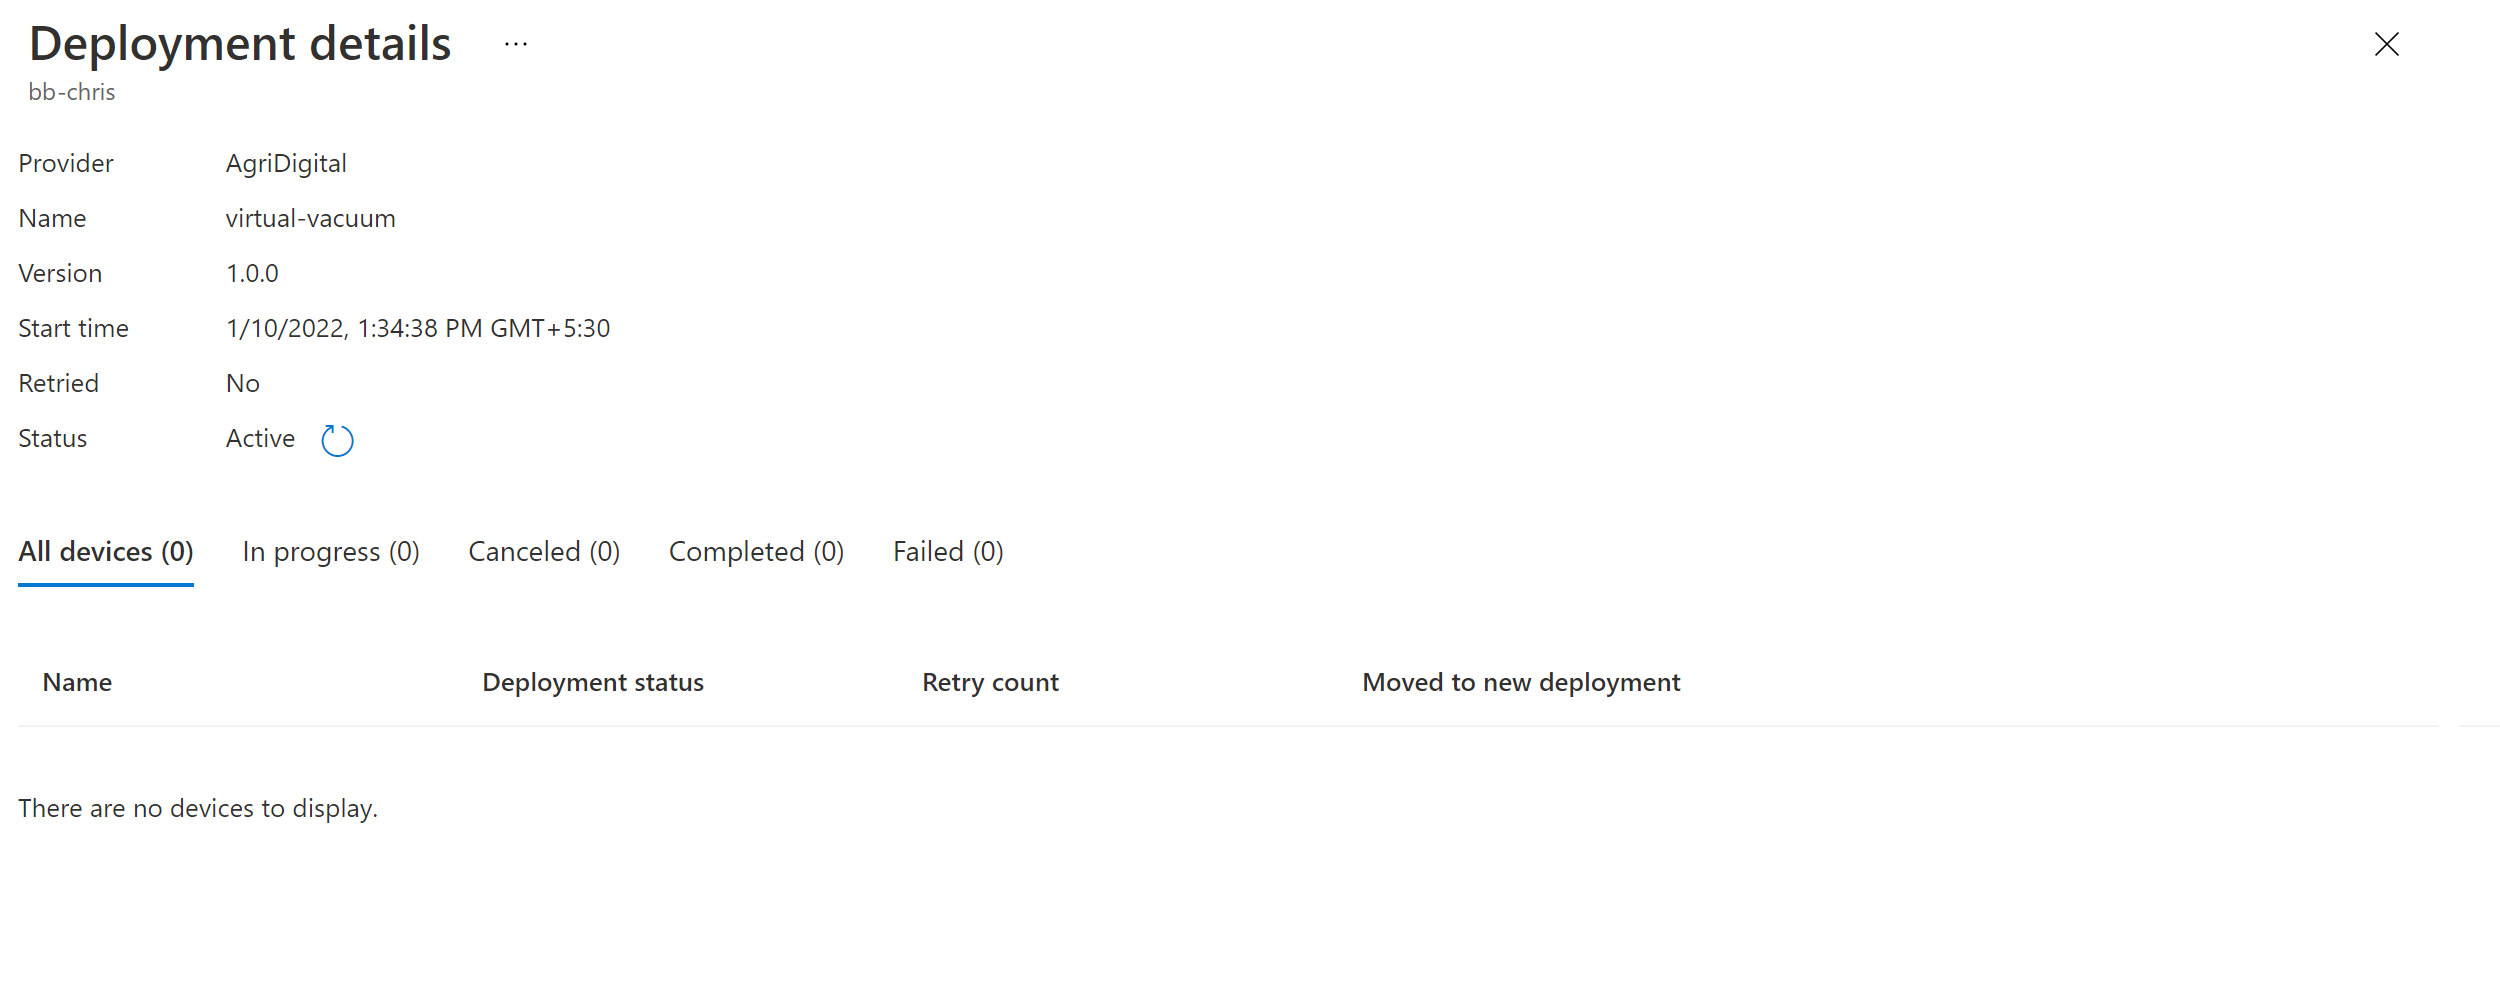
Select Refresh to view the latest status details.


You've now completed a successful end-to-end package update by using Device Update for IoT Hub on an Ubuntu Server 22.04 x64 device.
Clean up resources
When no longer needed, clean up your device update account, instance, and IoT hub. Also clean up the IoT Edge device if you created the VM via the Deploy to Azure button. To clean up resources, go to each individual resource and select Delete. Clean up a device update instance before you clean up the device update account.