Note
Access to this page requires authorization. You can try signing in or changing directories.
Access to this page requires authorization. You can try changing directories.
This article shows you how to create a route and endpoint in your hub in Azure IoT Hub and then delete your route and endpoint. Learn how to use the Azure portal to create routes and endpoints for Azure Event Hubs, Azure Service Bus queues and topics, Azure Storage, and Azure Cosmos DB.
To learn more about how routing works in IoT Hub, see Use IoT Hub message routing to send device-to-cloud messages to Azure services. To walk through setting up a route that sends messages to storage and then testing on a simulated device, see Tutorial: Send device data to Azure Storage using IoT Hub message routing.
Prerequisites
The procedures that are described in the article use the following resources:
- The Azure portal
- An IoT hub
- An endpoint service in Azure
Azure portal
This article uses the Azure portal to work with IoT Hub and other Azure services. To learn more about how to use the Azure portal, see What is the Azure portal?.
IoT hub
To create an IoT hub route, you need an IoT hub that you created by using Azure IoT Hub. Device messages and events originate in your IoT hub.
Be sure to have the following hub resource to use when you create your IoT hub route:
- An IoT hub in your Azure subscription. If you don't have a hub yet, you can follow the steps in Create an IoT hub.
Endpoint service
To create an IoT hub route, you need at least one other Azure service to use as an endpoint to the route. The endpoint receives device messages and events. You can choose which Azure service you use for an endpoint to connect with your IoT hub route: Event Hubs, Service Bus queues or topics, Azure Storage, or Azure Cosmos DB.
Be sure to have one of the following resources to use when you create an endpoint your IoT hub route:
An Event Hubs resource (namespace and entity). If you need to create a new Event Hubs resource, see Quickstart: Create an event hub using the Azure portal.
A Service Bus queue resource (namespace and queue). If you need to create a new Service Bus queue, see Use the Azure portal to create a Service Bus namespace and a queue.
A Service Bus topic resource (namespace and topic). If you need to create a new Service Bus topic, see Use the Azure portal to create a Service Bus topic and subscriptions to the topic.
An Azure Storage resource (account and container). If you need to create a new storage account in Azure, see Create an Azure storage account. When you create a storage account, you have many options, but you need only a new container in your account for this article.
An Azure Cosmos DB resource (account, database, and container). If you need to create a new instance of Azure Cosmos DB, see Quickstart: Create an Azure Cosmos DB for NoSQL account using the Azure portal. For the API option, select Azure Cosmos DB for NoSQL.
Create a route and endpoint
Routes send messages or event logs to an Azure service for storage or processing. Each route has a data source, where the messages or event logs originate, and an endpoint, where the messages or event logs end up. You can use routing queries to filter messages or events before they go to the endpoint. The endpoint can be an event hub, a Service Bus queue or topic, a storage account, or an Azure Cosmos DB resource.
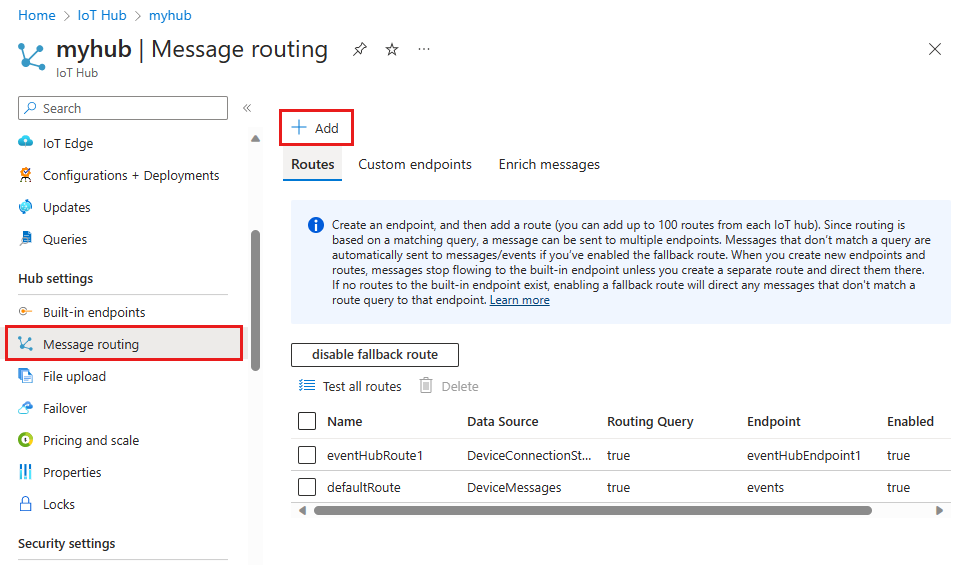
In the Azure portal, go to your IoT hub.
In the resource menu under Hub settings, select Message routing then select Add.
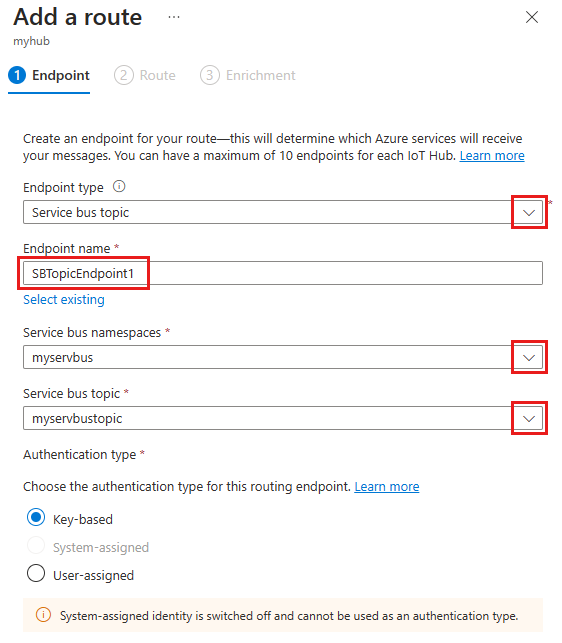
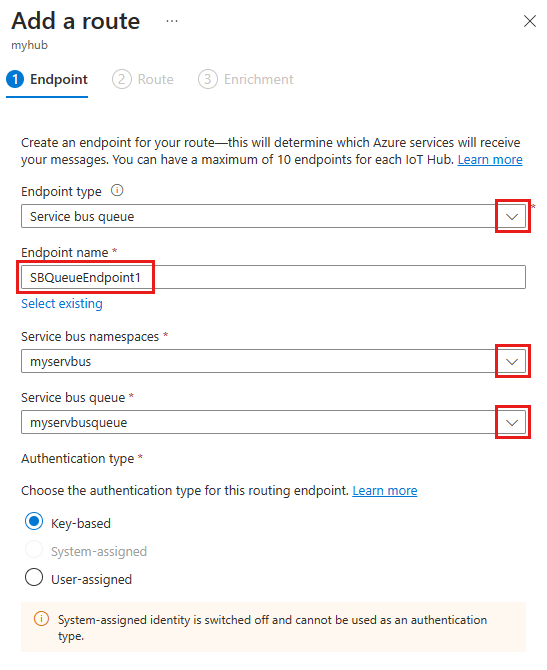
On the Endpoint tab, select an existing endpoint or create a new one by providing the following information:
Parameter Value Endpoint type Select Cosmos DB. Endpoint name Provide a unique name for a new endpoint, or select Select existing to choose an existing Storage endpoint. Cosmos DB account Use the drop-down menu to select an existing Cosmos DB account in your subscription. Database Use the drop-down menu to select an existing database in your Cosmos DB account. Collection Use the drop-down menu to select an existing collection (or container). Generate a synthetic partition key for messages Select Enable to support data storage for high-scale scenarios. Otherwise, select Disable For more information, see Partitioning and horizontal scaling in Azure Cosmos DB and Create a synthetic partition key. Partition key name If you enable synthetic partition keys, provide a name for the partition key. The partition key property name is defined at the container level and can't be changed once set. Partition key template Provide a template that is used to configure the synthetic partition key value. The generated partition key value is automatically added to the partition key property for each new Cosmos DB record. 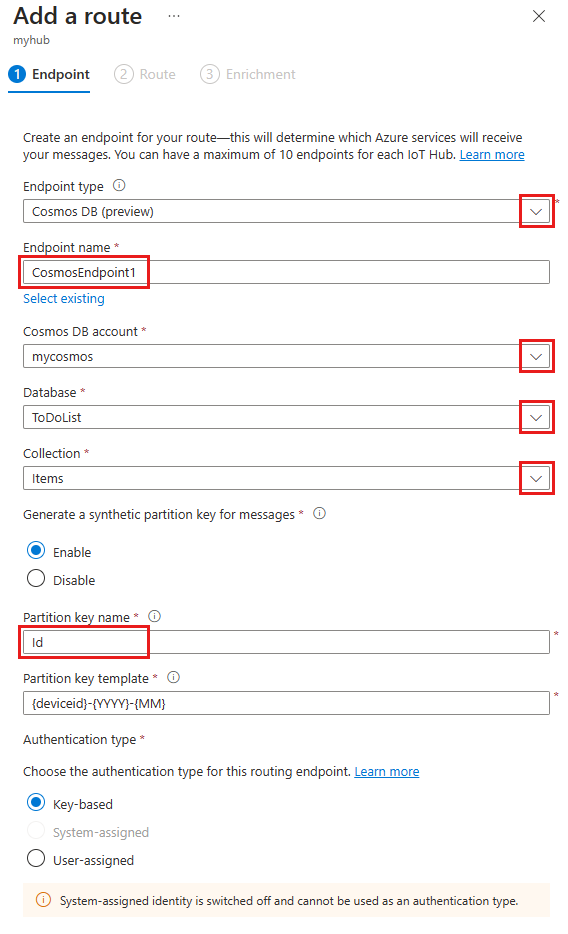


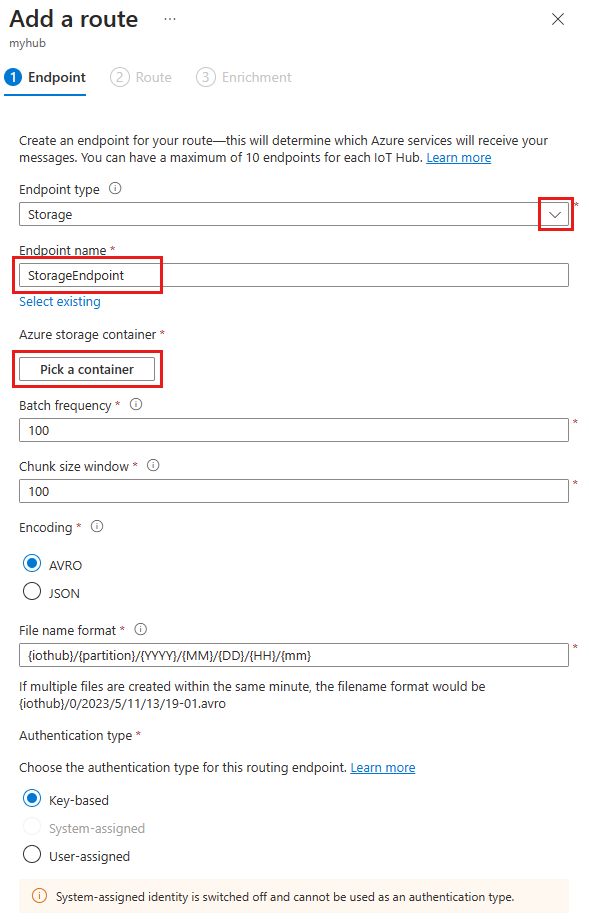
Select Create + next to create the endpoint and continue to create a route.
On the Route tab, create a new route to your endpoint by providing the following information:
Parameter Value Name Provide a unique name for the route. Data source Use the drop-down menu to select a data source for the route. You can route data from telemetry messages or non-telemetry events Routing query Optionally, add a query to filter the data before routing. For more information, see IoT Hub message routing query syntax. 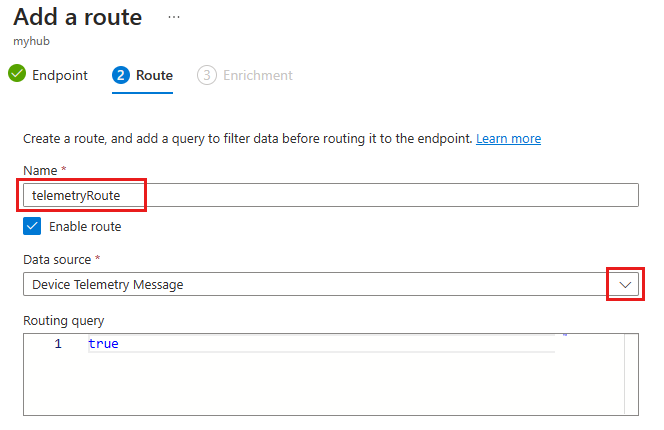
If you added a routing query, use the Test feature to provide a sample message and test the route against it.
If you want to add a message enrichment to your route, select Create + add enrichments. For more information, see Message enrichments for device-to-cloud IoT Hub messages. If not, select Create + skip enrichments.
Back on the Message routing overview, confirm that your new route appears on the Routes tab, and that your new endpoint appears on the Custom endpoints tab.
Update a route
To update a route in the Azure portal:
In the Azure portal, go to your IoT hub.
In the resource menu under Hub settings, select Message routing.
In the Routes tab, select the route that you want to modify.
You can change the following parameters of an existing route:
- Endpoint: You can create a new endpoint or select a different existing endpoint.
- Data source.
- Enable route.
- Routing query.
Select Save.
Delete a route
To delete a route in the Azure portal:
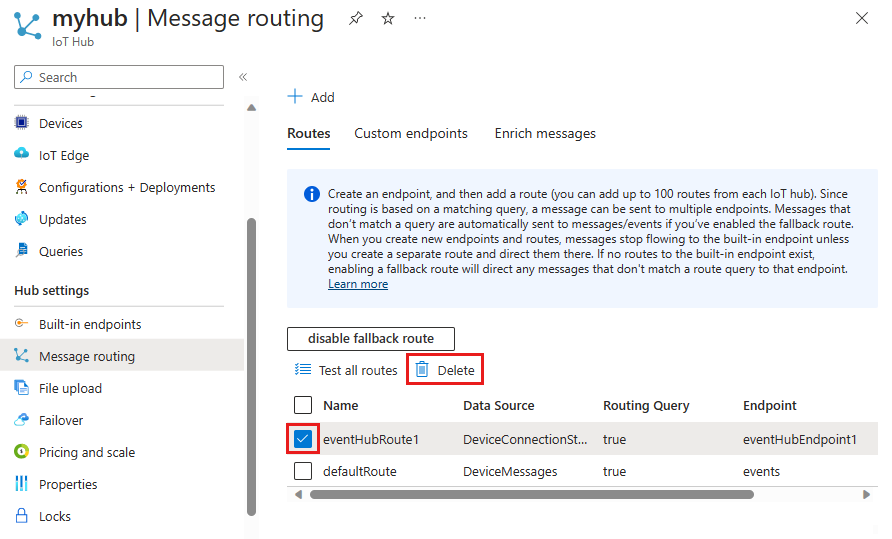
In Message routing for your IoT hub, select the route to delete.
Select Delete.

Update a custom endpoint
To update a custom endpoint in the Azure portal:
In the Azure portal, go to your IoT hub.
In the resource menu under Hub settings, select Message routing.
In the Custom endpoints tab, select the endpoint that you want to modify.
You can change the following parameters of an existing endpoint:
- Generate a synthetic partition key for messages
- Partition key name
- Partition key template
- Select Save.
Delete a custom endpoint
To delete a custom endpoint in the Azure portal:
In the Azure portal, go to your IoT hub.
In the resource menu under Hub settings, select Message routing.
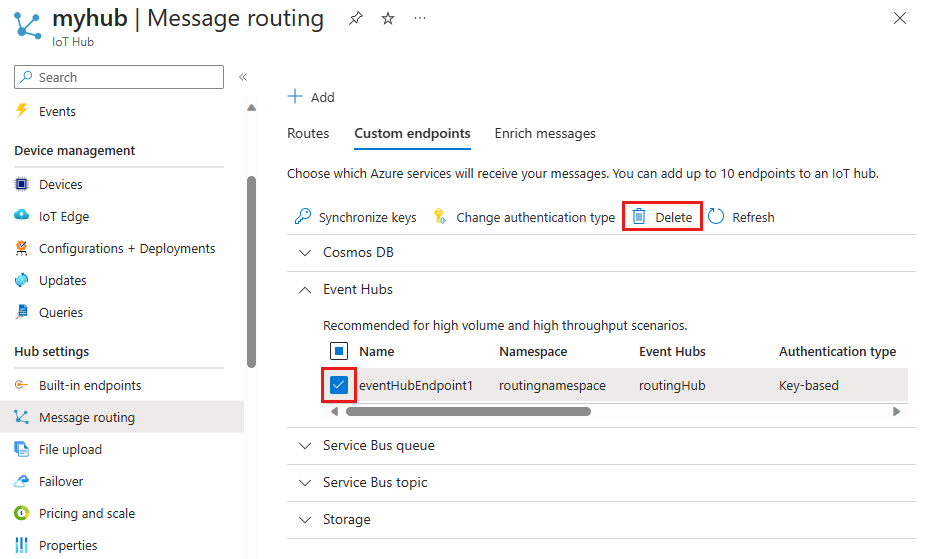
In the Custom endpoints tab, use the checkbox to select the endpoint that you want to delete.
Select Delete.

Next steps
To learn more about message routing, see Tutorial: Send device data to Azure Storage using IoT Hub message routing. In the tutorial, you create a storage route and test it with a device in your IoT hub.