Quickstart: Create a knowledge store in the Azure portal
In this quickstart, you create a knowledge store that serves as a repository for output generated from an AI enrichment pipeline in Azure AI Search. A knowledge store makes generated content available in Azure Storage for workloads other than search.
First, you set up some sample data in Azure Storage. Next, you run the Import data wizard to create an enrichment pipeline that also generates a knowledge store. The knowledge store contains original source content pulled from the data source (customer reviews of a hotel), plus AI-generated content that includes a sentiment label, key phrase extraction, and text translation of non-English customer comments.
Prerequisites
Before you begin, have the following prerequisites in place:
An Azure account with an active subscription. Create an account for free.
Azure AI Search. Create a service or find an existing service in your account. You can use a free service for this quickstart.
Azure Storage. Create an account or find an existing account. The account type must be StorageV2 (general purpose V2).
Sample data hosted in Azure Storage:
Download HotelReviews_Free.csv. This CSV contains 19 pieces of customer feedback about a single hotel (originates from Kaggle.com). The file is in a repo with other sample data. If you don't want the whole repo, copy the raw content and paste it into a spreadsheet app on your device.
Upload the file to a blob container in Azure Storage.
This quickstart also uses Azure AI services for AI enrichment. Because the workload is so small, Azure AI services is tapped behind the scenes for free processing for up to 20 transactions. This means that you can complete this exercise without having to create an extra Azure AI multi-service resource.
Start the wizard
Sign in to the Azure portal with your Azure account.
Find your search service and on the Overview page, select Import data on the command bar to create a knowledge store in four steps.

Step 1: Create a data source
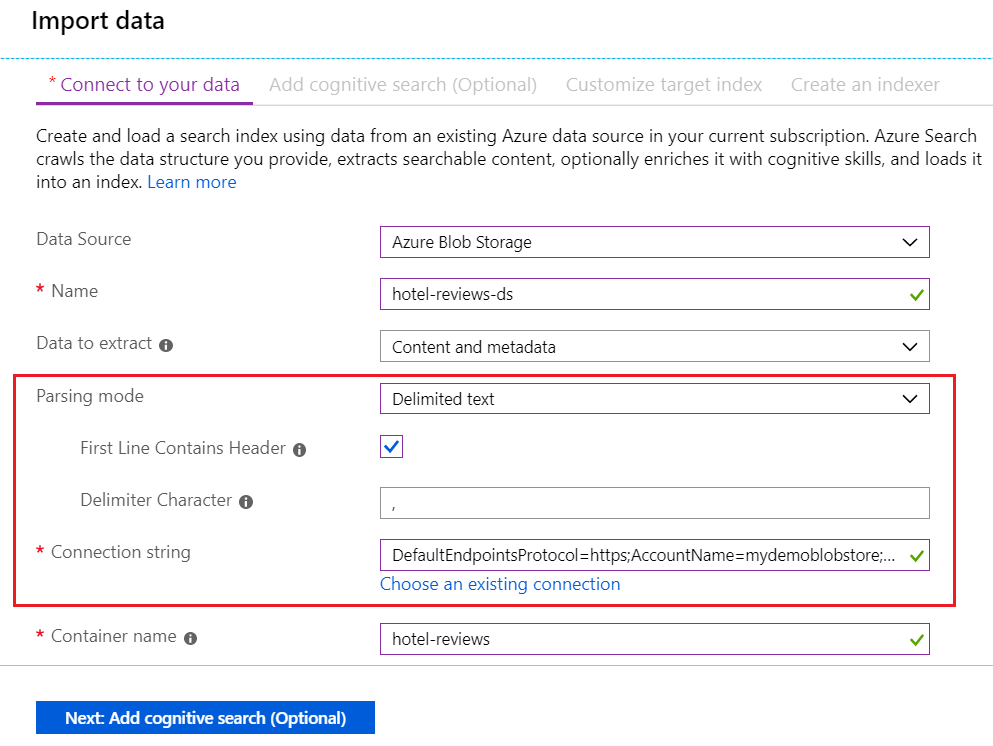
Because the data is multiple rows in one CSV file, set the parsing mode to get one search document for each row.
In Connect to your data, choose Azure Blob Storage.
For the Name, enter "hotel-reviews-ds".
For Data to extract, choose Content and Metadata.
For Parsing mode, select Delimited text, and then select the First Line Contains Header checkbox. Make sure the Delimiter character is a comma (,).
In Connection String, choose an existing connection if the storage account is in the same subscription. Otherwise, paste in a connection string to your Azure Storage account.
A connection string can be full access, having the following format:
DefaultEndpointsProtocol=https;AccountName=<YOUR-ACCOUNT-NAME>;AccountKey=<YOUR-ACCOUNT-KEY>;EndpointSuffix=core.windows.netOr, a connection string can reference a managed identity, assuming it's configured and assigned a role in Azure Storage:
ResourceId=/subscriptions/{YOUR-SUBSCRIPTION-ID}/resourceGroups/{YOUR-RESOURCE-GROUP-NAME}/providers/Microsoft.Storage/storageAccounts/{YOUR-ACCOUNT-NAME};In Containers, enter the name of the blob container holding the data ("hotel-reviews").
Your page should look similar to the following screenshot.
Continue to the next page.
Step 2: Add skills
In this wizard step, add skills for AI enrichment. The source data consists of customer reviews in English and French. Skills that are relevant for this data set include key phrase extraction, sentiment detection, and text translation. In a later step, these enrichments are "projected" into a knowledge store as Azure tables.
Expand Attach Azure AI services. Free (Limited enrichments) is selected by default. You can use this resource because the number of records in HotelReviews-Free.csv is 19 and this free resource allows up to 20 transactions a day.
Expand Add enrichments.
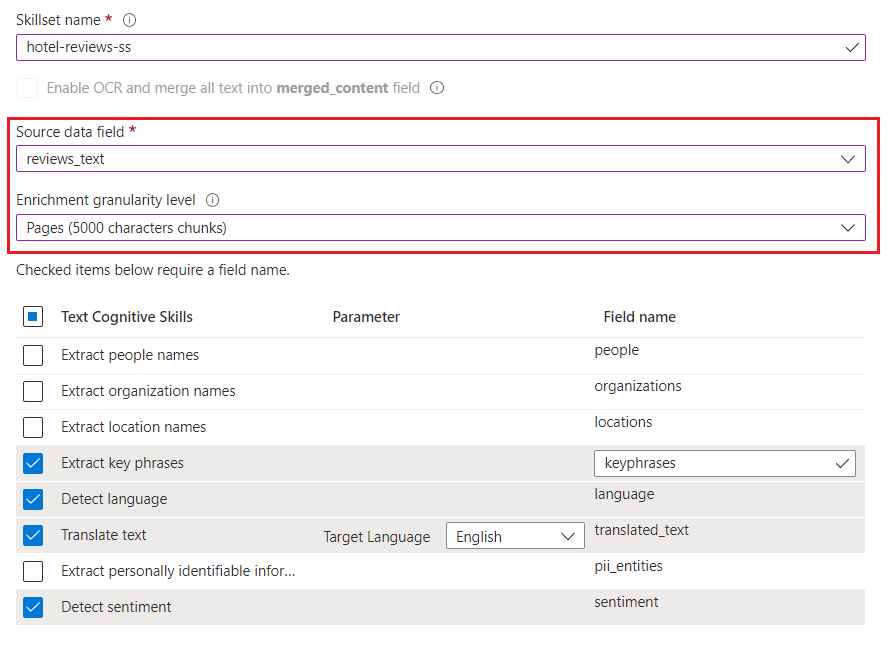
For Skillset name, enter "hotel-reviews-ss".
For Source data field, select reviews_text.
For Enrichment granularity level, select Pages (5000 characters chunks).
For Text Cognitive Skills, select the following skills:
- Extract key phrases
- Translate text
- Language detection
- Detect sentiment
Your page should look like the following screenshot:
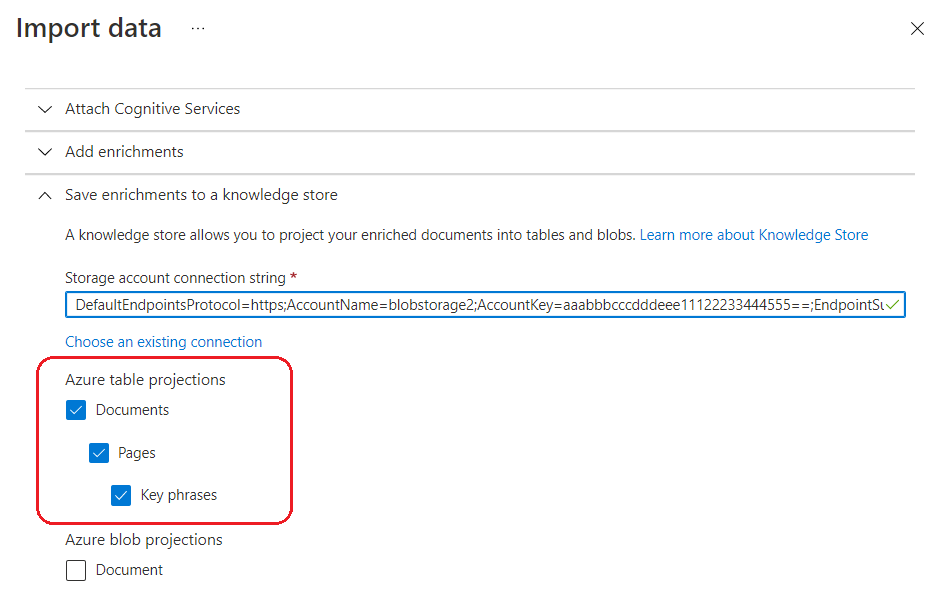
Scroll down and expand Save enrichments to knowledge store.
Select Choose an existing connection and then select an Azure Storage account. The Containers page appears so that you can create a container for projections. We recommend adopting a prefix naming convention, such as "kstore-hotel-reviews" to distinguish between source content and knowledge store content.
Returning to the Import data wizard, select the following Azure table projections. The wizard always offers the Documents projection. Other projections are offered depending on the skills you select (such as Key phrases), or the enrichment granularity (Pages):
- Documents
- Pages
- Key phrases
The following screenshot shows the table projection selections in the wizard.
Continue to the next page.
Step 3: Configure the index
In this wizard step, configure an index for optional full-text search queries. You don't need a search index for a knowledge store, but the indexer requires one in order to run.
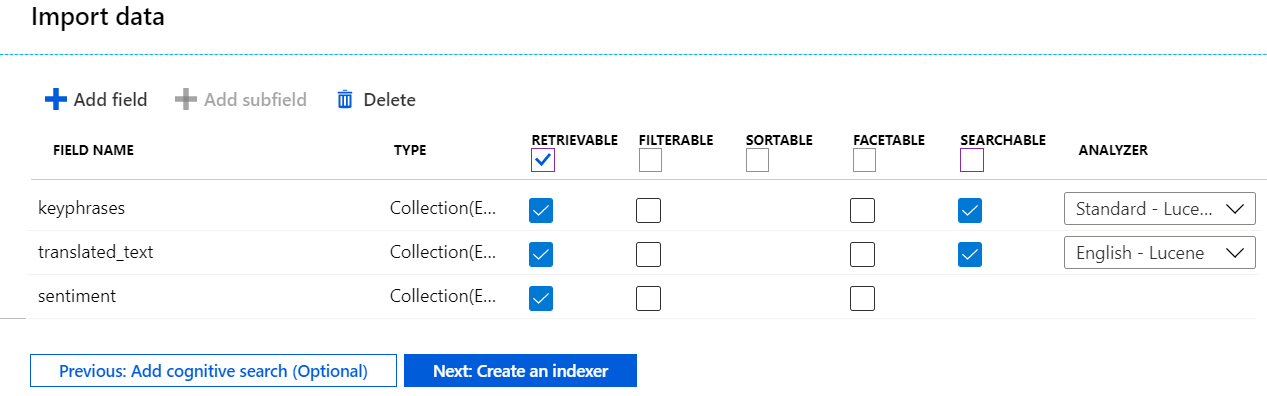
In this step, the wizard samples your data source to infer fields and data types. You only need to select the attributes for your desired behavior. For example, the Retrievable attribute allows the search service to return a field value, while the Searchable attribute enables full text search on the field.
For Index name, enter "hotel-reviews-idx".
For attributes, accept the default selections: Retrievable and Searchable for the new fields that the pipeline is creating.
Your index should look similar to the following image. Because the list is long, not all fields are visible in the image.
Continue to the next page.
Step 4: Configure and run the indexer
In this wizard step, configure an indexer that pulls together the data source, skillset, and the index you defined in the previous wizard steps.
For Name, enter "hotel-reviews-idxr".
For Schedule, keep the default Once.
Select Submit to run the indexer. Data extraction, indexing, application of cognitive skills all happen in this step.
Step 5: Check status
In the Overview page, open the Indexers tab in the middle of the page, and then select hotels-reviews-idxr. Within a minute or two, status should progress from "In progress" to "Success" with zero errors and warnings.
Check tables in Azure portal
In the Azure portal, open the Storage account used to create the knowledge store.
In the storage account's left navigation pane, select Storage browser to view the new tables.
You should see three tables, one for each projection that was offered in the "Save enrichments" section of the "Add enrichments" page.
"hotelReviewssDocuments" contains all of the first-level nodes of a document's enrichment tree that aren't collections.
"hotelReviewssKeyPhrases" contains a long list of just the key phrases extracted from all reviews. Skills that output collections (arrays), such as key phrases and entities, send output to a standalone table.
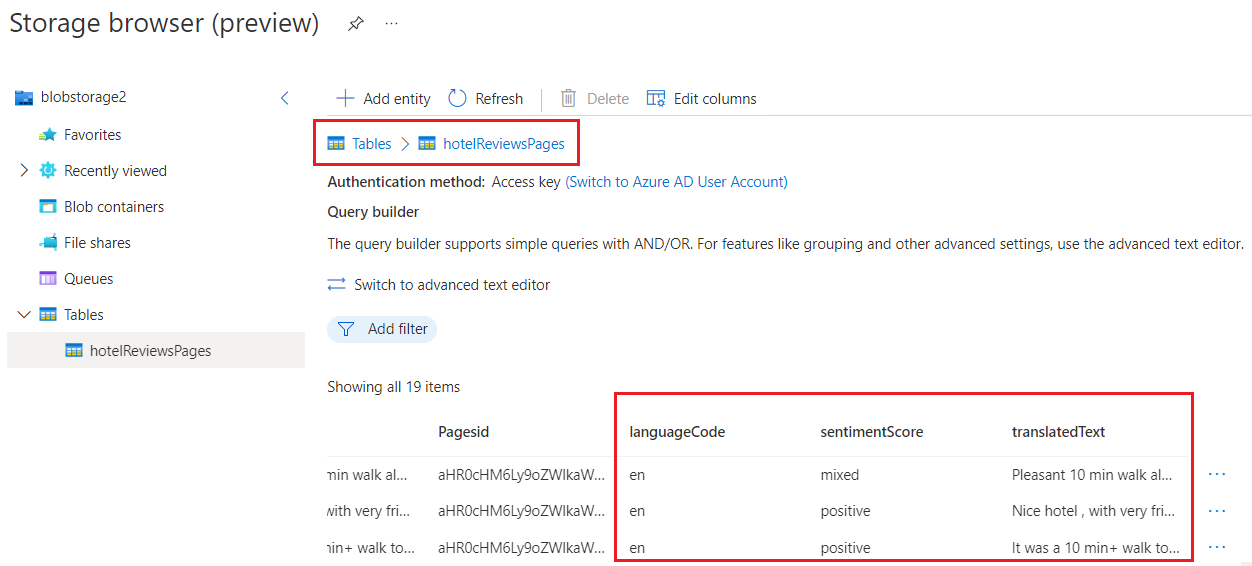
"hotelReviewssPages" contains enriched fields created over each page that was split from the document. In this skillset and data source, page-level enrichments consisting of sentiment labels and translated text. A pages table (or a sentences table if you specify that particular level of granularity) is created when you choose "pages" granularity in the skillset definition.
All of these tables contain ID columns to support table relationships in other tools and apps. When you open a table, scroll past these fields to view the content fields added by the pipeline.
In this quickstart, the table for "hotelReviewssPages" should look similar to the following screenshot:
Clean up
When you're working in your own subscription, it's a good idea at the end of a project to identify whether you still need the resources you created. Resources left running can cost you money. You can delete resources individually or delete the resource group to delete the entire set of resources.
You can find and manage resources in the portal, using the All resources or Resource groups link in the left-navigation pane.
If you're using a free service, remember that you're limited to three indexes, indexers, and data sources. You can delete individual items in the portal to stay under the limit.
Tip
If you want to repeat this exercise or try a different AI enrichment walkthrough, delete the hotel-reviews-idxr indexer and the related objects to recreate them. Deleting the indexer resets the free daily transaction counter to zero.
Next steps
Now that you've been introduced to a knowledge store, take a closer look at each step by switching over to the REST API walkthrough. Tasks that the wizard handled internally are explained in the REST walkthrough.