Tutorial: Deploy a .NET application in a Windows container to Azure Service Fabric
This tutorial shows you how to containerize an existing ASP.NET application and package it as a Service Fabric application. Run the containers locally on the Service Fabric development cluster and then deploy the application to Azure. The application persists data in Azure SQL Database.
In this tutorial, you learn how to:
- Containerize an existing application using Visual Studio
- Create a database in Azure SQL Database
- Create an Azure container registry
- Deploy a Service Fabric application to Azure
Note
We recommend that you use the Azure Az PowerShell module to interact with Azure. To get started, see Install Azure PowerShell. To learn how to migrate to the Az PowerShell module, see Migrate Azure PowerShell from AzureRM to Az.
Prerequisites
- If you don't have an Azure subscription, create a free account.
- Enable Windows features Hyper-V and Containers.
- Install Docker Desktop for Windows so that you can run containers on Windows 10.
- Install Service Fabric runtime version 6.2 or later and the Service Fabric SDK version 3.1 or later.
- Install Visual Studio and enable Azure development and ASP.NET and web development workloads.
- Install Azure PowerShell
Download and run Fabrikam Fiber CallCenter
Download the Fabrikam Fiber CallCenter sample application from GitHub.
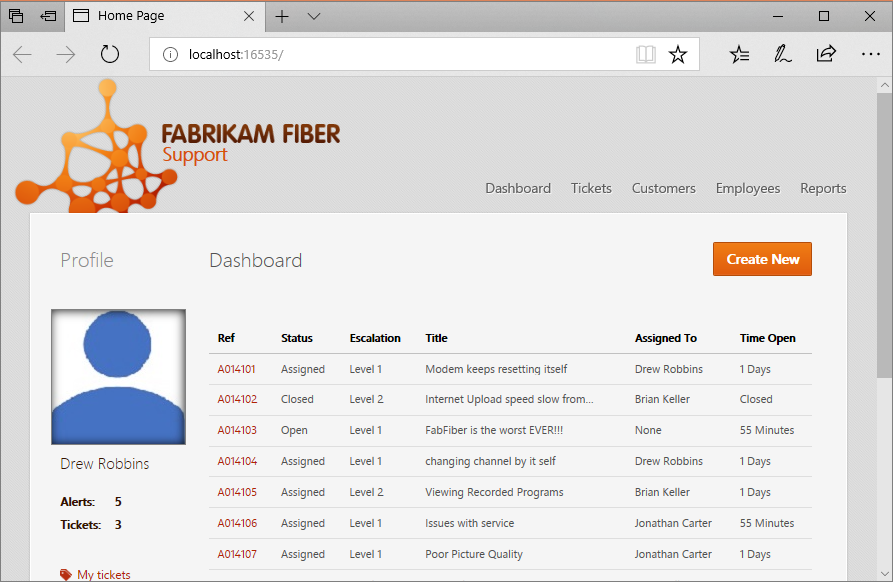
Verify that the Fabrikam Fiber CallCenter application builds and runs without error. Launch Visual Studio as administrator and open the VS2015\FabrikamFiber.CallCenter.sln file. Press F5 to run and debug the application.
Create an Azure SQL DB
When running the Fabrikam Fiber CallCenter application in production, the data needs to be persisted in a database. There is currently no way to guarantee persistent data in a container, therefore you cannot store production data in SQL Server in a container.
We recommend Azure SQL Database. To set up and run a managed SQL Server DB in Azure, run the following script. Modify the script variables as necessary. clientIP is the IP address of your development computer. Take note of the name of the server outputted by the script.
$subscriptionID="<subscription ID>"

# Sign in to your Azure account and select your subscription.
Login-AzAccount -SubscriptionId $subscriptionID

# The data center and resource name for your resources.
$dbresourcegroupname = "fabrikam-fiber-db-group"
$location = "southcentralus"

# The server name: Use a random value or replace with your own value (do not capitalize).
$servername = "fab-fiber-$(Get-Random)"

# Set an admin login and password for your database.
# The login information for the server.
$adminlogin = "ServerAdmin"
$password = "Password@123"

# The IP address of your development computer that accesses the SQL DB.
$clientIP = "<client IP>"

# The database name.
$databasename = "call-center-db"

# Create a new resource group for your deployment and give it a name and a location.
New-AzResourceGroup -Name $dbresourcegroupname -Location $location

# Create the SQL server.
New-AzSqlServer -ResourceGroupName $dbresourcegroupname `
    -ServerName $servername `
    -Location $location `
    -SqlAdministratorCredentials $(New-Object -TypeName System.Management.Automation.PSCredential -ArgumentList $adminlogin, $(ConvertTo-SecureString -String $password -AsPlainText -Force))

# Create the firewall rule to allow your development computer to access the server.
New-AzSqlServerFirewallRule -ResourceGroupName $dbresourcegroupname `
    -ServerName $servername `
    -FirewallRuleName "AllowClient" -StartIpAddress $clientIP -EndIpAddress $clientIP

# Create the database in the server.
New-AzSqlDatabase  -ResourceGroupName $dbresourcegroupname `
    -ServerName $servername `
    -DatabaseName $databasename `
    -RequestedServiceObjectiveName "S0"

Write-Host "Server name is $servername"
Tip
If you are behind a corporate firewall, the IP address of your development computer may not be IP address exposed to the internet. To verify that the database has the correct IP address for the firewall rule, go to the Azure portal and find your database in the SQL Databases section. Click on its name, then in the Overview section click "Set server firewall". "Client IP address" is the IP address of your development machine. Ensure that it matches the IP address in the "AllowClient" rule.
Update the web config
Back in the FabrikamFiber.Web project, update the connection string in the web.config file, to point to the SQL Server in the container. Update the Server part of the connection string to be the server name created by the previous script. It should be something like "fab-fiber-751718376.database.windows.net". In the following XML, you need to update only the connectionString attribute; the providerName and name attributes don't need to be changed.
<add name="FabrikamFiber-Express" connectionString="Server=<server name>,1433;Initial Catalog=call-center-db;Persist Security Info=False;User ID=ServerAdmin;Password=Password@123;MultipleActiveResultSets=False;Encrypt=True;TrustServerCertificate=False;Connection Timeout=30;" providerName="System.Data.SqlClient" />
<add name="FabrikamFiber-DataWarehouse" connectionString="Server=<server name>,1433;Initial Catalog=call-center-db;Persist Security Info=False;User ID=ServerAdmin;Password=Password@123;MultipleActiveResultSets=False;Encrypt=True;TrustServerCertificate=False;Connection Timeout=30;" providerName="System.Data.SqlClient" />
Note
You can use any SQL Server you prefer for local debugging, as long as it is reachable from your host. However, localdb does not support container -> host communication. If you want to use a different SQL database when building a release build of your web application, add another connection string to your web.release.config file.
Containerize the application
Right-click the FabrikamFiber.Web project > Add > Container Orchestrator Support. Select Service Fabric as the container orchestrator and click OK.
If prompted, click Yes to switch Docker to Windows containers now.
A new project Service Fabric application project FabrikamFiber.CallCenterApplication is created in the solution. A Dockerfile is added to the existing FabrikamFiber.Web project. A PackageRoot directory is also added to the FabrikamFiber.Web project, which contains the service manifest and settings for the new FabrikamFiber.Web service.
The container is now ready to be built and packaged in a Service Fabric application. Once you have the container image built on your machine, you can push it to any container registry and pull it down to any host to run.
Run the containerized application locally
Press F5 to run and debug the application in a container on the local Service Fabric development cluster. Click Yes if presented with a message box asking to grant 'ServiceFabricAllowedUsers' group read and execute permissions to your Visual Studio project directory.
If F5 run throws an exception such as follows, then the correct IP has not been added to the Azure database firewall.
System.Data.SqlClient.SqlException
HResult=0x80131904
Message=Cannot open server 'fab-fiber-751718376' requested by the login. Client with IP address '123.456.789.012' is not allowed to access the server.  To enable access, use the Windows Azure Management Portal or run sp_set_firewall_rule on the master database to create a firewall rule for this IP address or address range.  It may take up to five minutes for this change to take effect.
Source=.Net SqlClient Data Provider
StackTrace:
<Cannot evaluate the exception stack trace>
To add the appropriate IP to the Azure database firewall, run the following command.
# The IP address of your development computer that accesses the SQL DB.
$clientIPNew = "<client IP from the Error Message>"

# Create the firewall rule to allow your development computer to access the server.
New-AzSqlServerFirewallRule -ResourceGroupName $dbresourcegroupname `
    -ServerName $servername `
    -FirewallRuleName "AllowClientNew" -StartIpAddress $clientIPNew -EndIpAddress $clientIPNew
Create a container registry
Now that the application runs locally, start preparing to deploy to Azure. Container images need to be stored in a container registry. Create an Azure container registry using the following script. The container registry name is visible by other Azure subscriptions, so it must be unique. Before deploying the application to Azure, you push the container image to this registry. When the application deploys to the cluster in Azure, the container image is pulled from this registry.
# Variables
$acrresourcegroupname = "fabrikam-acr-group"
$location = "southcentralus"
$registryname="fabrikamregistry$(Get-Random)"

New-AzResourceGroup -Name $acrresourcegroupname -Location $location

$registry = New-AzContainerRegistry -ResourceGroupName $acrresourcegroupname -Name $registryname -EnableAdminUser -Sku Basic
Create a Service Fabric cluster on Azure
Service Fabric applications run on a cluster, a network-connected set of virtual or physical machines. Before you can deploy the application to Azure, create a Service Fabric cluster in Azure.
You can:
- Create a test cluster from Visual Studio. This option allows you to create a secure cluster directly from Visual Studio with your preferred configurations.
- Create a secure cluster from a template
This tutorial creates a cluster from Visual Studio, which is ideal for test scenarios. If you create a cluster some other way or use an existing cluster, you can copy and paste your connection endpoint or choose it from your subscription.
Before starting, open FabrikamFiber.Web -> PackageRoot -> ServiceManifest.xml in the Solution Explorer. Take note of the port for the web front-end listed in Endpoint.
When creating the cluster:
Right-click on the FabrikamFiber.CallCenterApplication application project in the Solution Explorer and choose Publish.
Sign in by using your Azure account so that you can have access to your subscription(s).
Below the dropdown for the Connection Endpoint, select the Create New Cluster... option.
In the Create cluster dialog, modify the following settings:
a. Specify the name of your cluster in the Cluster Name field, as well as the subscription and location you want to use. Take note of the name of your cluster resource group.
b. Optional: You can modify the number of nodes. By default you have three nodes, the minimum required for testing Service Fabric scenarios.
c. Select the Certificate tab. In this tab, type a password to use to secure the certificate of your cluster. This certificate helps make your cluster secure. You can also modify the path to where you want to save the certificate. Visual Studio can also import the certificate for you, since this is a required step to publish the application to the cluster.
Note
Keep a note of the folder path where this certificate is imported. The next step after the creation of the cluster is to import this certificate.
d. Select the VM Detail tab. Specify the password you would like to use for the Virtual Machines (VM) that make up the cluster. The user name and password can be used to remotely connect to the VMs. You must also select a VM machine size and can change the VM image if needed.
Important
Choose a SKU that supports running containers. The Windows Server OS on your cluster nodes must be compatible with the Windows Server OS of your container. To learn more, see Windows Server container OS and host OS compatibility. By default, this tutorial creates a Docker image based on Windows Server 2016 LTSC. Containers based on this image will run on clusters created with Windows Server 2016 Datacenter with Containers. However, if you create a cluster or use an existing cluster based on a different version of Windows Server, you must change the OS image that the container is based on. Open the dockerfile in the FabrikamFiber.Web project, comment out any existing
FROMstatement based on a previous version of Windows Server, and add aFROMstatement based on the desired version's tag from the Windows Server Core DockerHub page. For additional information about Windows Server Core releases, support timelines, and versioning, refer to Windows Server Core release info.e. In the Advanced tab, list the application port to open in the load balancer when the cluster deploys. This is the port that you took note of before starting creating the cluster. You can also add an existing Application Insights key to be used to route application log files to.
f. When you are done modifying settings, select the Create button.
Creation takes several minutes to complete; the output window will indicate when the cluster is fully created.
Install the imported certificate
Install the certificate imported as part of the cluster creation step, to the Current User store location and provide the private key password you provided.
You can confirm the installation by opening Manage User Certificates from the control panel and confirming the certificate is installed under Certificates - Current User -> Personal -> Certificates. The certificate should be like [Cluster Name].[Cluster Location].cloudapp.azure.com, e.g. fabrikamfibercallcenter.southcentralus.cloudapp.azure.com.
Allow your application running in Azure to access SQL Database
Previously, you created a SQL firewall rule to give access to your application running locally. Next, you need to enable the application running in Azure to access the SQL DB. Create a virtual network service endpoint for the Service Fabric cluster and then create a rule to allow that endpoint to access the SQL DB. Be sure to specify the cluster resource group variable that you took note of when creating the cluster.
# Create a virtual network service endpoint
$clusterresourcegroup = "<cluster resource group>"
$resource = Get-AzResource -ResourceGroupName $clusterresourcegroup -ResourceType Microsoft.Network/virtualNetworks | Select-Object -first 1
$vnetName = $resource.Name

Write-Host 'Virtual network name: ' $vnetName

# Get the virtual network by name.
$vnet = Get-AzVirtualNetwork `
  -ResourceGroupName $clusterresourcegroup `
  -Name              $vnetName

Write-Host "Get the subnet in the virtual network:"

# Get the subnet, assume the first subnet contains the Service Fabric cluster.
$subnet = Get-AzVirtualNetworkSubnetConfig -VirtualNetwork $vnet | Select-Object -first 1

$subnetName = $subnet.Name
$subnetID = $subnet.Id
$addressPrefix = $subnet.AddressPrefix

Write-Host "Subnet name: " $subnetName " Address prefix: " $addressPrefix " ID: " $subnetID

# Assign a Virtual Service endpoint 'Microsoft.Sql' to the subnet.
$vnet = Set-AzVirtualNetworkSubnetConfig `
  -Name            $subnetName `
  -AddressPrefix   $addressPrefix `
  -VirtualNetwork  $vnet `
  -ServiceEndpoint Microsoft.Sql | Set-AzVirtualNetwork

$vnet.Subnets[0].ServiceEndpoints;  # Display the first endpoint.

# Add a SQL DB firewall rule for the virtual network service endpoint
$subnet = Get-AzVirtualNetworkSubnetConfig `
  -Name           $subnetName `
  -VirtualNetwork $vnet;

$VNetRuleName="ServiceFabricClusterVNetRule"
$vnetRuleObject1 = New-AzSqlServerVirtualNetworkRule `
  -ResourceGroupName      $dbresourcegroupname `
  -ServerName             $servername `
  -VirtualNetworkRuleName $VNetRuleName `
  -VirtualNetworkSubnetId $subnetID;
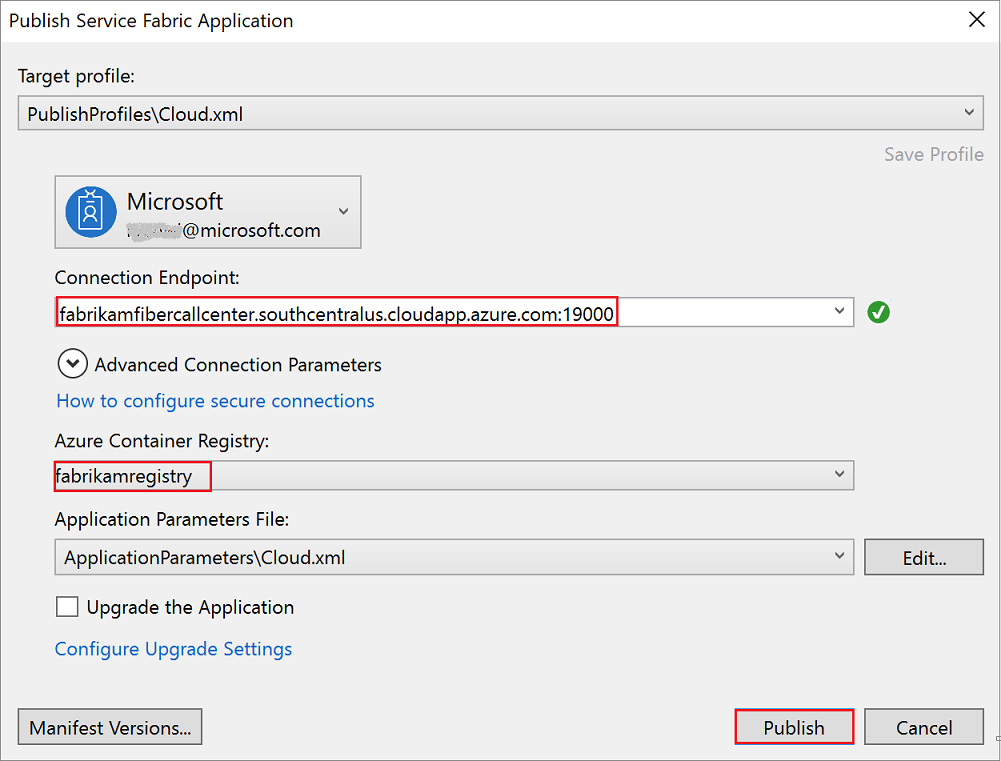
Deploy the application to Azure
Now that the application is ready, you can deploy it to the cluster in Azure directly from Visual Studio. In Solution Explorer, right-click the FabrikamFiber.CallCenterApplication application project and select Publish. In Connection Endpoint, select the endpoint of the cluster that you created previously. In Azure Container Registry, select the container registry that you created previously. Click Publish to deploy the application to the cluster in Azure.
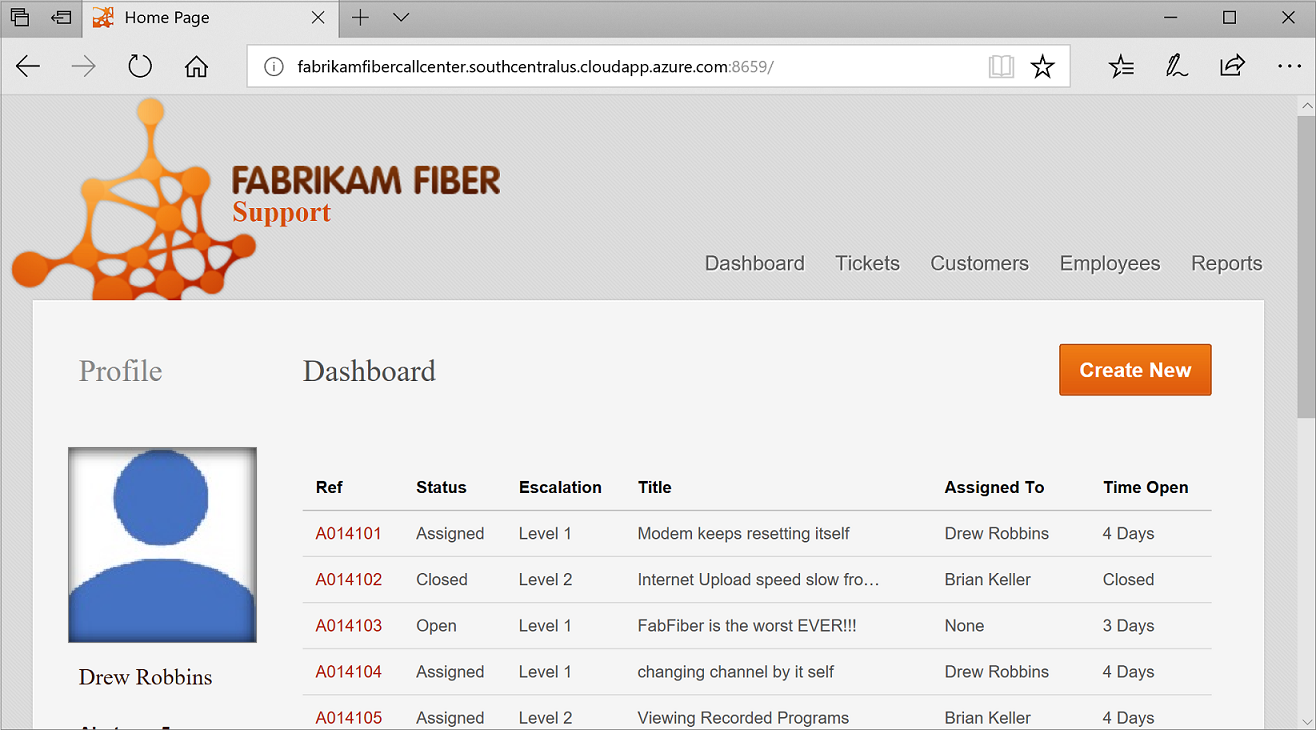
Follow the deployment progress in the output window. When the application is deployed, open a browser and type in the cluster address and application port. For example, http://fabrikamfibercallcenter.southcentralus.cloudapp.azure.com:8659/.
If the page fails to load, or fails to prompt for the certificate, try opening the Explorer path, for example, https://fabrikamfibercallcenter.southcentralus.cloudapp.azure.com:19080/Explorer and select the newly installed certificate.
Set up Continuous Integration and Deployment (CI/CD) with a Service Fabric cluster
To learn how to use Azure DevOps to configure CI/CD application deployment to a Service Fabric cluster, see Tutorial: Deploy an application with CI/CD to a Service Fabric cluster. The process described in the tutorial is the same for this (FabrikamFiber) project, just skip downloading the Voting sample and substitute FabrikamFiber as the repository name instead of Voting.
Clean up resources
If you're done, be sure to remove all the resources you created. The simplest way to is to remove the resources groups that contain the Service Fabric cluster, Azure SQL DB, and Azure Container Registry.
$dbresourcegroupname = "fabrikam-fiber-db-group"
$acrresourcegroupname = "fabrikam-acr-group"
$clusterresourcegroupname="fabrikamcallcentergroup"

# Remove the Azure SQL DB
Remove-AzResourceGroup -Name $dbresourcegroupname

# Remove the container registry
Remove-AzResourceGroup -Name $acrresourcegroupname

# Remove the Service Fabric cluster
Remove-AzResourceGroup -Name $clusterresourcegroupname
Next steps
In this tutorial, you learned how to:
- Containerize an existing application using Visual Studio
- Create a database in Azure SQL Database
- Create an Azure container registry
- Deploy a Service Fabric application to Azure
In the next part of the tutorial, learn how to Deploy a container application with CI/CD to a Service Fabric cluster.
Feedback
Coming soon: Throughout 2024 we will be phasing out GitHub Issues as the feedback mechanism for content and replacing it with a new feedback system. For more information see: https://aka.ms/ContentUserFeedback.
Submit and view feedback for