Note
Access to this page requires authorization. You can try signing in or changing directories.
Access to this page requires authorization. You can try changing directories.
When you deploy Microsoft Defender for Endpoint on macOS without a mobile device management (MDM) solution, you must manually approve system extensions and grant the required permissions. This article walks macOS administrators through approving system extensions, granting Accessibility and Full Disk Access permissions, enabling notifications, and verifying a healthy deployment state.
Configure system extensions and permissions using manual deployment
Approve system extensions manually
You might see the prompt that's shown in the following screenshot:
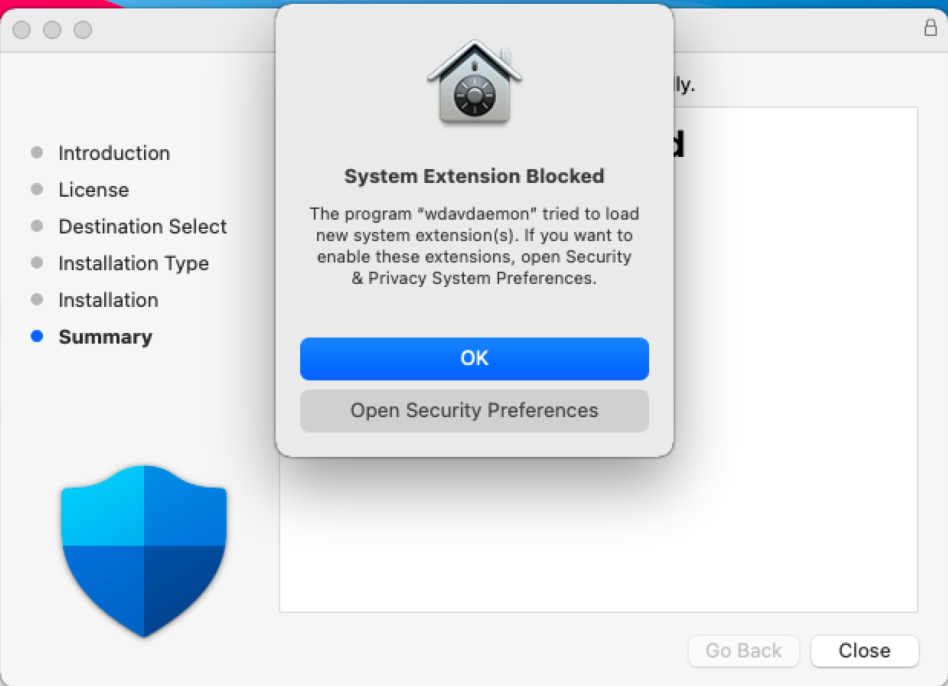
Select OK. You might get a second prompt as shown in the following screenshot:
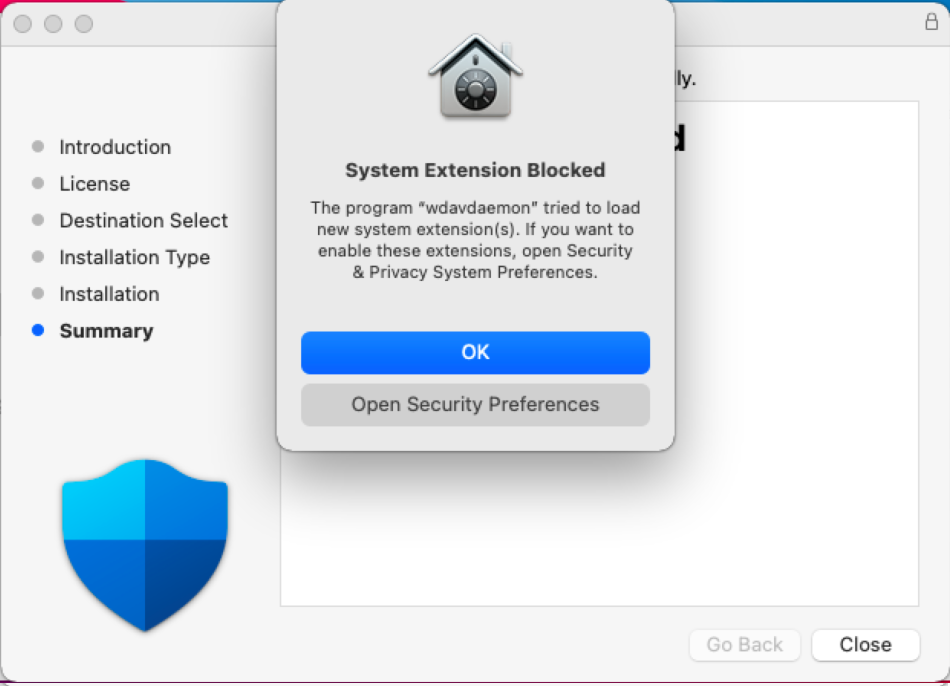
From this second-prompt screen, select OK. You receive a notification message that reads Installation succeeded, as shown in the following screenshot:
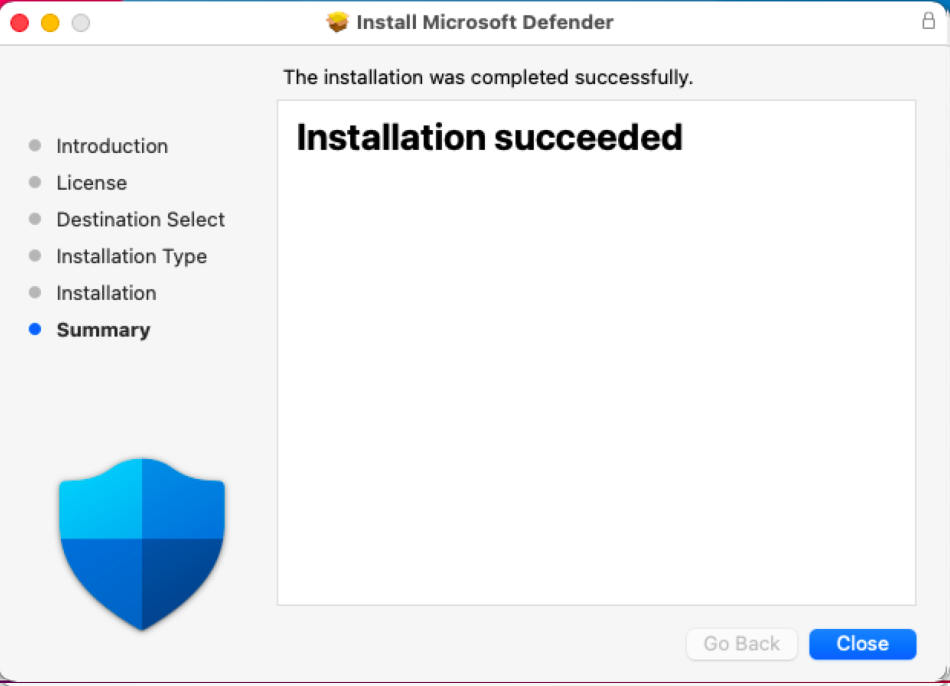
On the screen displaying the Installation succeeded notification message, select OK. You return to the following screen:

From the menu bar, select the x symbol on the shield. You get the options shown in the following screenshot:
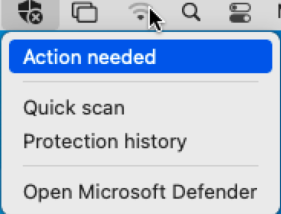
Select Action needed. The following screen appears:
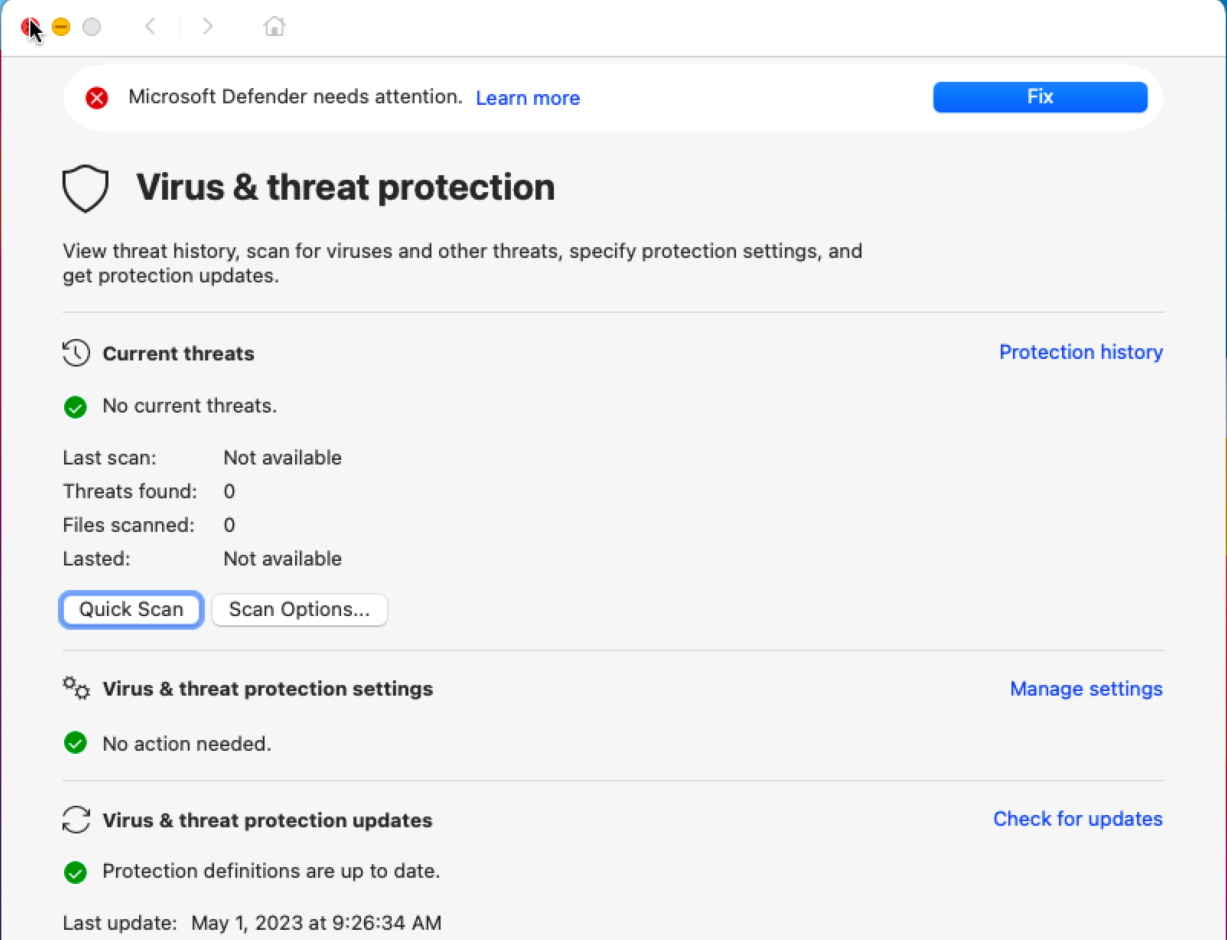
Select Fix in the upper-right corner of the Virus & threat protection screen. You get a prompt, as shown in the following screenshot:
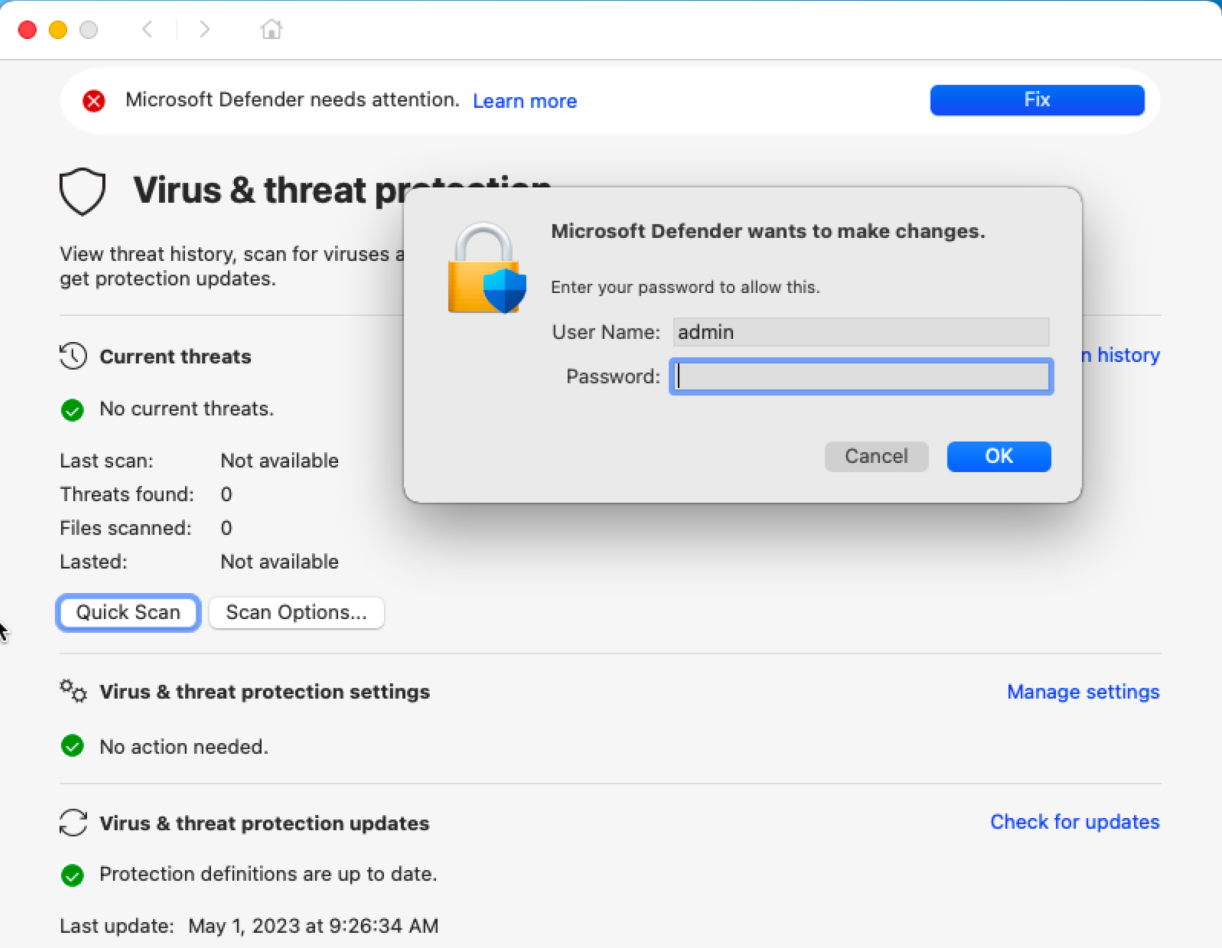
Enter your password and select OK.
Select

The System Preferences screen appears.
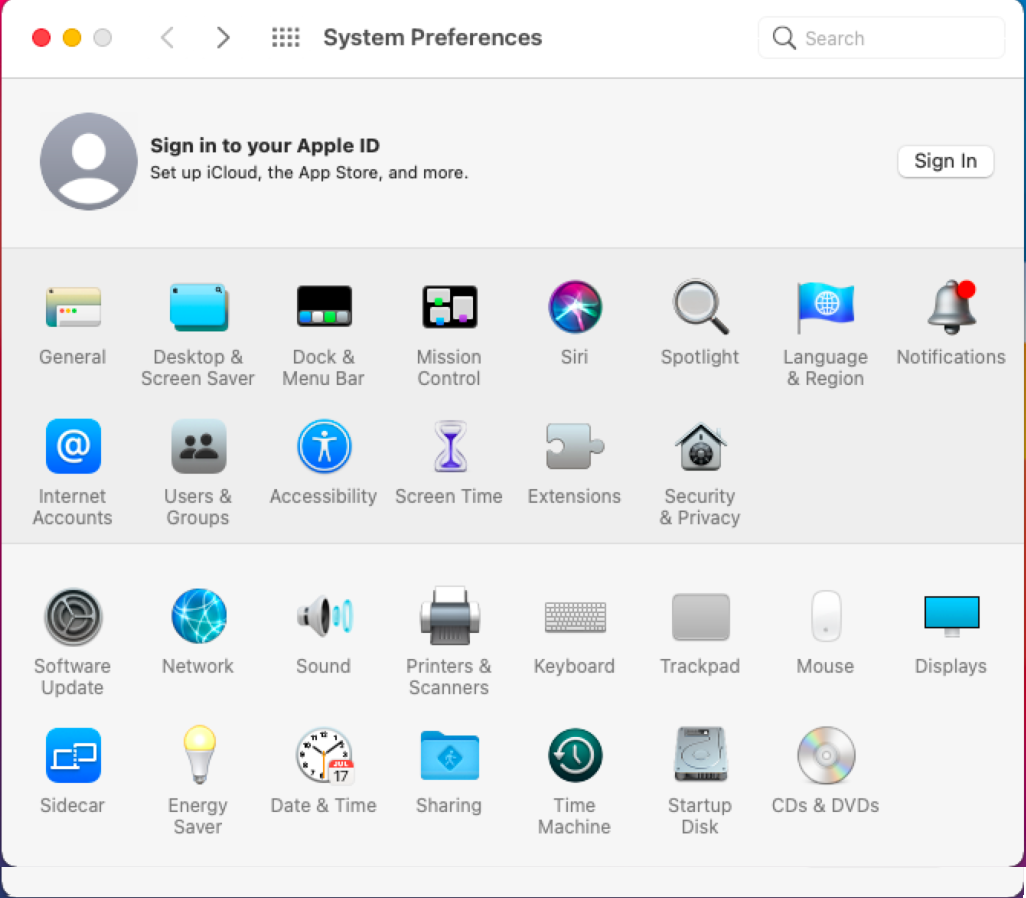
Select Security & Privacy. The Security & Privacy screen appears.
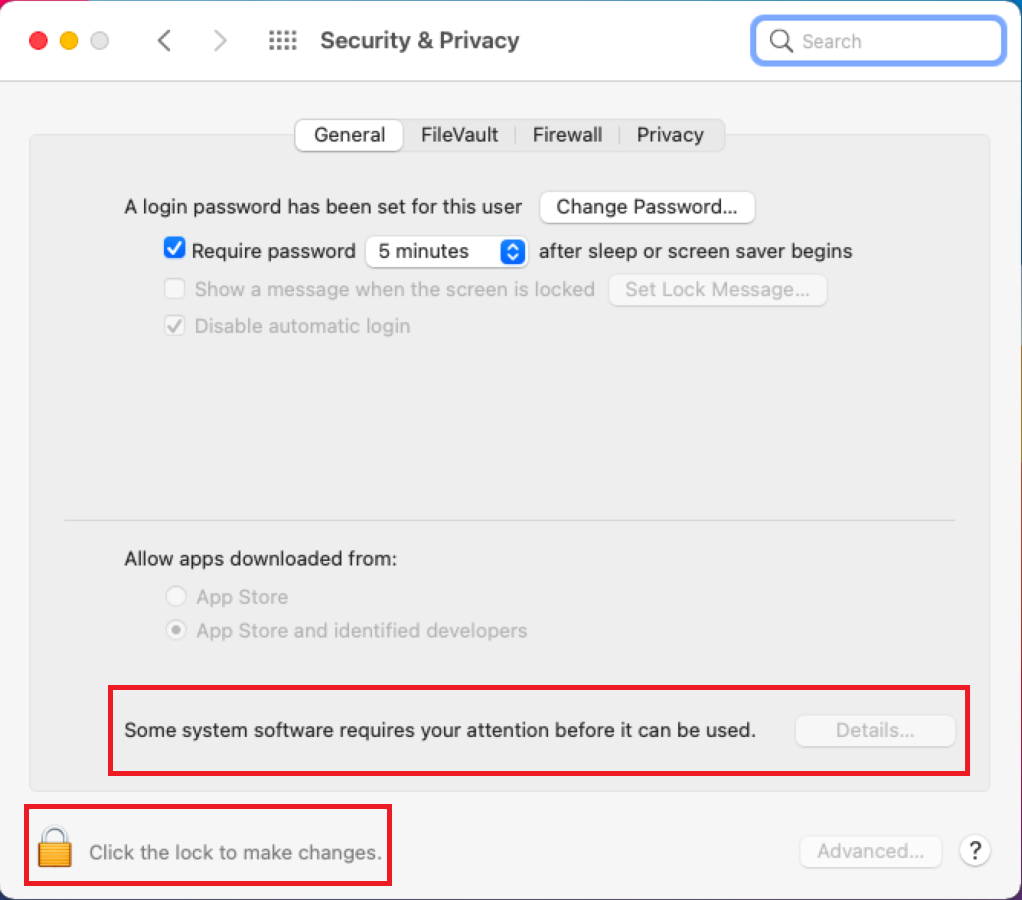
Select Click the lock to make changes. You get a prompt as shown in the following screenshot:
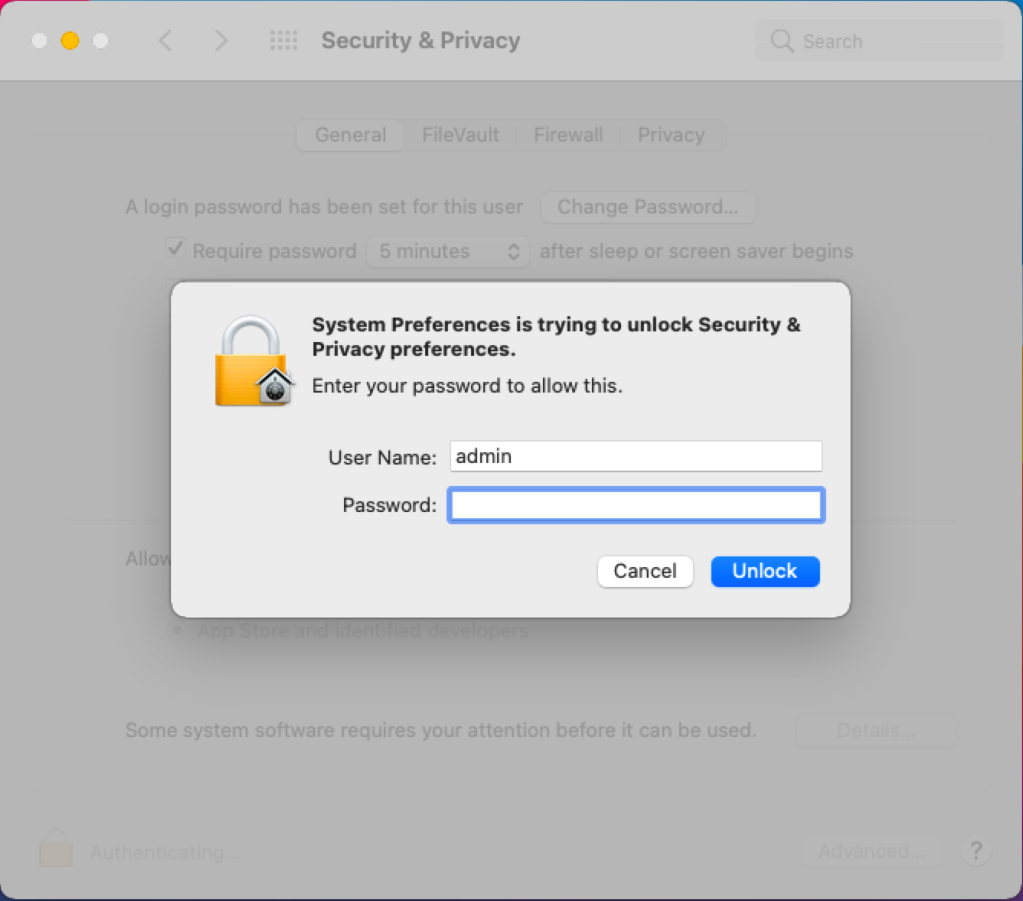
Enter your password and click Unlock. The following screen appears:
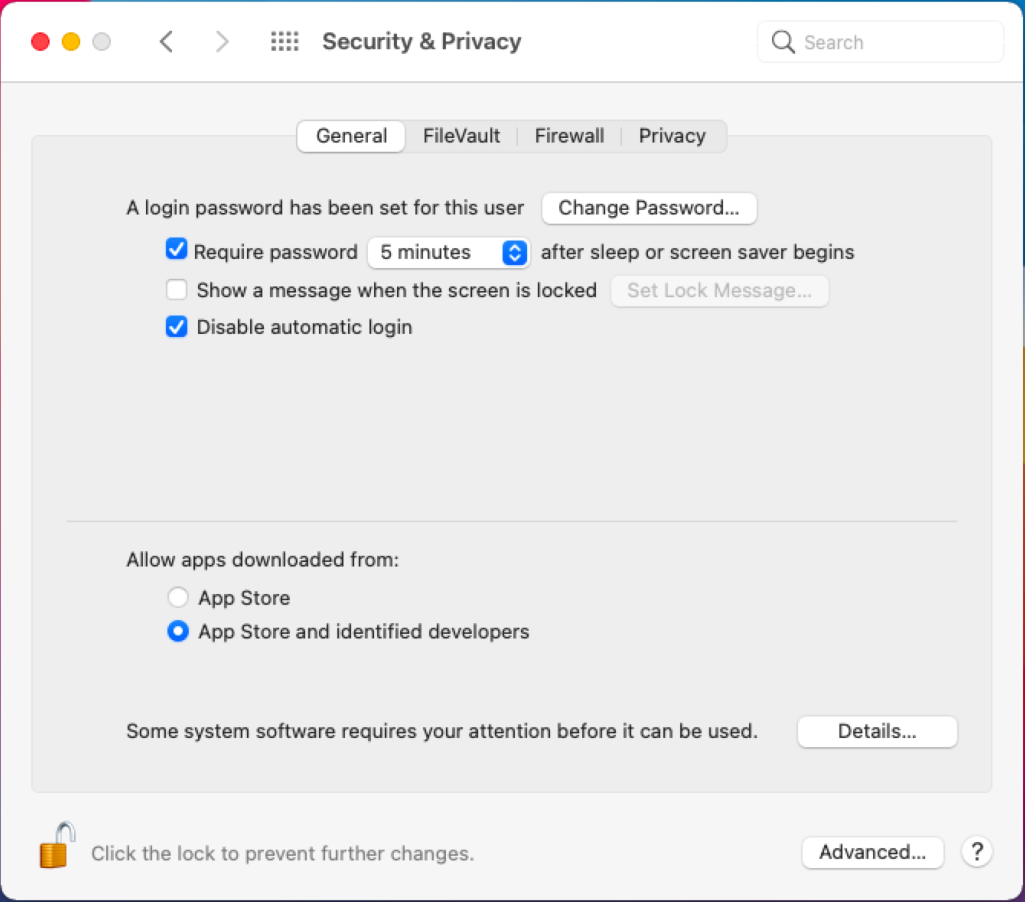
Select Details, next to Some software system requires your attention before it can be used.
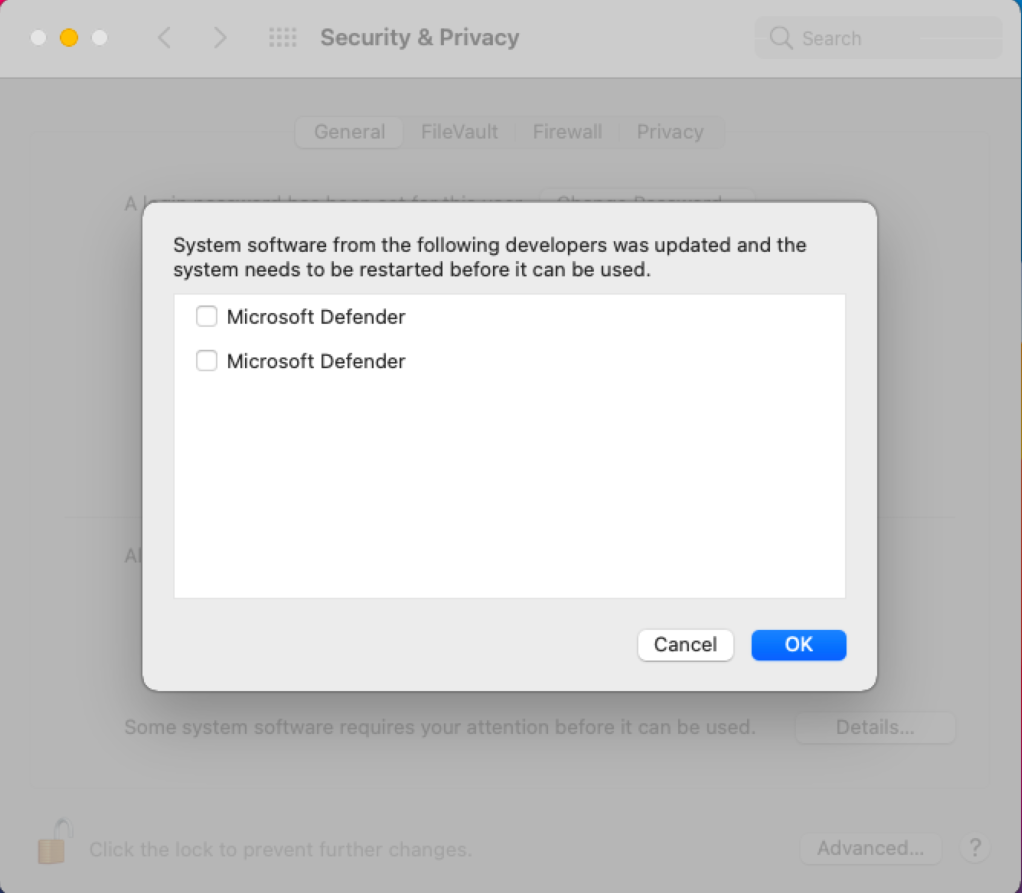
Check both the Microsoft Defender checkboxes, and select OK. You get two pop-up screens, as shown in the following screenshot:
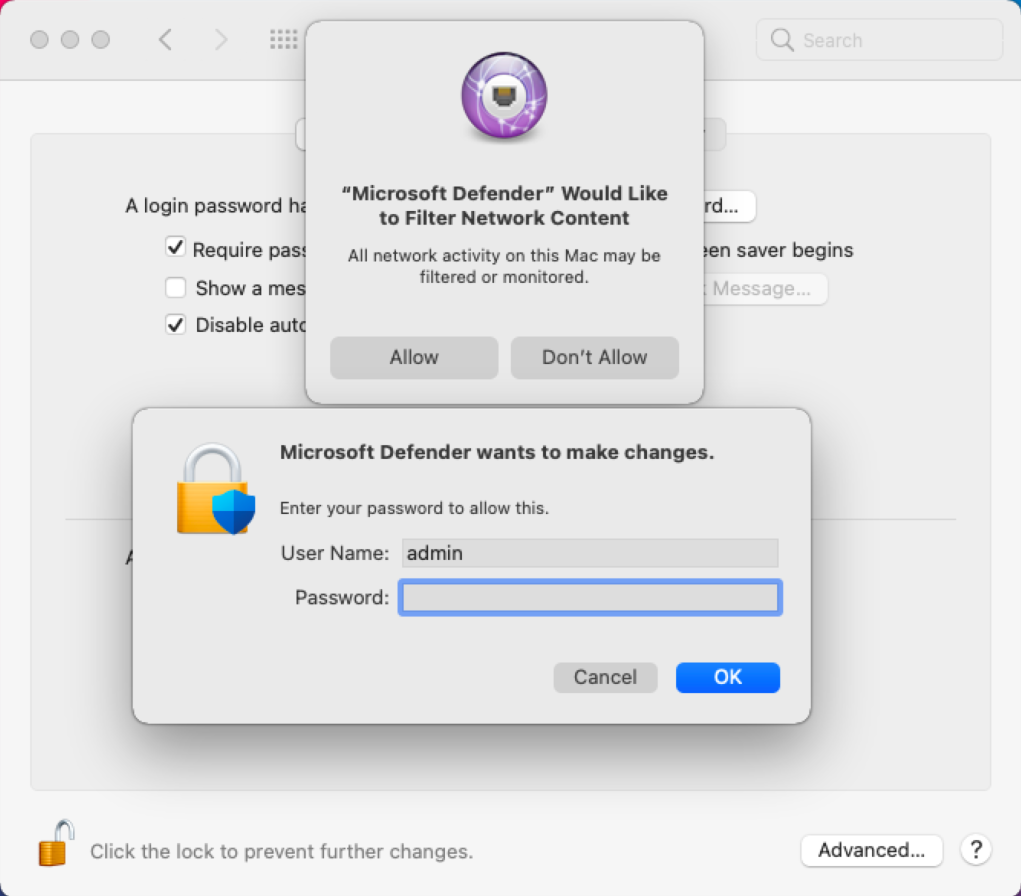
On the "Microsoft Defender" Would like to Filter Network Content pop-up screen, select Allow.
On the Microsoft Defender wants to make changes pop-up screen, enter your password and select OK.

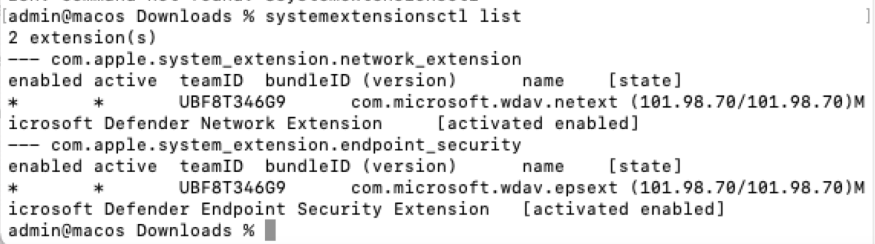
If you run systemextensionsctl list, you see output similar to the following screenshot showing the registered system extensions:
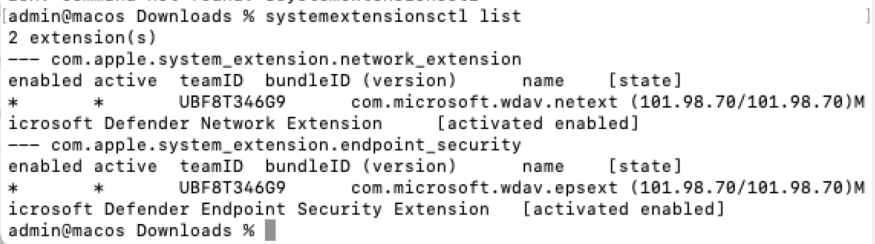
Grant Accessibility permissions manually
Perform the following steps to grant Accessibility access to Microsoft Defender:
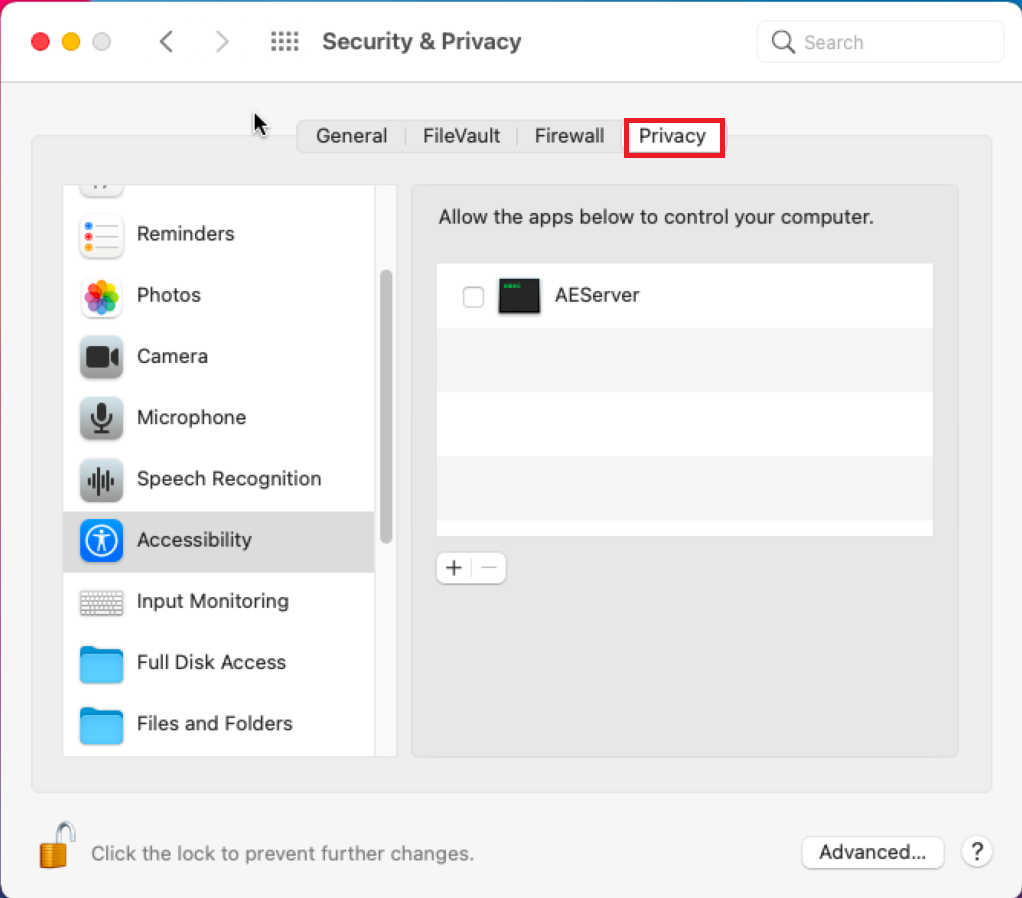
On the Security & Privacy screen, select the Privacy tab.
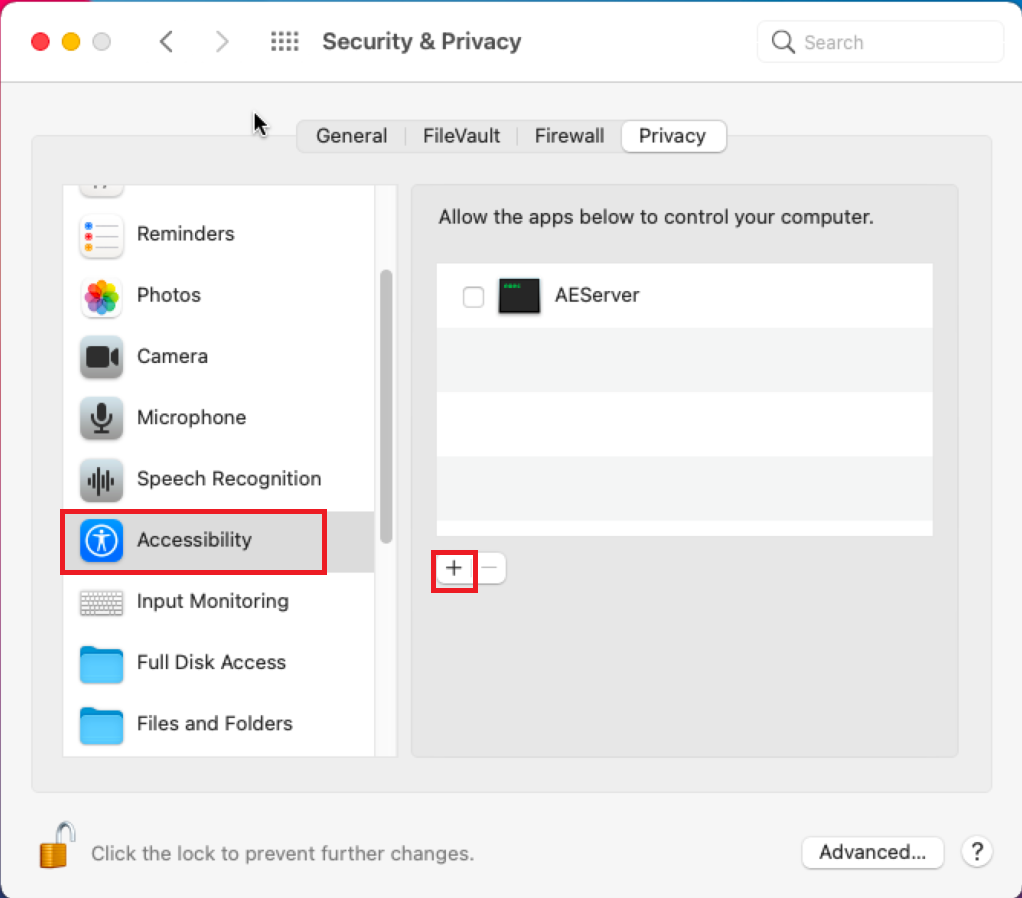
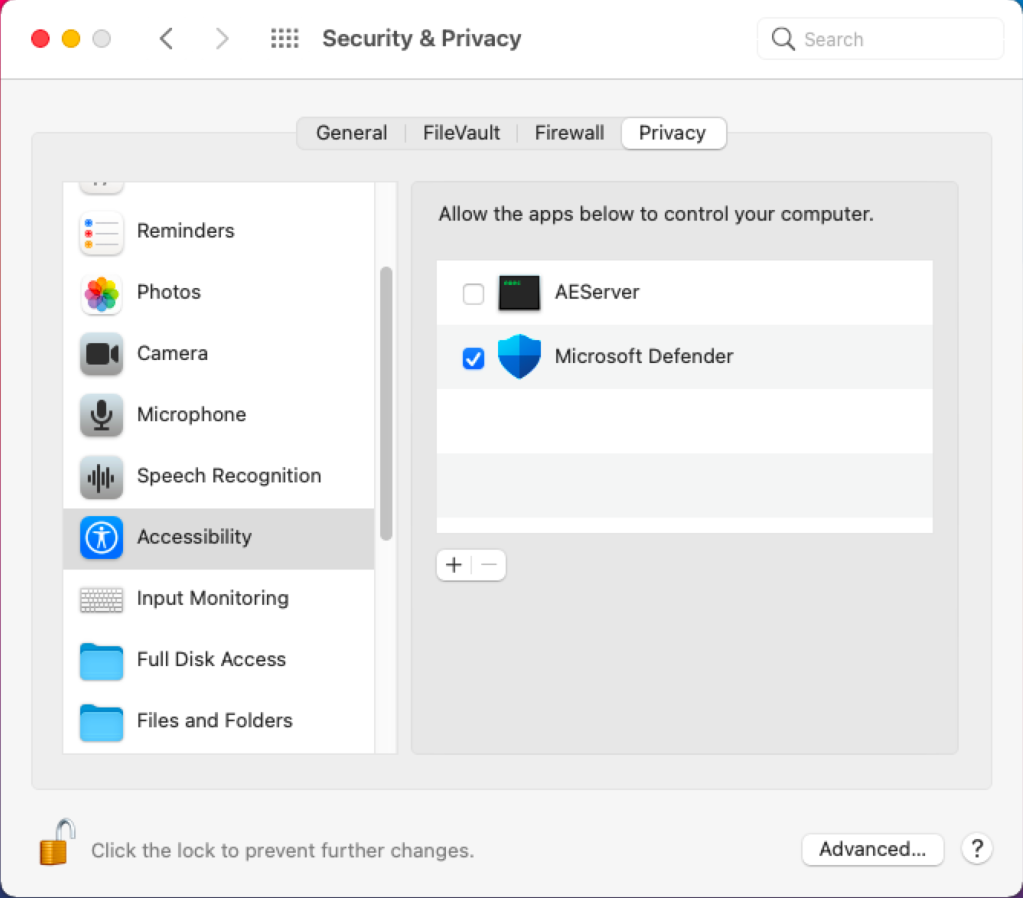
Select Accessibility from the left navigation pane, and select +.
In the file selection dialog, select Applications from the Favorites pane in the left-side of the screen; select Microsoft Defender; and then select Open at the bottom-right of the screen.
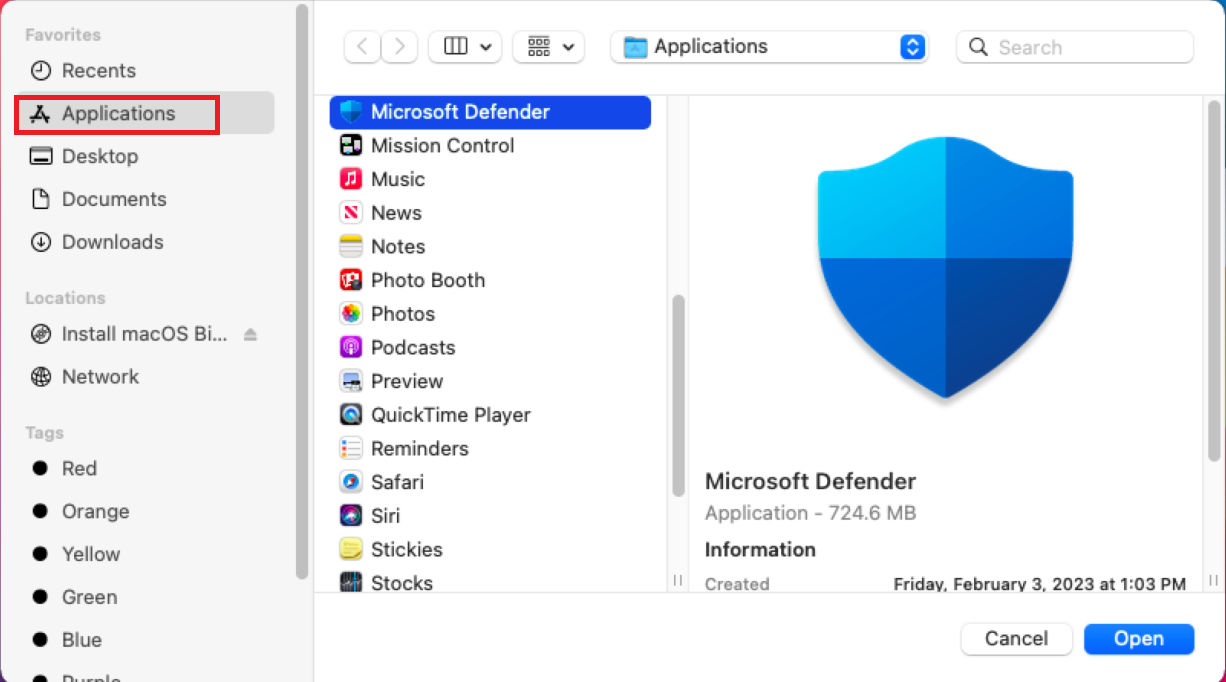
In the Accessibility list, check the Microsoft Defender checkbox.
Grant Full Disk Access manually
Perform the following steps to grant Full Disk Access to Microsoft Defender:
On the Security & Privacy screen, select the Privacy tab.
Select Full Disk Access from the left navigation pane, and then select the Lock icon.
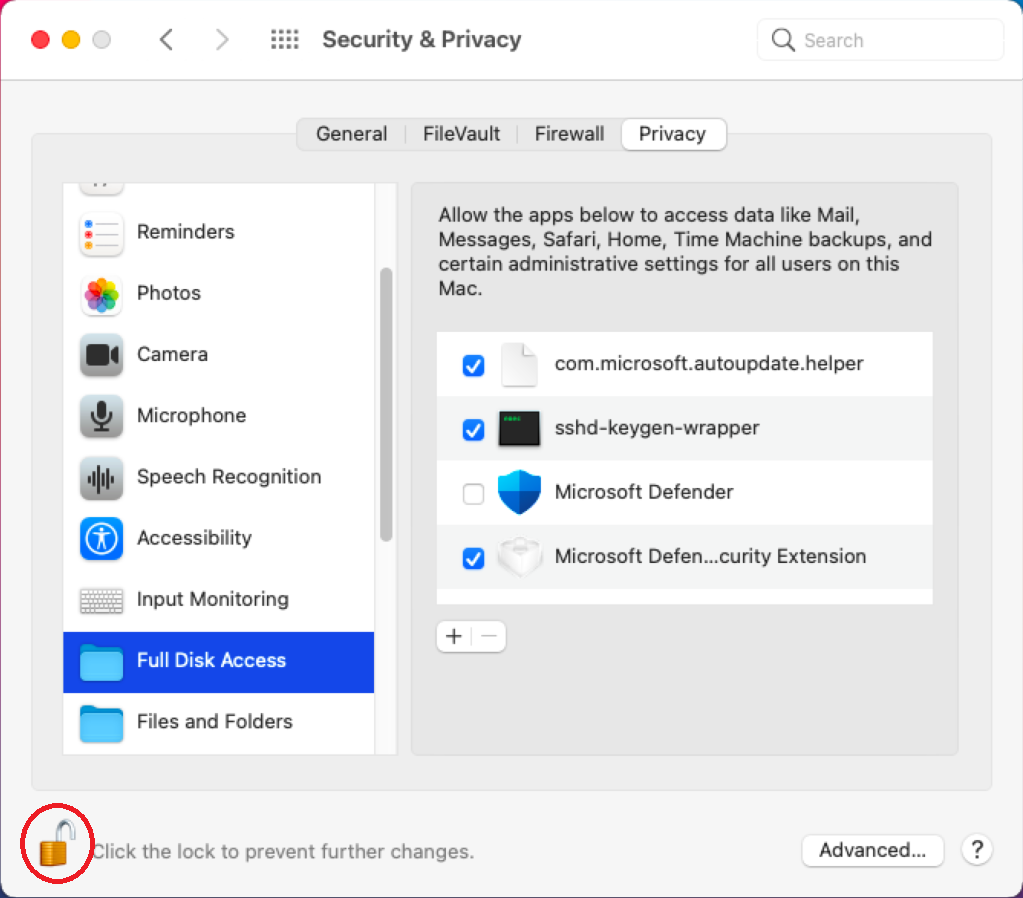
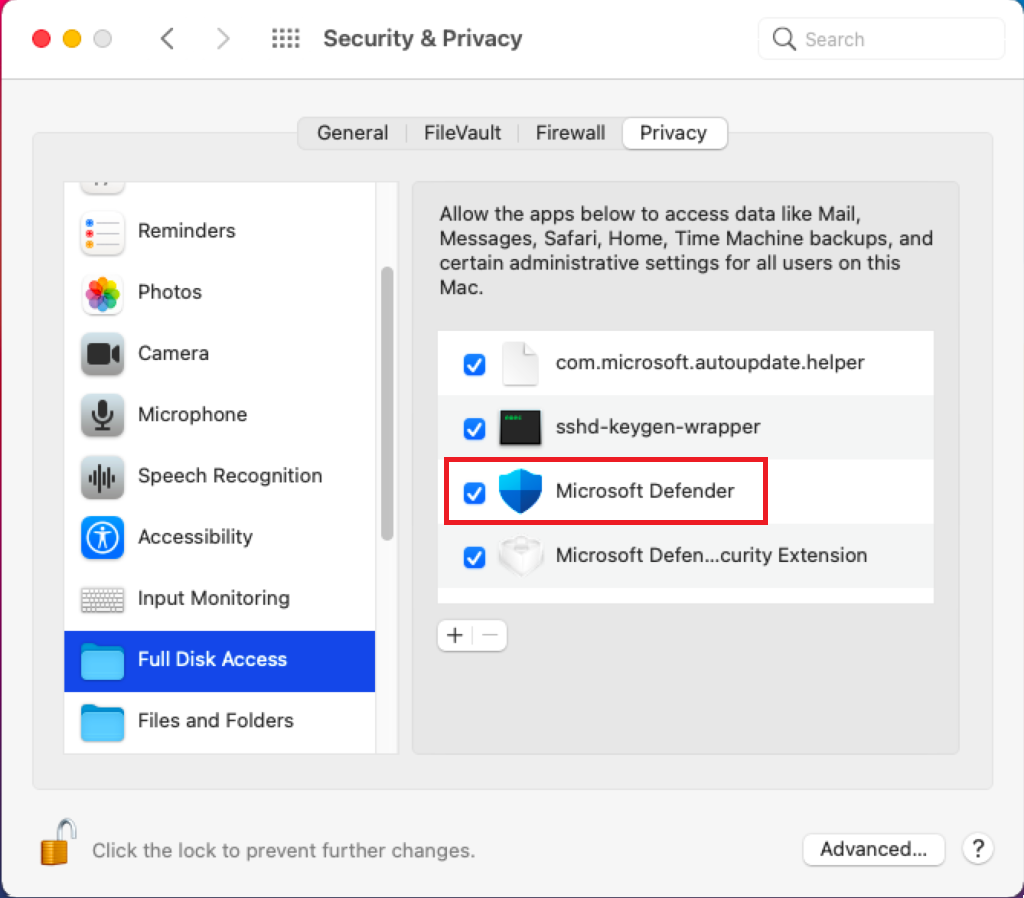
Confirm that the Microsoft Defender extension has full disk access; if not, check the Microsoft Defender checkbox.
Enable notifications manually
Use the following steps to enable notifications for Microsoft Defender:
From the System Preferences home screen, select Notifications.
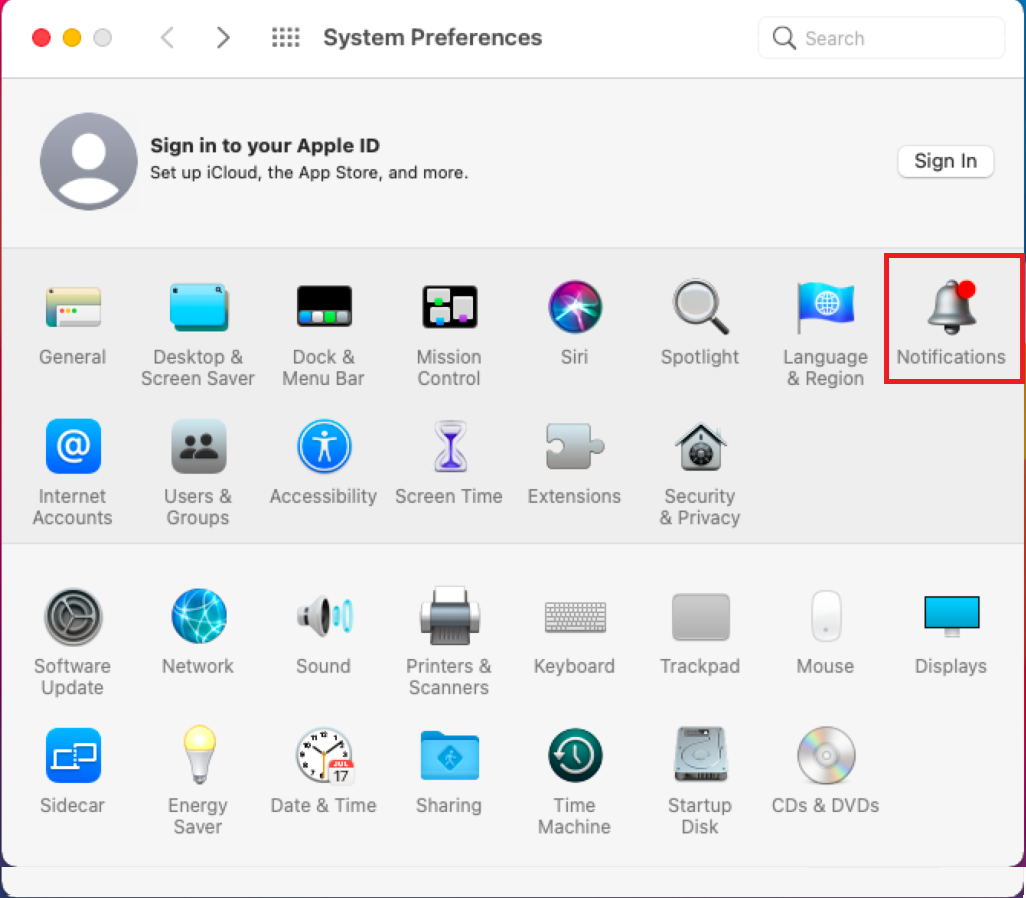
The Notifications screen appears.
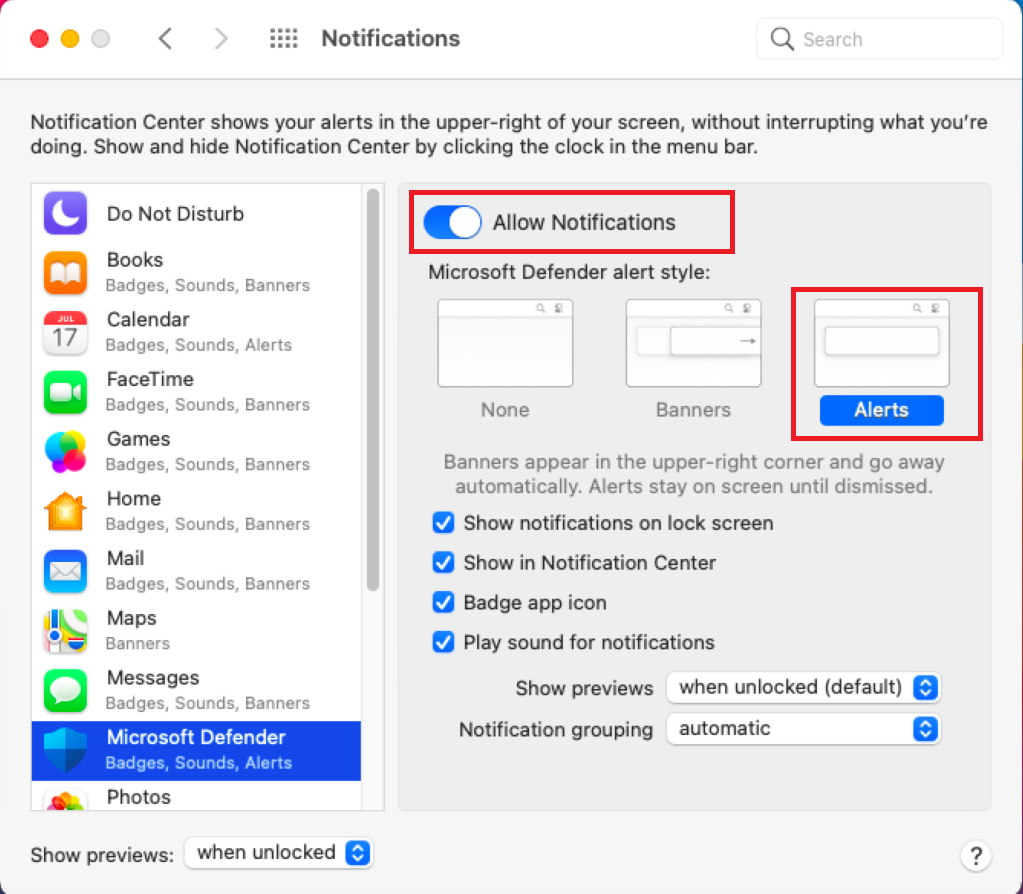
Select Microsoft Defender from the left navigation pane.
Enable the Allow Notifications option and select Alerts. No further changes are required; leave all other notification settings at their defaults.
Verify a healthy system state
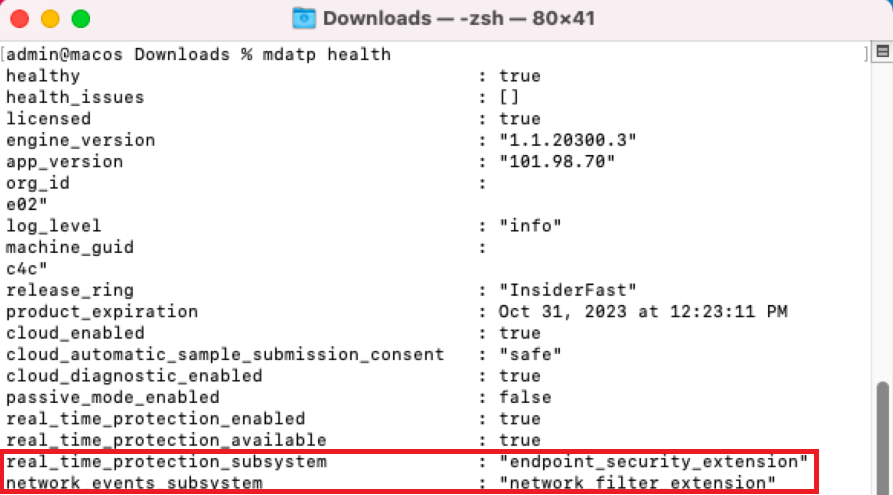
Review mdatp health output
After completing the manual deployment steps, run mdatp health in Terminal to confirm that Microsoft Defender for Endpoint is running correctly. The following screenshot shows an example of healthy output. In a healthy system, real-time protection is enabled, definitions are up to date, and the system extensions are active.
Check the system extensions
In terminal, run the following command to check the system extensions:
systemextensionsctl list
The following screenshot shows the expected output of systemextensionsctl list on a healthy system: