Events
17 Mar, 11 pm - 21 Mar, 11 pm
Join the meetup series to build scalable AI solutions based on real-world use cases with fellow developers and experts.
Register nowThis browser is no longer supported.
Upgrade to Microsoft Edge to take advantage of the latest features, security updates, and technical support.
Note
This article doesn't apply to hosted services in .NET. For the latest content on Windows services using Microsoft.Extensions.Hosting.BackgroundService and the Worker Service template, see:
This article demonstrates how to create a Windows service app in Visual Studio that writes messages to an event log.
To begin, create the project and set the values that are required for the service to function correctly.
From the Visual Studio File menu, select New > Project (or press Ctrl+Shift+N) to open the New Project window.
Find and select the Windows Service (.NET Framework) project template.
Note
If you don't see the Windows Service template, you might need to install the .NET desktop development workload using Visual Studio Installer.
For Project name, enter MyNewService, and then select Create.
The Design tab appears (Service1.cs [Design] or Service1.vb [Design]).
The project template includes a component class named Service1 that inherits from System.ServiceProcess.ServiceBase. It includes much of the basic service code, such as the code to start the service.
Rename the service from Service1 to MyNewService.
In Solution Explorer, select Service1.cs or Service1.vb, and choose Rename from the shortcut menu. Rename the file to MyNewService.cs or MyNewService.vb, and then press Enter.
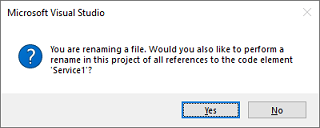
A pop-up window appears asking whether you would like to rename all references to the code element Service1.
In the pop-up window, select Yes.
Select Save All from the File menu.
In this section, you add a custom event log to the Windows service. The EventLog component is an example of the type of component you can add to a Windows service.
In the Toolbox window, expand Components, and then drag the EventLog component to the Service1.cs [Design] or Service1.vb [Design] designer.
In Solution Explorer, from the shortcut menu for MyNewService.cs or MyNewService.vb, choose View Code.
Define a custom event log.
For C#, edit the existing MyNewService() constructor as shown in the following code snippet. For Visual Basic, add the New() constructor as shown in the following code snippet.
public MyNewService()
{
    InitializeComponent();
    _eventLog1 = new EventLog();
    if (!EventLog.SourceExists("MySource"))
    {
        EventLog.CreateEventSource("MySource", "MyNewLog");
    }
    _eventLog1.Source = "MySource";
    _eventLog1.Log = "MyNewLog";
}
' To access the constructor in Visual Basic, select New from the
' method name drop-down list.
Public Sub New()
    MyBase.New()
    InitializeComponent()
    Me.EventLog1 = New System.Diagnostics.EventLog
    If Not System.Diagnostics.EventLog.SourceExists("MySource") Then
        System.Diagnostics.EventLog.CreateEventSource("MySource",
        "MyNewLog")
    End If
    EventLog1.Source = "MySource"
    EventLog1.Log = "MyNewLog"
End Sub
Add a using directive to MyNewService.cs (if it doesn't already exist), or an Imports statement to MyNewService.vb, for the System.Diagnostics namespace:
using System.Diagnostics;
Imports System.Diagnostics
Select Save All from the File menu.
In the code editor for MyNewService.cs or MyNewService.vb, locate the OnStart method. Visual Studio automatically created an empty method definition when you created the project. Add code that writes an entry to the event log when the service starts:
protected override void OnStart(string[] args)
{
    _eventLog1.WriteEntry("In OnStart.");
}
' To access the OnStart in Visual Basic, select OnStart from the
' method name drop-down list.
Protected Overrides Sub OnStart(ByVal args() As String)
    EventLog1.WriteEntry("In OnStart")
End Sub
Because a service application is designed to be long-running, it usually polls or monitors the system, which you set up in the OnStart method. The OnStart method must return to the operating system after the service's operation has begun so that the system isn't blocked.
To set up a simple polling mechanism, use the System.Timers.Timer component. The timer raises an Elapsed event at regular intervals, at which time your service can do its monitoring. You use the Timer component as follows:
MyNewService.OnStart method.Add a using directive to MyNewService.cs, or an Imports statement to MyNewService.vb, for the System.Timers namespace:
using System.Timers;
Imports System.Timers
Add the following code in the MyNewService.OnStart event to set up the polling mechanism:
// Set up a timer that triggers every minute.
Timer timer = new Timer
{
    Interval = 60000 // 60 seconds
};
timer.Elapsed += new ElapsedEventHandler(this.OnTimer);
timer.Start();
' Set up a timer that triggers every minute.
Dim timer As Timer = New Timer()
timer.Interval = 60000 ' 60 seconds
AddHandler timer.Elapsed, AddressOf Me.OnTimer
timer.Start()
In the MyNewService class, add a member variable. It contains the identifier of the next event to write into the event log:
private int eventId = 1;
Private eventId As Integer = 1
In the MyNewService class, add the OnTimer method to handle the Timer.Elapsed event:
public void OnTimer(object sender, ElapsedEventArgs args)
{
    // TODO: Insert monitoring activities here.
    _eventLog1.WriteEntry("Monitoring the System", EventLogEntryType.Information, eventId++);
}
Private Sub OnTimer(sender As Object, e As Timers.ElapsedEventArgs)
   ' TODO: Insert monitoring activities here.
   eventLog1.WriteEntry("Monitoring the System", EventLogEntryType.Information, eventId)
   eventId = eventId + 1
End Sub
Instead of running all your work on the main thread, you can run tasks by using background worker threads. For more information, see System.ComponentModel.BackgroundWorker.
Insert a line of code in the OnStop method that adds an entry to the event log when the service is stopped:
protected override void OnStop()
{
    _eventLog1.WriteEntry("In OnStop.");
}
Protected Overrides Sub OnStop()
    EventLog1.WriteEntry("In OnStop.")
End Sub
You can override the OnPause, OnContinue, and OnShutdown methods to define additional processing for your component.
The following code shows how you can override the OnContinue method in the MyNewService class:
protected override void OnContinue()
{
    _eventLog1.WriteEntry("In OnContinue.");
}
Protected Overrides Sub OnContinue()
    EventLog1.WriteEntry("In OnContinue.")
End Sub
Services report their status to the Service Control Manager so that a user can tell whether a service is functioning correctly. By default, a service that inherits from ServiceBase reports a limited set of status settings, which include SERVICE_STOPPED, SERVICE_PAUSED, and SERVICE_RUNNING. If a service takes a while to start up, it's useful to report a SERVICE_START_PENDING status.
You can implement the SERVICE_START_PENDING and SERVICE_STOP_PENDING status settings by adding code that calls the Windows SetServiceStatus function.
Add a using directive to MyNewService.cs, or an Imports statement to MyNewService.vb, for the System.Runtime.InteropServices namespace:
using System.Runtime.InteropServices;
Imports System.Runtime.InteropServices
Add the following enumeration and structure to MyNewService.cs, or MyNewService.vb, to declare the ServiceState values and to add a structure for the status, which you'll use in a platform invoke call:
public enum ServiceState
{
    SERVICE_STOPPED = 0x00000001,
    SERVICE_START_PENDING = 0x00000002,
    SERVICE_STOP_PENDING = 0x00000003,
    SERVICE_RUNNING = 0x00000004,
    SERVICE_CONTINUE_PENDING = 0x00000005,
    SERVICE_PAUSE_PENDING = 0x00000006,
    SERVICE_PAUSED = 0x00000007,
}

[StructLayout(LayoutKind.Sequential)]
public struct ServiceStatus
{
    public int dwServiceType;
    public ServiceState dwCurrentState;
    public int dwControlsAccepted;
    public int dwWin32ExitCode;
    public int dwServiceSpecificExitCode;
    public int dwCheckPoint;
    public int dwWaitHint;
};
Public Enum ServiceState
    SERVICE_STOPPED = 1
    SERVICE_START_PENDING = 2
    SERVICE_STOP_PENDING = 3
    SERVICE_RUNNING = 4
    SERVICE_CONTINUE_PENDING = 5
    SERVICE_PAUSE_PENDING = 6
    SERVICE_PAUSED = 7
End Enum

<StructLayout(LayoutKind.Sequential)>
Public Structure ServiceStatus
    Public dwServiceType As Long
    Public dwCurrentState As ServiceState
    Public dwControlsAccepted As Long
    Public dwWin32ExitCode As Long
    Public dwServiceSpecificExitCode As Long
    Public dwCheckPoint As Long
    Public dwWaitHint As Long
End Structure
Note
The Service Control Manager uses the dwWaitHint and dwCheckpoint members of the SERVICE_STATUS structure to determine how much time to wait for a Windows service to start or shut down. If your OnStart and OnStop methods run long, your service can request more time by calling SetServiceStatus again with an incremented dwCheckPoint value.
In the MyNewService class, declare the SetServiceStatus function by using platform invoke:
[DllImport("advapi32.dll", SetLastError = true)]
private static extern bool SetServiceStatus(System.IntPtr handle, ref ServiceStatus serviceStatus);
Declare Auto Function SetServiceStatus Lib "advapi32.dll" (ByVal handle As IntPtr, ByRef serviceStatus As ServiceStatus) As Boolean
To implement the SERVICE_START_PENDING status, add the following code to the beginning of the OnStart method:
// Update the service state to Start Pending.
ServiceStatus serviceStatus = new ServiceStatus();
serviceStatus.dwCurrentState = ServiceState.SERVICE_START_PENDING;
serviceStatus.dwWaitHint = 100000;
SetServiceStatus(this.ServiceHandle, ref serviceStatus);
' Update the service state to Start Pending.
Dim serviceStatus As ServiceStatus = New ServiceStatus()
serviceStatus.dwCurrentState = ServiceState.SERVICE_START_PENDING
serviceStatus.dwWaitHint = 100000
SetServiceStatus(Me.ServiceHandle, serviceStatus)
Add code to the end of the OnStart method to set the status to SERVICE_RUNNING:
// Update the service state to Running.
serviceStatus.dwCurrentState = ServiceState.SERVICE_RUNNING;
SetServiceStatus(this.ServiceHandle, ref serviceStatus);
' Update the service state to Running.
serviceStatus.dwCurrentState = ServiceState.SERVICE_RUNNING
SetServiceStatus(Me.ServiceHandle, serviceStatus)
(Optional) If OnStop is a long-running method, repeat this procedure in the OnStop method. Implement the SERVICE_STOP_PENDING status and return the SERVICE_STOPPED status before the OnStop method exits.
For example:
// Update the service state to Stop Pending.
ServiceStatus serviceStatus = new ServiceStatus();
serviceStatus.dwCurrentState = ServiceState.SERVICE_STOP_PENDING;
serviceStatus.dwWaitHint = 100000;
SetServiceStatus(this.ServiceHandle, ref serviceStatus);

// Update the service state to Stopped.
serviceStatus.dwCurrentState = ServiceState.SERVICE_STOPPED;
SetServiceStatus(this.ServiceHandle, ref serviceStatus);
' Update the service state to Stop Pending.
Dim serviceStatus As ServiceStatus = New ServiceStatus()
serviceStatus.dwCurrentState = ServiceState.SERVICE_STOP_PENDING
serviceStatus.dwWaitHint = 100000
SetServiceStatus(Me.ServiceHandle, serviceStatus)

' Update the service state to Stopped.
serviceStatus.dwCurrentState = ServiceState.SERVICE_STOPPED
SetServiceStatus(Me.ServiceHandle, serviceStatus)
Before you run a Windows service, you need to install it, which registers it with the Service Control Manager. Add installers to your project to handle the registration details.
In Solution Explorer, from the shortcut menu for MyNewService.cs or MyNewService.vb, choose View Designer.
In the Design view, select the background area, then choose Add Installer from the shortcut menu.
By default, Visual Studio adds a component class named ProjectInstaller, which contains two installers, to your project. These installers are for your service and for the service's associated process.
In the Design view for ProjectInstaller, select serviceInstaller1 for a C# project, or ServiceInstaller1 for a Visual Basic project, then choose Properties from the shortcut menu.
In the Properties window, verify the ServiceName property is set to MyNewService.
Add text to the Description property, such as A sample service.
This text appears in the Description column of the Services window and describes the service to the user.
Add text to the DisplayName property. For example, MyNewService Display Name.
This text appears in the Display Name column of the Services window. This name can be different from the ServiceName property, which is the name the system uses (for example, the name you use for the net start command to start your service).
Set the StartType property to Automatic from the drop-down list.
When you're finished, the Properties windows should look like the following figure:

In the Design view for ProjectInstaller, choose serviceProcessInstaller1 for a C# project, or ServiceProcessInstaller1 for a Visual Basic project, then choose Properties from the shortcut menu. Set the Account property to LocalSystem from the drop-down list.
This setting installs the service and runs it by using the local system account.
Important
The LocalSystem account has broad permissions, including the ability to write to the event log. Use this account with caution, because it might increase your risk of attacks from malicious software. For other tasks, consider using the LocalService account, which acts as a non-privileged user on the local computer and presents anonymous credentials to any remote server. This example fails if you try to use the LocalService account, because it needs permission to write to the event log.
For more information about installers, see How to: Add installers to your service application.
Note
Before you decide to add startup parameters, consider whether it's the best way to pass information to your service. Although they're easy to use and parse, and a user can easily override them, they might be harder for a user to discover and use without documentation. Generally, if your service requires more than just a few startup parameters, you should use the registry or a configuration file instead.
A Windows service can accept command-line arguments, or startup parameters. When you add code to process startup parameters, a user can start your service with their own custom startup parameters in the service properties window. However, these startup parameters aren't persisted the next time the service starts. To set startup parameters permanently, set them in the registry.
Each Windows service has a registry entry under the HKEY_LOCAL_MACHINE\SYSTEM\CurrentControlSet\Services subkey. Under each service's subkey, use the Parameters subkey to store information that your service can access. You can use application configuration files for a Windows service the same way you do for other types of programs. For sample code, see ConfigurationManager.AppSettings.
In MyNewService.cs, or MyNewService.vb, change the MyNewService constructor to accept and process an input parameter:
public MyNewService(string[] args)
{
    InitializeComponent();

    string eventSourceName = "MySource";
    string logName = "MyNewLog";

    if (args.Length > 0)
    {
        eventSourceName = args[0];
    }

    if (args.Length > 1)
    {
        logName = args[1];
    }

    _eventLog1 = new EventLog();

    if (!EventLog.SourceExists(eventSourceName))
    {
        EventLog.CreateEventSource(eventSourceName, logName);
    }

    _eventLog1.Source = eventSourceName;
    _eventLog1.Log = logName;
}
Public Sub New(ByVal cmdArgs() As String)
    InitializeComponent()
    Dim eventSourceName As String = "MySource"
    Dim logName As String = "MyNewLog"
    If (cmdArgs.Count() > 0) Then
        eventSourceName = cmdArgs(0)
    End If
    If (cmdArgs.Count() > 1) Then
        logName = cmdArgs(1)
    End If
    eventLog1 = New EventLog()
    If (Not EventLog.SourceExists(eventSourceName)) Then
        EventLog.CreateEventSource(eventSourceName, logName)
    End If
    eventLog1.Source = eventSourceName
    eventLog1.Log = logName
End Sub
This code sets the event source and log name according to the startup parameters that the user supplies. If no arguments are supplied, it uses default values.
Select Program.cs, or MyNewService.Designer.vb, then choose View Code from the shortcut menu. In the Main method, change the code to add an input parameter and pass it to the service constructor:
static void Main(string[] args)
{
    ServiceBase[] ServicesToRun;
    ServicesToRun = new ServiceBase[]
    {
        new MyNewService(args)
    };
    ServiceBase.Run(ServicesToRun);
}
Shared Sub Main(ByVal cmdArgs() As String)
    Dim ServicesToRun() As System.ServiceProcess.ServiceBase = New System.ServiceProcess.ServiceBase() {New MyNewService(cmdArgs)}
    System.ServiceProcess.ServiceBase.Run(ServicesToRun)
End Sub
To specify the command-line arguments, add the following code to the ProjectInstaller class in ProjectInstaller.cs, or ProjectInstaller.vb:
protected override void OnBeforeInstall(IDictionary savedState)
{
    string parameter = "MySource1\" \"MyLogFile1";
    Context.Parameters["assemblypath"] = "\"" + Context.Parameters["assemblypath"] + "\" \"" + parameter + "\"";
    base.OnBeforeInstall(savedState);
}
Protected Overrides Sub OnBeforeInstall(ByVal savedState As IDictionary)
    Dim parameter As String = "MySource1"" ""MyLogFile1"
    Context.Parameters("assemblypath") = """" + Context.Parameters("assemblypath") + """ """ + parameter + """"
    MyBase.OnBeforeInstall(savedState)
End Sub
Typically, this value contains the full path to the executable for the Windows service. For the service to start up correctly, the user must supply quotation marks for the path and each individual parameter. A user can change the parameters in the ImagePath registry entry to change the startup parameters for the Windows service. However, a better way is to change the value programmatically and expose the functionality in a user-friendly way, such as by using a management or configuration utility.
In Solution Explorer, choose Properties from the shortcut menu for the MyNewService project.
On the Application tab, in the Startup object list, choose MyNewService.Program, or Sub Main for Visual Basic projects.
To build the project, in Solution Explorer, choose Build from the shortcut menu for your project (or press Ctrl+Shift+B).
Now that you've built the Windows service, you can install it. To install a Windows service, you must have administrator credentials on the computer where it's installed.
Open Developer Command Prompt for Visual Studio with administrative credentials.
In Developer Command Prompt for Visual Studio, navigate to the folder that contains your project's output (by default, the \bin\Debug subdirectory of your project).
Enter the following command:
installutil MyNewService.exe
If the service installs successfully, the command reports success.
If the system can't find installutil.exe, make sure that it exists on your computer. This tool is installed with .NET Framework to the folder %windir%\Microsoft.NET\Framework[64]\<framework version>.
If the installutil.exe process fails, check the install log to find out why. By default, the log is in the same folder as the service executable. The installation can fail if:
ProjectInstaller class.true.ProjectInstaller class isn't defined as public.For more information, see How to: Install and uninstall services.
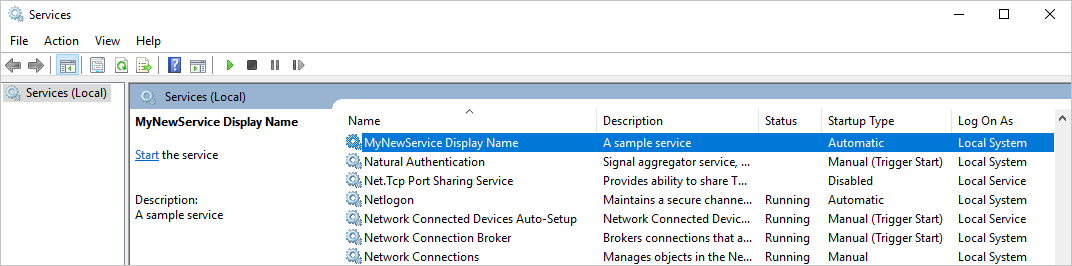
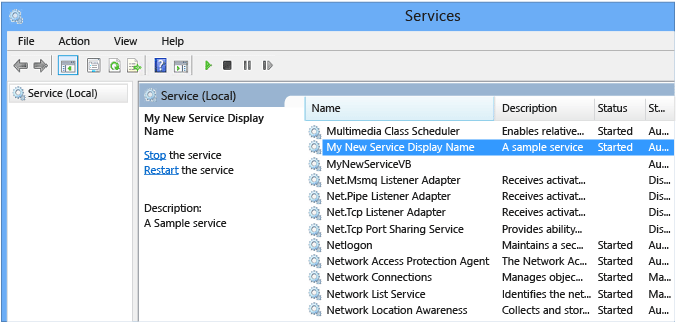
In Windows, open the Services desktop app: Press Windows+R to open the Run box, enter services.msc, and then press Enter or select OK.
You should see your service listed in Services, displayed alphabetically by the display name that you set for it.
To start the service, choose Start from the service's shortcut menu.
To stop the service, choose Stop from the service's shortcut menu.
(Optional) From the command line, use the commands net start <service name> and net stop <service name> to start and stop your service.
In Windows, open the Event Viewer desktop app: Enter Event Viewer in the Windows search bar, and then select Event Viewer from the search results.
Tip
In Visual Studio, you can access event logs by opening Server Explorer from the View menu (or press Ctrl+Alt+S) and expanding the Event Logs node for the local computer.
In Event Viewer, expand Applications and Services Logs.
Locate the listing for MyNewLog (or MyLogFile1 if you followed the procedure to add command-line arguments) and expand it. You should see the entries for the two actions (start and stop) that your service performed.

If you no longer need the Windows service app, you can remove it.
Open Developer Command Prompt for Visual Studio with administrative credentials.
In the Developer Command Prompt for Visual Studio window, navigate to the folder that contains your project's executable.
Enter the following command:
installutil.exe /u MyNewService.exe
If the service uninstalls successfully, the command reports that your service was successfully removed. For more information, see How to: Install and uninstall services.
Now that you've created the service, you can:
Create a standalone setup program for others to use to install your Windows service. Use the WiX Toolset to create an installer for a Windows service. For other ideas, see Create an installer package.
Explore the ServiceController component, which enables you to send commands to the service you've installed.
Instead of creating the event log when the application runs, use an installer to create an event log when you install the application. The event log is deleted by the installer when you uninstall the application. For more information, see EventLogInstaller.
.NET feedback
.NET is an open source project. Select a link to provide feedback:
Events
17 Mar, 11 pm - 21 Mar, 11 pm
Join the meetup series to build scalable AI solutions based on real-world use cases with fellow developers and experts.
Register nowTraining
Module
Build your first microservice with .NET - Training
Microservice applications are composed of small, independently versioned, and scalable customer-focused services that communicate with each other by using standard protocols and well-defined interfaces. Each microservice typically encapsulates simple business logic, which you can scale out or in. You test, deploy, and manage the microservice independently. Smaller teams develop a microservice based on a customer scenario, and choose the technologies that they use. This module teaches you how to build your f