Configure focused view
In focused view, sellers can view and manage their CRM records and their associated activities on one page. This view makes it easier for sellers to stay focused on their tasks, saving time by eliminating the need to navigate through multiple screens. It also allows sellers to better organize and prioritize their tasks.
Note
- Focused view is now available for the Activities entity. However, you must opt in for early access features.
- Focused view is not available for the Queue entity.
Configuring the focused view as default is allowed only for the contact, lead, account, and opportunity entities. Also, if you want to configure focused view as default for custom and other entities, see Configure as default for other entities.
Also, you can configure to automatically refresh a record at specified time intervals when it is updated. For more information, see Automatically refresh records
Prerequisites
- You must have the System Administrator or similar security role to perform these configurations.
- Ensure that the focused view is enabled for your organization.
Configure as default for contact, account, lead, and opportunity entities
Note
To view the Default view option, ensure that you have opted in for early access features.
By default, focused view is enabled for the lead entity. However, to improve the experience and eliminate the need for manual switching to the focused view, you can configure focused view as the default view for contact, account, and opportunity entities for all users.
To configure focused view as default, follow these steps:
Open the contact, lead, account, or opportunity grid.
Change to focused view and in the work item section, select More options > Settings.
On the Settings pane, select Default view.

Turn on the toggle to enable focused view as default for the required entities.
Save and close the settings pane.
Focused view is now set as the default view for the selected entities.
Configure as default for other entities
To configure and enable focused view as default for custom and other entities, follow these steps:
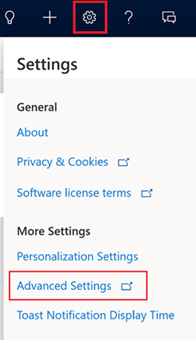
In the sales app, go to Settings > Advanced Settings.
Go to Customization > Customizations > Customize the System.
In the left pane, expand Tables and then the entity you want, and select Forms.
Note
If you are using the classic view, under Components, expand Entities, and then the entity you want, and select Forms. Go to the Controls tab and then add Focused view.
Open the entity form of type Main and then select Components on the tool bar.
In the Components section, search for Focused view and then drag it to the desired location on the form.
Note
If you don't see the Focused view control in the Components section, select Get more components to add it.
In the Add focused view dialog box, configure the following properties:
- Table: Select the entity for which you want to configure focused view as default.
- View: Select the view that you want to set as default.
Select Done.
Save and publish the configurations.
Focused view is now set as the default view for the selected entity.
Refresh records automatically
Records aren't updated automatically in focused view. However, you can configure focused view to automatically refresh records at specified time intervals. To configure automatic refresh for a record, follow these steps:
Open the contact, lead, account, or opportunity grid.
Change to focused view and in the work item section, select More options > Settings.
On the Settings pane, select Auto-refresh.

Turn on the Auto-refresh toggle to enable automatic refresh of the grid.
Select the time interval for the records in the view to refresh. The time interval can be set to 15, 18, or 20 minutes.
Save and close the Settings pane.
Records will now automatically refresh at the specified time interval.