Events
9 Apr, 3 pm - 10 Apr, 12 pm
Code the Future with AI and connect with Java peers and experts at JDConf 2025.
Register NowThis browser is no longer supported.
Upgrade to Microsoft Edge to take advantage of the latest features, security updates, and technical support.
In this article, you'll learn how to integrate TextMagic with Microsoft Entra ID. When you integrate TextMagic with Microsoft Entra ID, you can:
To get started, you need the following items:
In this article, you configure and test Microsoft Entra SSO in a test environment.
TextMagic supports IDP initiated SSO.
TextMagic supports Just In Time user provisioning.
Note
Identifier of this application is a fixed string value so only one instance can be configured in one tenant.
To configure the integration of TextMagic into Microsoft Entra ID, you need to add TextMagic from the gallery to your list of managed SaaS apps.
Alternatively, you can also use the Enterprise App Configuration Wizard. In this wizard, you can add an application to your tenant, add users/groups to the app, assign roles, as well as walk through the SSO configuration as well. Learn more about Microsoft 365 wizards.
Configure and test Microsoft Entra SSO with TextMagic using a test user called B.Simon. For SSO to work, you need to establish a link relationship between a Microsoft Entra user and the related user in TextMagic.
To configure and test Microsoft Entra SSO with TextMagic, perform the following steps:
Follow these steps to enable Microsoft Entra SSO.
Sign in to the Microsoft Entra admin center as at least a Cloud Application Administrator.
Browse to Identity > Applications > Enterprise applications > TextMagic > Single sign-on.
On the Select a single sign-on method page, select SAML.
On the Set up single sign-on with SAML page, click the pencil icon for Basic SAML Configuration to edit the settings.
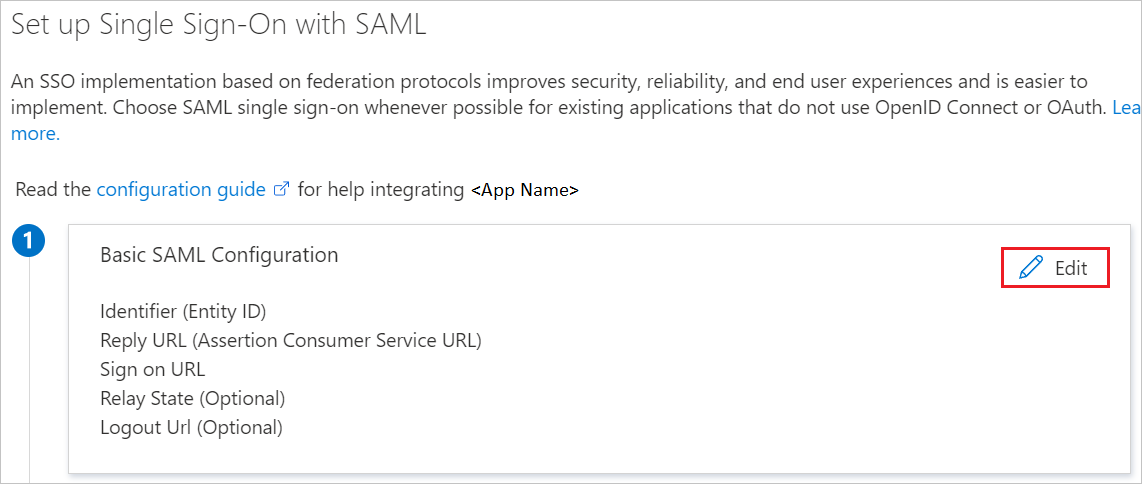
On the Basic SAML Configuration section, perform the following step:
In the Identifier text box, type the URL:
https://my.textmagic.com/saml/metadata
TextMagic application expects the SAML assertions in a specific format, which requires you to add custom attribute mappings to your SAML token attributes configuration. The following screenshot shows the list of default attributes, whereas nameidentifier is mapped with user.userprincipalname. TextMagic application expects nameidentifier to be mapped with user.mail, so you need to edit the attribute mapping by clicking on Edit icon and change the attribute mapping.

In addition to above, TextMagic application expects few more attributes to be passed back in SAML response which are shown below. These attributes are also pre populated but you can review them as per your requirement.
| Name | Source Attribute | Namespace |
|---|---|---|
| company | user.companyname | https://schemas.xmlsoap.org/ws/2005/05/identity/claims |
| firstName | user.givenname | https://schemas.xmlsoap.org/ws/2005/05/identity/claims |
| lastName | user.surname | https://schemas.xmlsoap.org/ws/2005/05/identity/claims |
| phone | user.telephonenumber | https://schemas.xmlsoap.org/ws/2005/05/identity/claims |
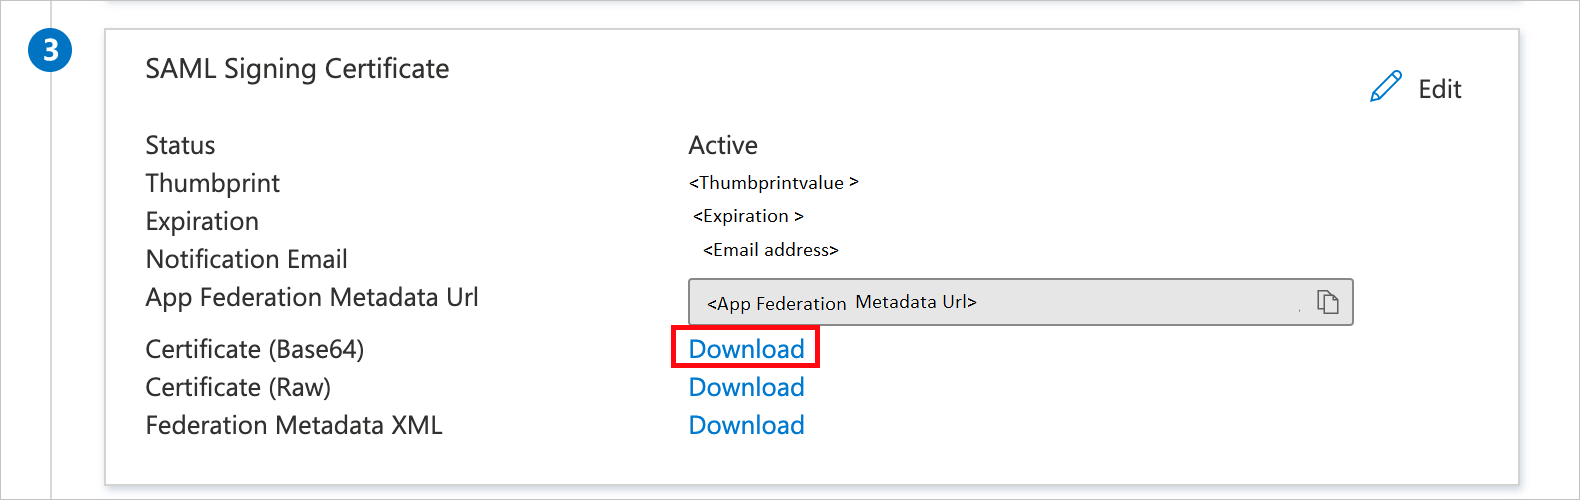
On the Set up single sign-on with SAML page, in the SAML Signing Certificate section, find Certificate (Base64) and select Download to download the certificate and save it on your computer.
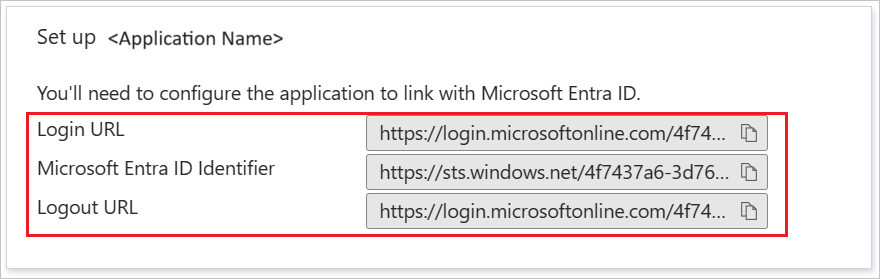
On the Set up TextMagic section, copy the appropriate URL(s) based on your requirement.
In this section, you'll create a test user called B.Simon.
B.Simon.B.Simon@contoso.com.In this section, you'll enable B.Simon to use single sign-on by granting access to TextMagic.
In a different web browser window, sign in to your TextMagic company site as an administrator
Select Account settings under the username.
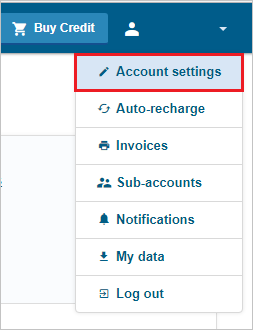
Click on the Single Sign-On (SSO) tab and fill in the following fields:
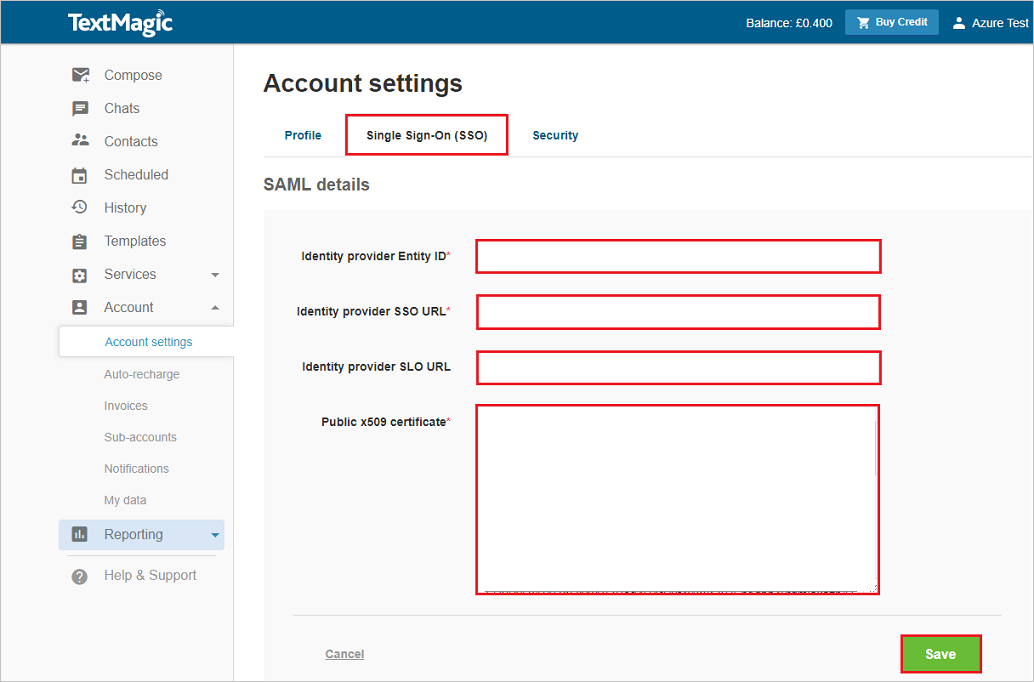
a. In Identity provider Entity ID: textbox, paste the value of Microsoft Entra Identifier.
b. In Identity provider SSO URL: textbox, paste the value of Login URL.
c. In Identity provider SLO URL: textbox, paste the value of Logout URL.
d. Open your base-64 encoded certificate in notepad downloaded from Azure portal, copy the content of it into your clipboard, and then paste it to the Public x509 certificate: textbox.
e. Click Save.
In this section, a user called B.Simon is created in TextMagic. TextMagic supports just-in-time user provisioning, which is enabled by default. There's no action item for you in this section. If a user doesn't already exist in TextMagic, a new one is created after authentication.
In this section, you test your Microsoft Entra single sign-on configuration with following options.
Click on Test this application, and you should be automatically signed in to the TextMagic for which you set up the SSO.
You can use Microsoft My Apps. When you click the TextMagic tile in the My Apps, you should be automatically signed in to the TextMagic for which you set up the SSO. For more information about the My Apps, see Introduction to the My Apps.
Once you configure TextMagic you can enforce session control, which protects exfiltration and infiltration of your organization’s sensitive data in real time. Session control extends from Conditional Access. Learn how to enforce session control with Microsoft Defender for Cloud Apps.
Events
9 Apr, 3 pm - 10 Apr, 12 pm
Code the Future with AI and connect with Java peers and experts at JDConf 2025.
Register NowTraining
Module
Microsoft Entra External ID가 소비자와 기업 고객에게 안전하고 원활한 로그인 환경을 제공하는 방법을 알아봅니다. 테넌트 만들기, 앱 등록, 흐름 사용자 지정 및 계정 보안에 대해 알아봅니다.
Certification
Microsoft Certified: Identity and Access Administrator Associate - Certifications
ID 솔루션을 현대화하고, 하이브리드 솔루션을 구현하고, ID 거버넌스를 구현하는 Microsoft Entra ID의 기능을 시연합니다.