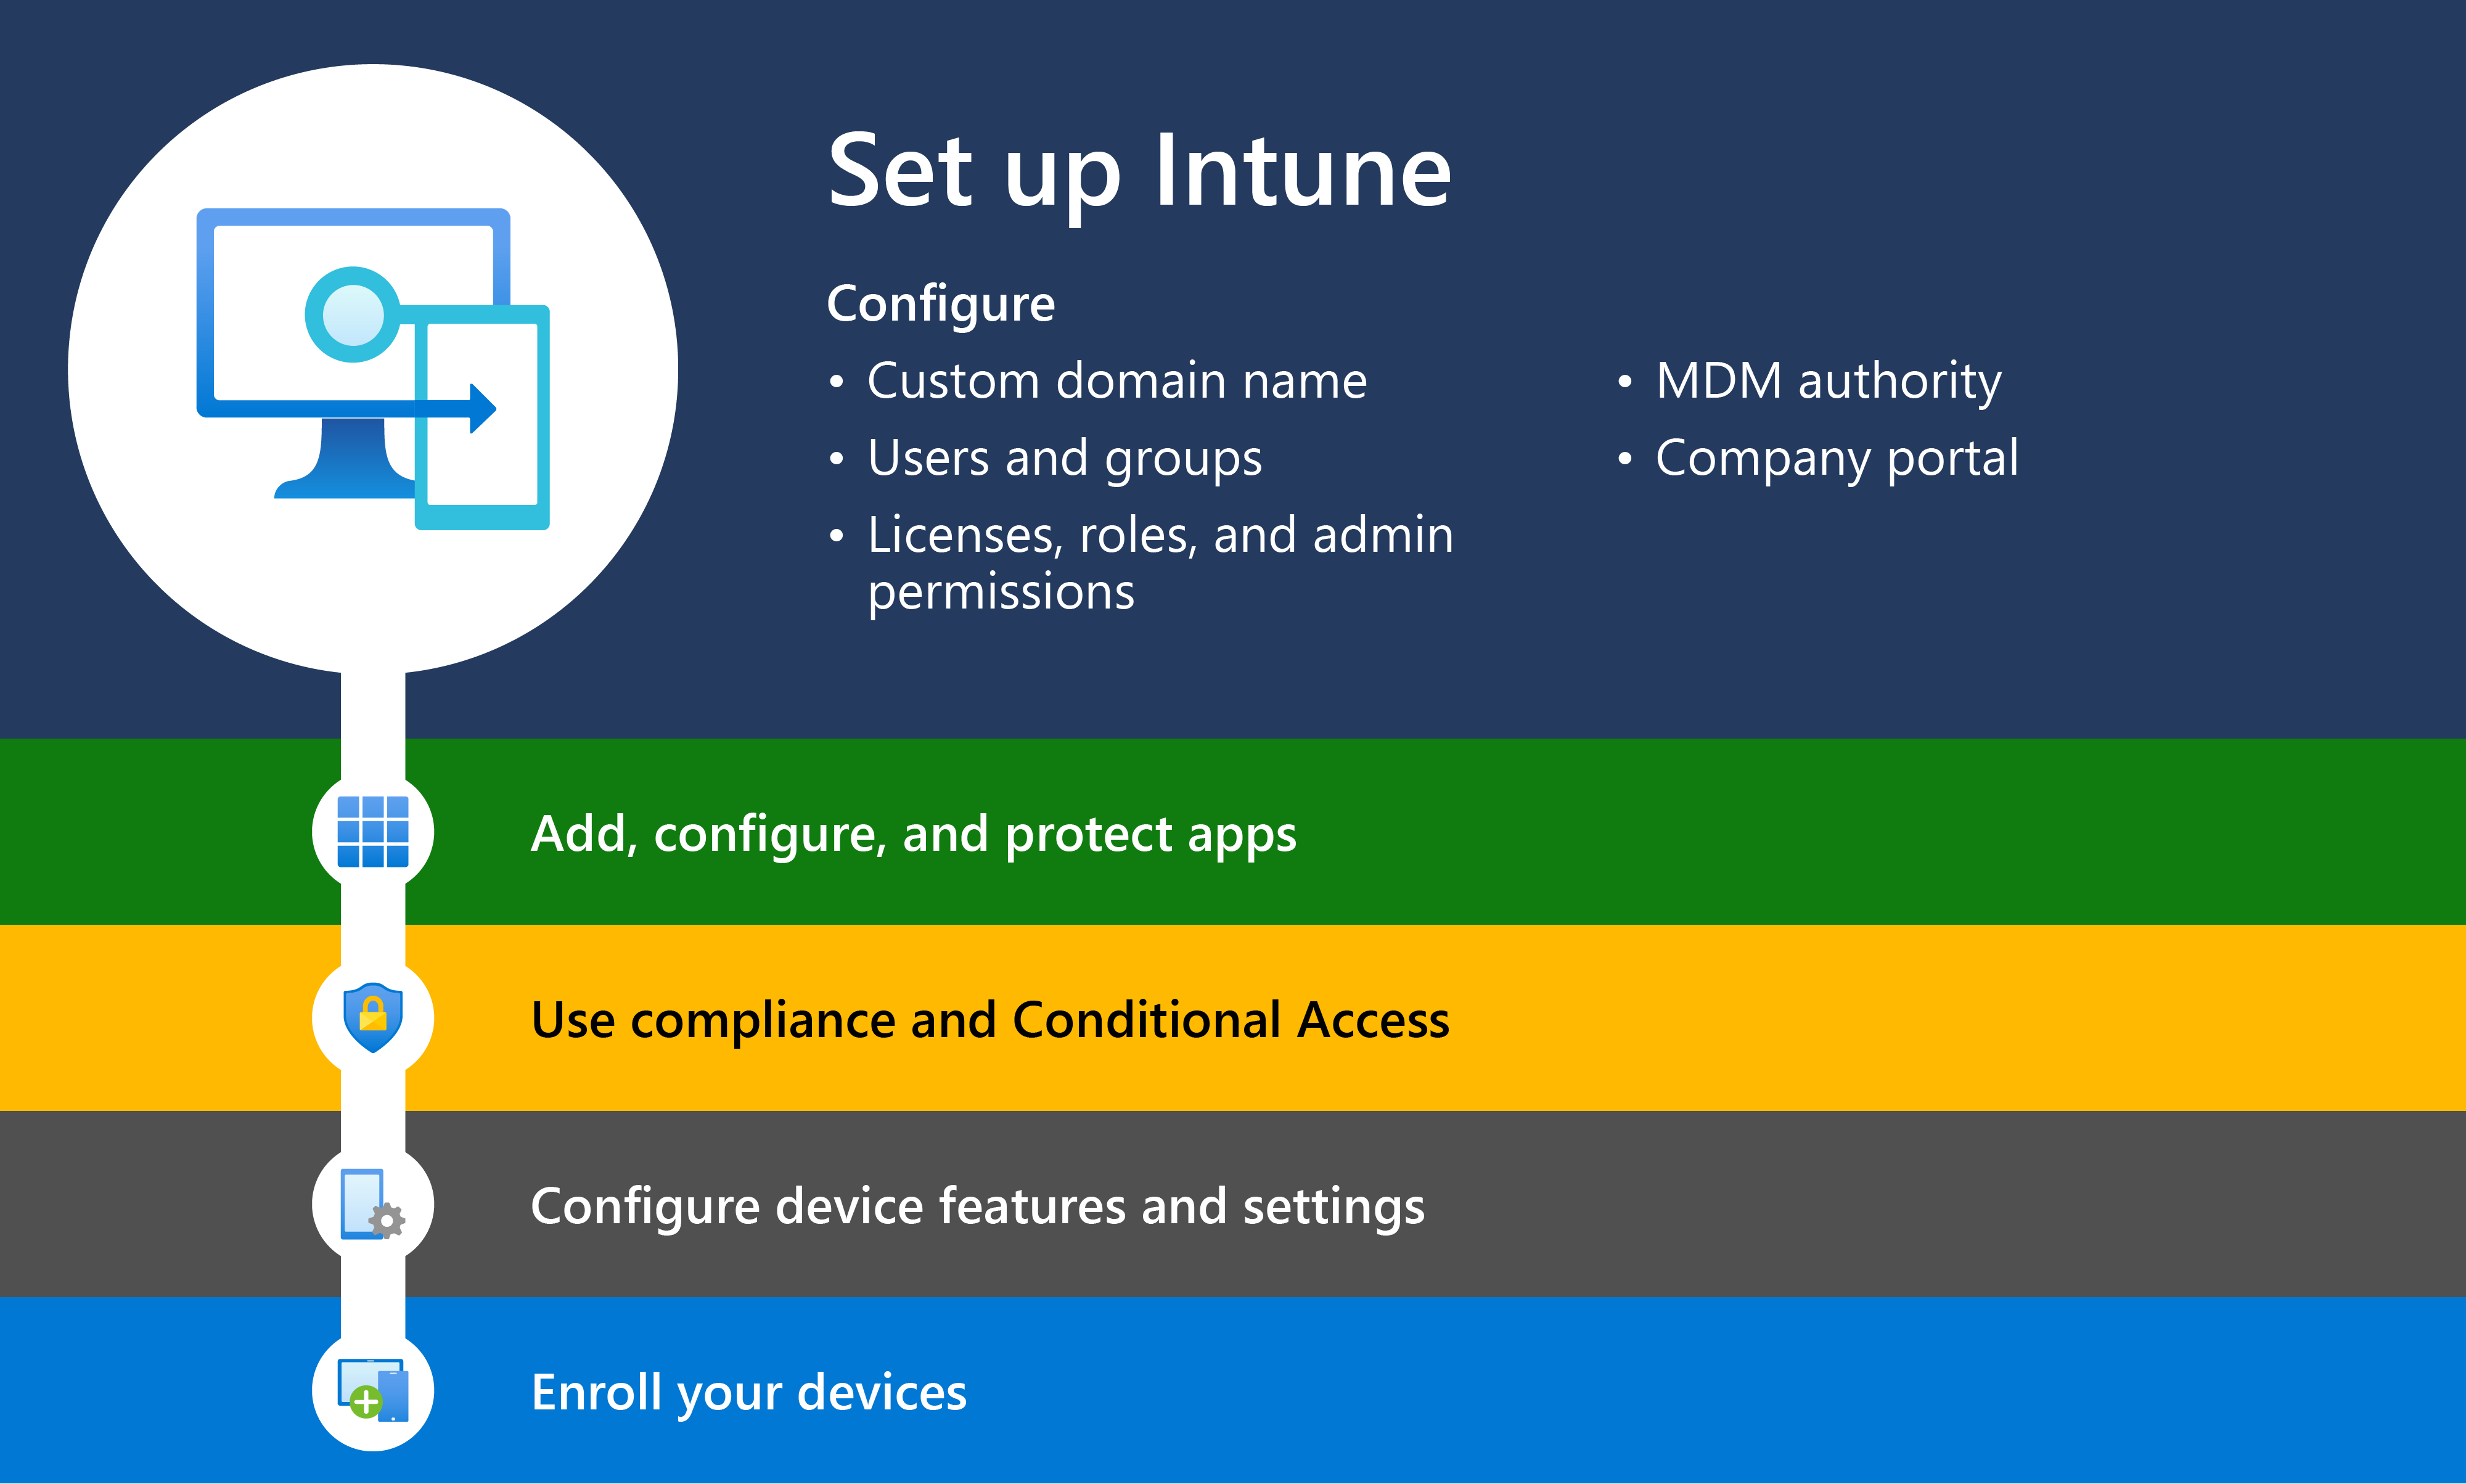
Step 1: Set up Microsoft Intune
The first step when deploying Microsoft Intune is to set up your Intune environment.
This article takes you through each step in the process of setting up Microsoft Intune. This article also provides the choices and considerations you need to make when setting up an endpoint-management solution such as Intune.
The purpose of this article is to help you get a better understanding of Intune's supported configurations. After reviewing the article, you should be able to sign up for the Microsoft Intune's free trial, add end users, define user groups, assign licenses to users, and set up the other needed settings to begin using Microsoft Intune. All the steps provided in the article help you to add and manage devices and apps using Intune.
Prerequisites
Before you begin setting up Microsoft Intune, review the Planning guide. The planning guide helps you to plan your move or migration to Intune.
The planning guide also helps you address these areas:
- What are some of the common objectives for device management?
- How to address potential licensing needs?
- How to handle personally owned devices?
- How to review current policies and infrastructure?
- What are some examples of creating a rollout plan?
1 - Review the Supported Configurations
✔️ Get started with supported configurations
Before you begin setting up Microsoft Intune, you should:
- Review the device platforms and operating systems that Intune supports.
- Review which web browsers are supported when accessing Intune using Microsoft Intune admin center.
- Get familiar with the network bandwidth requirements to perform installations and updates using Intune.
For guidance and need-to-know information before you start, go to Supported configurations.
Tip
By default, all device platforms can enroll in Intune. If you want to prevent specific platforms, then create a restriction. For more information, go to Create a device platform restriction.
2 - Sign up for Microsoft Intune
✔️ Get started with sign up, or sign in to Intune
Sign in to the Microsoft Intune admin center.
Before you sign up for Intune, determine whether you already have a Microsoft Online Services account, Enterprise Agreement, or equivalent volume licensing agreement. A Microsoft volume licensing agreement or other Microsoft cloud services subscription like Microsoft 365 usually includes a work or school account.
If you already have a work or school account, sign in with that account and add Intune to your subscription. Otherwise, you can sign up for a new account to use Intune for your organization.
For guidance, go to Sign in to Intune.
3 - Configure a custom domain name for your Intune tenant
✔️ Get started with configuring a custom domain name for your Intune tenant
When your organization signs up for Microsoft Intune, you're given an initial domain name hosted in Microsoft Entra ID that looks like your-domain.onmicrosoft.com.
The onmicrosoft.com suffix is assigned to all accounts added to subscriptions.
You can optionally configure your organization's custom domain in Intune, such as contoso.com. If you don't add your domain account, then for example, contoso.onmicrosoft.com may be used.
Set DNS registration to connect your company's domain name with Intune. When you connect your company's domain name with Intune, users experience a familiar domain when connecting to Intune and using resources.
If you're simply evaluating Intune using the free trial, you can skip this step.
If you're moving to Microsoft 365 from an Office 365 subscription, your domain may already be in Microsoft Entra ID. Intune uses the same Microsoft Entra ID, and can use your existing domain.
For guidance, go to Configure domain name.
4 - Add users to Intune
✔️ Get started with adding users to Intune
Users are stored in Microsoft Entra ID, which is also included with Microsoft 365. Microsoft Entra ID controls access to resources, and authenticates users.
You can add users, or connect Active Directory to sync with Intune. This step is required unless your devices are "userless" kiosk devices.
For guidance, go to Add users.
The people in your organization each need a user account before they can sign in and access Microsoft Intune. To create user accounts, you can add users to Intune. Once added, you can grant permissions and assign licenses to users. Then later, you can assign different types of policies to users to help and protect them.
As an administrator, you can add users individually or in bulk to Intune.
You must be an admin (global, license, or a user admin) to add users to Intune. If you set up Intune using the free trial, you're a global admin.
5 - Create groups in Intune
✔️ Get started with adding groups to Intune
Add groups to assign apps, settings, and other resources. For some guidance, go to Add groups.
Intune uses Microsoft Entra groups to organize and manage devices and users. As an Intune admin, you can set up groups to suit your organizational needs. For instance, you can create groups to organize users or devices by geographic location, department, or hardware characteristics. Also, you can use groups to manage tasks at scale. For example, you can set policies for many users or deploy apps to a set of devices based on groups.
6 - Manage licenses
Intune is available with different subscriptions, including as a stand-alone service. Determine the licensed services your organization needs and then continue to assign each user an Intune license before users can enroll their devices in Intune.
✔️ Determine your license needs
Microsoft Intune is available for different organization sizes and needs; from a simple-to-use management experience for schools and small businesses, to a more advanced functionality required by enterprise customers. An admin must have a license assigned to them to administer Intune (unless you selected to allow unlicensed admins).
For guidance, go to Microsoft Intune licensing.
✔️ Get started with assigning licenses to users
Whether you added users one at a time or all at once, you must assign each user an Intune license before users can enroll their devices in Intune. The Microsoft Intune free trial provides 25 Intune licenses. For a list of licenses, see Licenses that include Intune. Give users permission to use Intune. Each user or userless device requires an Intune license to access the service.
For guidance, go to Assign licenses.
✔️ Unlicensed admins
You can give administrators access to Microsoft Intune without them requiring an Intune license. This feature applies to any administrator, including Intune administrators, global administrators, Microsoft Entra administrators, and so on.
For guidance, go to Unlicensed admins.
7 - Manage Roles and grant admin permissions for Intune
After you add users to your Intune tenant, we recommend that you create your administrative team.
Microsoft Intune includes a set of admin roles that you can assign to users in your organization using the Microsoft Intune admin center. Each admin role maps to common business functions and gives people in your organization permissions to do specific tasks in the admin centers.
✔️ Get started with managing roles
You can use role-based access control(RBAC) to manage who has access to your organization's resources and what they can do with those resources. For guidance, go to Role-based access control (RBAC) with Microsoft Intune.
You can assign roles to your Intune users and limit what they can see and change. For guidance, go to Assign a role to an Intune user.
You can use both the built-in and custom roles. Built-in roles cover some common Intune scenarios. You can create your own custom roles with the exact set of permissions you need. For guidance, go to Create a custom role in Intune.
You can use role-based access control and scope tags to make sure that the right admins have the correct access and visibility to the required Intune objects. Roles determine what access admins have to which objects. Scope tags determine which objects admins can see. For guidance, go to Use role-based access control (RBAC) and scope tags for distributed IT.
8 - Set the mobile device management authority
✔️ Get started with MDM authority
The mobile device management (MDM) authority setting determines how you manage your devices. By default, the Intune free trial sets your MDM authority to Intune. As an IT admin, you must set an MDM authority before users can enroll devices for management. With the MDM authority set, you can start enrolling devices.
If you're changing your tenant to support Intune, then you need to change your MDM authority configuration.
For guidance, go to Set the mobile device management authority.
9 - Customize the Intune company portal
The Company Portal apps, Company Portal website, and Intune app on Android are where users access company data and can do common tasks. Common task may include enrolling devices, installing apps, and locating information (such as for assistance from your IT department).
✔️ Get started with configuring the company portal
Customize the Intune Company Portal that users use to enroll devices and install apps. These settings appear in both the Company Portal app and the Intune Company Portal website. You can also customize the Company Portal app so it includes your organization details.
For guidance, go to Configure the company portal.
Follow the minimum recommended baseline policies
- 🡺 Set up Microsoft Intune (You are here)
- Add, configure, and protect apps
- Plan for compliance policies
- Configure device features
- Enroll devices