Note
Access to this page requires authorization. You can try signing in or changing directories.
Access to this page requires authorization. You can try changing directories.
With Microsoft Visual Studio, you can create a NuGet package from a .NET Framework class library, and then publish it to nuget.org using the NuGet CLI tool.
The quickstart is for Windows users only. If you're using Visual Studio for Mac, see dotnet CLI tools instead.
Prerequisites
Install Visual Studio 2022 for Windows with any .NET-related workload.
You can install the 2022 Community edition for free from visualstudio.microsoft.com, or use the Professional or Enterprise edition.
Visual Studio 2017 and higher automatically includes NuGet capabilities when a .NET workload is installed.
Register for a free account on nuget.org if you don't have one already. You must register and confirm the account before you can upload a NuGet package.
Install the NuGet CLI by downloading it from nuget.org. Add the nuget.exe file to a suitable folder, and add that folder to your PATH environment variable.
Create a class library project
To create a class library project, follow these steps:
In Visual Studio, select File > New > Project.
In the Create a new project window, select C#, Windows, and Library in the dropdown lists.
In the resulting list of project templates, select Class Library (.NET Framework), and then select Next.
In the Configure your new project window, enter AppLogger for the Project name, and then select Create.
To ensure the project was created properly, select Build > Build Solution. The DLL is found within the Debug folder (or Release if you build that configuration instead).
(Optional) For this quickstart, you don't need to write any additional code for the NuGet package because the template class library is sufficient to create a package. However, if you'd like some functional code for this sample package, include the following code:
namespace AppLogger
{
    public class Logger
    {
        public void Log(string text)
        {
            Console.WriteLine(text);
        }
    }
}
Within a real-world NuGet package, you'd likely implement many useful features with which others can build applications. You can also set the target frameworks. For an example, see UWP.
Configure project properties for the package
A NuGet package includes a manifest (a .nuspec file), that contains relevant metadata such as the package identifier, version number, description, and more. Some of this metadata can be drawn from the project properties directly, which avoids having to separately update them in both the project and the manifest. The following steps describe how to set the applicable properties:
Select Project > Properties, and then select the Application tab.
For Assembly name, give your package a unique identifier. If you attempt to publish a package with a name that already exists, you see an error.
Important
You must give the package an identifier that's unique across nuget.org or whatever host you're using. Otherwise, an error occurs. For this quickstart we recommend including Sample or Test in the name because the publishing step makes the package publicly visible.
Select Assembly Information, which displays a dialog box in which you can enter other properties that carry into the manifest (see Replacement tokens). The most commonly used fields are Title, Description, Company, Copyright, and Assembly version. Because these properties appear with your package on a host like nuget.org after you publish it, make sure they're fully descriptive.
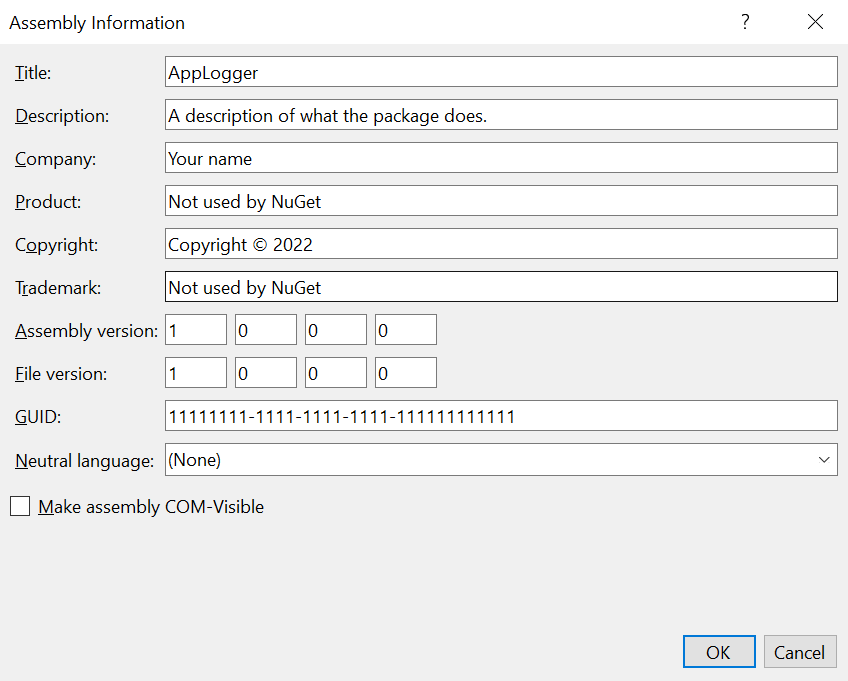
(Optional) To see and edit the properties directly, open the Properties/AssemblyInfo.cs file in the project by selecting select Project > Edit Project File.
After you've set these properties, set the Active solution configuration in Build > Configuration Manager to Release and rebuild the project to generate the updated DLL.
Generate the initial manifest
After you've set the project properties and created the DLL, you can now generate an initial .nuspec file from the project. This step includes the relevant replacement tokens to draw information from the project file.
Run nuget spec only once to generate the initial manifest. If you update the package, either change values in your project, or edit the manifest directly:
With your project open in Solution Explorer, open a command prompt by selecting Tools > Command Line > Developer Command Prompt.
The command prompt opens in your project directory where the
AppLogger.csprojfile is located.Run the following command:
nuget spec AppLogger.csproj.NuGet creates a manifest that matches the name of the project, in this case
AppLogger.nuspec. It also includes replacement tokens in the manifest.Open
AppLogger.nuspecin a text editor to examine its contents, which will be similar to the following code:<?xml version="1.0"?> <package > <metadata> <id>Package</id> <version>1.0.0</version> <authors>Your username</authors> <owners>Your username</owners> <license type="expression">MIT</license> <!-- <icon>icon.png</icon> --> <projectUrl>http://PROJECT_URL_HERE_OR_DELETE_THIS_LINE</projectUrl> <requireLicenseAcceptance>false</requireLicenseAcceptance> <description>Package description</description> <releaseNotes>Summary of changes made in this release of the package.</releaseNotes> <copyright>Copyright 2022</copyright> <tags>Tag1 Tag2</tags> </metadata> </package>
Edit the manifest
Edit the following properties before proceeding. Otherwise, if you try to create a NuGet package with the default values in your
.nuspecfile, an error occurs. For information about these properties, see Optional metadata elements:- licenseUrl
- projectUrl
- releaseNotes
- tags
For packages built for public consumption, pay special attention to the Tags property, as tags help others find your package and understand what it does.
You can also add any other elements to the manifest at this time, as described in .nuspec file reference.
Save the file before proceeding.
Run the pack command
With your project open in Solution Explorer, open a command prompt by selecting Tools > Command Line > Developer Command Prompt.
The command prompt opens in your project directory.
Run the following command:
nuget pack.NuGet generates a .nupkg file in the form of identifier.version.nupkg in the current folder.
Publish the package
After you've created a .nupkg file, publish it to nuget.org by using the NuGet CLI with an API key acquired from nuget.org. For nuget.org, you must use nuget.exe 4.1.0 or higher.
If you'd like to test and validate your package before publishing it a public gallery, you can upload it to a test environment like int.nugettest.org instead of nuget.org. Note that packages uploaded to int.nugettest.org may not be preserved.
Note
Nuget.org scans all uploaded packages for viruses and rejects the packages if it finds any viruses. Nuget.org also scans all existing listed packages periodically.
Packages you publish to nuget.org are publicly visible to other developers unless you unlist them. To host packages privately, see Host your own NuGet feeds.
Acquire your API key
Sign into your nuget.org account or create an account if you don't have one already.
Select your user name at upper right, and then select API Keys.
Select Create, and provide a name for your key.
Under Select Scopes, select Push.
Under Select Packages > Glob Pattern, enter *.
Select Create.
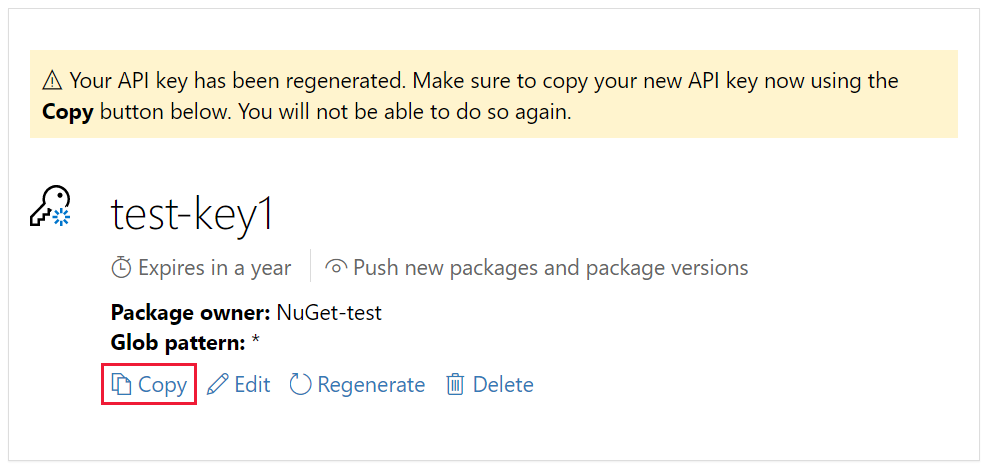
Select Copy to copy the new key.
Important
- Always keep your API key a secret. The API key is like a password that allows anyone to manage packages on your behalf. Delete or regenerate your API key if it's accidentally revealed.
- Save your key in a secure location, because you can't copy the key again later. If you return to the API key page, you need to regenerate the key to copy it. You can also remove the API key if you no longer want to push packages.
Scoping lets you create separate API keys for different purposes. Each key has an expiration timeframe, and you can scope the key to specific packages or glob patterns. You also scope each key to specific operations: Push new packages and package versions, push only new package versions, or unlist.
Through scoping, you can create API keys for different people who manage packages for your organization so they have only the permissions they need.
For more information, see scoped API keys.
Publish with the NuGet CLI
Using the NuGet CLI (nuget.exe) is an alternative to using the .NET CLI:
Open a command prompt and change to the folder containing the .nupkg file.
Run the following command. Replace <package filename> with the file name of your package and replace <api key value> with your API key. The package filename is a concatenation of your package ID and version number with a .nupkg extension. For example, AppLogger.1.0.0.nupkg:
nuget push <package filename> <api key value> -Source https://api.nuget.org/v3/index.jsonThe result of the publishing process is displayed as follows:
Pushing <package filename> to 'https://www.nuget.org/api/v2/package'...
    PUT https://www.nuget.org/api/v2/package/
    Created https://www.nuget.org/api/v2/package/ 6829ms
Your package was pushed.
For more information, see nuget push.
Publish errors
Errors from the push command typically indicate the problem. For example, you might have forgotten to update the version number in your project, so you're trying to publish a package that already exists.
You also see errors if your API key is invalid or expired, or if you try to publish a package using an identifier that already exists on the host. Suppose, for example, the identifier AppLogger-test already exists on nuget.org. If you try to publish a package with that identifier, the push command gives the following error:
Response status code does not indicate success: 403 (The specified API key is invalid,
has expired, or does not have permission to access the specified package.).
If you get this error, check that you're using a valid API key that hasn't expired. If you are, the error indicates the package identifier already exists on the host. To fix the error, change the package identifier to be unique, rebuild the project, recreate the .nupkg file, and retry the push command.
Manage the published package
When your package successfully publishes, you receive a confirmation email. To see the package you just published, on nuget.org, select your user name at upper right, and then select Manage Packages.
Note
It might take awhile for your package to be indexed and appear in search results where others can find it. During that time, your package appears under Unlisted Packages, and the package page shows the following message:

You've now published a NuGet package to nuget.org that other developers can use in their projects.
If you've created a package that isn't useful (such as this sample package that was created with an empty class library), or you decide you don't want the package to be visible, you can unlist the package to hide it from search results:
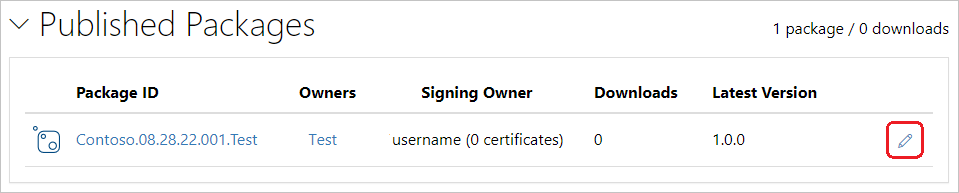
After the package appears under Published Packages on the Manage Packages page, select the pencil icon next to the package listing.
On the next page, select Listing, deselect the List in search results checkbox, and then select Save.
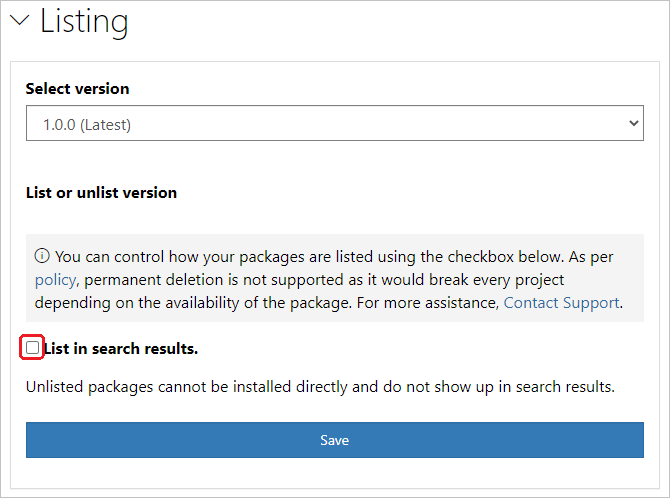
The package now appears under Unlisted Packages in Manage Packages and no longer appears in search results.
Note
To avoid your test package being live on nuget.org, you can push to the nuget.org test site at https://int.nugettest.org. Note that packages uploaded to int.nugettest.org might not be preserved.
Next steps
Congratulations on creating a NuGet package by using the Visual Studio .NET Framework. Advance to the next article to learn how to create a NuGet package with the NuGet CLI.
To explore more that NuGet has to offer, see the following articles: