Universal Actions Model code sample - Expense Approval
This sample illustrates the Universal Action Model implementation available for adaptive cards version 1.4 or higher.
Prerequisites
- Outlook/OWA client is available and you have an account.
- A valid Azure subsciption.
- Understanding of Azure Bot Framework.
Setup for bot
- Register a bot with Azure Bot Service, following the instructions here.
- Ensure that you've enabled the Outlook Channel.
- Open your bot resource in the Azure portal.
- Open the Channels pane.
- Select the Outlook channel in Available Channels section.
- Under the Actionable Messages tab, Click Apply followed by please register here.
- Fill out the registration form to request access. See Register your service with the actionable email developer dashboard for more information.
- Create your bot with the Bot Framework SDK, following the instruction here.
Step 1: Ensure your adaptive card payloads are ready
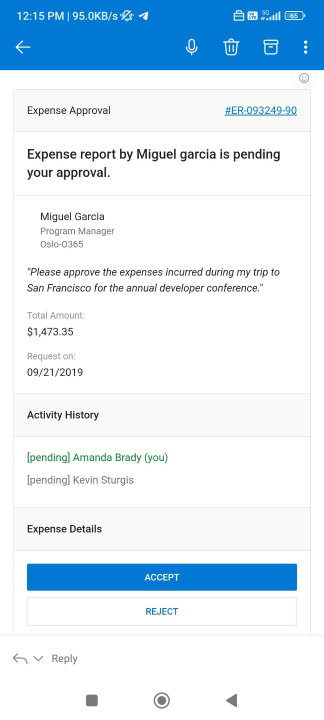
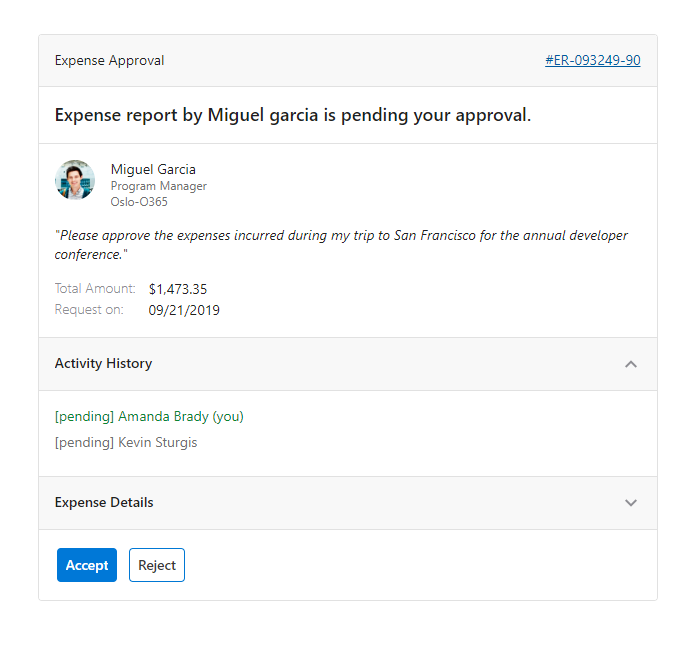
For the approvals scenario, you can find the JSON payload here. Below, you can see the payload rendering in mobile and desktop screens.
For Universal Actions, you need to use Action.Execute which gathers input fields and send an Invoke activity of type adaptiveCard/action to the target bot. Target bot can identify the the Action done using the verb field. Any additional input can be sent using the data field.
JSON payload
Here is a snippet of Actions for Approval scenario.
{
  "type": "ActionSet",
  "actions": [
    {
      "type": "Action.Execute",
      "title": "Accept",
      "verb": "approvalAccept",
      "data": {},
      "isPrimary": true,
      "style": "positive"
    },
    {
      "type": "Action.ShowCard",
      "id": "e1487cbc-66b0-037e-cdc4-045fb7d8d0b8",
      "title": "Reject",
      "card": {
        "type": "AdaptiveCard",
        "body": [
          {
            "type": "Input.Text",
            "id": "Comment",
            "placeholder": "Add a comment",
            "isMultiline": true
          },
          {
            "type": "ActionSet",
            "actions": [
              {
                "type": "Action.Execute",
                "title": "Submit",
                "verb": "approvalReject",
                "data": {
                  "comment": "${Comment.value}"
                }
              }
            ]
          }
        ],
        "$schema": "http://adaptivecards.io/schemas/adaptive-card.json",
        "fallbackText": "Unable to render the card",
        "padding": "None"
      }
    }
  ],
  "spacing": "None"
}
For more information, see Action.Execute schema and properties
Step 2: Write custom business logic in the bot for approval
In the Azure bot, you can use OnAdaptiveCardInvokeAsync method to capture the action using the verb field, add your business logic and send the refresh card back to Outlook.
protected override async Task<AdaptiveCardInvokeResponse> OnAdaptiveCardInvokeAsync(
    ITurnContext<IInvokeActivity> turnContext,
    AdaptiveCardInvokeValue invokeValue,
    CancellationToken cancellationToken)
{
    try
    {
        // Approval Scenario
        if (invokeValue.Action.Verb == "approvalAccept")
        {
            // This function can contain your business logic
            // to capture the approval and show the refresh card
            return await ProcessApprovalAccepted();
        }
        else if (invokeValue.Action.Verb == "approvalReject")
        {
            // This function can contain you business logic
            // to capture the rejection and show the refresh card
            return await ProcessApprovalRejected();
        }
        else
        {
            throw new InvokeResponseException(HttpStatusCode.NotImplemented);
        }
    }
    catch (AdaptiveCardActionException e)
    {
        throw new InvokeResponseException(HttpStatusCode.NotImplemented, e.Response);
    }
}
You can test your bot locally or deploy your bot to Azure.
Step 3: Sending the Actionable Message
You can send the Actionable Message backed by Universal Actions similar to any other Actionable Message. For more information, please see Send an actionable message via email.
Feedback
Coming soon: Throughout 2024 we will be phasing out GitHub Issues as the feedback mechanism for content and replacing it with a new feedback system. For more information see: https://aka.ms/ContentUserFeedback.
Submit and view feedback for