Note
Access to this page requires authorization. You can try signing in or changing directories.
Access to this page requires authorization. You can try changing directories.
Applies to:  SQL Server on Linux
SQL Server Data Tools (SSDT) turns Visual Studio into a powerful development and database lifecycle management (DLM) environment for SQL Server on Linux. You can develop, build, test, and publish your database from a source-controlled project, just as you develop your application code.
Install Visual Studio and SQL Server Data Tools
If you haven't already installed Visual Studio on your Windows machine, Download and Install Visual Studio. If you don't have a Visual Studio license, Visual Studio Community edition is a free, fully featured IDE for students, open-source, and individual developers.
During the Visual Studio installation, select Custom for the Choose the type of installation option. Select Next.
Select Microsoft SQL Server Data Tools, Git for Windows, and GitHub Extension for Visual Studio from the feature selection list.
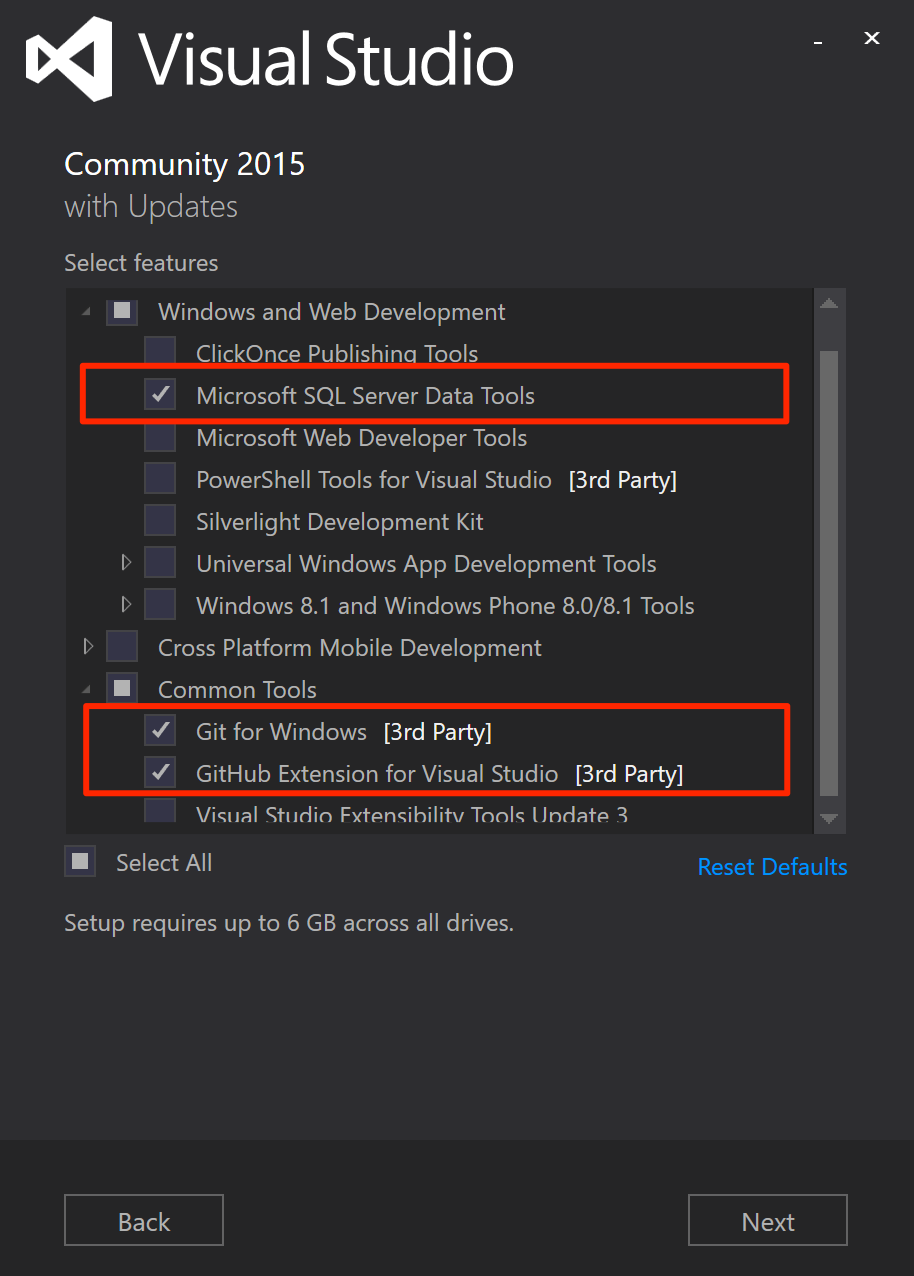
Continue and finish the installation of Visual Studio. It can take a few minutes.
Get the latest version of SQL Server Data Tools
SQL Server on Linux is supported by SSDT version 17.0 or later.
Create a new database project in source control
Launch Visual Studio.
Select Team Explorer on the View menu.
Select New in the Local Git Repository section on the Connect page.
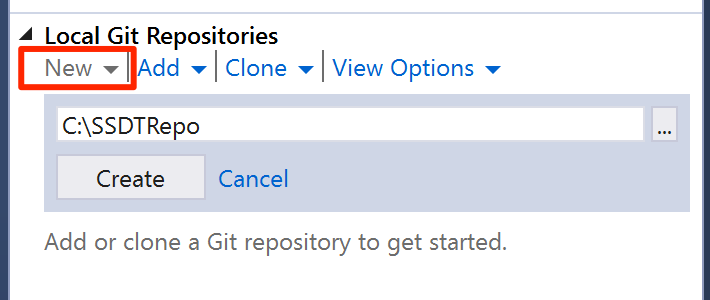
Select Create. After the local Git repository is created, double-click SSDTRepo.
Select New in the Solutions section. Select SQL Server under the Other Languages node in the New Project dialog.
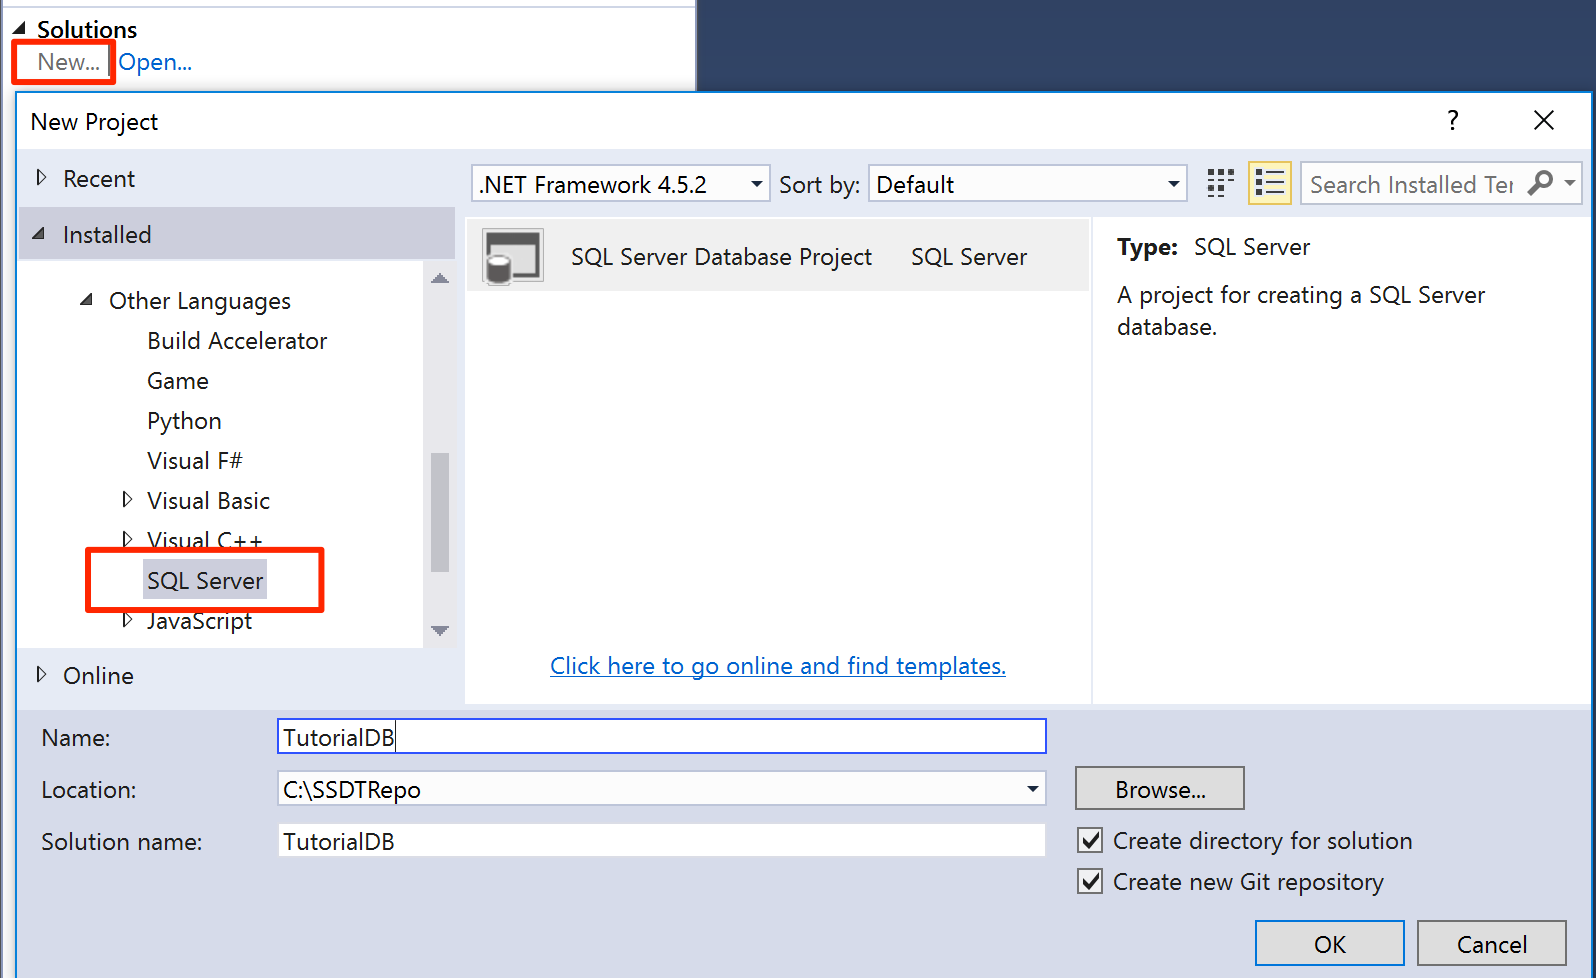
Enter
TutorialDBas the name, and then select OK to create a new database project.
Create a new table in the database project
Select Solution Explorer on the View menu.
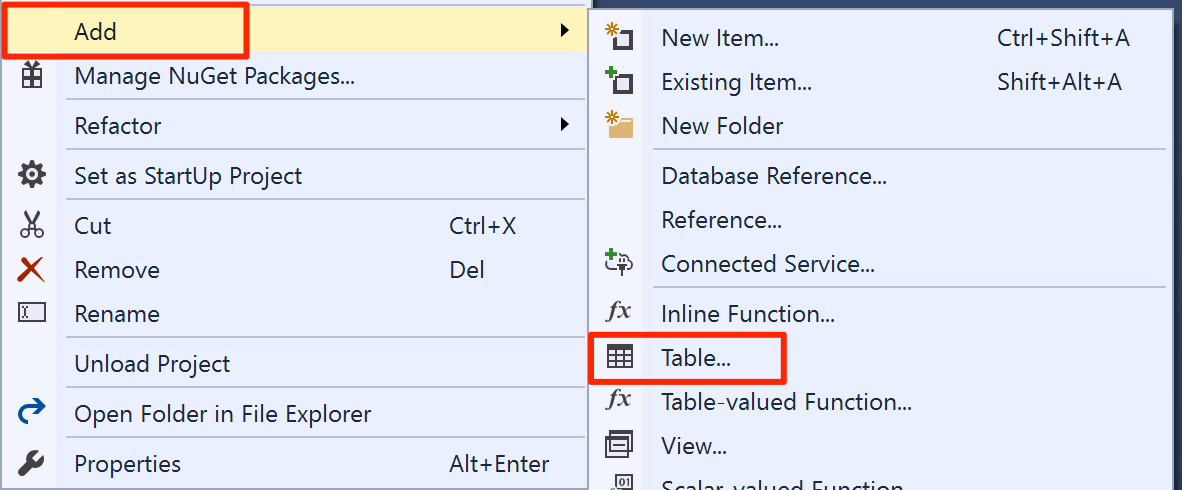
Open the database project menu by right-clicking on TutorialDB in Solution Explorer.
Select Table under Add.
In the table designer, add the Name and Location columns. Set both columns to the nvarchar(50) data type, as shown in the image. SSDT generates the
CREATE TABLEscript as you add the columns in the designer.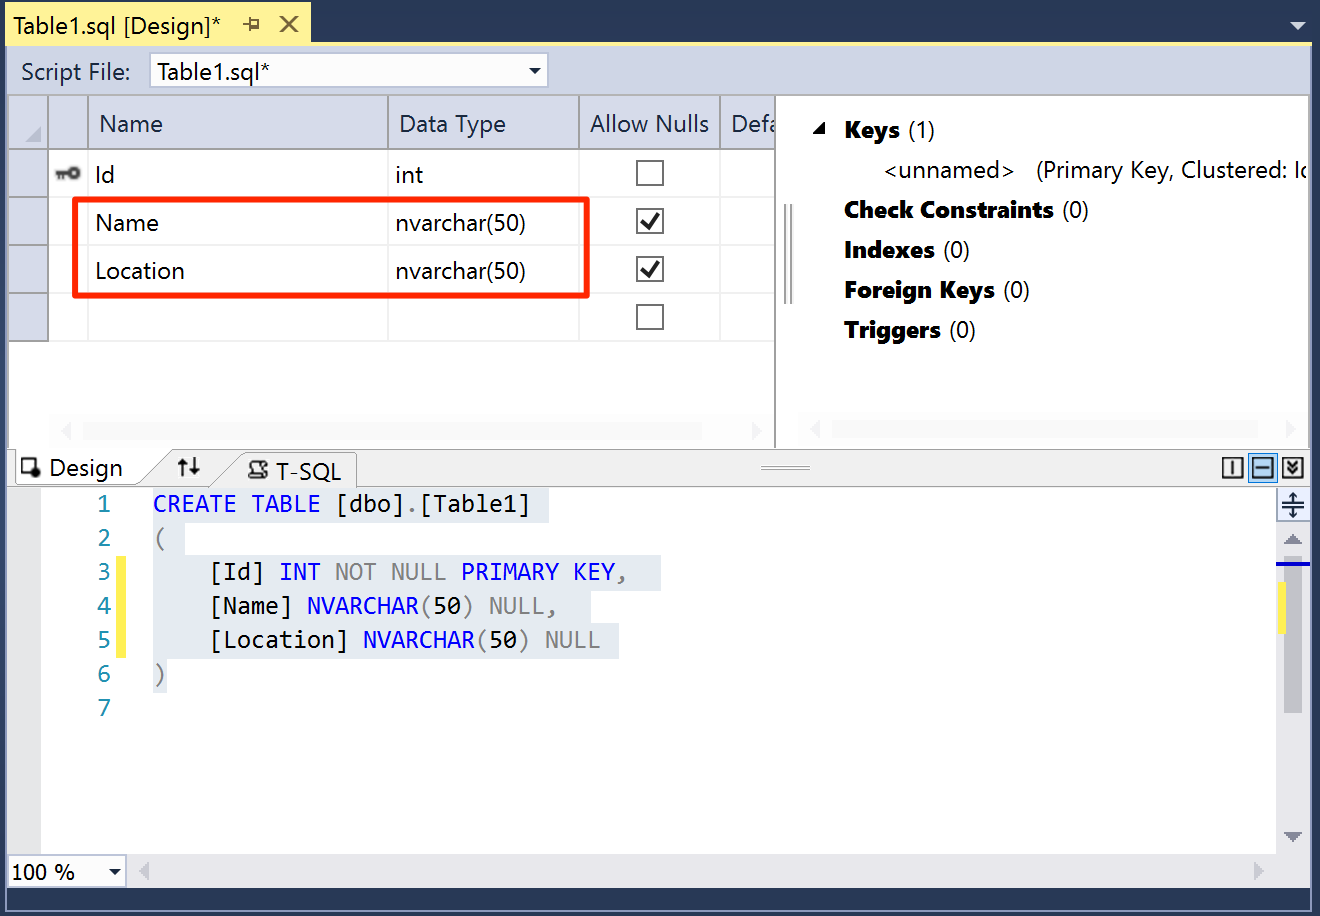
Save the Table1.sql file.
Build and validate the database
Open the database project menu on TutorialDB and select Build. SSDT compiles the
.sqlsource files in your project and builds a data-tier application package (DACPAC) file. You can use this file to publish a database to your SQL Server instance on Linux.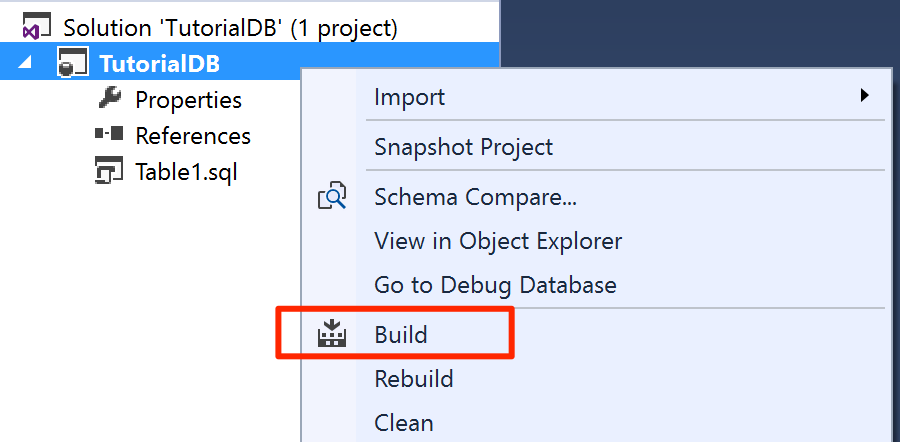
Check for a build success message in the Output window in Visual Studio.
Publish the database to a SQL Server instance on Linux
Open the database project menu on TutorialDB and select Publish.
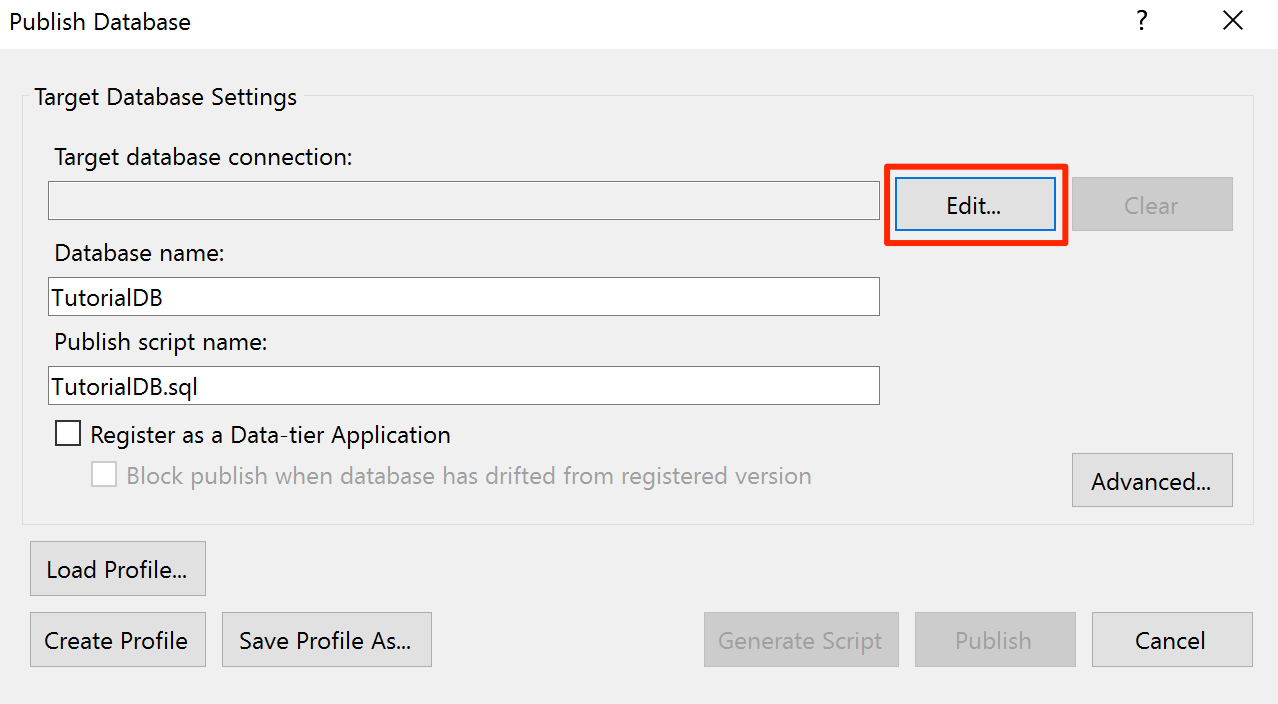
Select Edit to select your SQL Server instance on Linux.
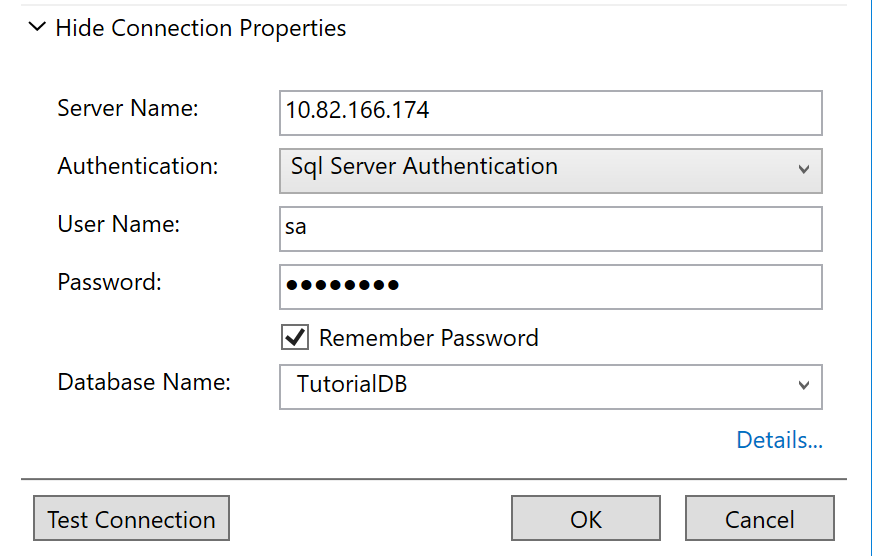
In the connection dialog, enter the IP address or host name, user name, and password for your SQL Server instance on Linux.
Select Publish in the publish dialog.
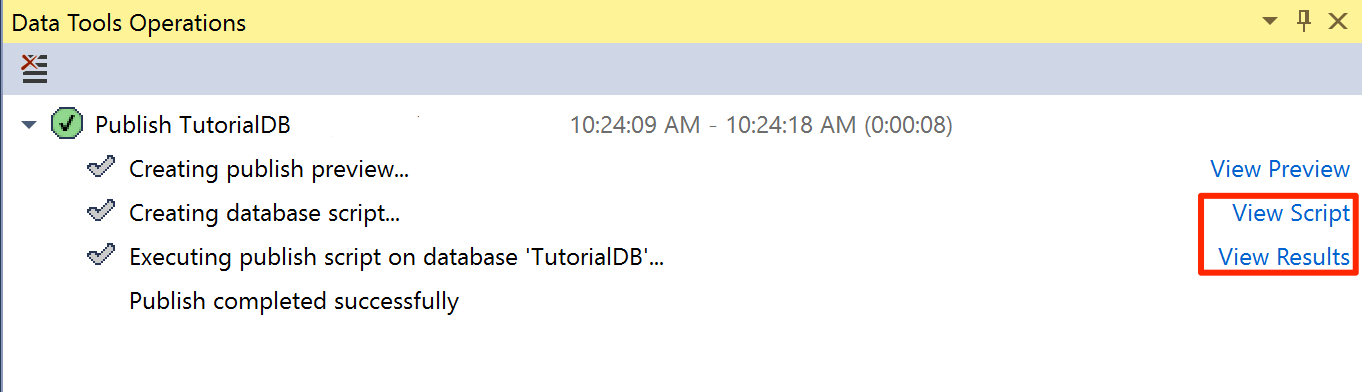
Check the publish status in the Data Tools Operations window.
Select View Results or View Script to see details of the database publish result on your SQL Server on Linux.
You've successfully created a new database on a SQL Server instance on Linux and learned the basics of developing a database with a source-controlled database project.