Introduction - Create an assemble-to-stock assembly order
You typically use Assemble to Stock for items that you want to assemble ahead of the occurrence of sales, such as to prepare for a kit campaign, and to keep items in stock until they are ordered. These items are usually standard items, such as packaged kits that you don't offer to customize to customer requests.
In the assemble-to-stock process, the item is assembled without an immediate sales demand and is stocked in the warehouse as an inventory item for later sale or for consumption as a subassembly. At this point, the item is picked and processed as a single item and is treated like a finished production item.
When you enter an assemble-to-stock item on a sales line, the line looks a lot like any other item sold from inventory. There are some differences, however. For example, availability is checked for the assembly item only.
To enable this process, the Assembly Policy field on the item card must be set to Assemble-to-Stock.
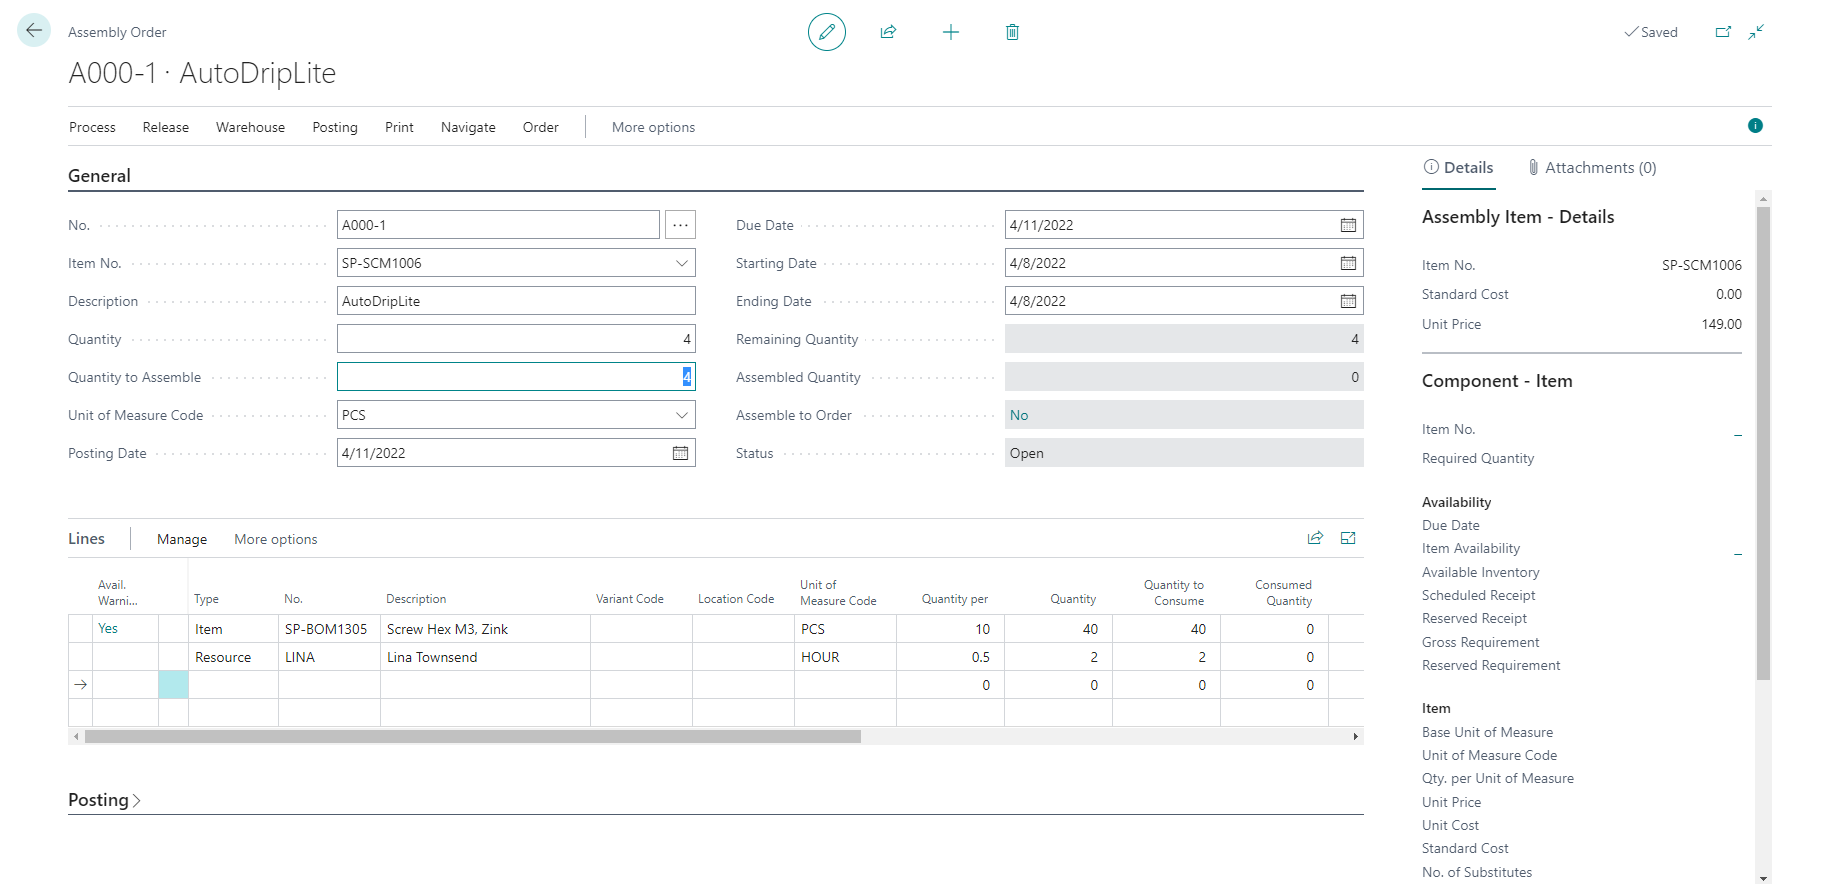
Create an assembly order manually
In this procedure, you will create and process an assembly order for items that are assembled to stock, which means without a linked sales order. The steps include initiating the assembly order, handling potential component availability issues, and partially posting assembly item output.
To assemble an item manually by using an Assembly Order, select the Search for Page icon in the top-right corner of the page, enter Assembly Orders, and then choose the related link.
Post an assembly order
Assembly order posting is based on the same principles as when posting the similar activities of sales orders and production consumption/output. However, the principles are combined because assembly orders have their own posting UI, just like sales orders. Actual entry posting happens in the background as direct item and resource journal postings, just like that for production consumption, output, and capacity.
Like production order posting, the consumed components and the used resources are converted and output as the assembly item when the assembly order is posted. However, the cost flow for assembly orders is less complex, especially because assembly cost posting only occurs once and therefore does not generate work-in-process inventory.
To post an Assembly Order, select the Search for Page icon in the top-right corner of the page, enter Assembly Orders, and then select the related link.
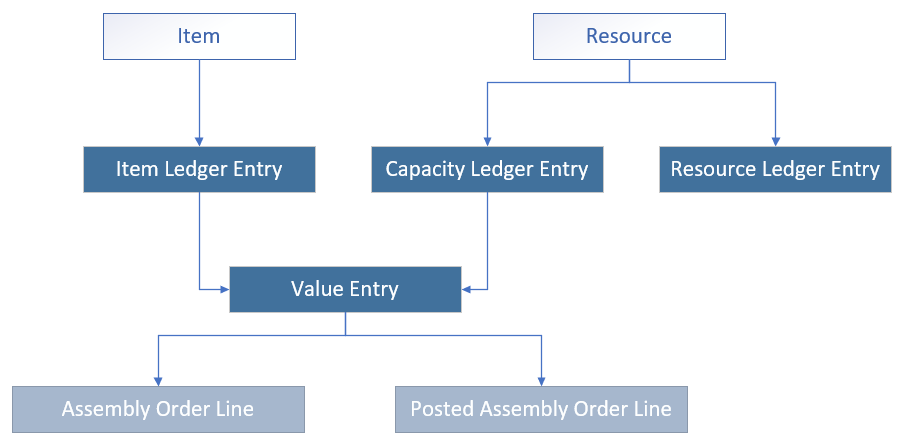
The following journal postings occur during assembly order posting.
The item journal posts positive item ledger entries, representing output of the assembly item, from the assembly order header.
The item journal posts negative item ledger entries, representing consumption of assembly components, from the assembly order lines.
The resource journal posts usage of assembly resources (time units) from the assembly order lines.
The capacity journal posts value entries relating to the resource usage from the assembly order lines.
The following diagram shows the structure of item and resource ledger entries that result from assembly order posting.
Once an Assembly Order is posted, meaning that components (material) and resources are assembled into a new item, then it should be possible to determine the actual cost of that assembly item and the actual inventory cost of the components involved. This determination of costs is achieved by forwarding costs from the posted entries of the source (the components and resources) to the posted entries of the destination (the assembly item). The forwarding of costs is done by calculating and generating new entries, called adjustment entries, that become associated with the destination entries.
The concept of work in process (WIP) doesn't apply in assembly order posting. Assembly costs are posted only as actual cost, never as expected cost. Accordingly, only actual costs are posted to the general ledger, and no interim accounts are populated from assembly order posting.
Check consumption and output
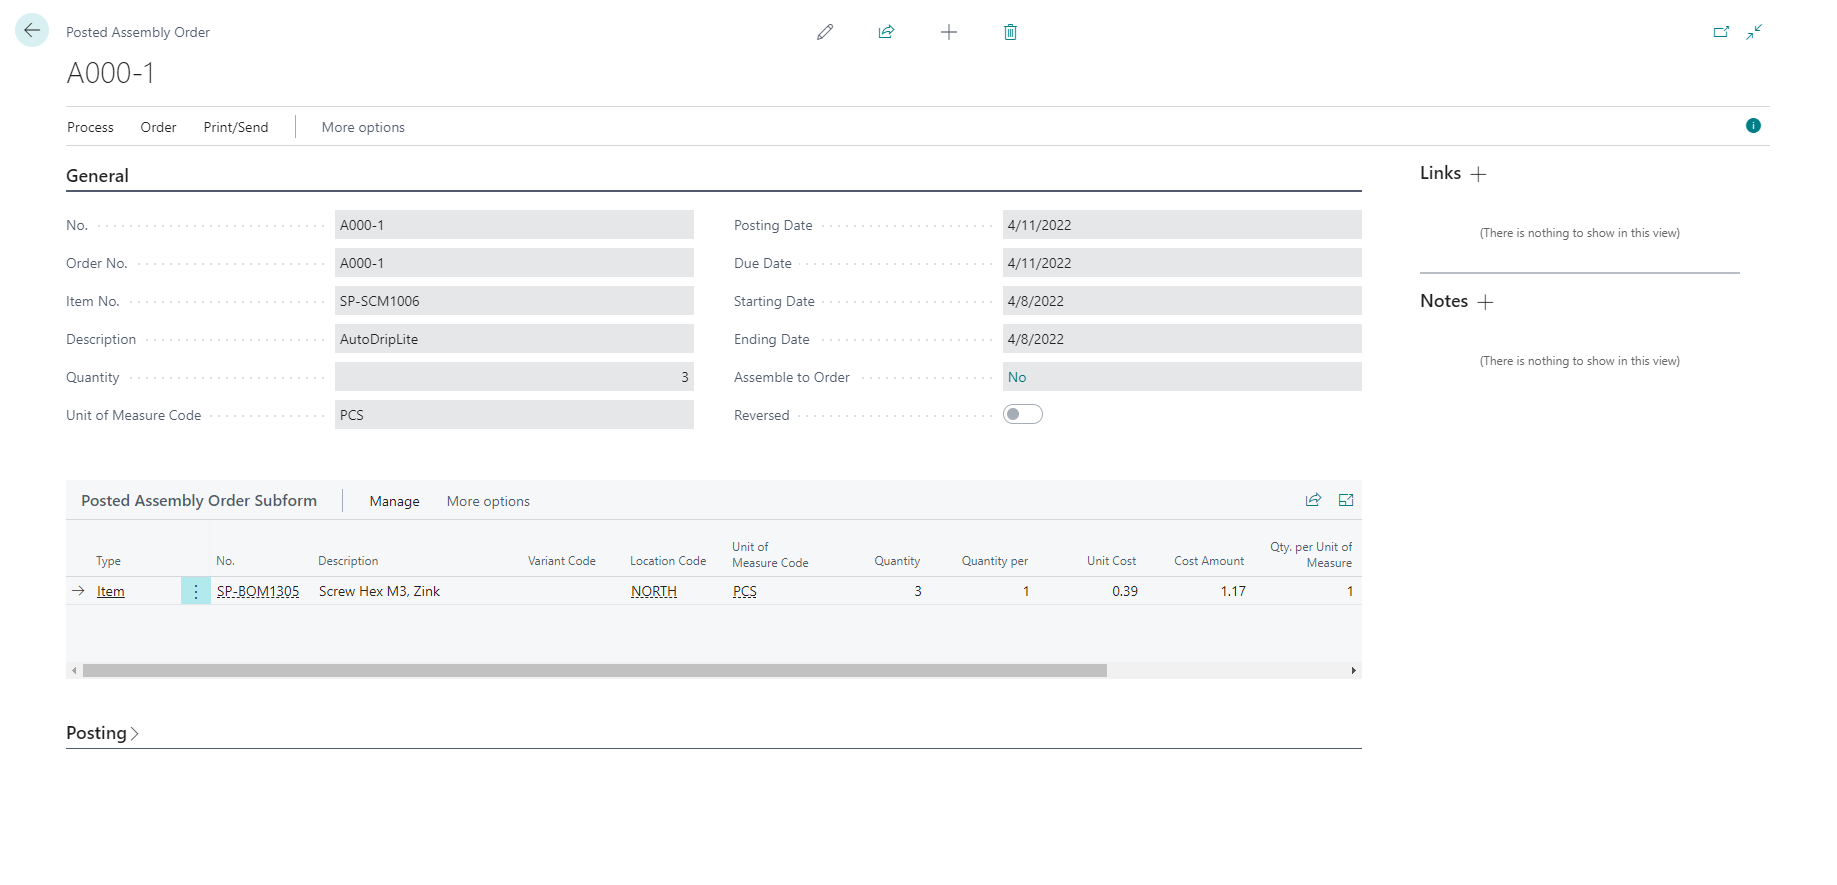
If you want to check all results of assembly order posting, such as consumptions and outputs, you need to select the search for page icon in the top-right corner of the page, enter Posted Assembly Orders, and then select the related link.
Find your Posted Assembly Order, point to this line, select Manage, and select the View action.
Your Posted Assembly Order will appear.
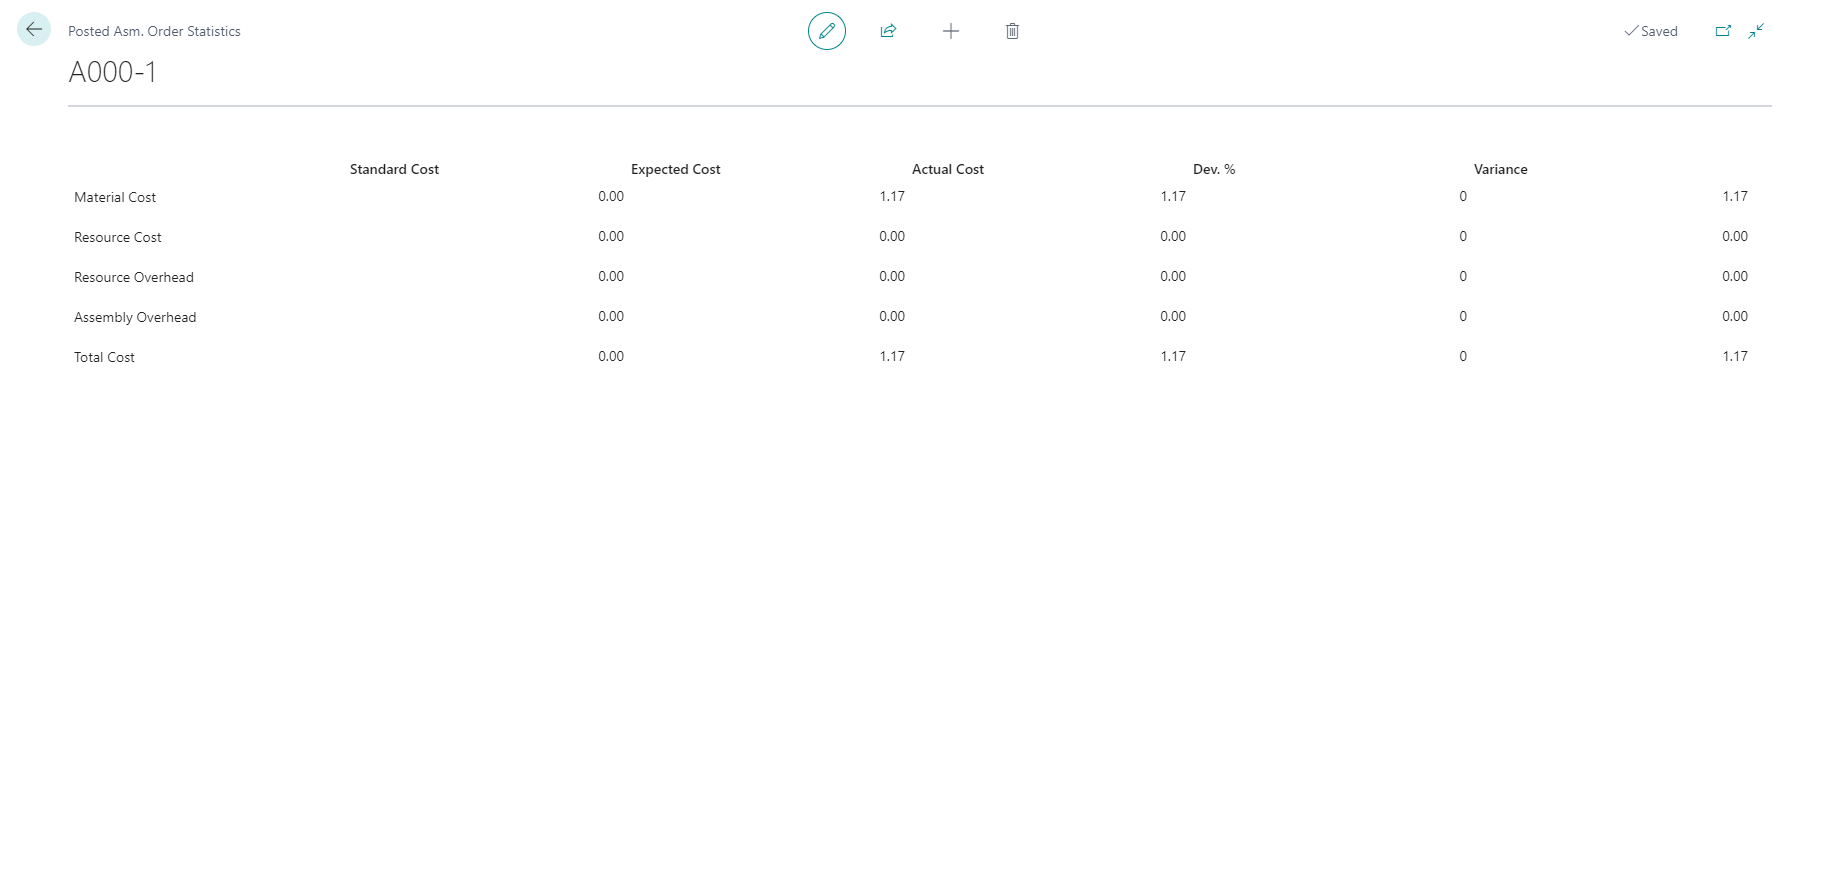
From this point, you can check statistic of document, select Order, and then selecting the Statistic action.
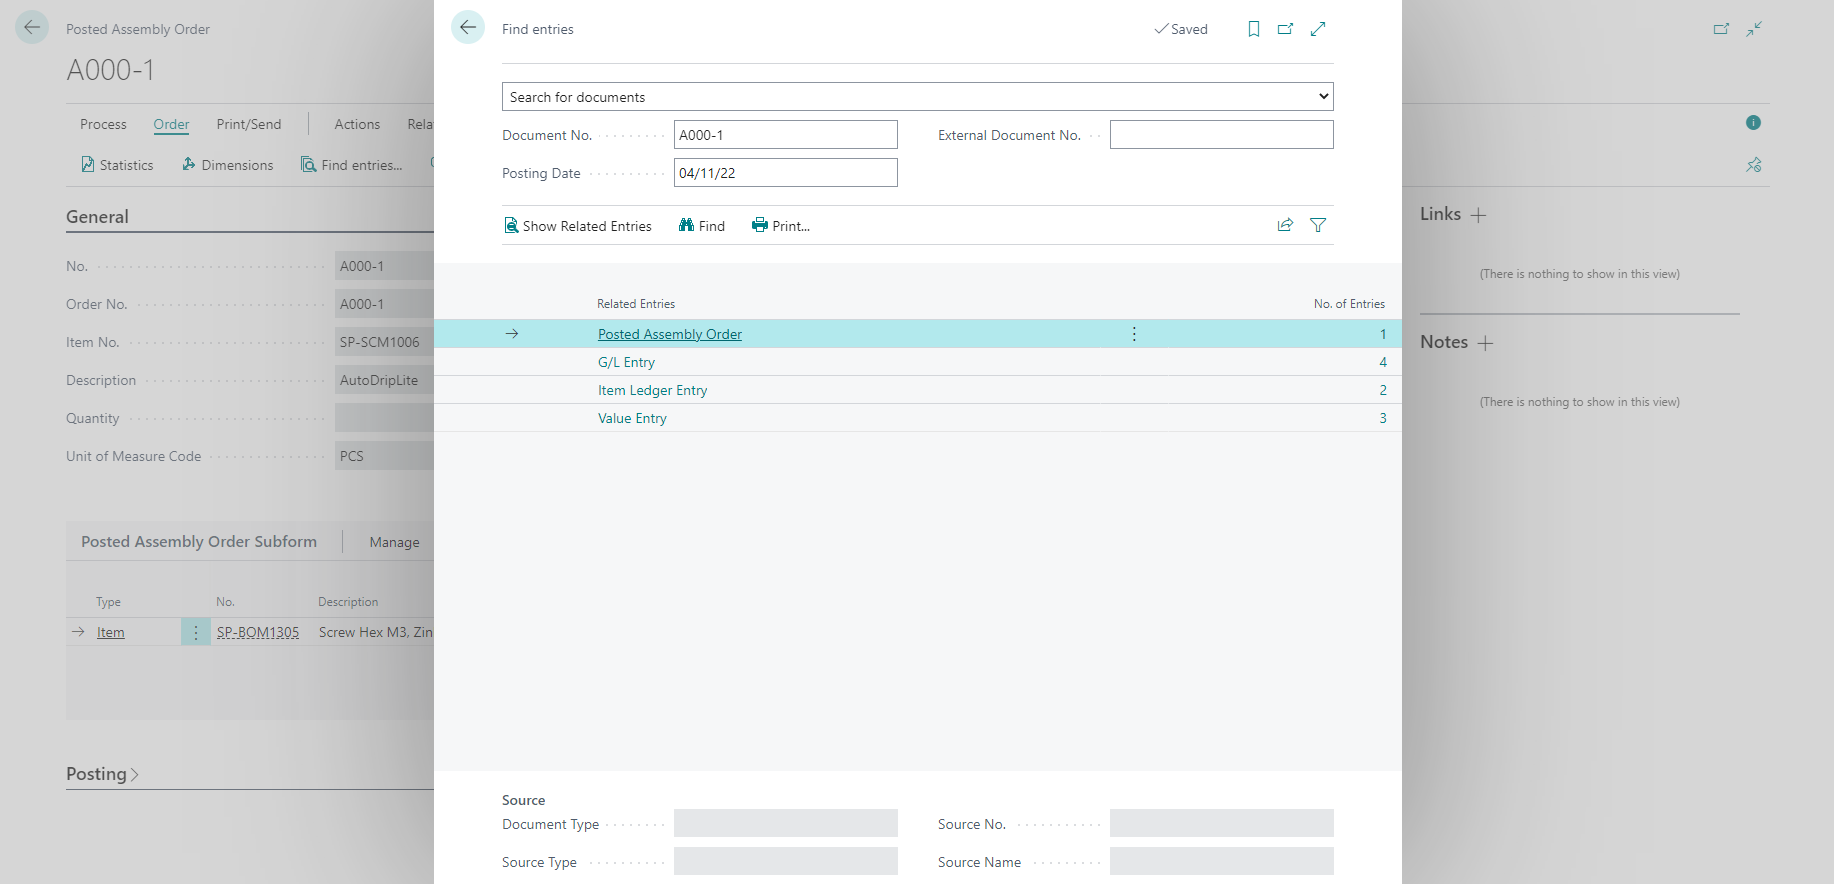
If you want to review all posted entries, select Order, and then select the Find entries action.
On the Find entries page, select entries you want to check from the Related Entries FastTab. Point to an entry line and select the Show Related Entries action.
Eventually, if you made some mistake posting this document, you can correct it.
To do this, select Process, and then select the Undo Assembly action.
Select Yes.
If you want to recreate the Assembly Order to start with the same items again, select Yes. Otherwise, select No.
If you chose Yes on the last step, when you open the Assembly Orders page you will see an already prepared order with the same elements you already used.
This action will cancel the posting of the assembly order. A set of corrective item ledger entries will be created to reverse the original entries. Each positive output entry for the assembly item will be reversed by a negative output entry. Each negative consumption entry for an assembly component will be reversed by a positive consumption entry. Fixed cost application will be created automatically between the corrective and original entries to make sure there is exact cost reversal.
Create an assemble-to-stock assembly order
Watch this demonstration of how to create an assemble-to-stock assembly order.
