Document sending profiles
You can set up each customer and vendor with a preferred method of sending sales and purchase documents so that you don't have to select a sending option every time you select the Send action.
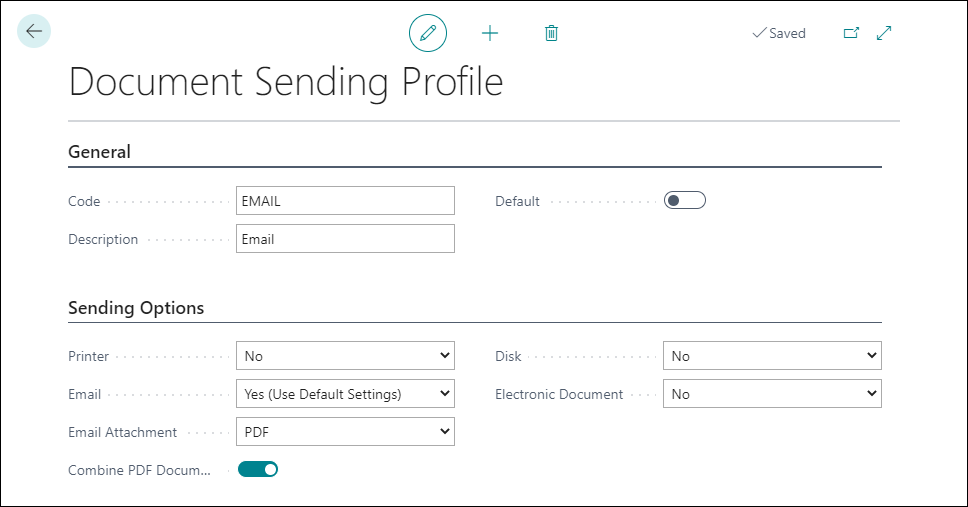
On the Document Sending Profile page, you can set up different sending profiles that you can then select from in the Document Sending Profile field on a customer or vendor card.
You can set up a document sending profile by following these steps:
Select the search for page icon in the upper-right corner of the page, enter document sending profile, and then choose the related link.
On the Document Sending Profile page, select the New action.
Fill in the fields as necessary.
Code - A unique identifier for the document sending profile.
Description - A short description of the document sending profile.
Default - Select this option to specify that the document sending profile is the default profile for all customers, except for customers where the Document Sending Profile field is filled in with another sending profile.
Note
When you choose the Post and Send action on a sales document, the Post and Send Confirmation dialog box will show the sending options that are used, whether they're the options that are set up for the customer or the default for all customers. In the dialog box, you can change the sending options for the sales document.
Printer - Specifies if and how the document is printed when you select the Post and Send action. If you select the Yes (Prompt for Settings) option, the document is printed according to settings that you must make on the printer setup dialog box.
Email - Specifies if and how the document is attached as a PDF file to an email to the involved customer when you select the Post and Send action.
Note
If you select the Yes (Prompt for Settings) option, the document will be attached to an email according to settings that you make in the Send Email page. The Send Email page will open automatically and will be prefilled with the contact person in the To field, and the document will be attached as a PDF file. In the Body field, you can enter text manually or you can have the Body field filled in automatically with a document-specific email body that you have set up previously.
If you don't want to specify email settings every time that you email a document, you can select the Yes (Use Default Settings) option. In that case, the Send Email page won't open.
Combine PDF Documents - Merge selected documents into a single PDF file when you send the documents by email or print them. For example, this selection reduces the number of documents that the recipient must process.
Disk - Specify if the document is saved as a PDF file or if an electronic document is created when you select the Post and Send action.
Electronic Document - Specifies if the document is sent as an electronic document that the customer can import into their system when you select the Post and Send action. To use this option, you must also fill in the Electronic Format field. The file can also be saved to your hard drive.
Customers and vendors that have no assigned document sending profile will use the default one.
