Note
Access to this page requires authorization. You can try signing in or changing directories.
Access to this page requires authorization. You can try changing directories.
In Azure Stream Analytics, you can test your query without starting or stopping your job. You can test queries on incoming data from your streaming sources or upload sample data from a local file on the Azure portal. You can also test queries locally from your local sample data or live data in Visual Studio and Visual Studio Code.
Automatically sample incoming data from input
Azure Stream Analytics automatically fetches events from your streaming inputs. You can run queries on the default sample or set a specific time frame for the sample.
Sign in to the Azure portal.
Locate and select your existing Stream Analytics job.
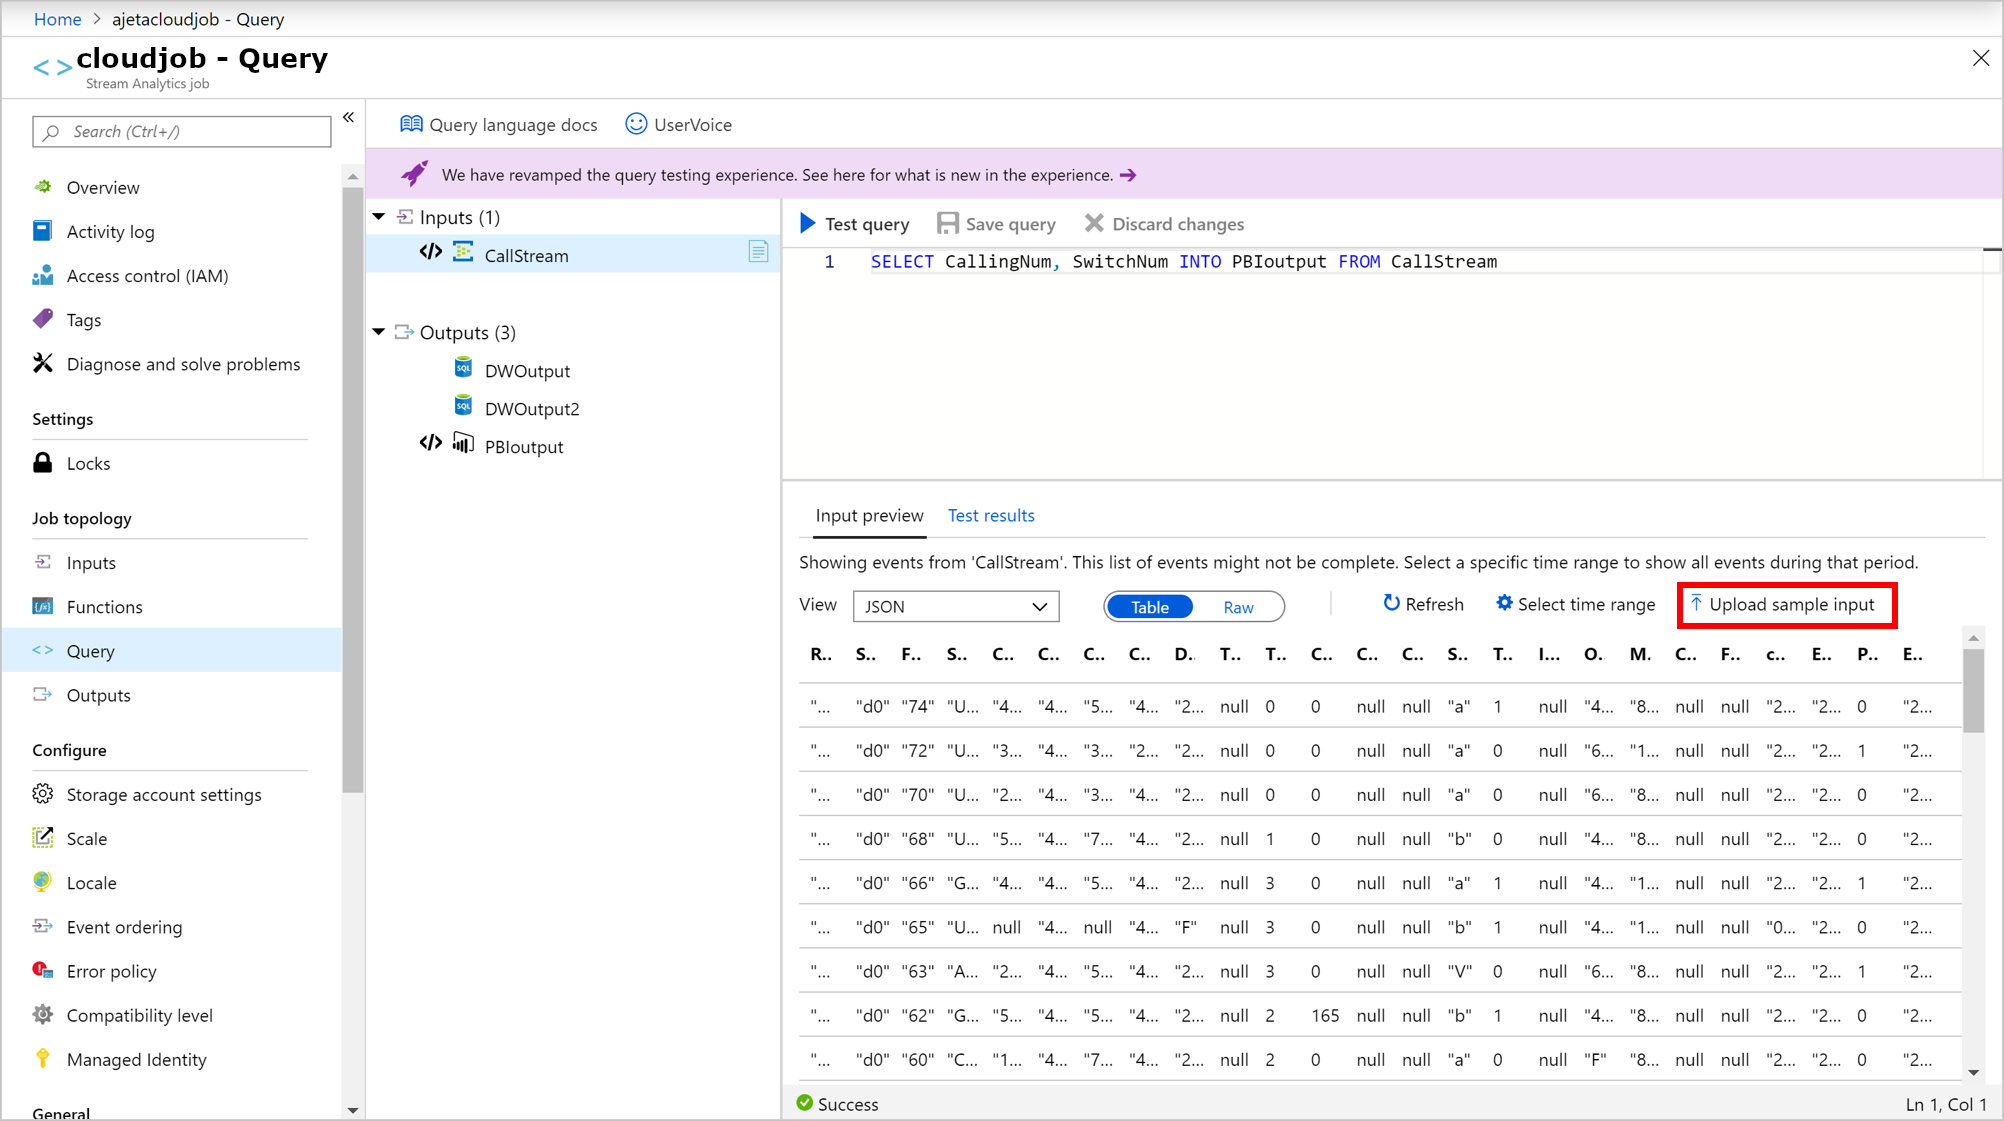
On the Stream Analytics job page, under the Job Topology heading, select Query to open the Query editor window.
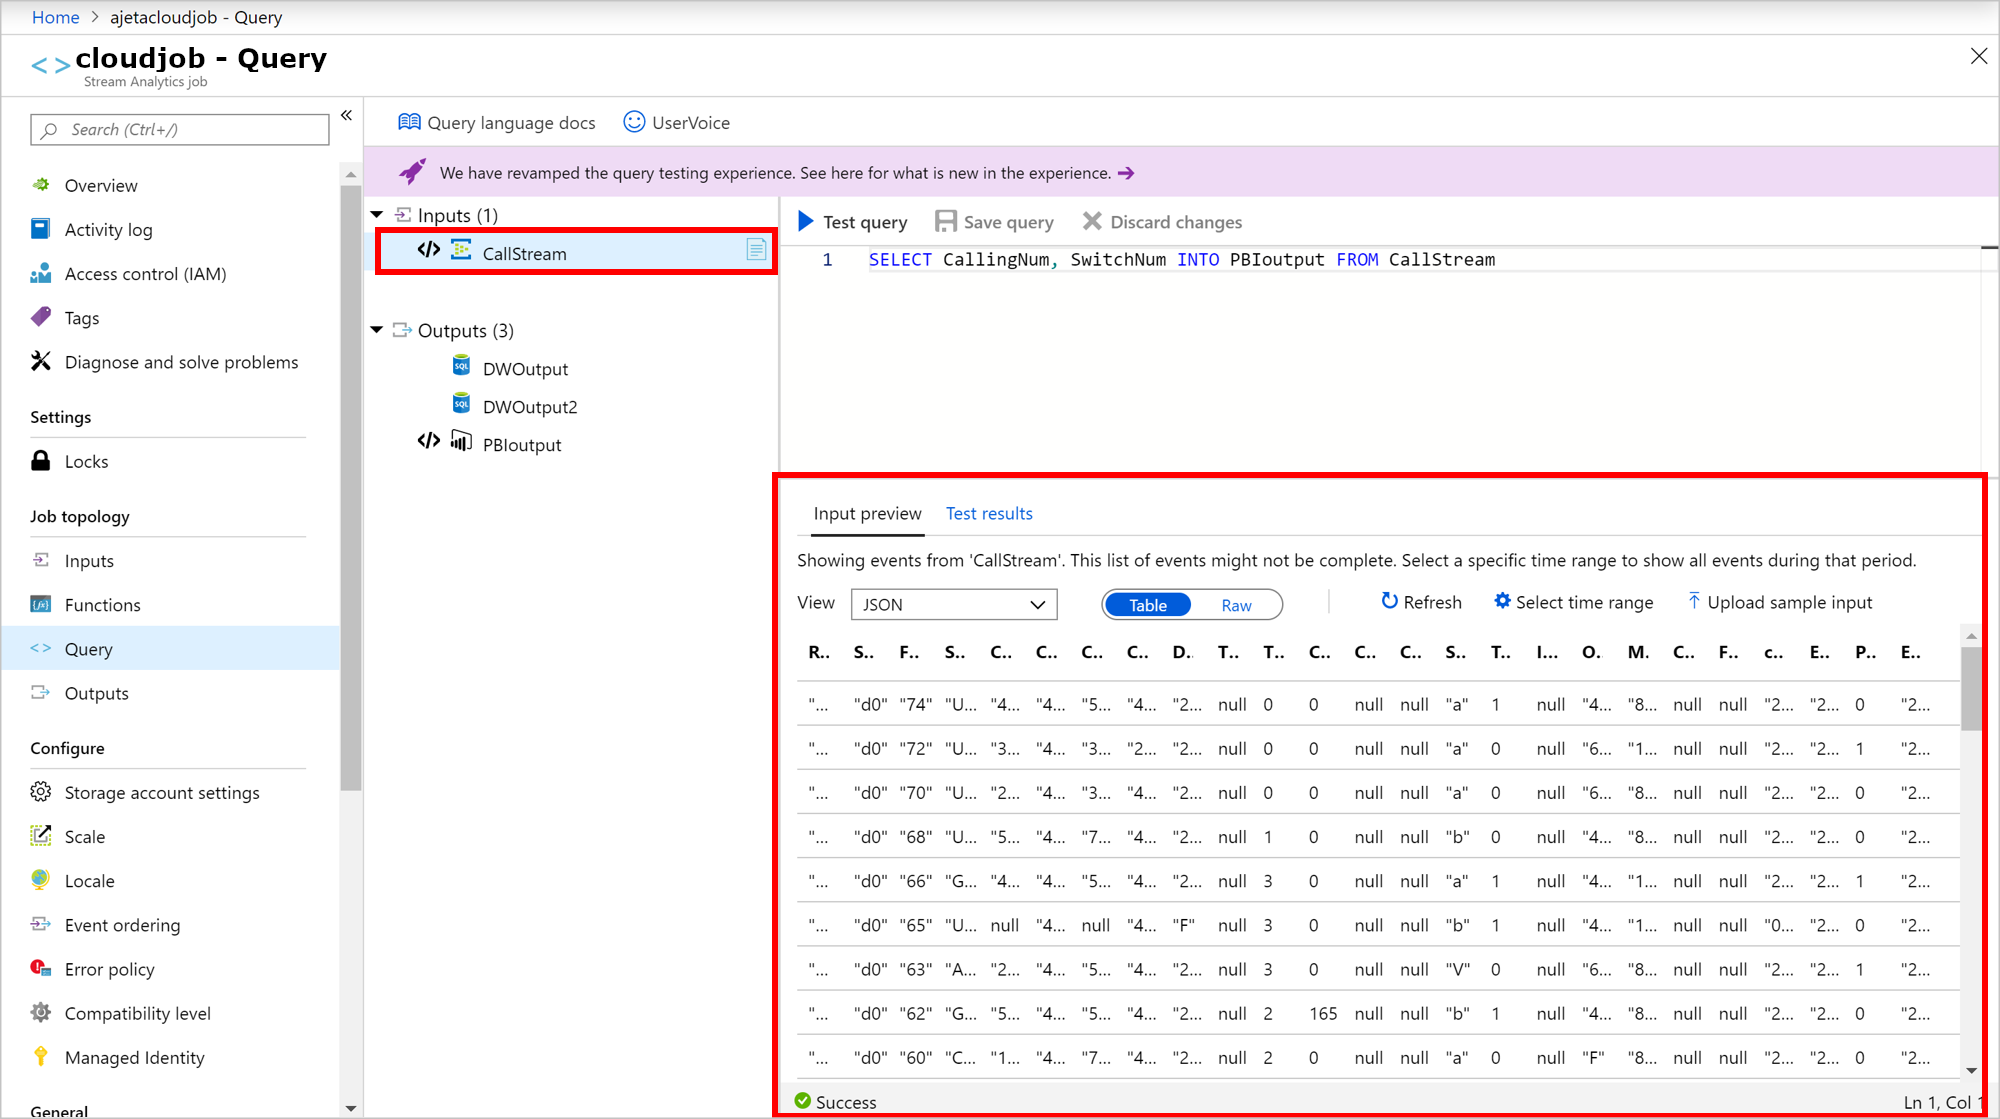
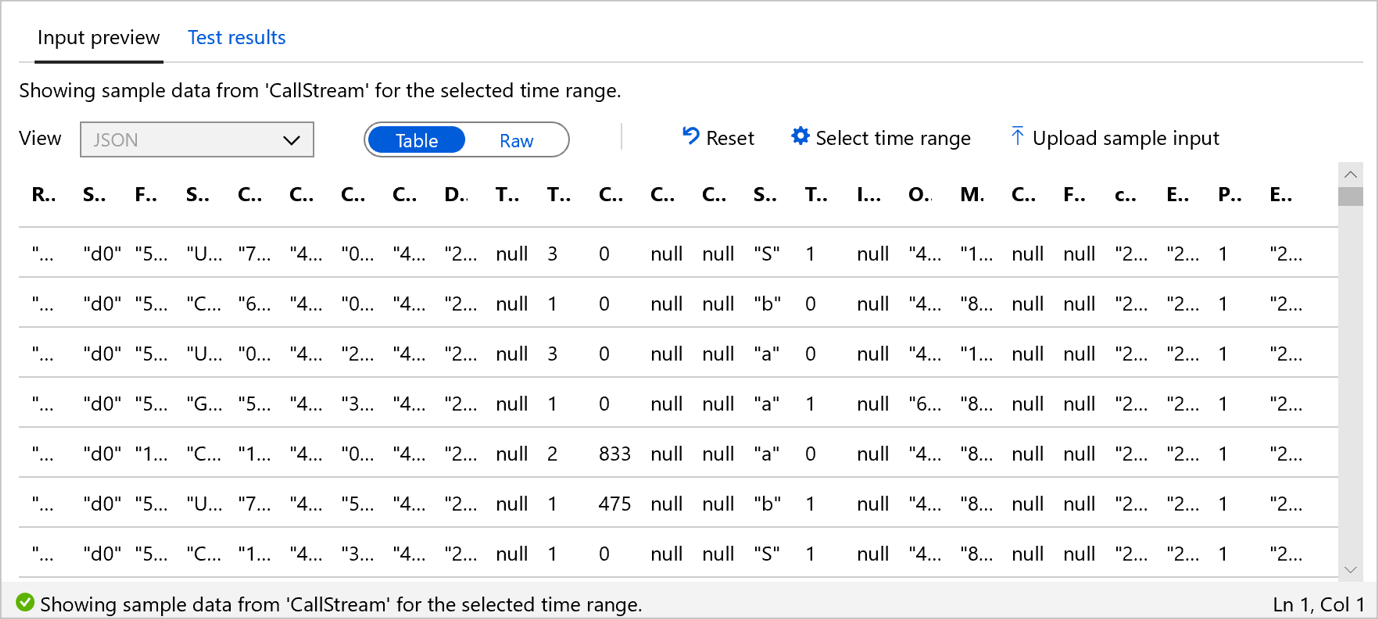
To see a sample list of incoming events, select the input with the file icon. The sample events automatically appear in Input preview.
a. The serialization type for your data is automatically detected if it's JSON or CSV. You can manually change it to JSON, CSV, or AVRO by selecting the option in the dropdown menu.
b. Use the selector to view your data in Table or Raw format.
c. If your data isn't current, select Refresh to see the latest events.
The following table is an example of data in the Table format:
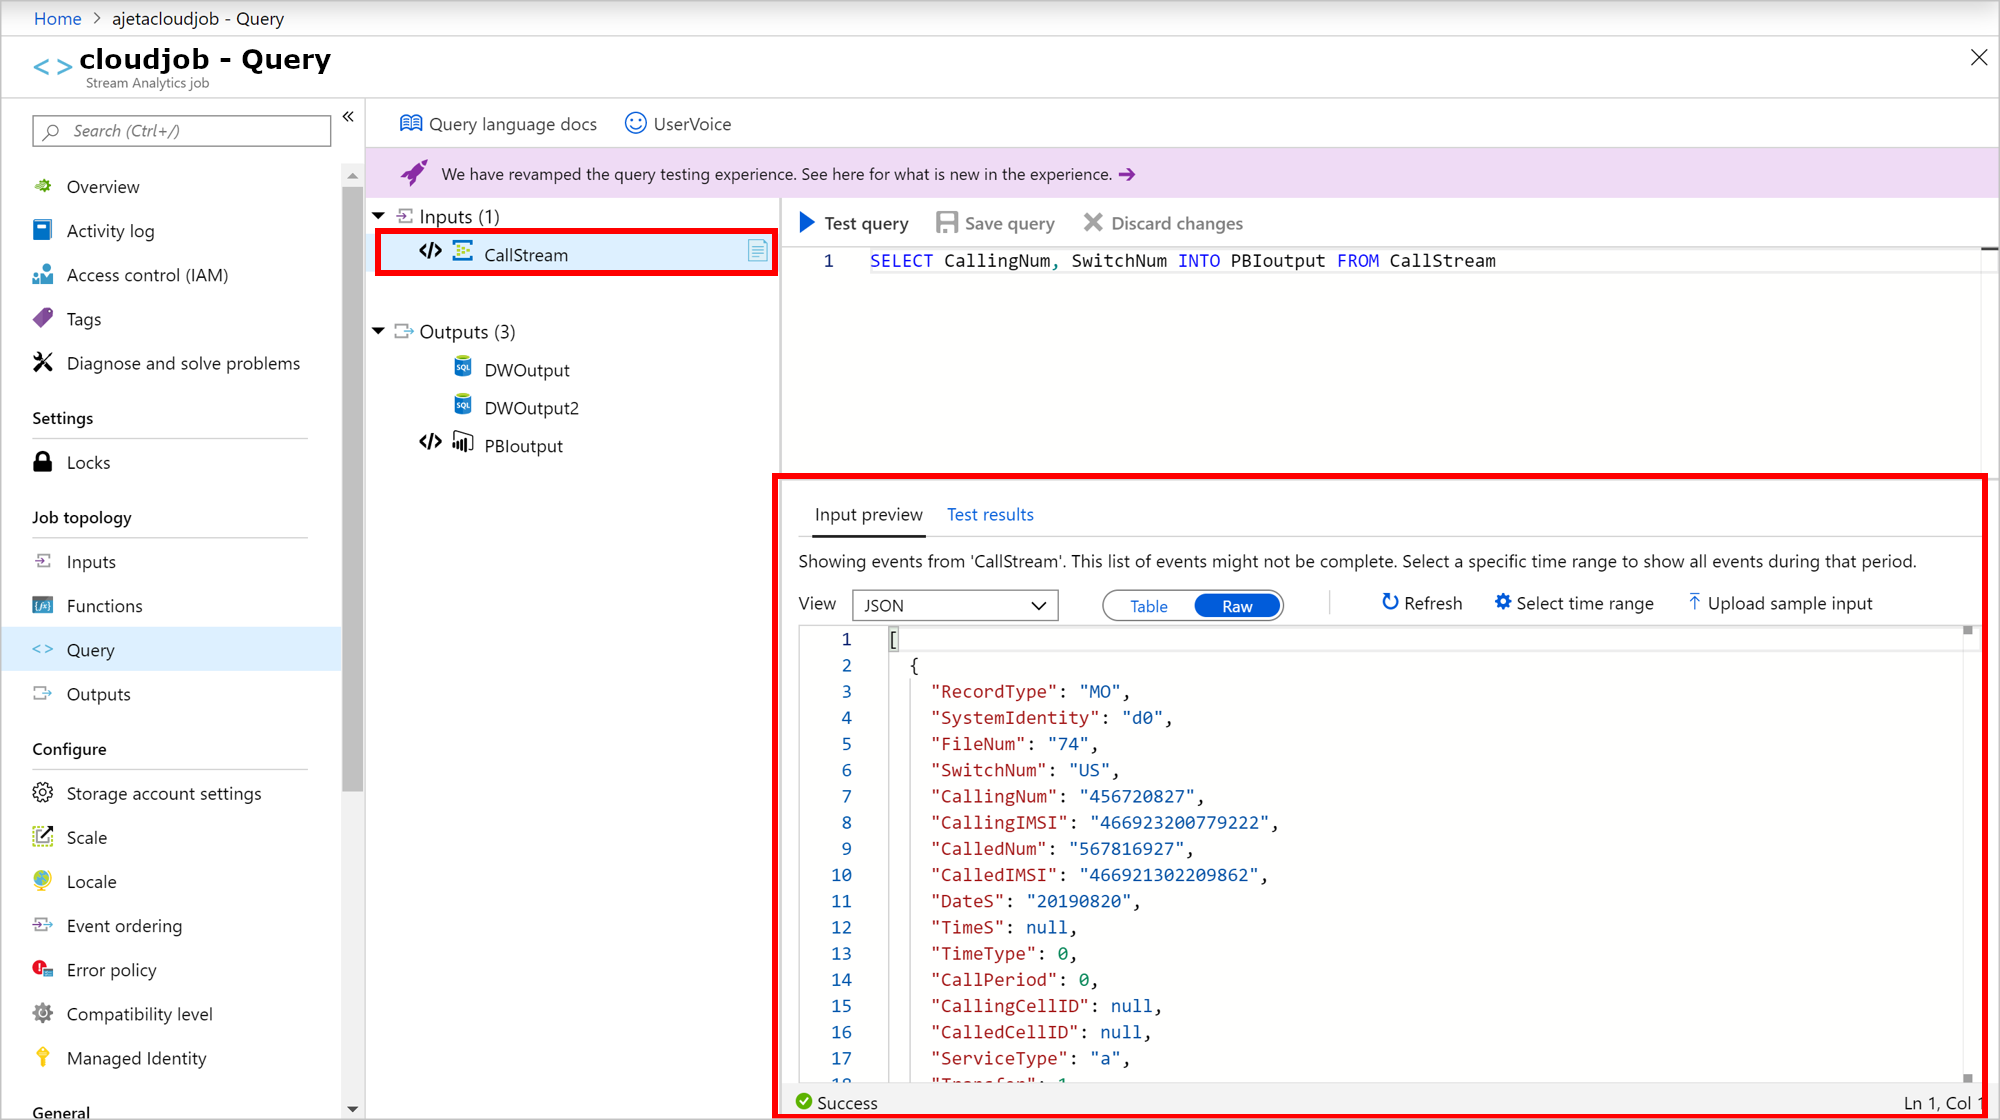
The following table is an example of data in the Raw format:
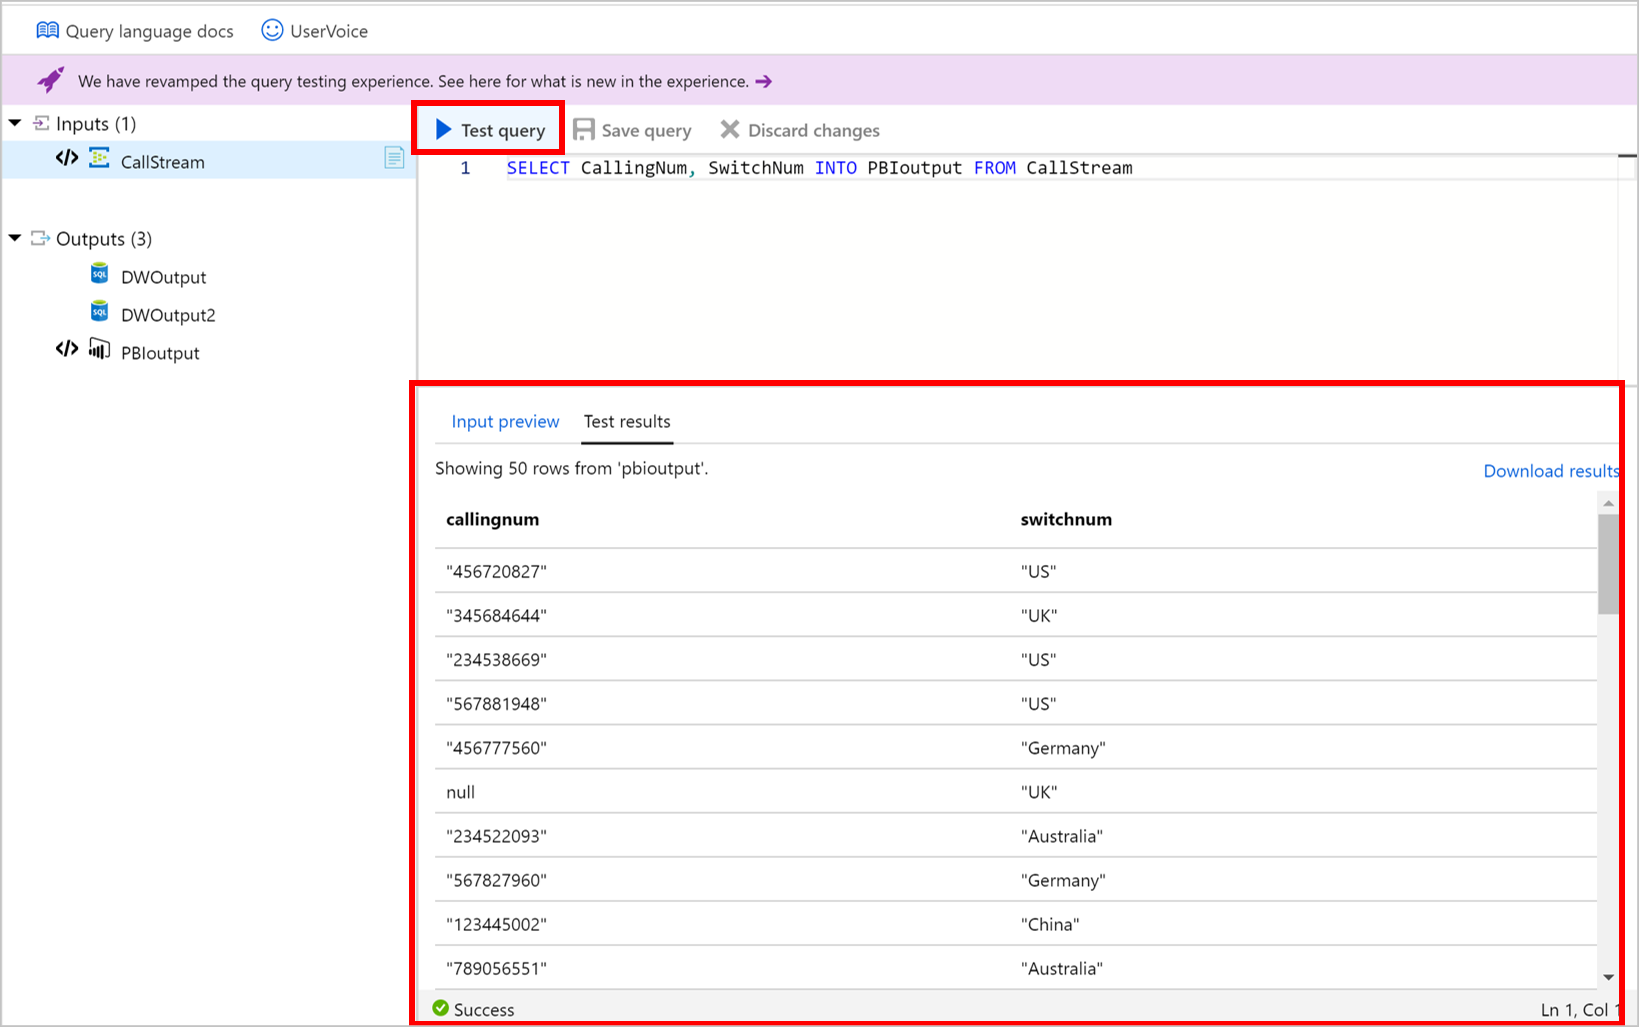
To test your query with incoming data, select Test query. Results appear in the Test results tab. You can also select Download results to download the results.
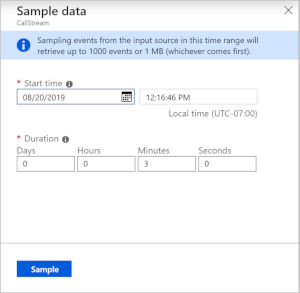
To test your query against a specific time range of incoming events, select Select time range.
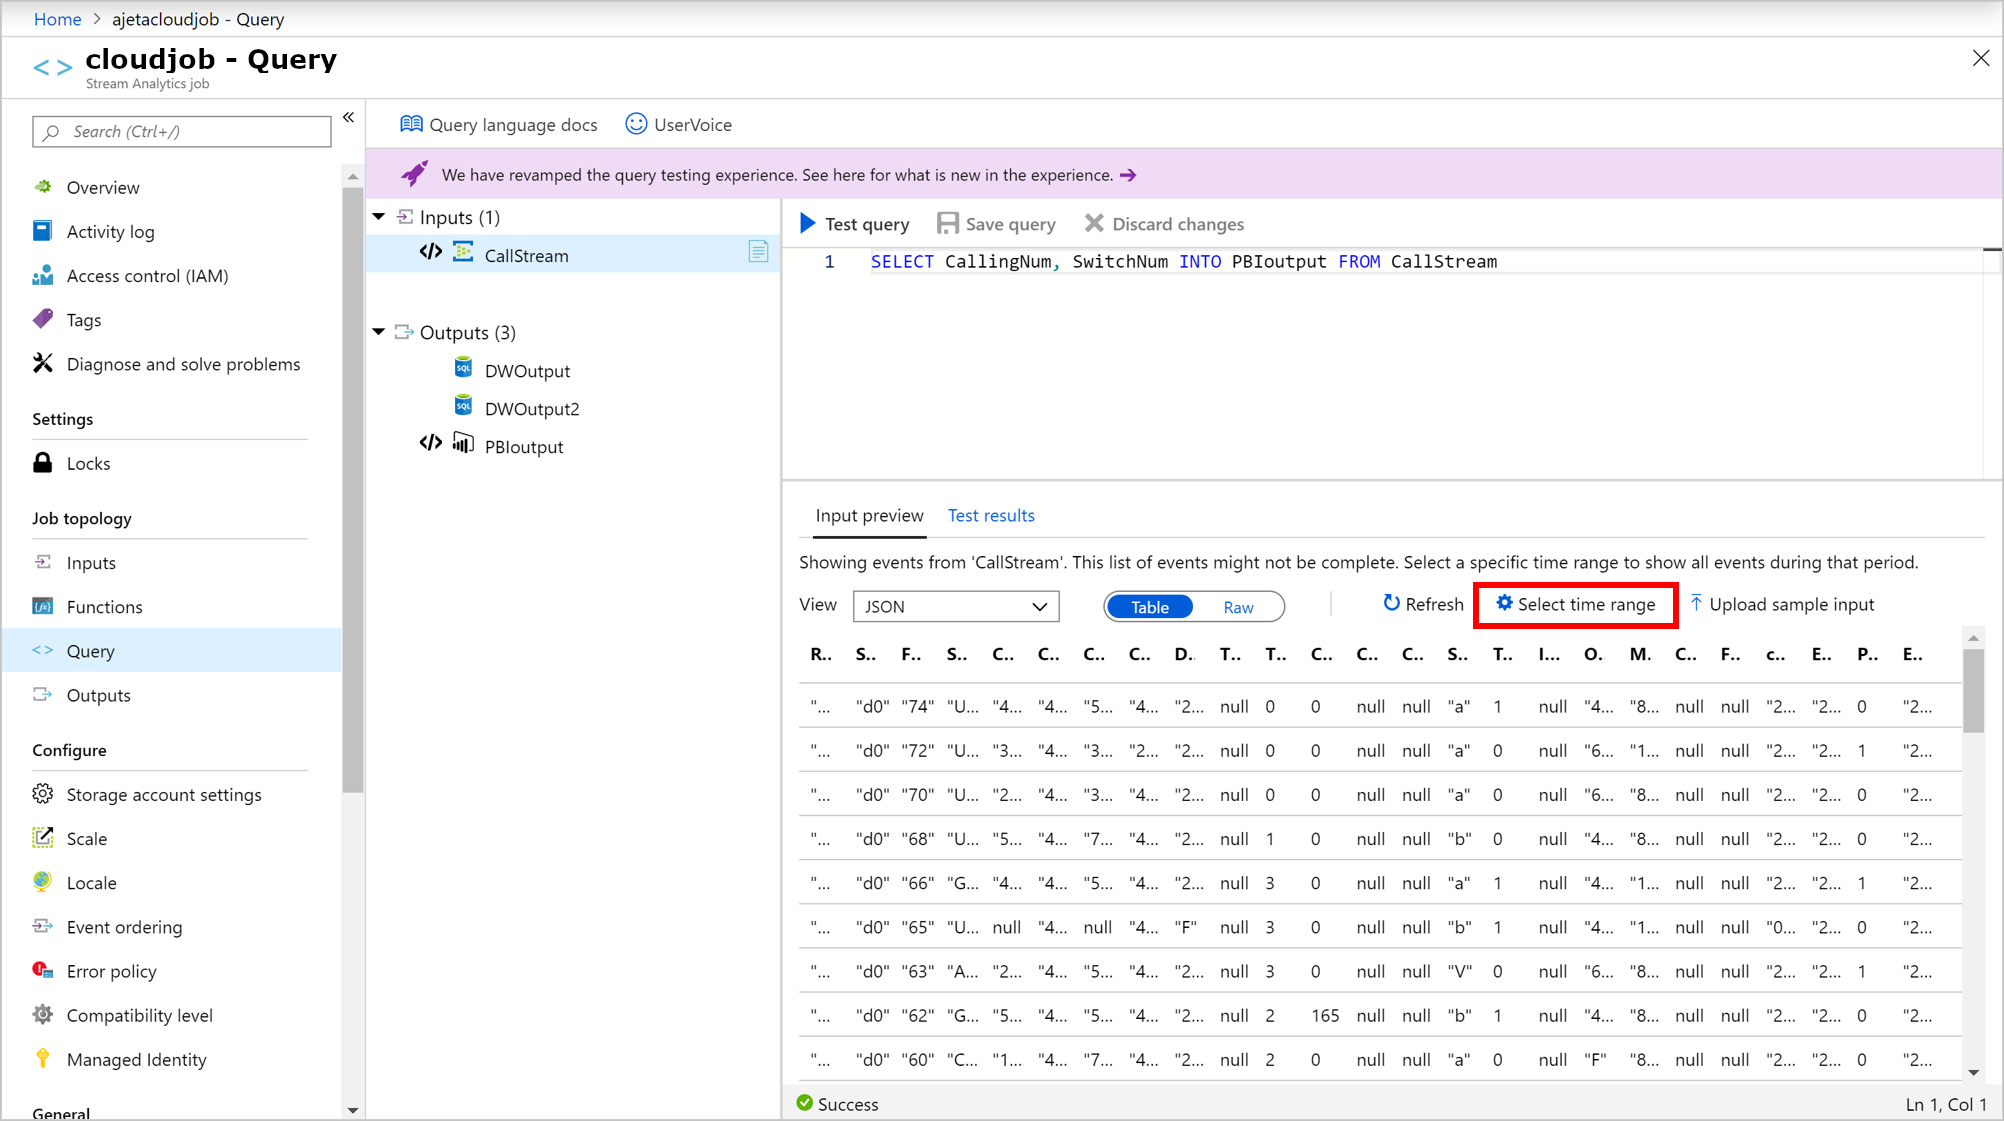
Set the time range of the events you want to use to test your query, and then select Sample. Within that time frame, you can retrieve up to 1,000 events or 1 MB, whichever comes first.
After the events are sampled for the selected time range, they appear in the Input preview tab.
Select Reset to see the sample list of incoming events. If you select Reset, your time range selection will be lost. Select Test query to test your query and review the results in the Test results tab.
When you make changes to your query, select Save query to test the new query logic. This process allows you to iteratively modify your query and test it again to see how the output changes.
After you verify the results shown in the browser, you're ready to Start the job.
Upload sample data from a local file
Instead of using live data, you can use sample data from a local file to test your Azure Stream Analytics query.
Sign in to the Azure portal.
Locate your existing Stream Analytics job and select it.
On the Stream Analytics job page, under the Job Topology heading, select Query to open the Query editor window.
To test your query with a local file, select Upload sample input on the Input preview tab.
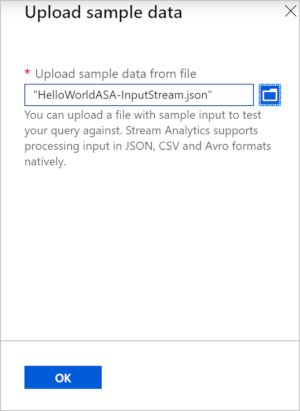
Upload your local file to test the query. You can only upload files with the JSON, CSV, or AVRO formats. Select OK.
After you upload the file, you can see the file contents as a table or in its raw format. If you select Reset, the sample data returns to the automatically sampled incoming input data. You can upload any other file to test the query at any time.
Select Test query to test your query against the uploaded sample file.
Test results appear based on your query. You can change your query and select Save query to test the new query logic. This process allows you to iteratively modify your query and test it again to see how the output changes.
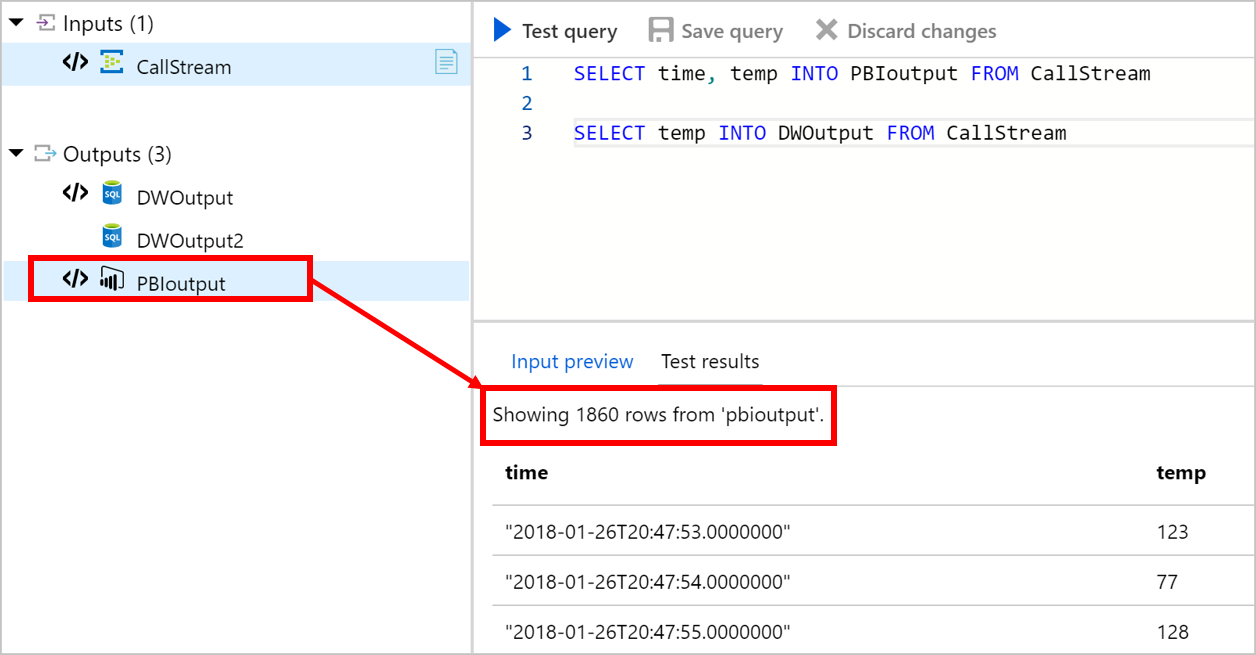
When you use multiple outputs in the query, the results appear based on the selected output.
After you verify the results shown in the browser, you can Start the job.
Test query limitations
Time policy isn't supported in portal testing:
- Out-of-order: All incoming events are ordered.
- Late arrival: There's no late arrival event since Stream Analytics can only use existing data for testing.
C# UDF isn't supported.
All testing runs with a job that has one Streaming Unit.
The timeout size is one minute. Any query with a window size greater than one minute can't get any data.
Machine learning isn't supported.
The sample data API is throttled after five requests in a 15-minute window. After the end of the 15-minute window, you can make more sample data requests. This limitation applies at the subscription level.
Troubleshoot test query errors
If you get the error "The request size is too big. Please reduce the input data size and try again.", follow these steps:
- Reduce input size: Test your query with a smaller sample file or with a smaller time range.
- Reduce query size: To test a selection of query, select a portion of the query, and then select Test selected query.