Note
Access to this page requires authorization. You can try signing in or changing directories.
Access to this page requires authorization. You can try changing directories.
Azure Service Groups let you create flexible, custom groupings of your Azure resources across subscriptions and resource groups, without changing your existing resource hierarchy. For a full overview of capabilities and scenarios, see What are Azure Service Groups?.
Important
Azure Service Groups is currently in public preview. See the Supplemental Terms of Use for Microsoft Azure Previews for legal terms that apply to Azure features that are in beta, preview, or otherwise not yet released into general availability.
Prerequisites
- If you don't have an Azure subscription, create a free account before you begin.
- You need Service Group Contributor or Service Group Administrator role on the parent service group where you want to create the new group. If creating under the root service group, see Root Service Group access.
Create in Azure portal
Log into the Azure portal.
In the top search bar, search for Service Groups and select Service Groups from the results.
Select + Create Service Group.
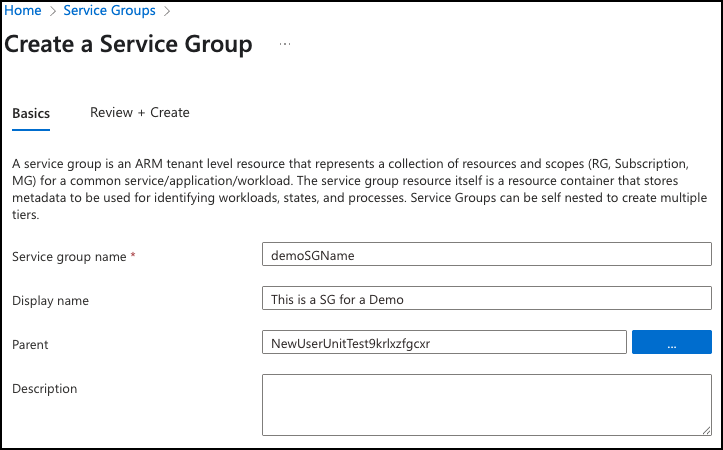
Fill in the Service Group ID field.
- The Service Group ID is a unique identifier used to reference this service group in API calls, scripts, and policies. This ID can't be changed after creation, so choose a meaningful and descriptive name (for example,
platform-networkingorproject-contoso-prod). - The ID must be globally unique across all Microsoft Entra tenants. Two tenants can't have a Service Group with the same ID.
- The Display name field is optional and can be changed at any time. It controls how the service group appears in the Azure portal.
- The Service Group ID is a unique identifier used to reference this service group in API calls, scripts, and policies. This ID can't be changed after creation, so choose a meaningful and descriptive name (for example,
Select the Parent Service Group.
- If you don't have a parent service group, or don't know what to pick, select the Root Service Group which has the same ID as your tenant's ID:
Microsoft.Management/serviceGroups/[tenantId]
- If you don't have a parent service group, or don't know what to pick, select the Root Service Group which has the same ID as your tenant's ID:
Select Next to proceed.
The review page shows a summary of your choices.
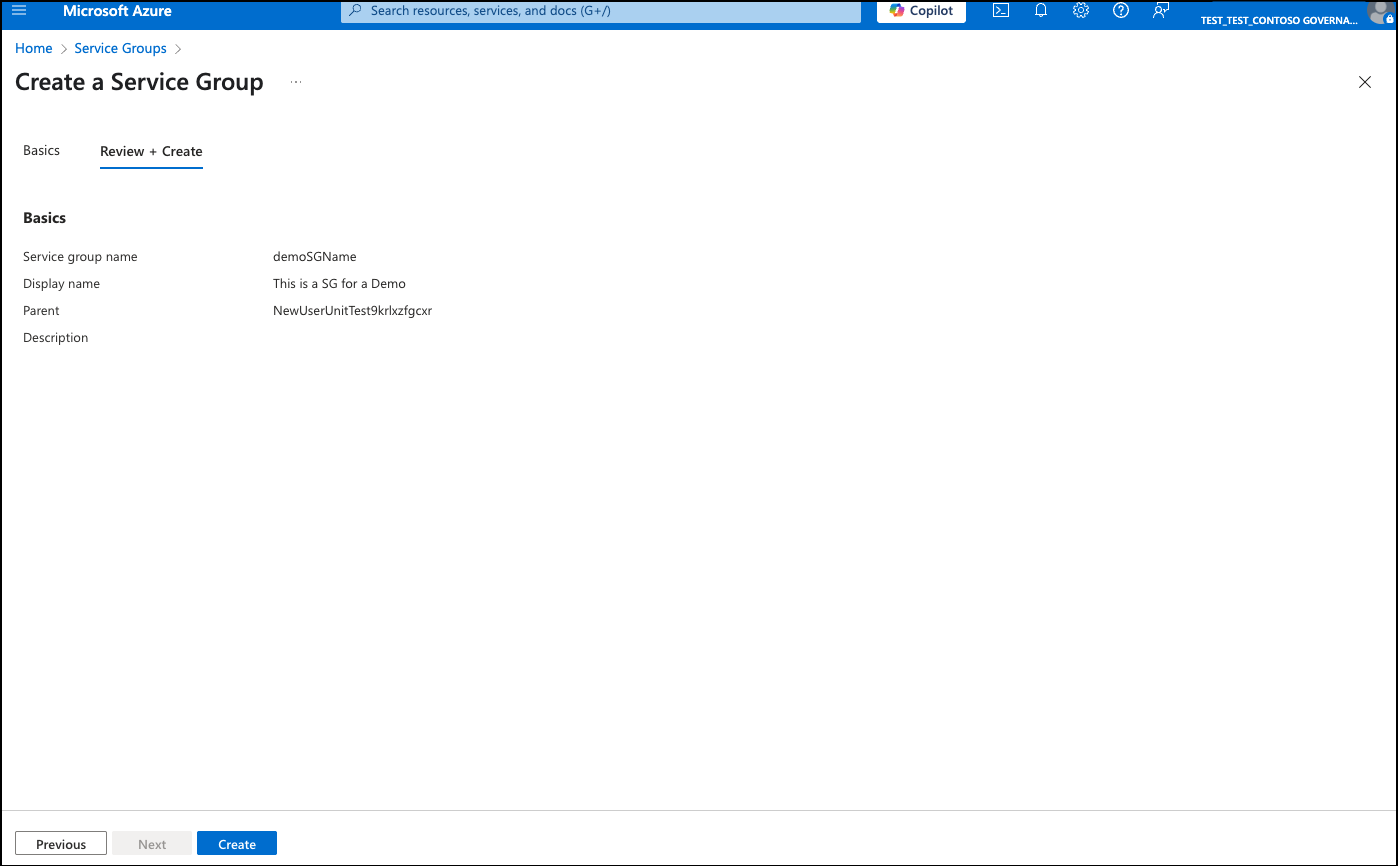
If all information is correct, select Create.
Tip
After creating your service group, the next step is to add members. See Add members to a service group in the portal or Add members using REST API.
Clean up resources
In the top search bar, search for Service Groups and select Service Groups from the results.
Find the service group you want to delete, select the checkbox next to it.
Select the Delete button at the top of the page.
Next steps
In this quickstart, you created a service group. The next step is to add resources, resource groups, or subscriptions as members.