Use the side-by-side migration feature to migrate App Service Environment v2 to App Service Environment v3
Note
The migration feature described in this article is used for side-by-side (different subnet) automated migration of App Service Environment v2 to App Service Environment v3.
If you're looking for information on the in-place migration feature, see Migrate to App Service Environment v3 by using the in-place migration feature. If you're looking for information on manual migration options, see Manual migration options. For help deciding which migration option is right for you, see Migration path decision tree. For more information on App Service Environment v3, see App Service Environment v3 overview.
You can automatically migrate App Service Environment v2 to App Service Environment v3 by using the side-by-side migration feature. To learn more about the migration process and to see if your App Service Environment supports migration at this time, see the overview of the side-by-side migration feature.
Important
We recommend that you use this feature for development environments before migrating any production environments, to avoid unexpected problems. Please provide any feedback related to this article or the feature by using the buttons at the bottom of the page.
Prerequisites
Ensure that you understand how migrating to App Service Environment v3 affects your applications. Review the migration process to understand the process timeline and where and when you need to get involved. Also review the FAQs, which can answer some of your questions.
Ensure that there are no locks on your virtual network, resource groups, resources, or subscription. Locks block platform operations during migration.
Ensure that no Azure policies are blocking actions that are required for the migration, including subnet modifications and Azure App Service resource creations. Policies that block resource modifications and creations can cause migration to get stuck or fail.
Since your App Service Environment v3 is in a different subnet in your virtual network, you need to ensure that you have an available subnet in your virtual network that meets the subnet requirements for App Service Environment v3. The subnet you select must also be able to communicate with the subnet that your existing App Service Environment is in. Ensure there's nothing blocking communication between the two subnets. If you don't have an available subnet, you need to create one before migrating. Creating a new subnet might involve increasing your virtual network address space. For more information, see Create a virtual network and subnet.
Since scaling is blocked during the migration, you should scale your environment to the desired size before starting the migration. If you need to scale your environment after the migration, you can do so once the migration is complete.
Follow the steps described here in order and as written, because you're making Azure REST API calls. We recommend that you use the Azure CLI to make these API calls. For information about other methods, see Azure REST API reference.
For this guide, install the Azure CLI or use Azure Cloud Shell and use a Bash shell.
Note
We recommend that you use a Bash shell to run the commands given in this guide. The commands might not be compatible with PowerShell conventions and escape characters.
Important
During the migration, the Azure portal might show incorrect information about your App Service Environment and your apps. Don't go to the Migration experience in the Azure portal since the side-by-side migration feature isn't available there. We recommend that you use the Azure CLI to check the status of your migration. If you have any questions about the status of your migration or your apps, contact support.
1. Select the subnet for your new App Service Environment v3
Select a subnet in your App Service Environment v3 that meets the subnet requirements for App Service Environment v3. Note the name of the subnet you select. This subnet must be different than the subnet your existing App Service Environment is in.
2. Get your App Service Environment ID
Run the following commands to get your App Service Environment ID and store it as an environment variable. Replace the placeholders for the name and resource groups with your values for the App Service Environment that you want to migrate. ASE_RG and VNET_RG are the same if your virtual network and App Service Environment are in the same resource group.
ASE_NAME=<Your-App-Service-Environment-name>
ASE_RG=<Your-ASE-Resource-Group>
VNET_RG=<Your-VNet-Resource-Group>
ASE_ID=$(az appservice ase show --name $ASE_NAME --resource-group $ASE_RG --query id --output tsv)
3. Validate migration is supported
The following command checks whether your App Service Environment is supported for migration. If you receive an error or if your App Service Environment is in an unhealthy or suspended state, you can't migrate at this time. See the troubleshooting section for descriptions of the potential error messages that you can get. If your environment isn't supported for migration using the side-by-side migration feature or you want to migrate to App Service Environment v3 without using the side-by-side migration feature, see the manual migration options. This command also validates that your App Service Environment is on the supported build version for migration. If your App Service Environment isn't on the supported build version, you need to start the upgrade yourself. For more information on the premigration upgrade, see Validate that migration is supported using the side-by-side migration feature for your App Service Environment.
az rest --method post --uri "${ASE_ID}/NoDowntimeMigrate?phase=Validation&api-version=2022-03-01"
If there are no errors, your migration is supported, and you can continue to the next step.
If you need to start an upgrade to upgrade your App Service Environment to the supported build version, run the following command. Only run this command if you fail the validation step and you're instructed to upgrade your App Service Environment.
az rest --method post --uri "${ASE_ID}/NoDowntimeMigrate?phase=PreMigrationUpgrade&api-version=2022-03-01"
4. Generate outbound IP addresses for your new App Service Environment v3
Create a file called zoneredundancy.json with the following details for your region and zone redundancy selection.
{
    "location":"<region>",
    "Properties": {
        "zoneRedundant": "<true/false>"
    }
}
You can make your new App Service Environment v3 zone redundant if your existing environment is in a region that supports zone redundancy. Zone redundancy can be configured by setting the zoneRedundant property to true. Zone redundancy is an optional configuration. This configuration can only be set during the creation of your new App Service Environment v3 and can't be removed at a later time.
Run the following command to create new outbound IP addresses. This step takes about 15 minutes to complete. Don't scale or make changes to your existing App Service Environment during this time.
az rest --method post --uri "${ASE_ID}/NoDowntimeMigrate?phase=PreMigration&api-version=2022-03-01" --body @zoneredundancy.json
Run the following command to check the status of this step:
az rest --method get --uri "${ASE_ID}?api-version=2022-03-01" --query properties.status
If the step is in progress, you get a status of Migrating. After you get a status of Ready, run the following command to view your new outbound IPs. If you don't see the new IPs immediately, wait a few minutes and try again.
az rest --method get --uri "${ASE_ID}/configurations/networking?api-version=2022-03-01" --query properties.windowsOutboundIpAddresses
5. Update dependent resources with new outbound IPs
By using the new outbound IPs, update any of your resources or networking components to ensure that your new environment functions as intended after migration is complete. It's your responsibility to make any necessary updates.
6. Delegate your App Service Environment subnet
App Service Environment v3 requires the subnet it's in to have a single delegation of Microsoft.Web/hostingEnvironments. Previous versions didn't require this delegation. You need to confirm that your subnet is delegated properly and update the delegation (if necessary) before migrating. You can update the delegation either by running the following command or by going to the subnet in the Azure portal.
az network vnet subnet update --resource-group $VNET_RG --name <subnet-name> --vnet-name <vnet-name> --delegations Microsoft.Web/hostingEnvironments
7. Confirm there are no locks on the virtual network
Virtual network locks block platform operations during migration. If your virtual network has locks, you need to remove them before migrating. If necessary, you can add back the locks after migration is complete.
Locks can exist at three scopes: subscription, resource group, and resource. When you apply a lock at a parent scope, all resources within that scope inherit the same lock. If you have locks applied at the subscription, resource group, or resource scope, you need to remove them before the migration. For more information on locks and lock inheritance, see Lock your resources to protect your infrastructure.
Use the following command to check if your virtual network has any locks:
az lock list --resource-group $VNET_RG --resource <vnet-name> --resource-type Microsoft.Network/virtualNetworks
Delete any existing locks by using the following command:
az lock delete --resource-group $VNET_RG --name <lock-name> --resource <vnet-name> --resource-type Microsoft.Network/virtualNetworks
For related commands to check if your subscription or resource group has locks, see the Azure CLI reference for locks.
8. Prepare your configurations
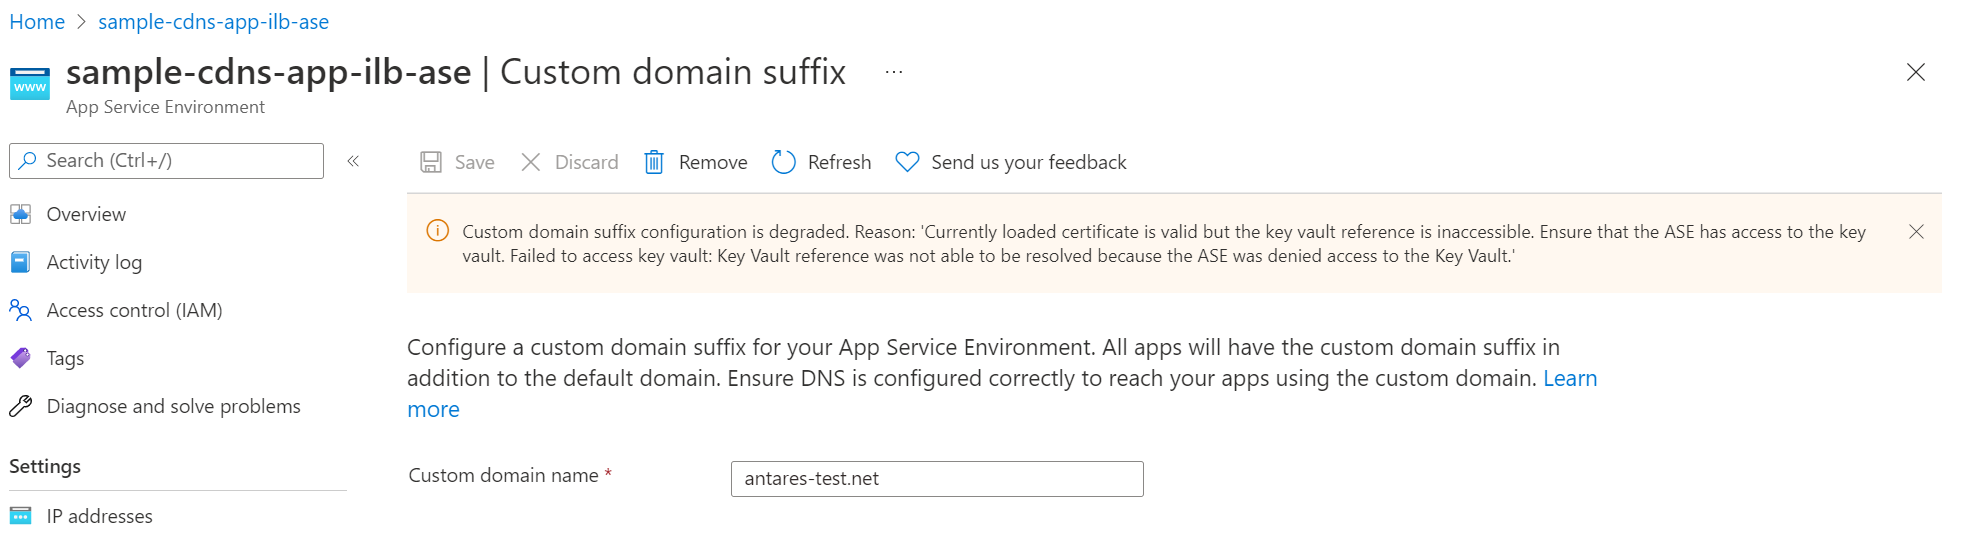
If your existing App Service Environment uses a custom domain suffix, you need to configure one for your new App Service Environment v3 resource during the migration process. Migration fails if you don't configure a custom domain suffix and are using one currently. For more information on App Service Environment v3 custom domain suffixes, including requirements, step-by-step instructions, and best practices, see Custom domain suffix for App Service Environments.
Note
If you're configuring a custom domain suffix, when you're adding the network permissions on your Azure key vault, be sure that your key vault allows access from your App Service Environment v3's new subnet.
To set these configurations, including identifying the subnet you selected earlier, create another file called parameters.json with the following details based on your scenario. Be sure to use the new subnet that you selected for your new App Service Environment v3. Don't include the properties for a custom domain suffix if this feature doesn't apply to your migration. Pay attention to the value of the zoneRedundant property and set it to the same value you used in the outbound IP generation step. You must use the same value for zone redundancy that you used in the outbound IP generation step.
If you're migrating without a custom domain suffix, use this code:
{
    "Properties": {
        "VirtualNetwork": {
            "Id": "/subscriptions/<subscription-id>/resourceGroups/<resource-group-name>/providers/Microsoft.Network/virtualNetworks/<virtual-network-name>/subnets/<subnet-name>"
        },
        "zoneRedundant": "<true/false>"
    }
}
If you're using a user assigned managed identity for your custom domain suffix configuration, use this code:
{
    "Properties": {
        "VirtualNetwork": {
            "Id": "/subscriptions/<subscription-id>/resourceGroups/<resource-group-name>/providers/Microsoft.Network/virtualNetworks/<virtual-network-name>/subnets/<subnet-name>"
        },
        "zoneRedundant": "<true/false>",
        "customDnsSuffixConfiguration": {
            "dnsSuffix": "internal.contoso.com",
            "certificateUrl": "https://contoso.vault.azure.net/secrets/myCertificate",
            "keyVaultReferenceIdentity": "/subscriptions/00000000-0000-0000-0000-000000000000/resourcegroups/asev3-migration/providers/Microsoft.ManagedIdentity/userAssignedIdentities/ase-managed-identity"
        }
    }
}
If you're using a system assigned managed identity for your custom domain suffix configuration, use this code:
{
    "properties": {
        "VirtualNetwork": {
            "Id": "/subscriptions/<subscription-id>/resourceGroups/<resource-group-name>/providers/Microsoft.Network/virtualNetworks/<virtual-network-name>/subnets/<subnet-name>"
        },
        "zoneRedundant": "<true/false>",
        "customDnsSuffixConfiguration": {
            "dnsSuffix": "internal.contoso.com",
            "certificateUrl": "https://contoso.vault.azure.net/secrets/myCertificate",
            "keyVaultReferenceIdentity": "SystemAssigned"
        }
    }
}
9. Migrate to App Service Environment v3 and check status
After you complete all of the preceding steps, you can start the migration. Make sure that you understand the implications of migration.
This step takes three to six hours complete. During that time, there's no application downtime. Scaling, deployments, and modifications to your existing App Service Environment are blocked during this step.
Run the following command to start the migration:
az rest --method post --uri "${ASE_ID}/NoDowntimeMigrate?phase=HybridDeployment&api-version=2022-03-01" --body @parameters.json
Run the following command to check the status of your migration:
az rest --method get --uri "${ASE_ID}?api-version=2022-03-01" --query properties.subStatus
After you get a status of MigrationPendingDnsChange, migration is done, and you have an App Service Environment v3 resource. Your apps are now running in your new environment and in your old environment.
Get the details of your new environment by running the following command:
az appservice ase show --name $ASE_NAME --resource-group $ASE_RG
Important
During the migration as well as during the MigrationPendingDnsChange step, the Azure portal shows incorrect information about your App Service Environment and your apps. Use the Azure CLI to check the status of your migration. If you have any questions about the status of your migration or your apps, contact support.
Note
If your migration includes a custom domain suffix, your custom domain suffix configuration might show as degraded once the migration is complete due to a known bug. Your App Service Environment should still function as expected. The degraded status should resolve itself within 6-8 hours. If the configuration is degraded after 8 hours or if your custom domain suffix isn't functioning, contact support.
10. Get the inbound IP addresses for your new App Service Environment v3 and update dependent resources
You have two App Service Environments at this stage in the migration process. Your apps are running in both environments. You need to update any dependent resources to use the new IP inbound address for your new App Service Environment v3. For internal facing (ILB) App Service Environments, you need to update your private DNS zones to point to the new inbound IP address.
You can get the new inbound IP address for your new App Service Environment v3 by running the following command that corresponds to your App Service Environment load balancer type. It's your responsibility to make any necessary updates.
For ILB App Service Environments, get the private inbound IP address by running the following command:
az rest --method get --uri "${ASE_ID}?api-version=2022-03-01" --query properties.networkingConfiguration.internalInboundIpAddresses
For ELB App Service Environments, get the public inbound IP address by running the following command:
az rest --method get --uri "${ASE_ID}?api-version=2022-03-01" --query properties.networkingConfiguration.externalInboundIpAddresses
11. Redirect customer traffic, validate your App Service Environment v3, and complete migration
This step is your opportunity to test and validate your new App Service Environment v3. By default, traffic is sent to your App Service Environment v2 front ends. If you're using an ILB App Service Environment v3, you can test your App Service Environment v3 front ends by updating your private DNS zone with the new inbound IP address. If you're using an ELB App Service Environment v3, the process for testing is dependent on your specific network configuration. One simple method to test for ELB environments is to update your hosts file to use your new App Service Environment v3 inbound IP address. If you have custom domains assigned to your individual apps, you can alternatively update their DNS to point to the new inbound IP. Testing this change allows you to fully validate your App Service Environment v3 before initiating the final step of the migration where your old App Service Environment is deleted. If you're able to access your apps without issues that means you're ready to complete the migration.
Once you confirm your apps are working as expected, you can redirect customer traffic to your new App Service Environment v3 by running the following command. This command also deletes your old environment. You have 14 days to complete this step. If you don't complete this step in 14 days, your migration is automatically reverted back to an App Service Environment v2. If you need more than 14 days to complete this step, contact support.
If you find any issues or decide at this point that you no longer want to proceed with the migration, contact support to revert the migration. Don't run the DNS change command if you need to revert the migration. For more information, see Revert migration.
az rest --method post --uri "${ASE_ID}/NoDowntimeMigrate?phase=DnsChange&api-version=2022-03-01"
Run the following command to check the status of this step:
az rest --method get --uri "${ASE_ID}?api-version=2022-03-01" --query properties.subStatus
During this step, you get a status of CompletingMigration. When you get a status of MigrationCompleted, the traffic redirection step is done and your migration is complete.
Next steps
Feedback
Coming soon: Throughout 2024 we will be phasing out GitHub Issues as the feedback mechanism for content and replacing it with a new feedback system. For more information see: https://aka.ms/ContentUserFeedback.
Submit and view feedback for