Note
Access to this page requires authorization. You can try signing in or changing directories.
Access to this page requires authorization. You can try changing directories.
Introduction
Historically, Application Gateway v2 SKUs, and to a certain extent v1, have required public IP addressing to enable management of the service. This requirement has imposed several limitations in using fine-grain controls in Network Security Groups and Route Tables. Specifically, the following challenges have been observed:
- All Application Gateways v2 deployments must contain public facing frontend IP configuration to enable communication to the Gateway Manager service tag.
- Network Security Group associations require rules to allow inbound access from GatewayManager and Outbound access to Internet.
- When introducing a default route (0.0.0.0/0) to forward traffic anywhere other than the Internet, metrics, monitoring, and updates of the gateway result in a failed status.
Application Gateway v2 can now address each of these items to further eliminate risk of data exfiltration and control privacy of communication from within the virtual network. These changes include the following capabilities:
- Private IP address only frontend IP configuration
- No public IP address resource required
- Elimination of inbound traffic from GatewayManager service tag via Network Security Group
- Ability to define a Deny All outbound Network Security Group (NSG) rule to restrict egress traffic to the Internet
- Ability to override the default route to the Internet (0.0.0.0/0)
- DNS resolution via defined resolvers on the virtual network Learn more, including private link private DNS zones.
Each of these features can be configured independently. For example, a public IP address can be used to allow traffic inbound from the Internet and you can define a Deny All outbound rule in the network security group configuration to prevent data exfiltration.
Onboard to the feature
The functionality of the new controls of private IP frontend configuration, control over NSG rules, and control over route tables, are generally available and supported in production. To use the features, you must opt in to the experience using the Azure portal, PowerShell, CLI, or REST API.
When enrolled, all new Application Gateways provision with the ability to define any combination of the NSG, Route Table, or private IP configuration features. If you wish to opt out from the new functionality, you can do so by unregistering from the feature.
Register the feature
Use the following steps to enroll into the feature for the enhanced Application Gateway network controls via the Azure portal:
Sign in to the Azure portal.
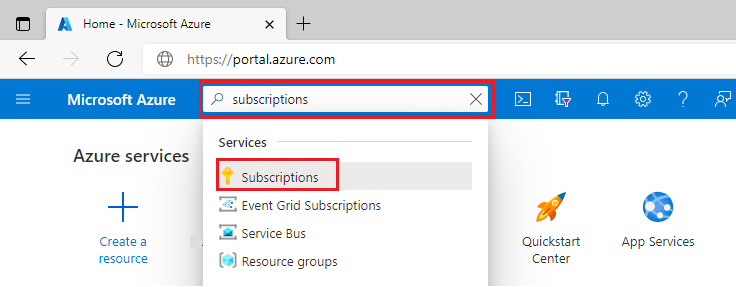
In the search box, enter subscriptions and select Subscriptions.
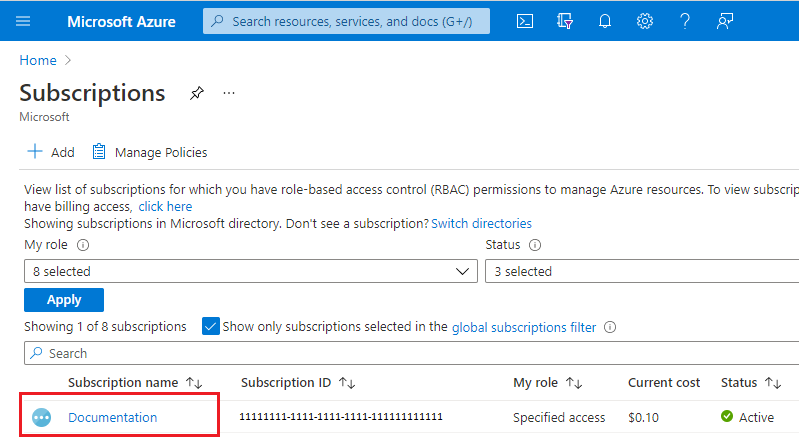
Select the link for your subscription's name.
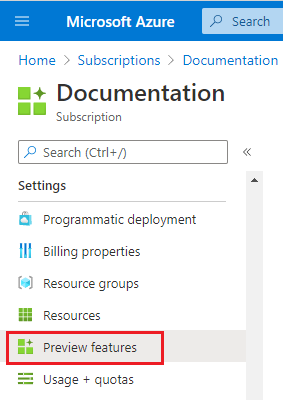
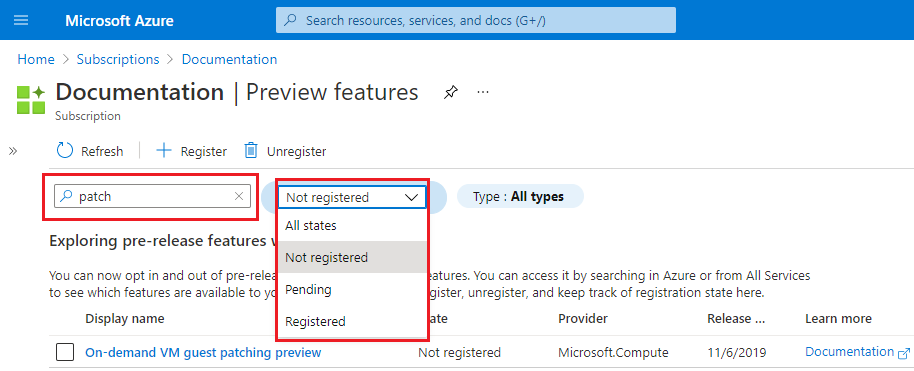
From the left menu, under Settings select Preview features.
You see a list of available features and your current registration status.
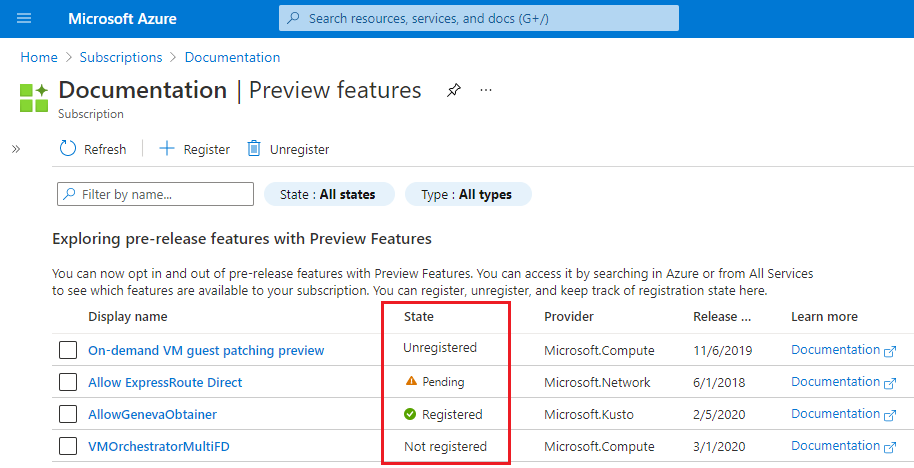
From Preview features type into the filter box EnableApplicationGatewayNetworkIsolation, check the feature, and click Register.
Note
Feature registration may take up to 30 minutes to transition from Registering to Registered status.
Unregister the feature
To opt out of the feature for the enhanced Application Gateway network controls via Portal, use the following steps:
Sign in to the Azure portal.
In the search box, enter subscriptions and select Subscriptions.
Select the link for your subscription's name.
From the left menu, under Settings select Preview features.
You see a list of available features and your current registration status.
From Preview features type into the filter box EnableApplicationGatewayNetworkIsolation, check the feature, and click Unregister.
Configuration of network controls
After registering the feature, configuration of NSG, Route Table, and private IP address frontend configuration can be performed using any methods. For example: REST API, ARM Template, Bicep deployment, Terraform, PowerShell, CLI, or Portal.
Application Gateway Subnet
Application Gateway Subnet is the subnet within the Virtual Network where the Application Gateway Resources will be deployed. In the Frontend Private Ip configuration, is important that this subnet can reach privately the resources that want to connect to your exposed app or site.
Note
As of May 5, 2025, new and existing deployments of Private Application Gateway require Subnet Delegation to Microsoft.Network/applicationGateways.
Please follow these steps for configuring Subnet Delegation.
Outbound Internet connectivity
Application Gateway deployments that contain only a private frontend IP configuration (do not have a public IP frontend configuration associated to a request routing rule) aren't able to egress traffic destined to the Internet. This configuration affects communication to backend targets that are publicly accessible via the Internet.
To enable outbound connectivity from your Application Gateway to an Internet facing backend target, you can utilize Virtual Network NAT or forward traffic to a virtual appliance that has access to the Internet.
Virtual Network NAT offers control over what IP address or prefix should be used as well as configurable idle-timeout. To configure, create a new NAT Gateway with a public IP address or public prefix and associate it with the subnet containing Application Gateway.
If a virtual appliance is required for Internet egress, see the route table control section in this document.
Common scenarios where public IP usage is required:
- Communication to key vault without use of private endpoints or service endpoints
- Outbound communication isn't required for pfx files uploaded to Application Gateway directly
- Communication to backend targets via Internet
- Communication to Internet facing CRL or OCSP endpoints
Network Security Group Control
Network security groups associated to an Application Gateway subnet no longer require inbound rules for GatewayManager, and they don't require outbound access to the Internet. The only required rule is Allow inbound from AzureLoadBalancer to ensure health probes can reach the gateway.
The following configuration is an example of the most restrictive set of inbound rules, denying all traffic but Azure health probes. In addition to the defined rules, explicit rules are defined to allow client traffic to reach the listener of the gateway.

Note
Application Gateway will display an alert asking to ensure the Allow LoadBalanceRule is specified if a DenyAll rule inadvertently restricts access to health probes.
Example scenario
This example walks through creation of an NSG using the Azure portal with the following rules:
- Allow inbound traffic to port 80 and 8080 to Application Gateway from client requests originating from the Internet
- Deny all other inbound traffic
- Allow outbound traffic to a backend target in another virtual network
- Allow outbound traffic to a backend target that is Internet accessible
- Deny all other outbound traffic
First, create a network security group. This security group contains your inbound and outbound rules.
Inbound rules
Three inbound default rules are already provisioned in the security group. See the following example:

Next, create the following four new inbound security rules:
- Allow inbound port 80, tcp, from Internet (any)
- Allow inbound port 8080, tcp, from Internet (any)
- Allow inbound from AzureLoadBalancer
- Deny Any Inbound
To create these rules:
- Select Inbound security rules
- Select Add
- Enter the following information for each rule into the Add inbound security rule pane.
- When you've entered the information, select Add to create the rule.
- Creation of each rule takes a moment.
| Rule # | Source | Source service tag | Source port ranges | Destination | Service | Dest port ranges | Protocol | Action | Priority | Name |
|---|---|---|---|---|---|---|---|---|---|---|
| 1 | Any | * | Any | HTTP | 80 | TCP | Allow | 1028 | AllowWeb | |
| 2 | Any | * | Any | Custom | 8080 | TCP | Allow | 1029 | AllowWeb8080 | |
| 3 | Service Tag | AzureLoadBalancer | * | Any | Custom | * | Any | Allow | 1045 | AllowLB |
| 4 | Any | * | Any | Custom | * | Any | Deny | 4095 | DenyAllInbound |
Select Refresh to review all rules when provisioning is complete.

Outbound rules
Three default outbound rules with priority 65000, 65001, and 65500 are already provisioned.
Create the following three new outbound security rules:
- Allow TCP 443 from 10.10.4.0/24 to backend target 203.0.113.1
- Allow TCP 80 from source 10.10.4.0/24 to destination 10.13.0.4
- DenyAll traffic rule
These rules are assigned a priority of 400, 401, and 4096, respectively.
Note
- 10.10.4.0/24 is the Application Gateway subnet address space.
- 10.13.0.4 is a virtual machine in a peered VNet.
- 203.0.113.1 is a backend target VM.
To create these rules:
- Select Outbound security rules
- Select Add
- Enter the following information for each rule into the Add outbound security rule pane.
- When you've entered the information, select Add to create the rule.
- Creation of each rule takes a moment.
| Rule # | Source | Source IP addresses/CIDR ranges | Source port ranges | Destination | Destination IP addresses/CIDR ranges | Service | Dest port ranges | Protocol | Action | Priority | Name |
|---|---|---|---|---|---|---|---|---|---|---|---|
| 1 | IP Addresses | 10.10.4.0/24 | * | IP Addresses | 203.0.113.1 | HTTPS | 443 | TCP | Allow | 400 | AllowToBackendTarget |
| 2 | IP Addresses | 10.10.4.0/24 | * | IP Addresses | 10.13.0.4 | HTTP | 80 | TCP | Allow | 401 | AllowToPeeredVnetVM |
| 3 | Any | * | Any | Custom | * | Any | Deny | 4096 | DenyAll |
Select Refresh to review all rules when provisioning is complete.

Associate NSG to the subnet
The last step is to associate the network security group to the subnet that contains your Application Gateway.
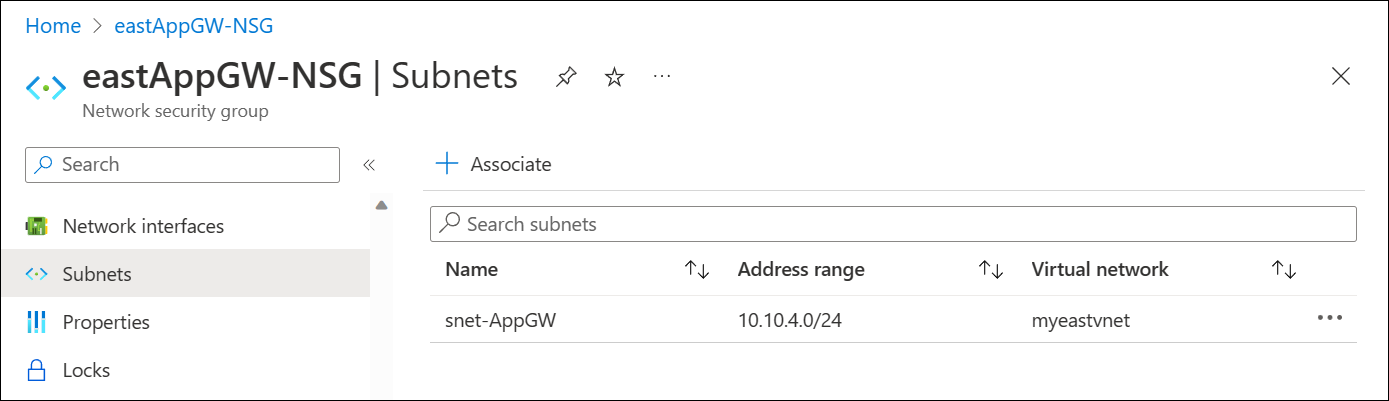
Result:

Important
Be careful when you define DenyAll rules, as you might inadvertently deny inbound traffic from clients to which you intend to allow access. You might also inadvertently deny outbound traffic to the backend target, causing backend health to fail and produce 5XX responses.
Route Table Control
In the current offering of Application Gateway, association of a route table with a rule (or creation of rule) defined as 0.0.0.0/0 with a next hop as virtual appliance is unsupported to ensure proper management of Application Gateway.
After registration of the feature, the ability to forward traffic to a virtual appliance is now possible via definition of a route table rule that defines 0.0.0.0/0 with a next hop to Virtual Appliance.
Forced Tunneling or learning of 0.0.0.0/0 route through BGP advertising does not affect Application Gateway health, and is honored for traffic flow. This scenario can be applicable when using VPN, ExpressRoute, Route Server, or Virtual WAN.
Example scenario
In the following example, we create a route table and associate it to the Application Gateway subnet to ensure outbound Internet access from the subnet will egress from a virtual appliance. At a high level, the following design is summarized in Figure 1:
- The Application Gateway is in spoke virtual network
- There is a network virtual appliance (a virtual machine) in the hub network
- A route table with a default route (0.0.0.0/0) to the virtual appliance is associated to Application Gateway subnet
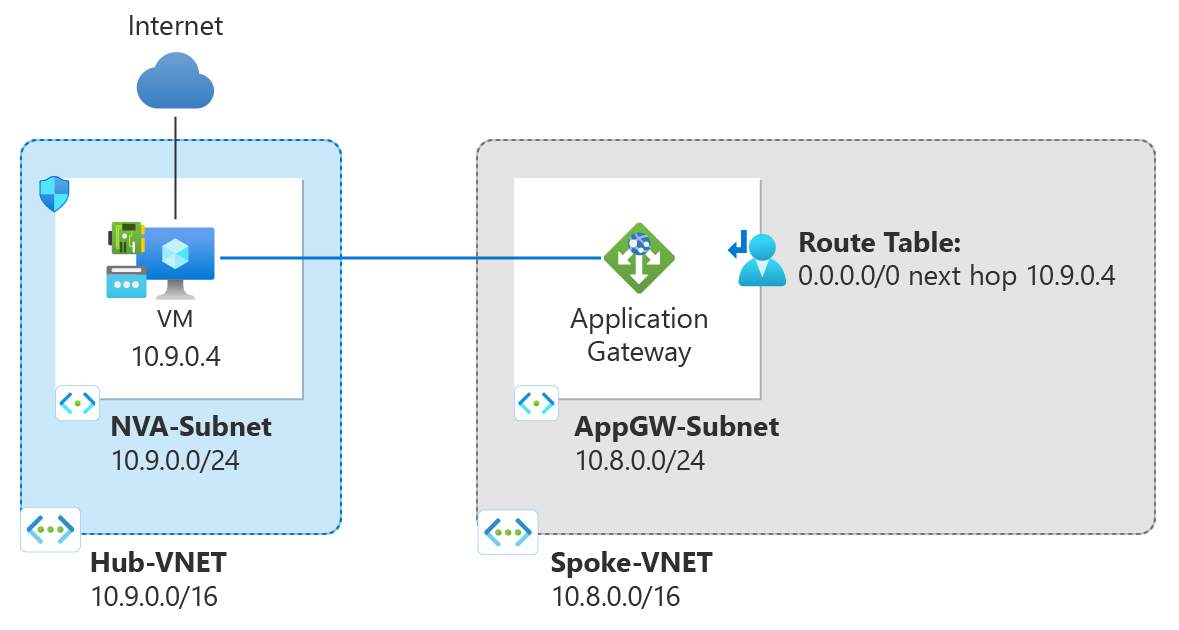
Figure 1: Internet access egress through virtual appliance
To create a route table and associate it to the Application Gateway subnet:
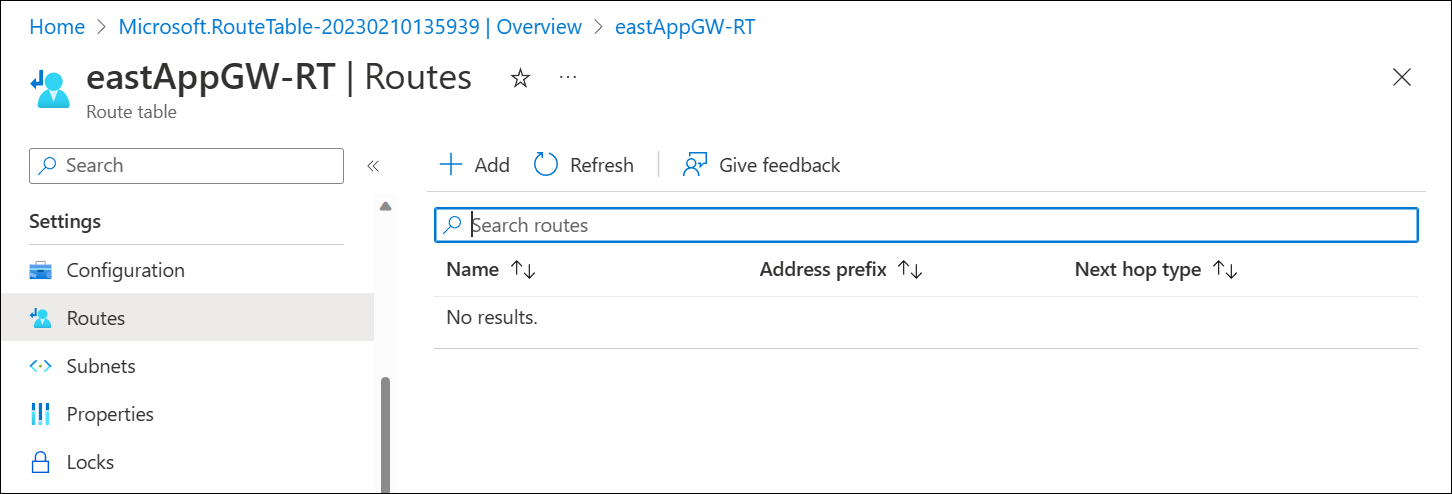
- Select Routes and create the next hop rule for 0.0.0.0/0 and configure the destination to be the IP address of your VM:

- Select Subnets and associate the route table to the Application Gateway subnet:

- Validate that traffic is passing through the virtual appliance.
Limitations / Known Issues
The following limitations apply:
Private link configuration
Private link configuration support for tunneling traffic through private endpoints to Application Gateway is unsupported with private only gateway.
WAF Rate Limiting
Rate limiting custom rules for Application Gateway WAF v2 are not currently supported.
Private IP frontend configuration only with AGIC
AGIC v1.7 must be used to introduce support for private frontend IP only.
Private Endpoint connectivity via Global VNet Peering
If Application Gateway has a backend target or key vault reference to a private endpoint located in a VNet that is accessible via global VNet peering, traffic is dropped, resulting in an unhealthy status.
Network Watcher integration
Connection troubleshoots and NSG diagnostics return an error when running check and diagnostic tests.
Coexisting v2 Application Gateways created prior to enablement of enhanced network control
If a subnet shares Application Gateway v2 deployments that were created both prior to and after enablement of the enhanced network control functionality, Network Security Group (NSG) and Route Table functionality is limited to the prior gateway deployment. Application gateways provisioned prior to enablement of the new functionality must either be reprovisioned, or newly created gateways must use a different subnet to enable enhanced network security group and route table features.
- If a gateway deployed prior to enablement of the new functionality exists in the subnet, you might see errors such as:
For routes associated to subnet containing Application Gateway V2, please ensure '0.0.0.0/0' uses Next Hop Type as 'Internet'when adding route table entries. - When adding network security group rules to the subnet, you might see:
Failed to create security rule 'DenyAnyCustomAnyOutbound'. Error: Network security group \<NSG-name\> blocks outgoing Internet traffic on subnet \<AppGWSubnetId\>, associated with Application Gateway \<AppGWResourceId\>. This isn't permitted for Application Gateways that have fast update enabled or have V2 Sku.
Next steps
- See Azure security baseline for Application Gateway for more security best practices.