How to create alerts for Change Tracking and Inventory
Alerts in Azure proactively notify you of results from runbook jobs, service health issues, or other scenarios related to your Automation account. Azure Automation does not include pre-configured alert rules, but you can create your own based on data that it generates. This article provides guidance on creating alert rules based on changes identified by Change Tracking and Inventory.
If you're not familiar with Azure Monitor alerts, see Overview of alerts in Microsoft Azure before you start. To learn more about alerts that use log queries, see Log alerts in Azure Monitor.
Create alert
The following example shows that the file c:\windows\system32\drivers\etc\hosts has been modified on a machine. This file is important because Windows uses it to resolve host names to IP addresses. This operation takes precedence over DNS, and might result in connectivity issues. It can also lead to redirection of traffic to malicious or otherwise dangerous websites.

Let's use this example to discuss the steps for creating alerts on a change.
On the Change tracking page from your Virtual Machine, select Log Analytics.
In the Logs search, look for content changes to the hosts file with the query
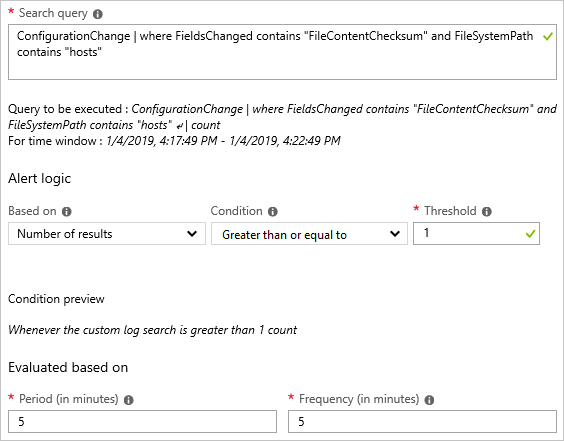
ConfigurationChange | where FieldsChanged contains "FileContentChecksum" and FileSystemPath contains "hosts". This query looks for content changes for files with fully qualified path names containing the wordhosts. You can also ask for a specific file by changing the path portion to its fully qualified form, for example, usingFileSystemPath == "c:\windows\system32\drivers\etc\hosts".After the query returns its results, select New alert rule in the log search to open the Alert creation page. You can also navigate to this page through Azure Monitor in the Azure portal.
Check your query again and modify the alert logic. In this case, you want the alert to be triggered if there's even one change detected across all the machines in the environment.
After the alert logic is set, assign action groups to perform actions in response to triggering of the alert. In this case, we're setting up emails to be sent and an IT Service Management (ITSM) ticket to be created.
Follow the steps below to set up alerts to let you know the status of an update deployment. If you are new to Azure alerts, see Azure Alerts overview.
Configure action groups for your alerts
Once you have your alerts configured, you can set up an action group, which is a group of actions to use across multiple alerts. The actions can include email notifications, runbooks, webhooks, and much more. To learn more about action groups, see Create and manage action groups.
Select an alert and then select Create New under Action Groups.
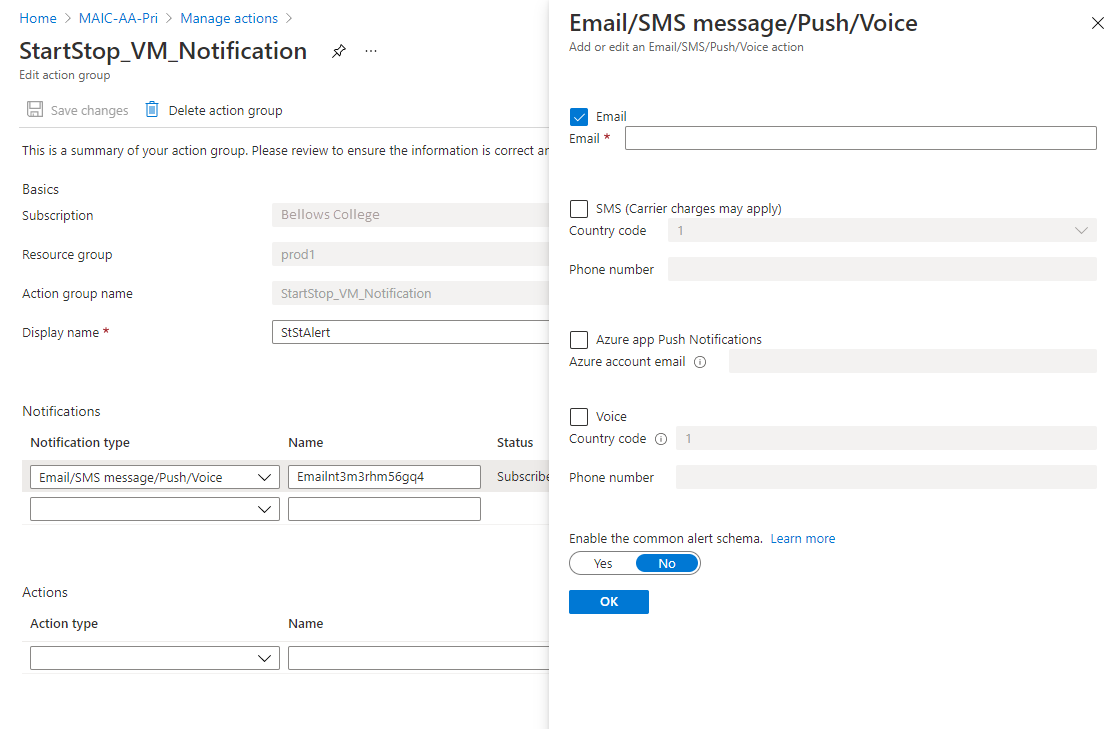
Enter a full name and a short name for the action group. Update Management uses the short name when sending notifications using the specified group.
Under Actions, enter a name that specifies the action, for example, Email Notification.
For Action Type, select the appropriate type, for example, Email/SMS message/Push/Voice.
Select the pencil icon to edit the action details.
Fill in the pane for your action type. For example, if using Email/SMS message/Push/Voice to send an email, enter an action name, select the Email checkbox, enter a valid email address, and then select OK.
In the Add action group pane, select OK.
For an alert email, you can customize the email subject. Select Customize actions under Create rule, then select Email subject.
When you're finished, select Create alert rule.
Next steps
Learn more about alerts in Azure Monitor.
Learn about log queries to retrieve and analyze data from a Log Analytics workspace.
Analyze usage in Log Analytics workspace describes how to analyze and alert on your data usage.
Feedback
Coming soon: Throughout 2024 we will be phasing out GitHub Issues as the feedback mechanism for content and replacing it with a new feedback system. For more information see: https://aka.ms/ContentUserFeedback.
Submit and view feedback for