Manage your Azure Automation account
After you enable an Azure Automation account to help automate IT or business process, or enable its other features to support operations management of your Azure and non-Azure machines such as Update Management, you may decide to stop using the Automation account. If you have enabled features that depend on integration with an Azure Monitor Log Analytics workspace, there are more steps required to complete this action.
This article tells you how to completely remove your Automation account through the Azure portal, using Azure PowerShell, the Azure CLI, or the REST API and restore your deleted Azure Automation account.
Delete your Azure Automation account
Removing your Automation account can be done using one of the following methods based on the supported deployment models:
Delete the resource group containing the Automation account.
Delete the resource group containing the Automation account and linked Azure Monitor Log Analytics workspace, if:
- The account and workspace is dedicated to supporting Update Management, Change Tracking, and Inventory, and/or Start/Stop VMs during off-hours.
- The account is dedicated to process automation and integrated with a workspace to send runbook job status and job streams.
Unlink the Log Analytics workspace from the Automation account and delete the Automation account.
Delete the feature from your linked workspace, unlink the account from the workspace, and then delete the Automation account.
Prerequisite
Verify there aren't any Resource Manager locks applied at the subscription, resource group, or resource, which prevents accidental deletion or modification of critical resources. If you've deployed the Start/Stop VMs during off-hours solution, it sets the lock level to CanNotDelete against several dependent resources in the Automation account (specifically its runbooks and variables). Remove any locks before deleting the Automation account.
Note
If you receive an error message similar to: The link cannot be updated or deleted because it is linked to Update Management and/or ChangeTracking Solutions, then your Automation account is linked to a Log Analytics workspace with either the Update Management and/or Change Tracking and Inventory features enabled. For more information, see Delete a shared capability Automation account, below.
Delete the dedicated resource group
To delete your Automation account, and also the Log Analytics workspace if linked to the account, created in the same resource group dedicated to the account, follow the steps outlined in the Azure Resource Manager resource group and resource deletion article.
Delete a standalone Automation account
If your Automation account isn't linked to a Log Analytics workspace, perform the following steps to delete it.
Sign in to Azure at https://portal.azure.com.
In the Azure portal, navigate to Automation Accounts.
Open your Automation account and select Delete from the menu.
While the information is verified and the account is deleted, you can track the progress under Notifications, chosen from the menu.
Delete a standalone Automation account linked to workspace
If your Automation account is linked to a Log Analytics workspace to collect job streams and job logs, perform the following steps to delete the account.
There are two options for unlinking the Log Analytics workspace from your Automation account. You can perform this process from the Automation account or from the linked workspace.
To unlink from your Automation account, perform the following steps.
In the Azure portal, navigate to Automation Accounts.
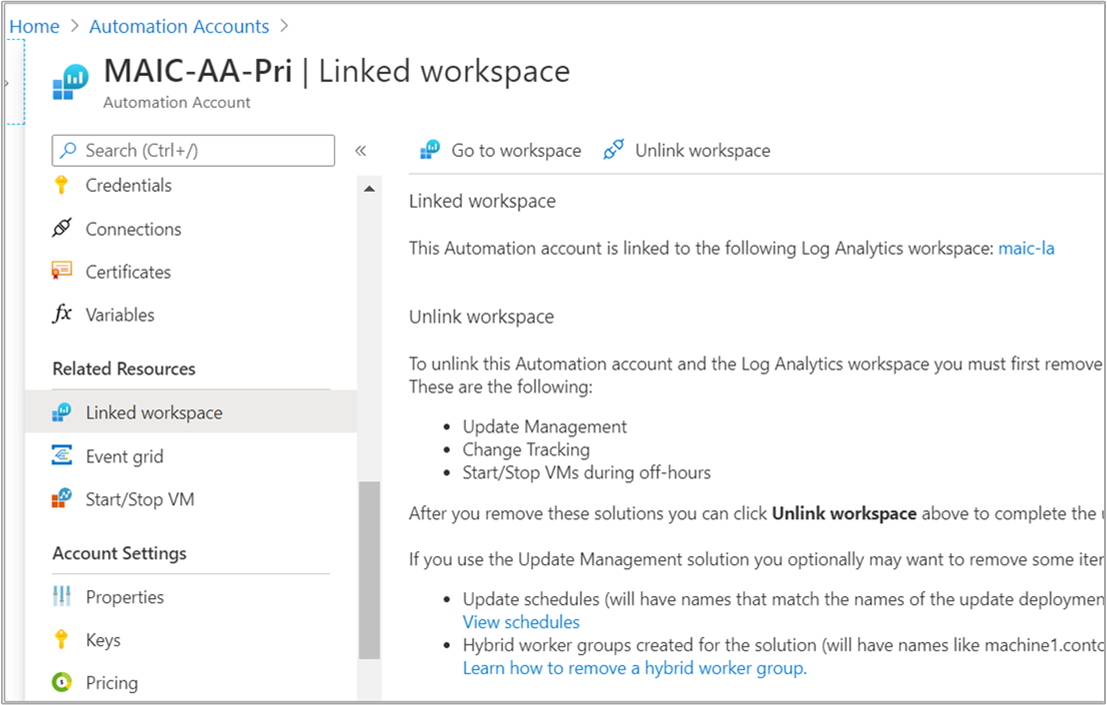
Open your Automation account and select Linked workspace under Related Resources on the left.
On the Unlink workspace page, select Unlink workspace, and respond to prompts.
While it attempts to unlink the Log Analytics workspace, you can track the progress under Notifications from the menu.
To unlink from the workspace, perform the following steps.
In the Azure portal, navigate to Log Analytics workspaces.
From the workspace, select Automation Account under Related Resources.
On the Automation Account page, select Unlink account, and respond to prompts.
While it attempts to unlink the Automation account, you can track the progress under Notifications from the menu.
After the Automation account is successfully unlinked from the workspace, perform the steps in the standalone Automation account section to delete the account.
Delete a shared capability Automation account
To delete your Automation account linked to a Log Analytics workspace in support of Update Management, Change Tracking and Inventory, and/or Start/Stop VMs during off-hours, perform the following steps.
Step 1: Delete the solution from the linked workspace
Sign in to Azure at https://portal.azure.com.
Navigate to your Automation account, and select Linked workspace under Related resources.
Select Go to workspace.
Select Solutions under General.
On the Solutions page, select one of the following based on the feature(s) deployed in the account:
- For Start/Stop VMs during off-hours, select Start-Stop-VM[workspace name].
- For Update Management, select Updates(workspace name).
- For Change Tracking and Inventory, select ChangeTracking(workspace name).
On the Solution page, select Delete from the menu. If more than one of the above listed features are deployed to the Automation account and linked workspace, you need to select and delete each one before proceeding.
While the information is verified and the feature is deleted, you can track the progress under Notifications, chosen from the menu. You're returned to the Solutions page after the removal process.
Step 2: Unlink workspace from Automation account
There are two options for unlinking the Log Analytics workspace from your Automation account. You can perform this process from the Automation account or from the linked workspace.
To unlink from your Automation account, perform the following steps.
In the Azure portal, navigate to Automation Accounts.
Open your Automation account and select Linked workspace under Related Resources on the left.
On the Unlink workspace page, select Unlink workspace, and respond to prompts.
While it attempts to unlink the Log Analytics workspace, you can track the progress under Notifications from the menu.
To unlink from the workspace, perform the following steps.
In the Azure portal, navigate to Log Analytics workspaces.
From the workspace, select Automation Account under Related Resources.
On the Automation Account page, select Unlink account, and respond to prompts.
While it attempts to unlink the Automation account, you can track the progress under Notifications from the menu.
Step 3: Delete Automation account
After the Automation account is successfully unlinked from the workspace, perform the steps in the standalone Automation account section to delete the account.
Restore a deleted Automation account
You can recover a deleted automation account from Azure portal.
To recover an Automation account, ensure that the following conditions are met:
- You've created the Automation account with the Azure Resource Manager deployment model and deleted within the past 30 days.
- Before you attempt to recover a deleted Automation account, ensure that resource group for that account exists.
Note
- If the resource group of the Automation account is deleted, to recover, you must recreate the resource group with the same name.
- Though the resource group isn't present, you can see the Automation account in the deleted list. If the resource group isn't present, the account restore operation fails with the error Account restore failed.
Recover a deleted Automation account
Sign in to the Azure portal.
Go to your Automation account.
On the Automation Accounts page, select Manage deleted accounts.

In the Manage deleted automation accounts pane, select Subscription from the drop-down list.
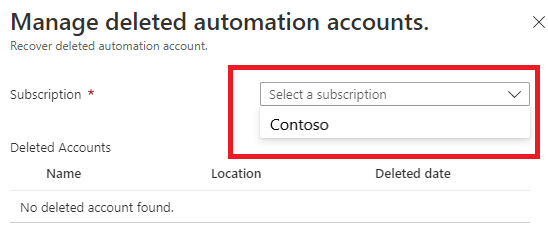
Deleted accounts list in that subscription is displayed.
Select the checkbox for the accounts you want to restore and click Recover.
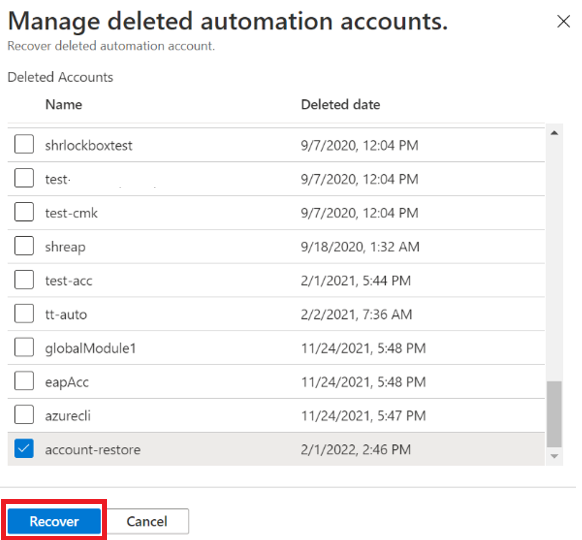
A notification appears to confirm that account is restored.


Next steps
To create an Automation account from the Azure portal, see Create a standalone Azure Automation account. If you prefer to create your account using a template, see Create an Automation account using an Azure Resource Manager template.
Feedback
Coming soon: Throughout 2024 we will be phasing out GitHub Issues as the feedback mechanism for content and replacing it with a new feedback system. For more information see: https://aka.ms/ContentUserFeedback.
Submit and view feedback for