Configure failover group - portal
This article explains how to configure disaster recovery for SQL Managed Instance enabled by Azure Arc with Azure portal. Before you proceed, review the information and prerequisites in SQL Managed Instance enabled by Azure Arc - disaster recovery.
Prerequisites
The following prerequisites must be met before setting up failover groups between two instances of SQL Managed Instance enabled by Azure Arc:
- An Azure Arc data controller and an Arc enabled SQL managed instance provisioned at the primary site with
--license-typeas one ofBasePriceorLicenseIncluded. - An Azure Arc data controller and an Arc enabled SQL managed instance provisioned at the secondary site with identical configuration as the primary in terms of:
- CPU
- Memory
- Storage
- Service tier
- Collation
- Other instance settings
- The instance at the secondary site requires
--license-typeasDisasterRecovery. This instance needs to be new, without any user objects.
Note
- It is important to specify the
--license-typeduring the managed instance creation. This will allow the DR instance to be seeded from the primary instance in the primary data center. Updating this property post deployment will not have the same effect.
Deployment process
To set up an Azure failover group between two instances, complete the following steps:
- Create custom resource for distributed availability group at the primary site
- Create custom resource for distributed availability group at the secondary site
- Copy the binary data from the mirroring certificates
- Set up the distributed availability group between the primary and secondary sites
either in
syncmode orasyncmode
The following image shows a properly configured distributed availability group:
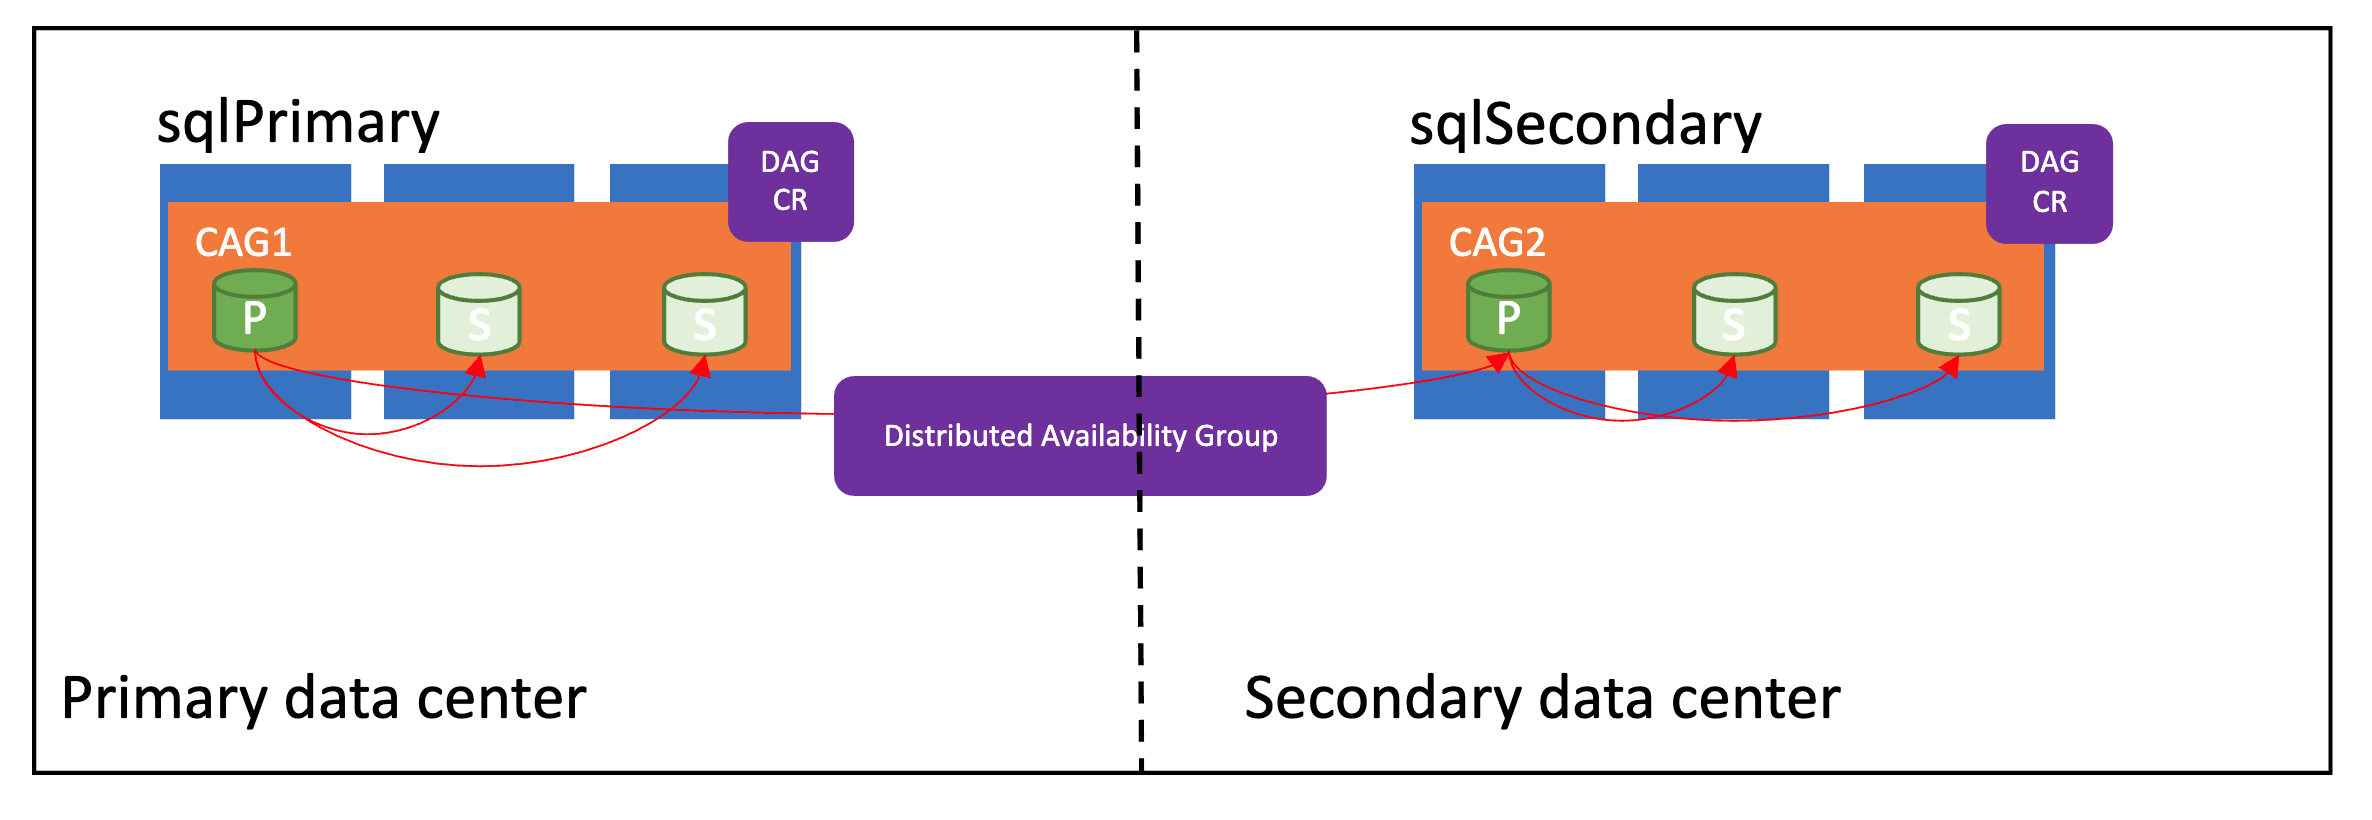
Synchronization modes
Failover groups in Azure Arc data services support two synchronization modes - sync and async. The synchronization mode directly impacts how the data is synchronized between the instances, and potentially the performance on the primary managed instance.
If primary and secondary sites are within a few miles of each other, use sync mode. Otherwise use async mode to avoid any performance impact on the primary site.
To configure disaster recovery through Azure portal, the Azure Arc-enabled data service requires direct connectivity to Azure.
Configure Azure failover group
In the portal, go to your primary availability group.
Under Data Management, select Failover Groups.
Azure portal presents Create instance failover group.
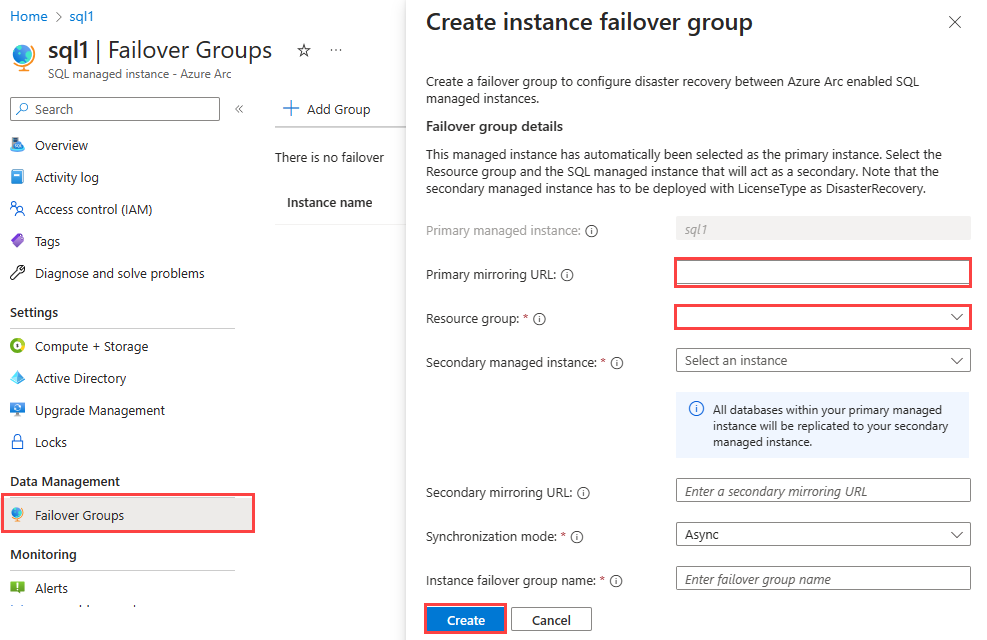
Provide the information to define the failover group.
- Primary mirroring URL: The mirroring endpoint for the failover group instance.
- Resource group: The resource group for the failover group instance.
- Secondary managed instance: The Azure SQL Managed Instance at the DR location.
- Synchronization mode: Select either Sync for synchronous mode, or Async for asynchronous mode.
- Instance failover group name: The name of the failover group.
Select Create.
Azure portal begins to provision the instance failover group.
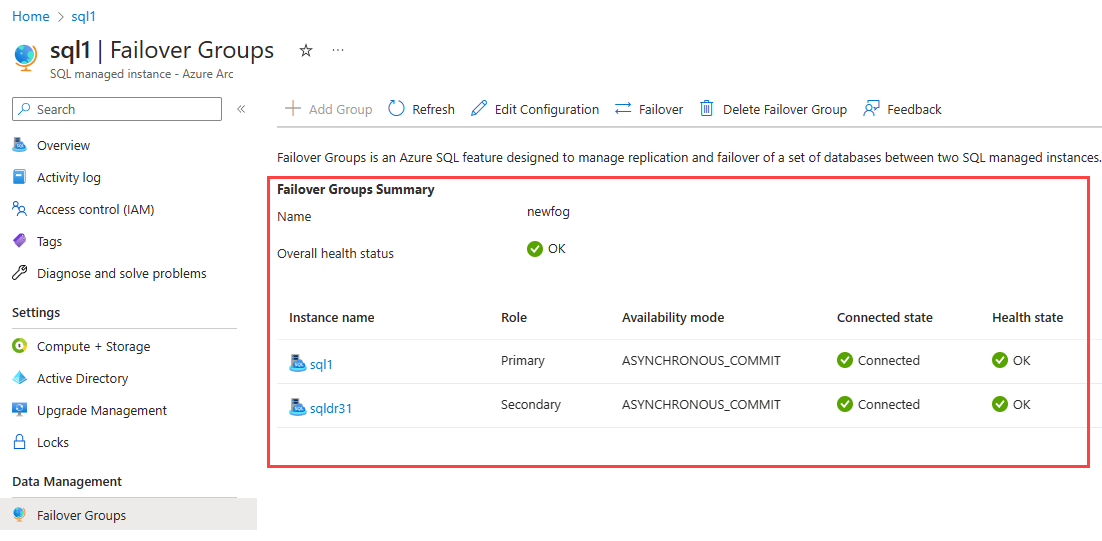
View failover group
After the failover group is provisioned, you can view it in Azure portal.
Failover
In the disaster recovery configuration, only one of the instances in the failover group is primary. You can fail over from the portal to migrate the primary role to the other instance in your failover group. To fail over:
- In portal, locate your managed instance.
- Under Data Management select Failover Groups.
- Select Failover.
Monitor failover progress in Azure portal.
Set synchronization mode
To set the synchronization mode:
From Failover Groups, select Edit configuration.
Azure portal shows an Edit Configuration control.
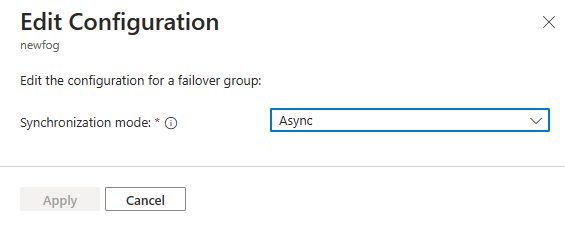
Under Edit configuration, select your desired mode, and select Apply.
Monitor failover group status in the portal
After you use the portal to change a failover group, the portal automatically reports the status as the change is applied. Changes that the portal reports include:
- Add failover group
- Edit failover group configuration
- Start failover
- Delete failover group
After you initiate the change, the portal automatically refreshes the status every two minutes. The portal automatically refreshes for two minutes.
Delete failover group
From Failover Groups**, select Delete Failover Group.
Azure portal asks you to confirm your choice to delete the failover group.
Select Delete failover group to proceed. Otherwise select Cancel, to not delete the group.
Related content
Feedback
Coming soon: Throughout 2024 we will be phasing out GitHub Issues as the feedback mechanism for content and replacing it with a new feedback system. For more information see: https://aka.ms/ContentUserFeedback.
Submit and view feedback for