Tutorial: Sync data from SQL Edge to Azure Blob storage by using Azure Data Factory
Important
Azure SQL Edge will be retired on September 30, 2025. For more information and migration options, see the Retirement notice.
Note
Azure SQL Edge no longer supports the ARM64 platform.
This tutorial shows you how to use Azure Data Factory to incrementally sync data to Azure Blob storage from a table in an instance of Azure SQL Edge.
Before you begin
If you haven't already created a database or table in your Azure SQL Edge deployment, use one of these methods to create one:
Use SQL Server Management Studio or Azure Data Studio to connect to SQL Edge. Run a SQL script to create the database and table.
Create a database and table by using sqlcmd by directly connecting to the SQL Edge module. For more information, see Connect to the Database Engine by using sqlcmd.
Use SQLPackage.exe to deploy a DAC package file to the SQL Edge container. You can automate this process by specifying the SqlPackage file URI as part of the module's desired properties configuration. You can also directly use the SqlPackage.exe client tool to deploy a DAC package to SQL Edge.
For information about how to download SqlPackage.exe, see Download and install sqlpackage. Following are some sample commands for SqlPackage.exe. For more information, see the SqlPackage.exe documentation.
Create a DAC package
sqlpackage /Action:Extract /SourceConnectionString:"Data Source=<Server_Name>,<port>;Initial Catalog=<DB_name>;User ID=<user>;Password=<password>" /TargetFile:<dacpac_file_name>Apply a DAC package
sqlpackage /Action:Publish /Sourcefile:<dacpac_file_name> /TargetServerName:<Server_Name>,<port> /TargetDatabaseName:<DB_Name> /TargetUser:<user> /TargetPassword:<password>
Create a SQL table and procedure to store and update the watermark levels
A watermark table is used to store the last timestamp up to which data has already been synchronized with Azure Storage. A Transact-SQL (T-SQL) stored procedure is used to update the watermark table after every sync.
Run these commands on the SQL Edge instance:
CREATE TABLE [dbo].[watermarktable] (
    TableName VARCHAR(255),
    WatermarkValue DATETIME,
);
GO

CREATE PROCEDURE usp_write_watermark @timestamp DATETIME,
    @TableName VARCHAR(50)
AS
BEGIN
    UPDATE [dbo].[watermarktable]
    SET [WatermarkValue] = @timestamp
    WHERE [TableName] = @TableName;
END
GO
Create a Data Factory pipeline
In this section, you'll create an Azure Data Factory pipeline to sync data to Azure Blob storage from a table in Azure SQL Edge.
Create a data factory by using the Data Factory UI
Create a data factory by following the instructions in this tutorial.
Create a Data Factory pipeline
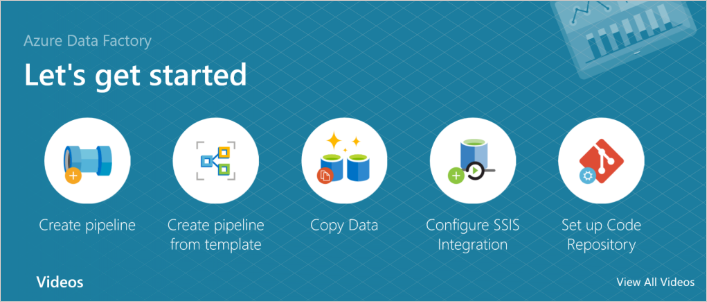
On the Let's get started page of the Data Factory UI, select Create pipeline.
On the General page of the Properties window for the pipeline, enter PeriodicSync for the name.
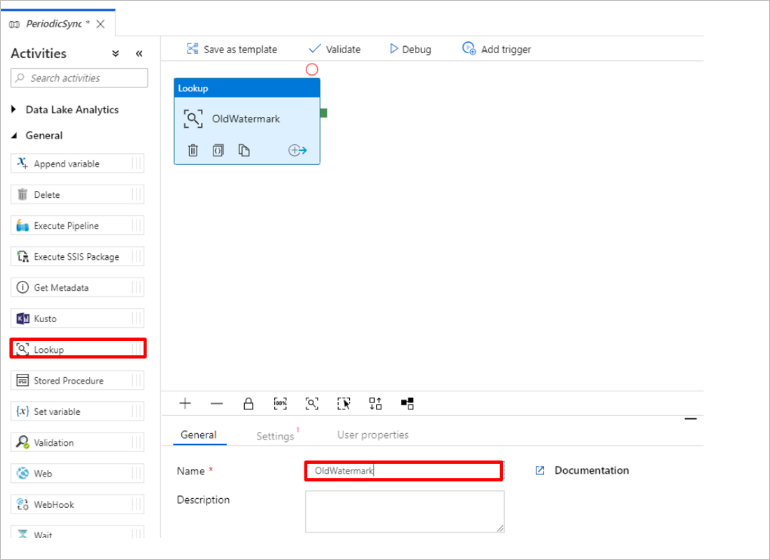
Add the Lookup activity to get the old watermark value. In the Activities pane, expand General and drag the Lookup activity to the pipeline designer surface. Change the name of the activity to OldWatermark.
Switch to the Settings tab and select New for Source Dataset. You'll now create a dataset to represent data in the watermark table. This table contains the old watermark that was used in the previous copy operation.
In the New Dataset window, select Azure SQL Server, and then select Continue.
In the Set properties window for the dataset, under Name, enter WatermarkDataset.
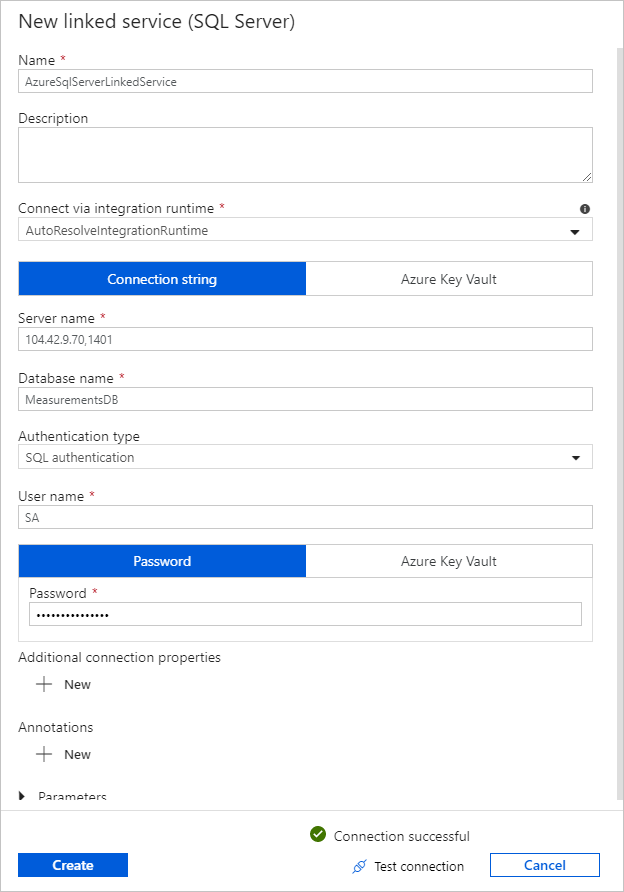
For Linked Service, select New, and then complete these steps:
Under Name, enter SQLDBEdgeLinkedService.
Under Server name, enter your SQL Edge server details.
Select your Database name from the list.
Enter your User name and Password.
To test the connection to the SQL Edge instance, select Test connection.
Select Create.
Select OK.
On the Settings tab, select Edit.
On the Connection tab, select
[dbo].[watermarktable]for Table. If you want to preview data in the table, select Preview data.Switch to the pipeline editor by selecting the pipeline tab at the top or by selecting the name of the pipeline in the tree view on the left. In the properties window for the Lookup activity, confirm that WatermarkDataset is selected in the Source dataset list.
In the Activities pane, expand General and drag another Lookup activity to the pipeline designer surface. Set the name to NewWatermark on the General tab of the properties window. This Lookup activity gets the new watermark value from the table that contains the source data so it can be copied to the destination.
In the properties window for the second Lookup activity, switch to the Settings tab and select New to create a dataset to point to the source table that contains the new watermark value.
In the New Dataset window, select SQL Edge instance, and then select Continue.
In the Set properties window, under Name, enter SourceDataset. Under Linked service, select SQLDBEdgeLinkedService.
Under Table, select the table that you want to synchronize. You can also specify a query for this dataset, as described later in this tutorial. The query takes precedence over the table you specify in this step.
Select OK.
Switch to the pipeline editor by selecting the pipeline tab at the top or by selecting the name of the pipeline in the tree view on the left. In the properties window for the Lookup activity, confirm that SourceDataset is selected in the Source dataset list.
Select Query under Use query. Update the table name in the following query and then enter the query. You're selecting only the maximum value of
timestampfrom the table. Be sure to select First row only.SELECT MAX(timestamp) AS NewWatermarkValue FROM [TableName];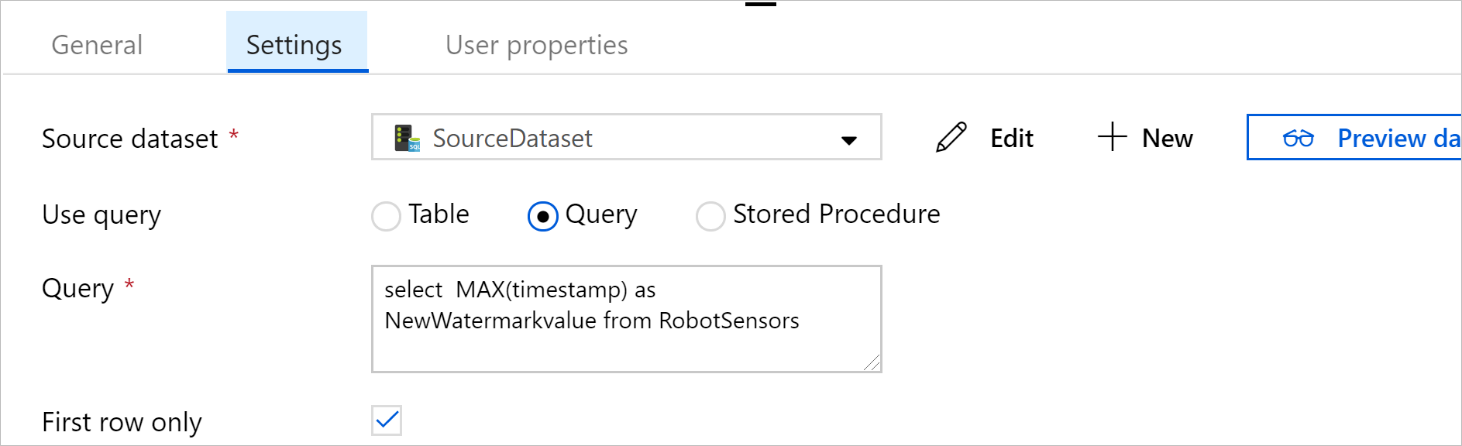
In the Activities pane, expand Move & Transform and drag the Copy activity from the Activities pane to the designer surface. Set the name of the activity to IncrementalCopy.
Connect both Lookup activities to the Copy activity by dragging the green button attached to the Lookup activities to the Copy activity. Release the mouse button when you see the border color of the Copy activity change to blue.
Select the Copy activity and confirm that you see the properties for the activity in the Properties window.
Switch to the Source tab in the Properties window and complete these steps:
In the Source dataset box, select SourceDataset.
Under Use query, select Query.
Enter the SQL query in the Query box. Here's a sample query:
SELECT *
FROM TemperatureSensor
WHERE timestamp > '@{activity(' OldWaterMark ').output.firstRow.WatermarkValue}'
    AND timestamp <= '@{activity(' NewWaterMark ').output.firstRow.NewWatermarkvalue}';
On the Sink tab, select New under Sink Dataset.
In this tutorial, the sink data store is an Azure Blob storage data store. Select Azure Blob storage, and then select Continue in the New Dataset window.
In the Select Format window, select the format of your data, and then select Continue.
In the Set Properties window, under Name, enter SinkDataset. Under Linked service, select New. You'll now create a connection (a linked service) to your Azure Blob storage.
In the New Linked Service (Azure Blob storage) window, complete these steps:
In the Name box, enter AzureStorageLinkedService.
Under Storage account name, select the Azure storage account for your Azure subscription.
Test the connection and then select Finish.
In the Set Properties window, confirm that AzureStorageLinkedService is selected under Linked service. Select Create and OK.
On Sink tab, select Edit.
Go to the Connection tab of SinkDataset and complete these steps:
Under File path, enter
asdedatasync/incrementalcopy, whereasdedatasyncis the blob container name andincrementalcopyis the folder name. Create the container if it doesn't exist, or use the name of an existing one. Azure Data Factory automatically creates the output folderincrementalcopyif it doesn't exist. You can also use the Browse button for the File path to navigate to a folder in a blob container.For the File part of the File path, select Add dynamic content [Alt+P], and then enter
@CONCAT('Incremental-', pipeline().RunId, '.txt')in the window that opens. Select Finish. The file name is dynamically generated by the expression. Each pipeline run has a unique ID. The Copy activity uses the run ID to generate the file name.
Switch to the pipeline editor by selecting the pipeline tab at the top or by selecting the name of the pipeline in the tree view on the left.
In the Activities pane, expand General and drag the Stored Procedure activity from the Activities pane to the pipeline designer surface. Connect the green (success) output of the Copy activity to the Stored Procedure activity.
Select Stored Procedure Activity in the pipeline designer and change its name to
SPtoUpdateWatermarkActivity.Switch to the SQL Account tab, and select *QLDBEdgeLinkedService under Linked service.
Switch to the Stored Procedure tab and complete these steps:
Under Stored procedure name, select
[dbo].[usp_write_watermark].To specify values for the stored procedure parameters, select Import parameter and enter these values for the parameters:
Name Type Value LastModifiedTime DateTime @{activity('NewWaterMark').output.firstRow.NewWatermarkvalue}TableName String @{activity('OldWaterMark').output.firstRow.TableName}To validate the pipeline settings, select Validate on the toolbar. Confirm that there are no validation errors. To close the Pipeline Validation Report window, select >>.
Publish the entities (linked services, datasets, and pipelines) to the Azure Data Factory service by selecting the Publish All button. Wait until you see a message confirming that the publish operation has succeeded.
Trigger a pipeline based on a schedule
On the pipeline toolbar, select Add Trigger, select New/Edit, and then select New.
Name your trigger HourlySync. Under Type, select Schedule. Set the Recurrence to every 1 hour.
Select OK.
Select Publish All.
Select Trigger Now.
Switch to the Monitor tab on the left. You can see the status of the pipeline run triggered by the manual trigger. Select Refresh to refresh the list.
## Related content
- The Azure Data Factory pipeline in this tutorial copies data from a table on a SQL Edge instance to a location in Azure Blob storage once every hour. To learn about using Data Factory in other scenarios, see these tutorials.