Configure customer-managed keys for your Azure Cosmos DB account with Azure Managed HSM Key Vault
APPLIES TO:
![]() NoSQL
NoSQL
![]() MongoDB
MongoDB
![]() Cassandra
Cassandra
![]() Gremlin
Gremlin
![]() Table
Table
Please refer to link Configure customer-managed keys with Azure Key Vault
Note
Currently, customer-managed keys are available only for new Azure Cosmos DB accounts. You should configure them during account creation.
Register the Azure Cosmos DB resource provider for your Azure subscription
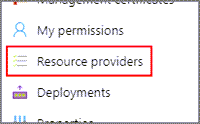
Sign in to the Azure portal, go to your Azure subscription, and select Resource providers under the Settings tab:
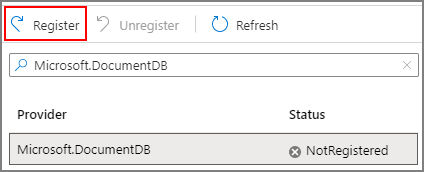
Search for the Microsoft.DocumentDB resource provider. Verify if the resource provider is already marked as registered. If not, choose the resource provider and select Register:

Configure your Azure Managed HSM Key Vault
Using customer-managed keys with Azure Cosmos DB requires you to set two properties on the Azure Key Vault instance that you plan to use to host your encryption keys: Soft Delete and Purge Protection.
Because soft delete is turned on by default, only purge protection must be enabled. When creating your managed HSM, use the following CLI command:
objectId = az ad signed-in-user show --query id -o tsv
az keyvault create --hsm-name $hsmName --resource-group $rgName --location $location --enable-purge-protection true --administrators $objectId --retention-days 7
If you're using an existing Azure Managed HSM Key Vault instance, you can verify that these properties are enabled by looking at the Properties section with the following command:
az keyvault show $hsmName $rgName
If purge protection isn't enabled, the following command can be used:
az keyvault update-hsm --enable-purge-protection true --hsm-name $hsmName --resource-group $rgName
For more information about the CLI commands available for managed HSM, refer to the following Azure Key Vault
Creating the encryption key and assigning the correspondent roles
Once the Managed HSM has been activated, the key that is going to be used for the CMK account needs to be created. For this, the role “Managed HSM Crypto User” is assigned to the administrator. To read more about how RBAC (role based access control) works with Managed HSM, refer to the following articles: Managed HSM local RBAC built-in roles - Azure Key Vault | Microsoft Learn and Azure Managed HSM access control | Microsoft Learn
objectId = az ad signed-in-user show --query id -o tsv
$keyName = "Name of your key"
az keyvault role assignment create --hsm-name $hsmName --role "Managed HSM Crypto User" --assignee $objectId --scope /keys
az keyvault key create --hsm-name $hsmName --name $keyName --ops wrapKey unwrapKey --kty RSA-HSM --size 3072
Now that the key has been created, the correspondent role needs to be assigned to either the Cosmos DB Principal ID or the Azure Managed Identity for provisioning the account. The role “Managed HSM Crypto Service Encryption User” is used because it has the only three permissions needed to work with a CMK account, being: get, wrap and unwrap. These permissions are also scoped to only be useful on the keys stored on the Azure Managed HSM.
Without Azure managed identity:
$cosmosPrincipal = az ad sp show --id a232010e-820c-4083-83bb-3ace5fc29d0b --query id -o tsv
az keyvault role assignment create --hsm-name $hsmName --role "Managed HSM Crypto Service Encryption User" --assignee $cosmosPrincipal --scope /keys
$keyURI = "https://{0}.managedhsm.azure.net/keys/{1}" -f $hsmName, $keyName
az cosmosdb create -n $cosmosName -g $rgName --key-uri $keyURI
With Azure managed identity:
$identityResourceID = az identity show -g $rgName -n $identityName --query id -o tsv
$identityPrincipal = az identity show -g $rgName -n $identityName --query principalId -o tsv
$defaultIdentity = "UserAssignedIdentity={0}" -f $identityResourceID
az keyvault role assignment create --hsm-name $hsmName --role "Managed HSM Crypto Service Encryption User" --assignee $cosmosPrincipal --scope /keys
$keyURI = "https://{0}.managedhsm.azure.net/keys/{1}" -f $hsmName, $keyName
az cosmosdb create -n $cosmosName -g $rgName --key-uri $keyURI --assign-identity $identityResourceID --default-identity $defaultIdentity
This will provision a Cosmos DB CMK account with a key stored on an Azure Managed HSM Key Vault.
Switching to system assigned managed identity.
Cosmos DB supports the use of a system assigned managed identity for a CMK Cosmos DB account. For more information about system assigned managed identity CMK, refer to: Configure customer-managed keys for your Azure Cosmos DB account
Execute the following commands to switch from default identity to system assigned managed identity:
az cosmosdb identity assign -n $cosmosName -g $rgName
$principalMSIId = az cosmosdb identity show -n $cosmosName -g $rgName --query principalId -o tsv
az keyvault role assignment create --hsm-name $hsmName --role "Managed HSM Crypto Service Encryption User" --assignee $principalMSIId --scope /keys
az cosmosdb update --resource-group $rgName --name $cosmosName --default-identity "SystemAssignedIdentity"
As an optional note, the original role assignment to Cosmos DB’s principal ID or Azure Managed Identity can be removed.
az keyvault role assignment delete --hsm-name $hsmName --role "Managed HSM Crypto Service Encryption User" --assignee $cosmosPrincipal --scope /keys
Next steps
- Learn more about data encryption in Azure Cosmos DB.
- Get an overview of secure access to data in Azure Cosmos DB.
Feedback
Coming soon: Throughout 2024 we will be phasing out GitHub Issues as the feedback mechanism for content and replacing it with a new feedback system. For more information see: https://aka.ms/ContentUserFeedback.
Submit and view feedback for