Troubleshoot the Salesforce and Salesforce Service Cloud connectors in Azure Data Factory and Azure Synapse
APPLIES TO:  Azure Data Factory
Azure Synapse Analytics
Azure Data Factory
Azure Synapse Analytics
Tip
Try out Data Factory in Microsoft Fabric, an all-in-one analytics solution for enterprises. Microsoft Fabric covers everything from data movement to data science, real-time analytics, business intelligence, and reporting. Learn how to start a new trial for free!
This article provides suggestions to troubleshoot common problems with the Salesforce and Salesforce Service Cloud connectors in Azure Data Factory and Azure Synapse.
Error code: SalesforceOauth2ClientCredentialFailure
Cause: You encounter this error code as you don't complete the Salesforce Connected App configuration.
Recommendation:
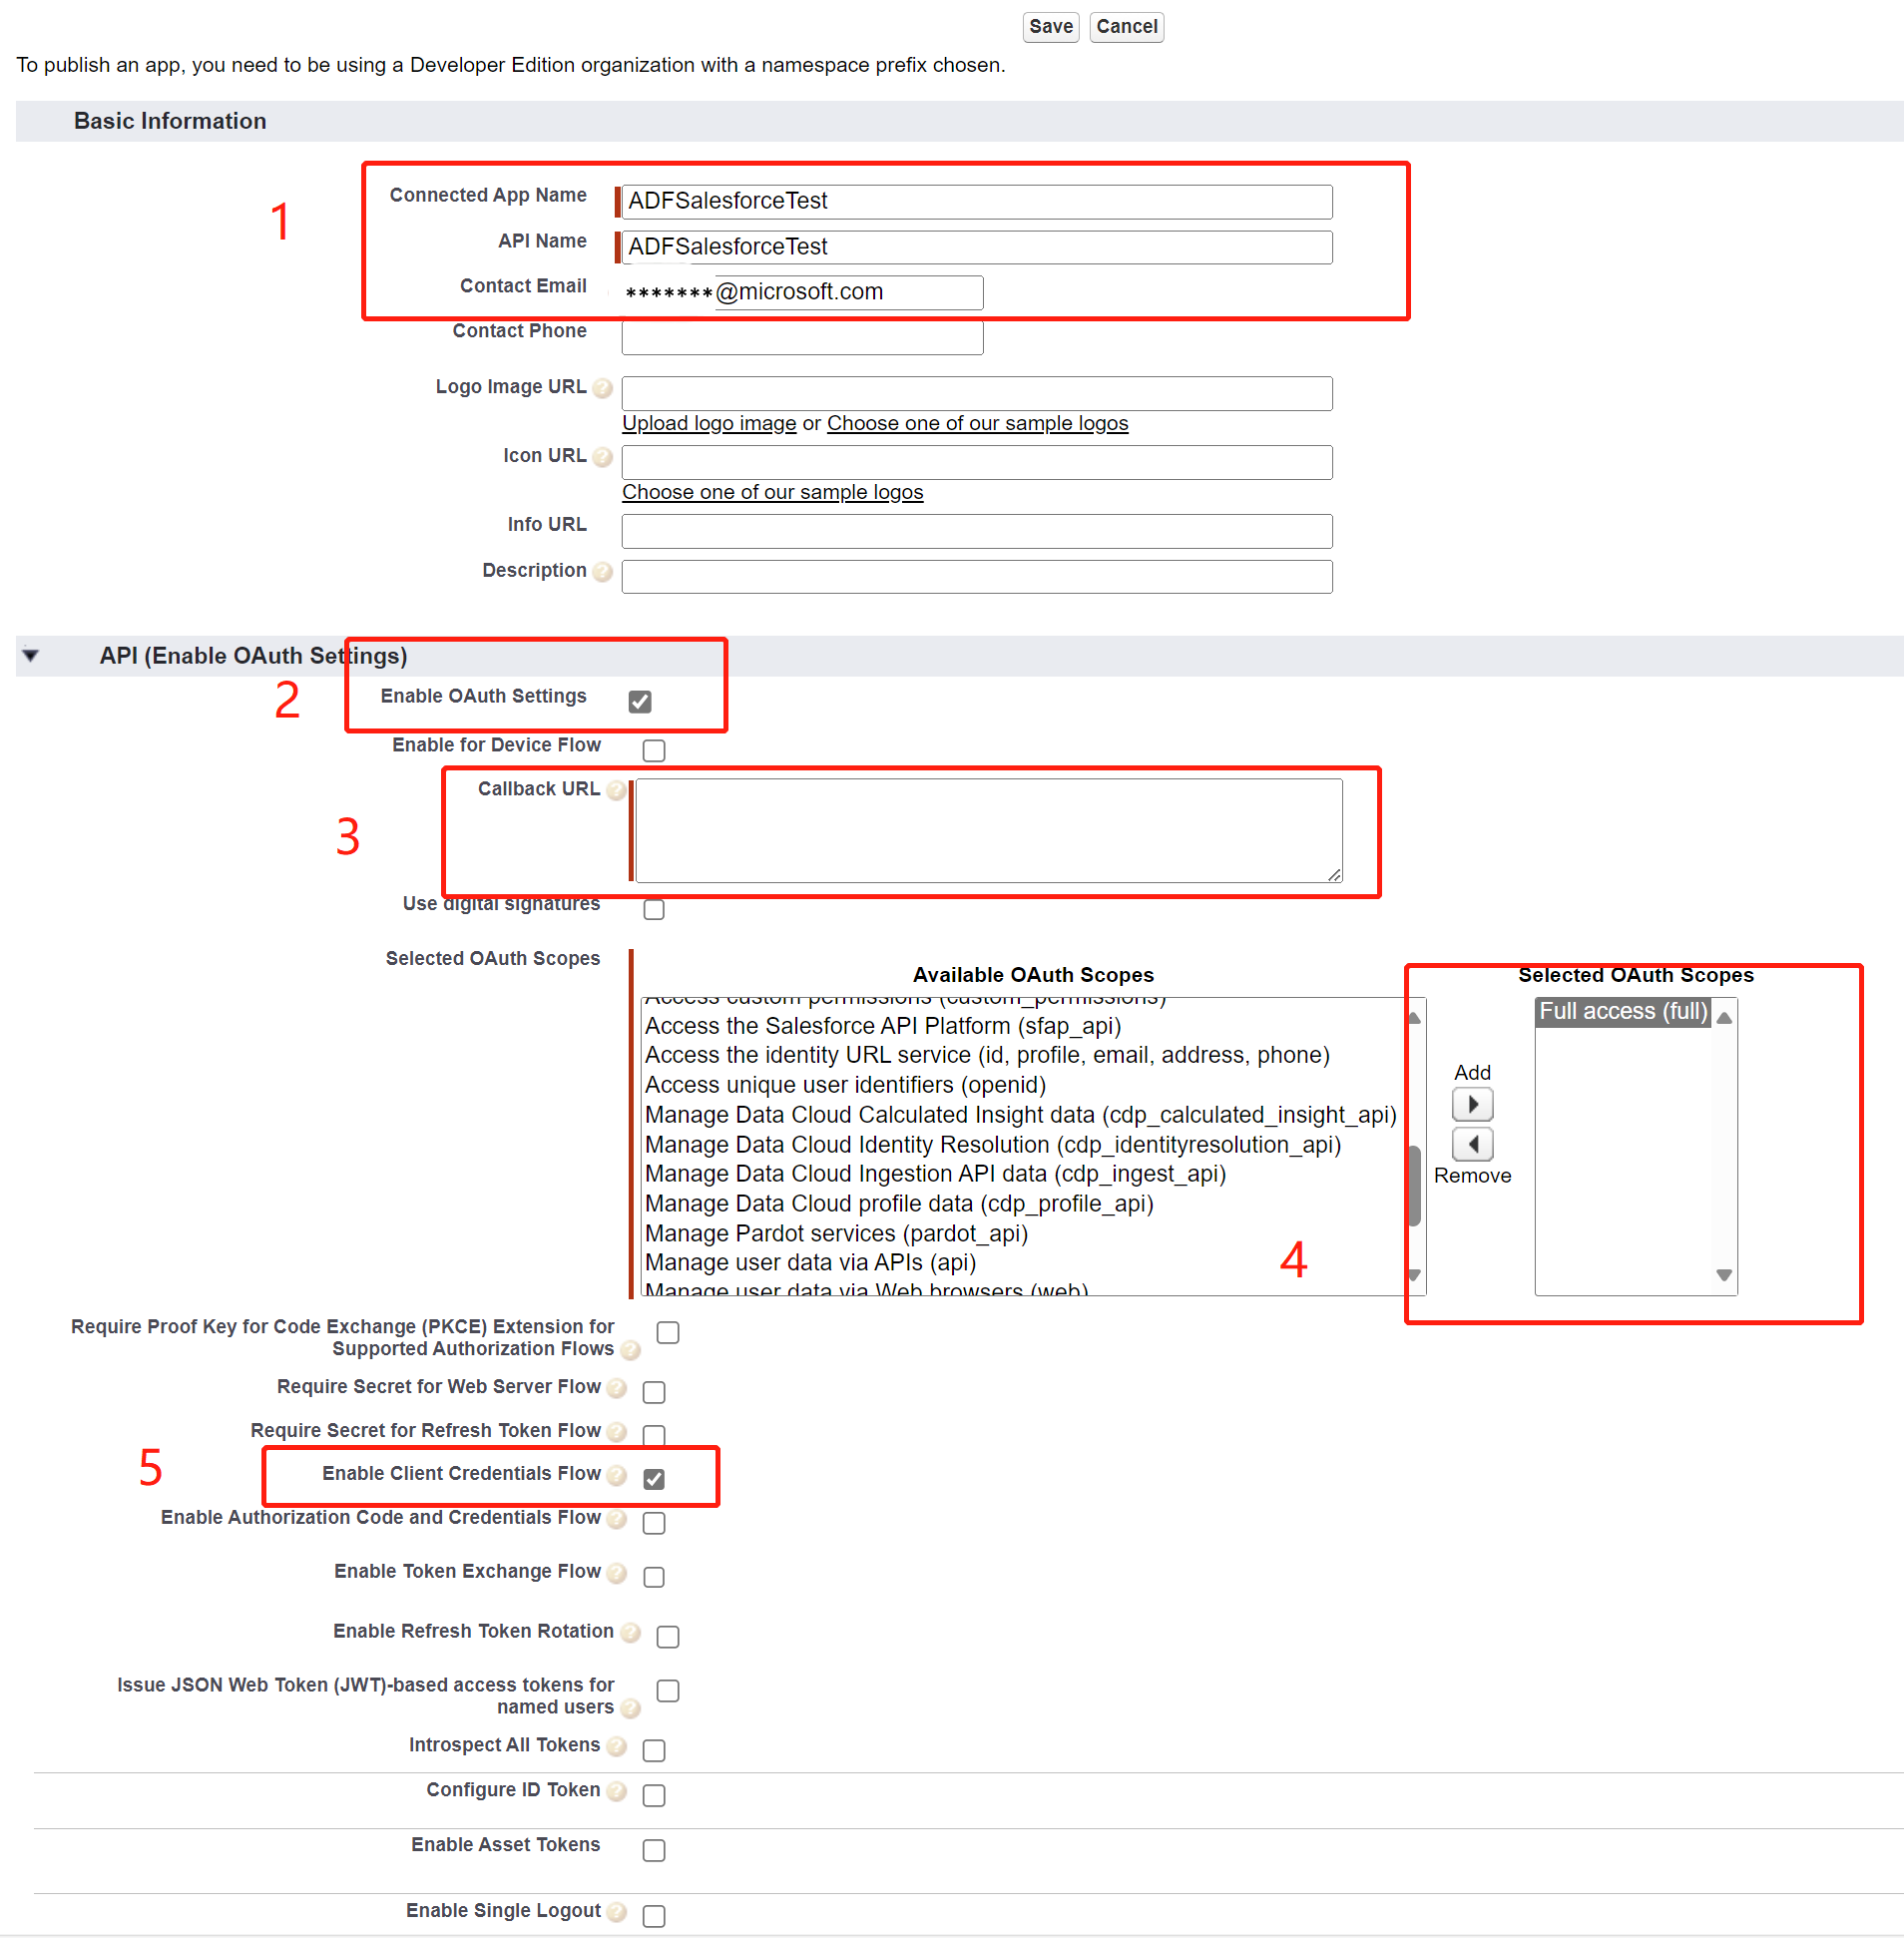
To configure your Salesforce Connected App, follow these steps:Create your connected app, and complete its basic information and OAuth settings for the connected app.
- Configure the Connected App Name, API Name and Contact Email.
- Select Enable OAuth Settings.
- Callback url can be random as Client Credential Flow don't need callback, for example:
https://login.salesforce.com/services/oauth2/callback - Setup OAuth access token scope, it's better to set up "Full access" for Azure Data Factory in case of permission issue.
If you want to keep the mini scope, at least the "Manage user data via APIs (api)" should be added.
If you don't set proper scope, you may get following similar message like: Unauthorized, This session is not valid for use with the REST API - Select Enable Client Credentials Flow.
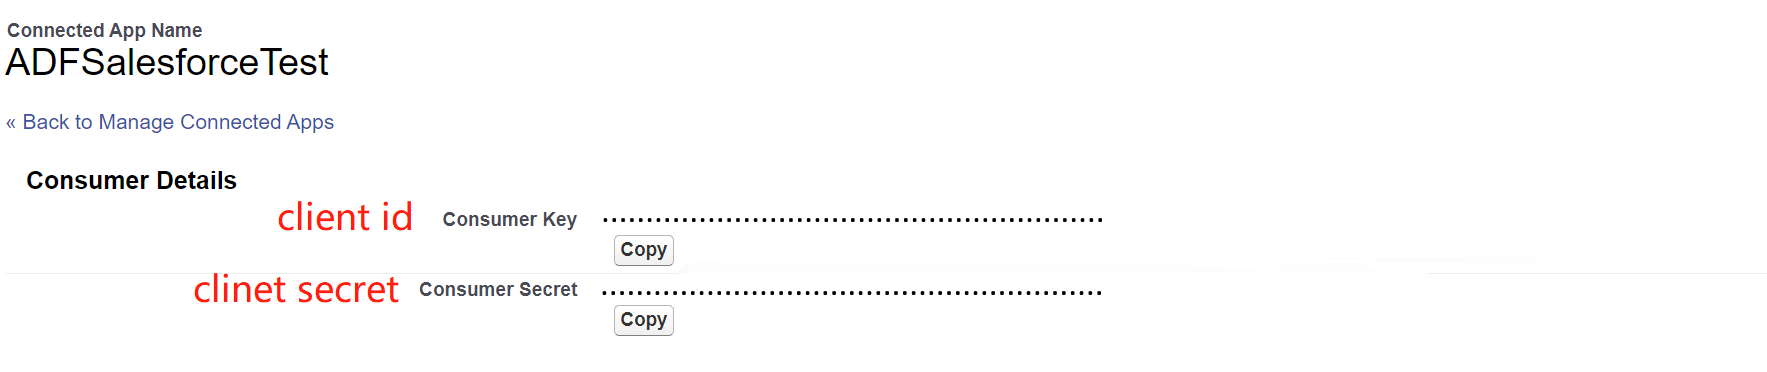
Get Client ID and Secret through Manage Consumer Details.

Copy the client ID and secret to a txt file for Azure Data Factory linked service.
Create a user who has the API Only User permission.
- Set up a permission set which only has API only permission.
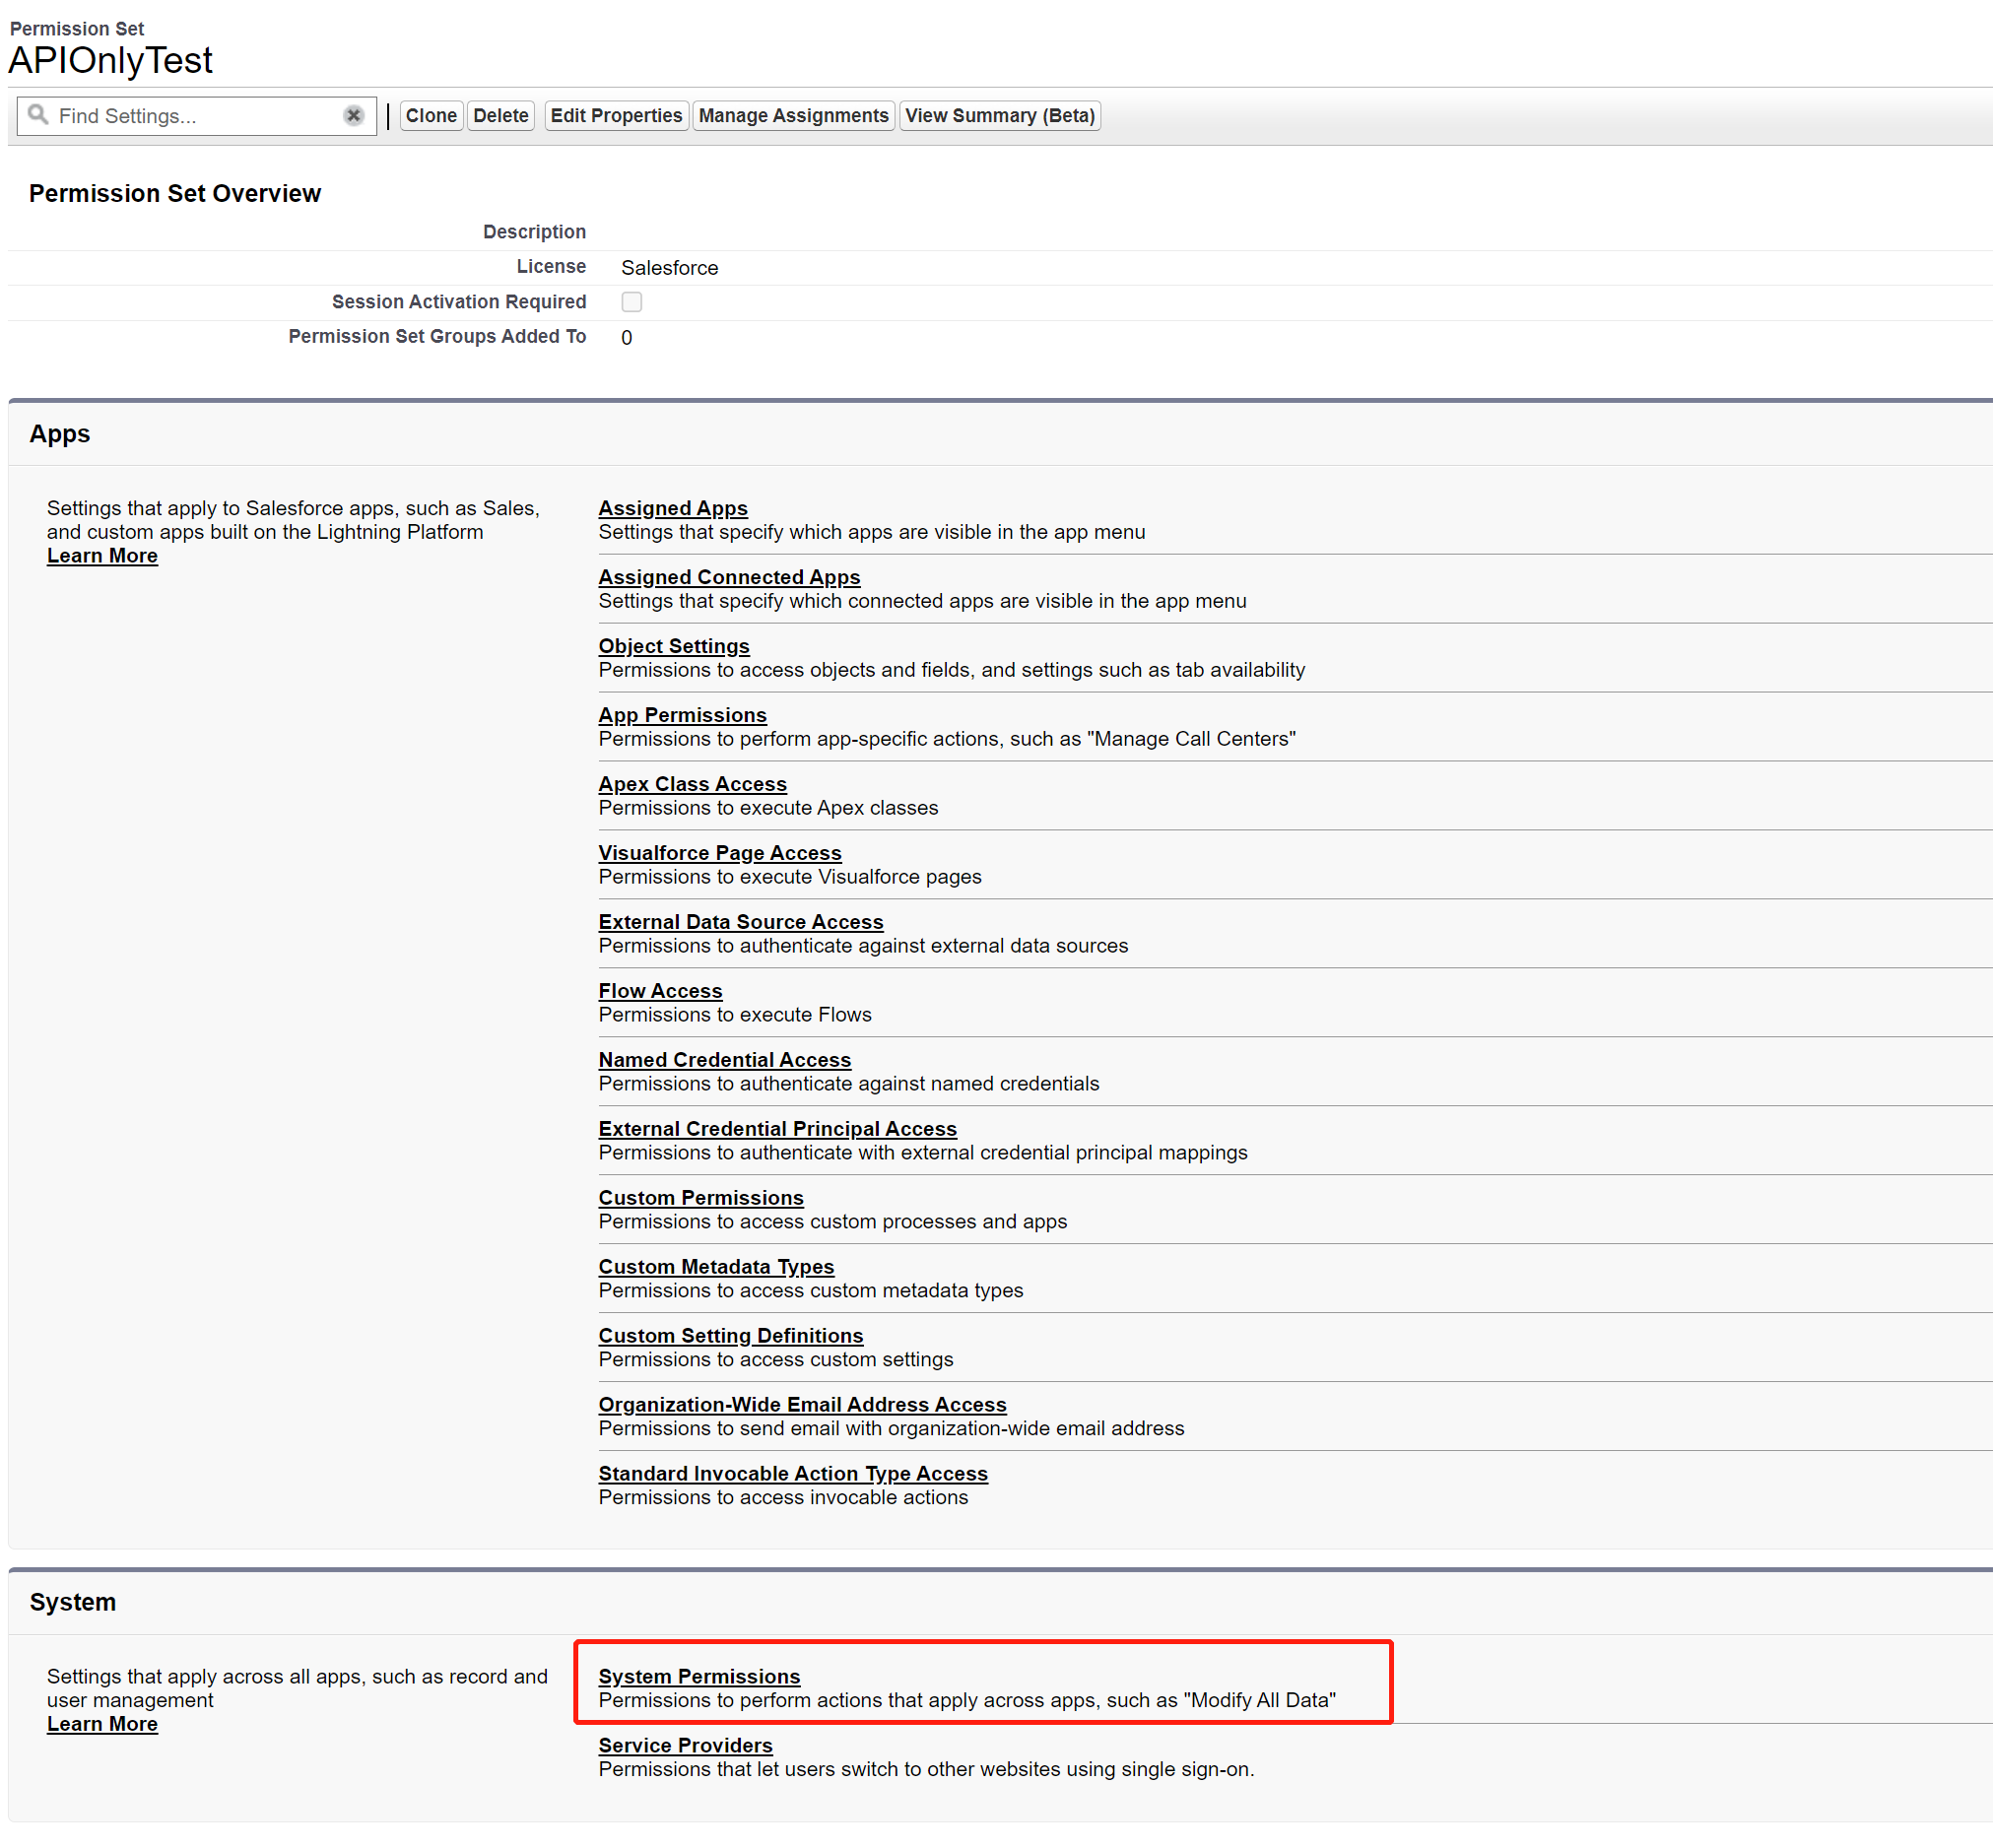
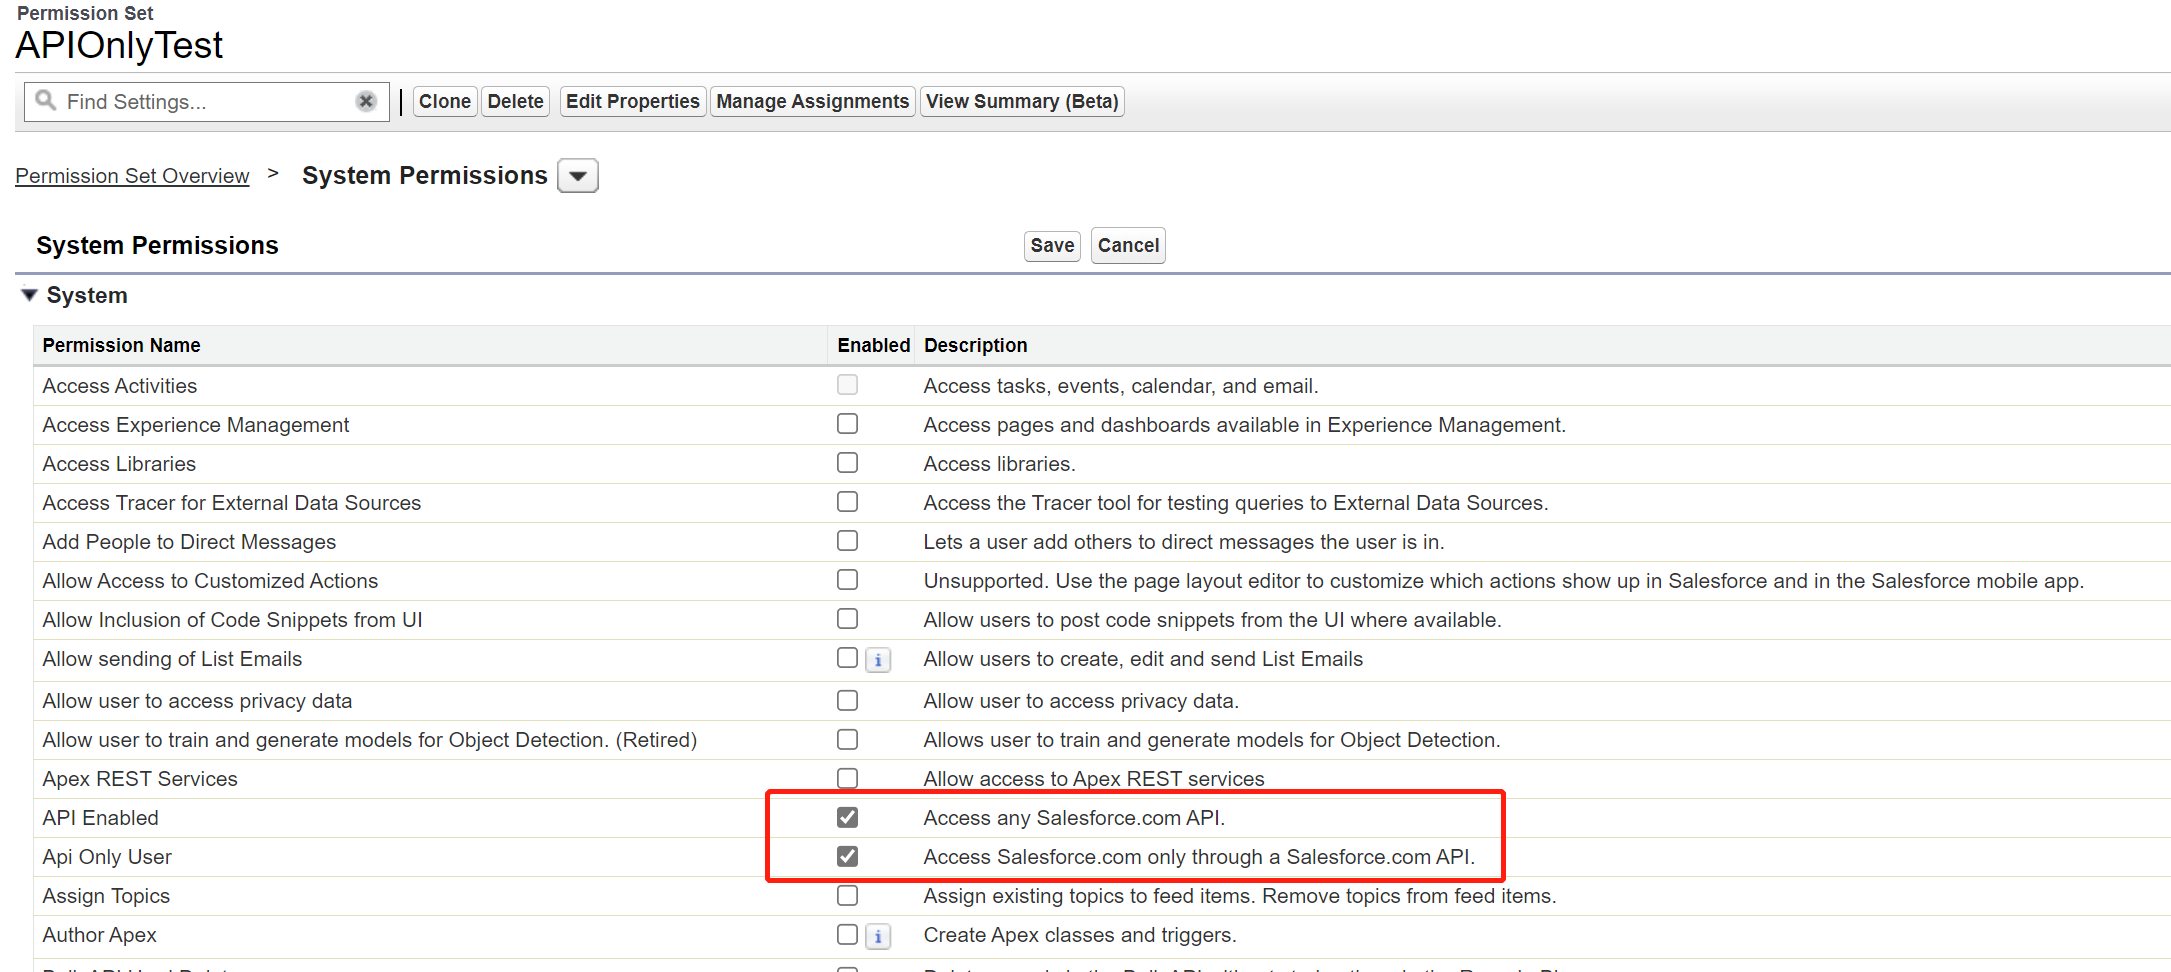
- Specify the API Enabled and Api Only User.
- Set up a permission set which only has API only permission.
Create a new user and link the permission set in the user detail page: Permission Set Assignments.

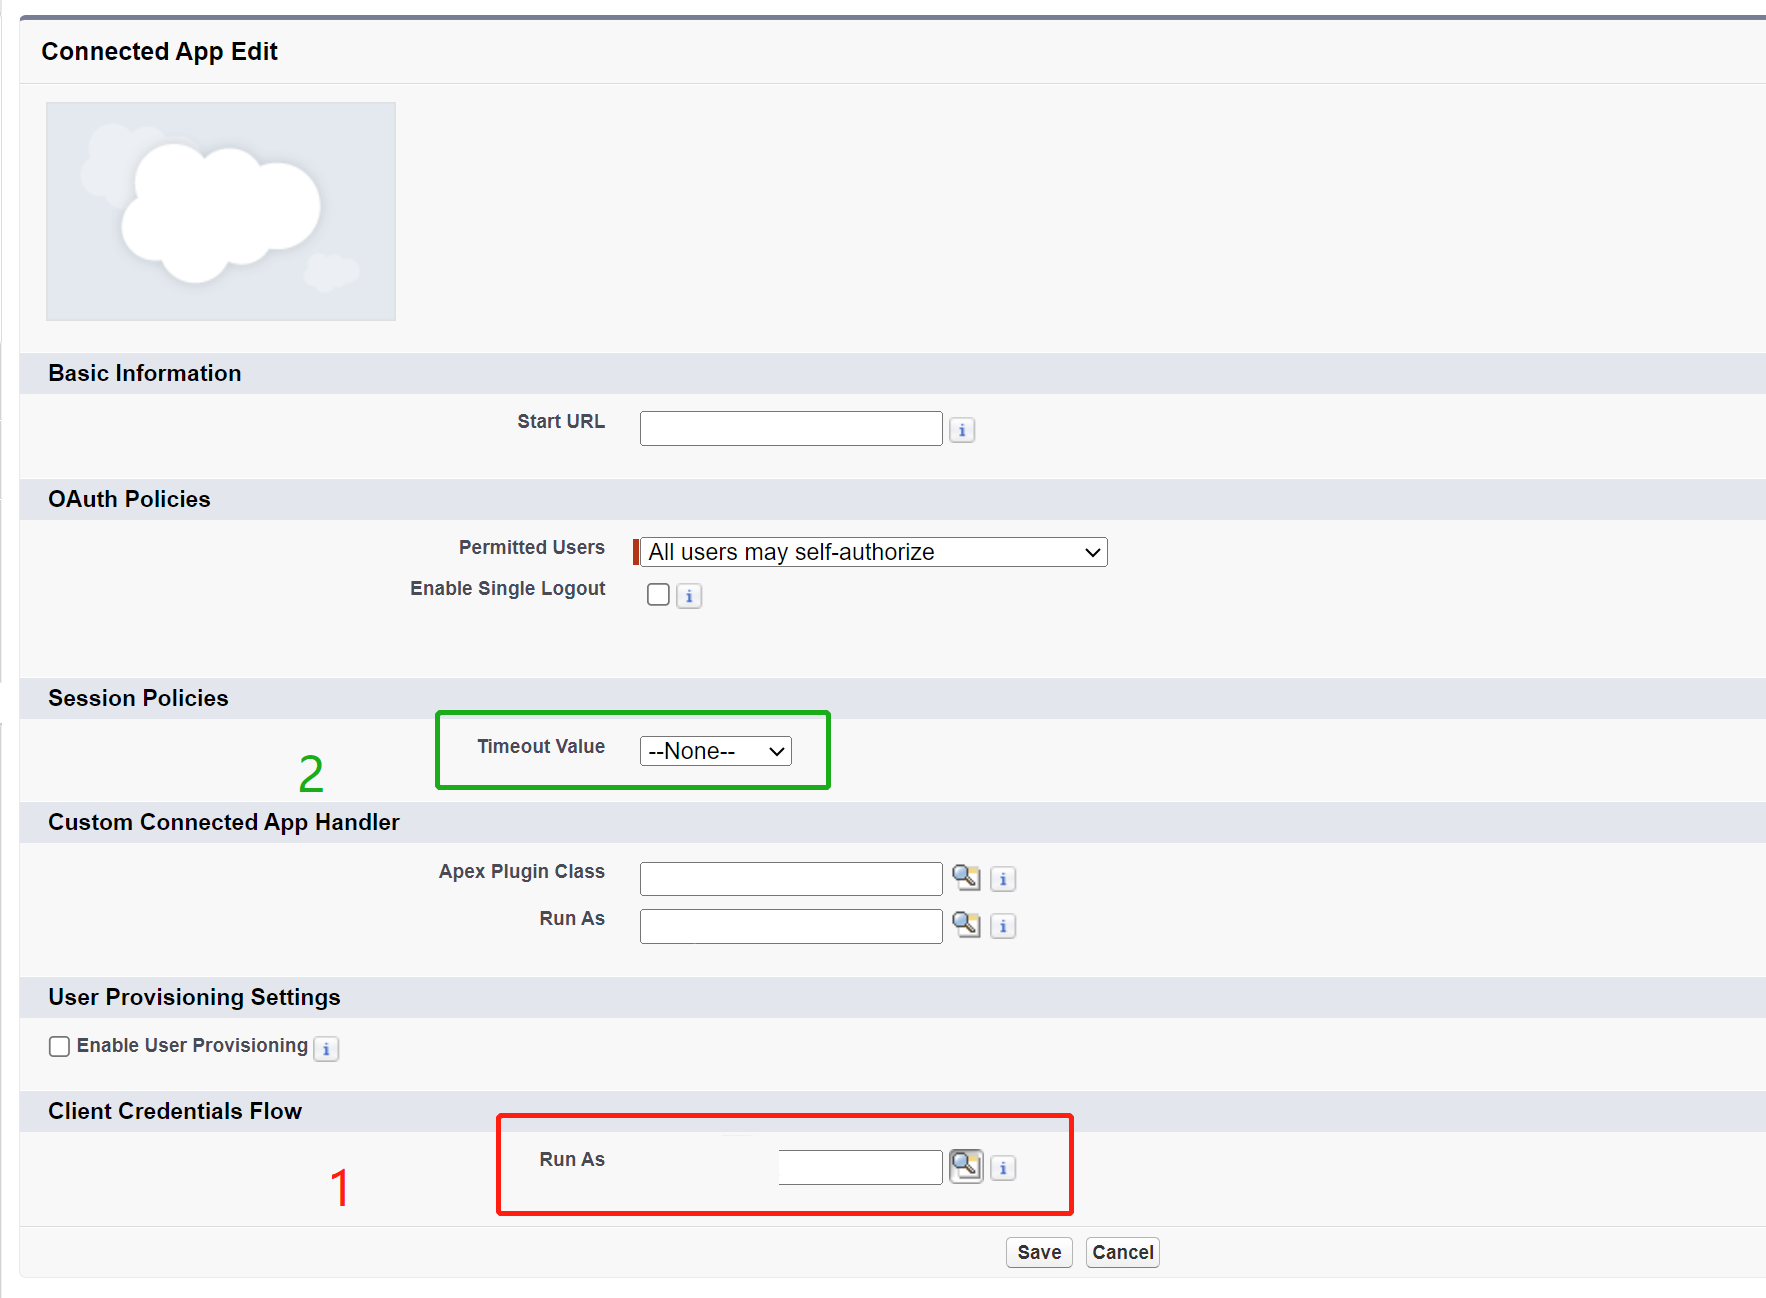
From the connected app detail page, click Manage, click Edit Policies. For Run As, select an execution user who has the API Only User permission. For Timeout Value, you can select a proper value or remain default None.

Related content
For more troubleshooting help, try these resources:
Feedback
Coming soon: Throughout 2024 we will be phasing out GitHub Issues as the feedback mechanism for content and replacing it with a new feedback system. For more information see: https://aka.ms/ContentUserFeedback.
Submit and view feedback for