Start and stop an Azure-SSIS integration runtime on a schedule
APPLIES TO:  Azure Data Factory
Azure Synapse Analytics
Azure Data Factory
Azure Synapse Analytics
Tip
Try out Data Factory in Microsoft Fabric, an all-in-one analytics solution for enterprises. Microsoft Fabric covers everything from data movement to data science, real-time analytics, business intelligence, and reporting. Learn how to start a new trial for free!
This article describes how to schedule the starting and stopping of an Azure-SQL Server Integration Services (SSIS) integration runtime (IR) by using Azure Data Factory and Azure Synapse Analytics. An Azure-SSIS IR is a compute resource that's dedicated for running SSIS packages.
A cost is associated with running an Azure-SSIS IR. You typically want to run your IR only when you need to run SSIS packages in Azure and stop your IR when you don't need it anymore. You can use Data Factory, the Azure portal page for Azure Synapse Analytics pipelines, or Azure PowerShell to manually start or stop your IR.
Alternatively, you can create web activities in Data Factory or Azure Synapse Analytics pipelines to start and stop your IR on a schedule. For example, you can start it in the morning before running your daily ETL workloads and stop it in the afternoon after the workloads are done.
You can also chain an Execute SSIS Package activity between two web activities that start and stop your IR. Your IR will then start and stop on demand, before or after your package execution. For more information about the Execute SSIS Package activity, see Run an SSIS package with the Execute SSIS Package activity in the Azure portal.
Note
We recommend that you use the Azure Az PowerShell module to interact with Azure. To get started, see Install Azure PowerShell. To learn how to migrate to the Az PowerShell module, see Migrate Azure PowerShell from AzureRM to Az.
Prerequisites
To implement this walkthrough, you need:
An instance of Azure Data Factory. If you don't have one provisioned, follow the steps in Quickstart: Create a data factory by using the Azure portal and Azure Data Factory Studio.
An Azure-SSIS IR. If you don't have one provisioned, follow the instructions in Provision the Azure-SSIS integration runtime in Azure Data Factory.
Create and schedule Data Factory pipelines that start and stop an Azure-SSIS IR
Note
This section is not supported for Azure-SSIS in Azure Synapse Analytics with data exfiltration protection enabled.
This section shows you how to use web activities in Data Factory pipelines to start and stop your Azure-SSIS IR on a schedule, or to start and stop it on demand. You'll create three pipelines:
- The first pipeline contains a web activity that starts your Azure-SSIS IR.
- The second pipeline contains a web activity that stops your Azure-SSIS IR.
- The third pipeline contains an Execute SSIS Package activity chained between two web activities that start and stop your Azure-SSIS IR.
After you create and test those pipelines, you can create a trigger that defines a schedule for running a pipeline. For example, you can create two triggers. The first one is scheduled to run daily at 6 AM and is associated with the first pipeline. The second one is scheduled to run daily at 6 PM and is associated with the second pipeline. In this way, you have a period from 6 AM to 6 PM every day when your IR is running, ready to run your daily ETL workloads.
If you create a third trigger that's scheduled to run daily at midnight and is associated with the third pipeline, that pipeline will run at midnight every day. It will start your IR just before package execution, and then run your package. It will immediately stop your IR just after package execution, so your IR won't run idly.
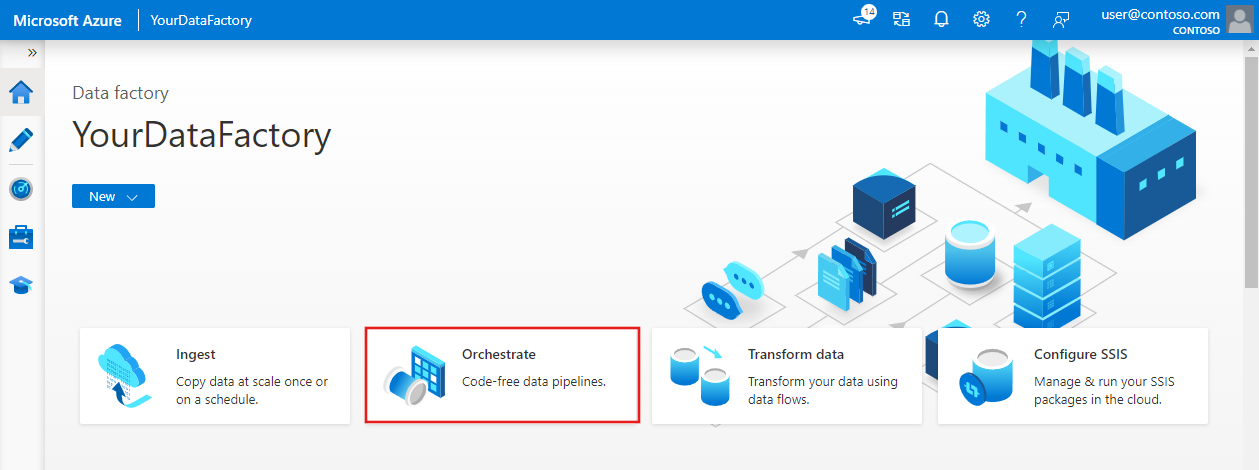
Create your pipelines
On the Azure Data Factory home page, select Orchestrate.
In the Activities toolbox, expand the General menu and drag a web activity onto the pipeline designer surface. On the General tab of the activity properties window, change the activity name to startMyIR. Switch to the Settings tab, and then do the following actions.
Note
For Azure-SSIS in Azure Synapse Analytics, use the corresponding Azure Synapse Analytics REST API to get the integration runtime status, start the integration runtime, and stop the integration runtime.
For URL, enter the following URL for the REST API that starts the Azure-SSIS IR. Replace
{subscriptionId},{resourceGroupName},{factoryName}, and{integrationRuntimeName}with the actual values for your IR.https://management.azure.com/subscriptions/{subscriptionId}/resourceGroups/{resourceGroupName}/providers/Microsoft.DataFactory/factories/{factoryName}/integrationRuntimes/{integrationRuntimeName}/start?api-version=2018-06-01Alternatively, you can copy and paste the resource ID of your IR from its monitoring page on the Data Factory UI or app to replace the following part of the preceding URL:
/subscriptions/{subscriptionId}/resourceGroups/{resourceGroupName}/providers/Microsoft.DataFactory/factories/{factoryName}/integrationRuntimes/{integrationRuntimeName}.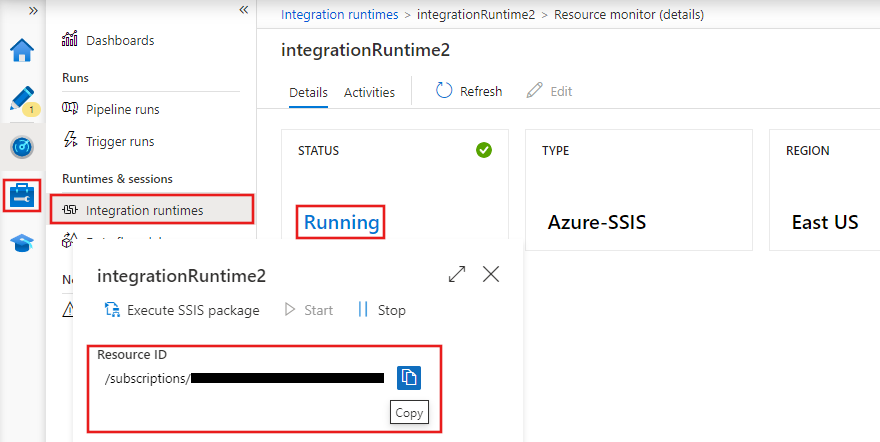
For Method, select POST.
For Body, enter
{"message":"Start my IR"}.For Authentication, select Managed Identity to use the specified system-managed identity for your data factory. For more information, see Managed identity for Azure Data Factory.
For Resource, enter
https://management.azure.com/.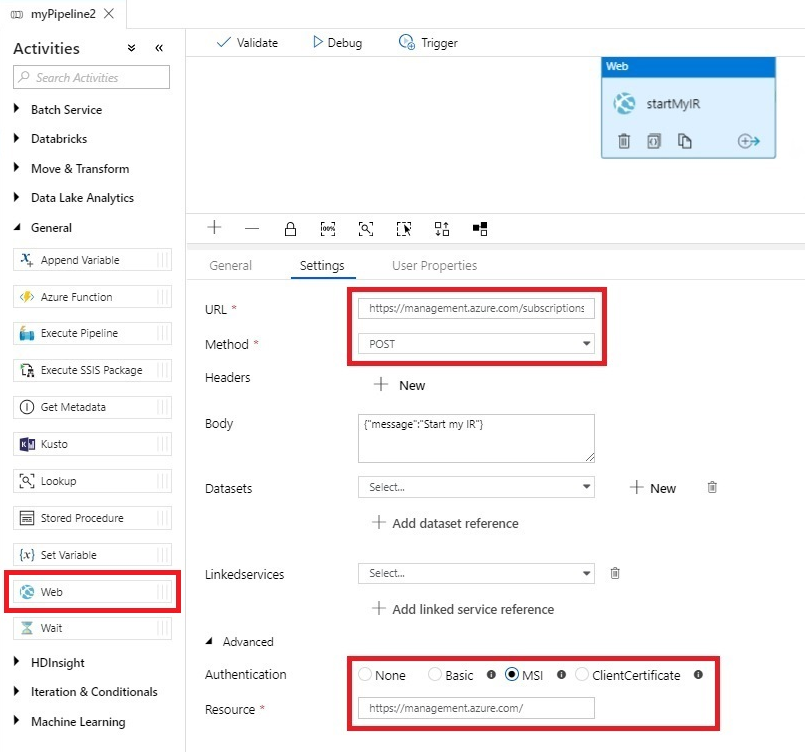
Clone the first pipeline to create a second one. Change the activity name to stopMyIR, and replace the following properties:
For URL, enter the following URL for the REST API that stops the Azure-SSIS IR. Replace
{subscriptionId},{resourceGroupName},{factoryName}, and{integrationRuntimeName}with the actual values for your IR.https://management.azure.com/subscriptions/{subscriptionId}/resourceGroups/{resourceGroupName}/providers/Microsoft.DataFactory/factories/{factoryName}/integrationRuntimes/{integrationRuntimeName}/stop?api-version=2018-06-01.For Body, enter
{"message":"Stop my IR"}.
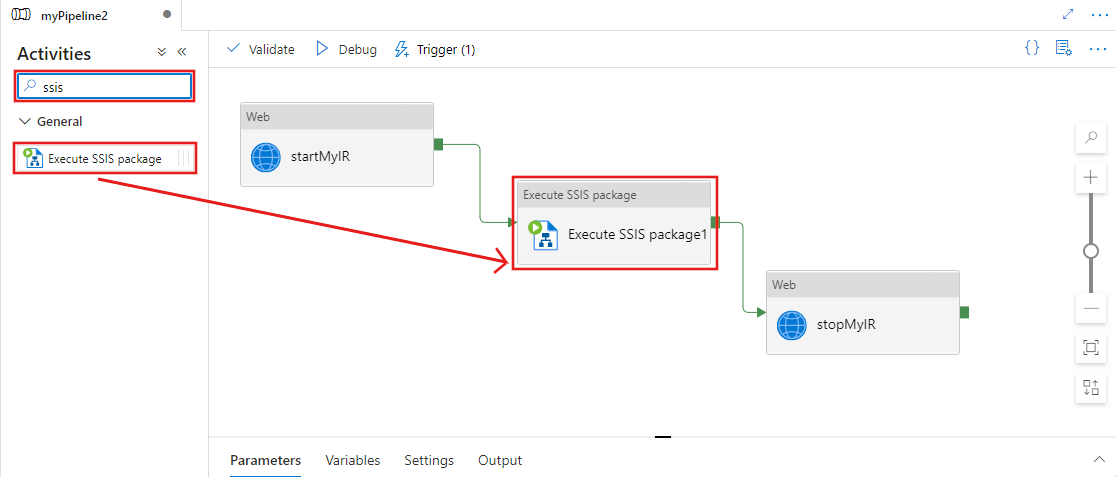
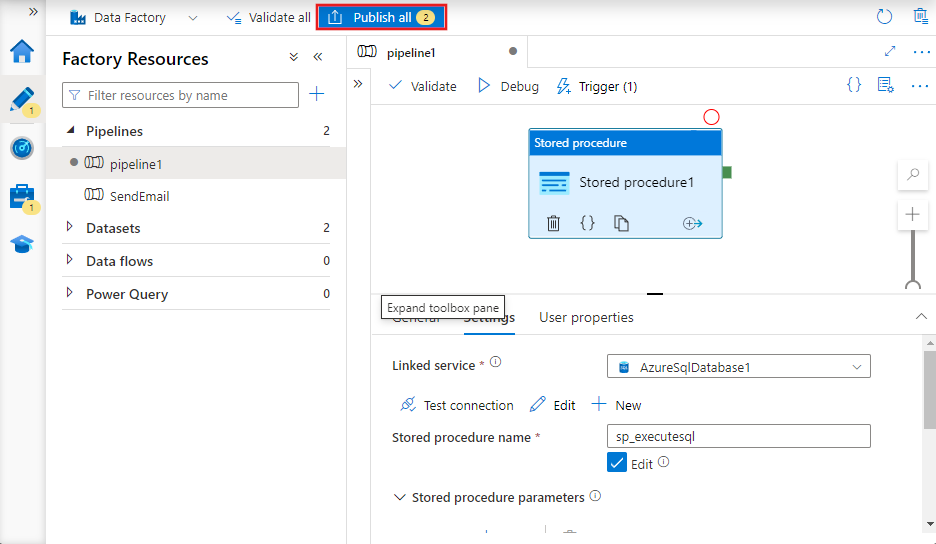
Create a third pipeline. Drag an Execute SSIS Package activity from the Activities toolbox onto the pipeline designer surface. Then, configure the activity by following the instructions in Run an SSIS package with the Execute SSIS Package activity in the Azure portal.
Chain the Execute SSIS Package activity between two web activities that start and stop your IR, similar to those web activities in the first and second pipelines.
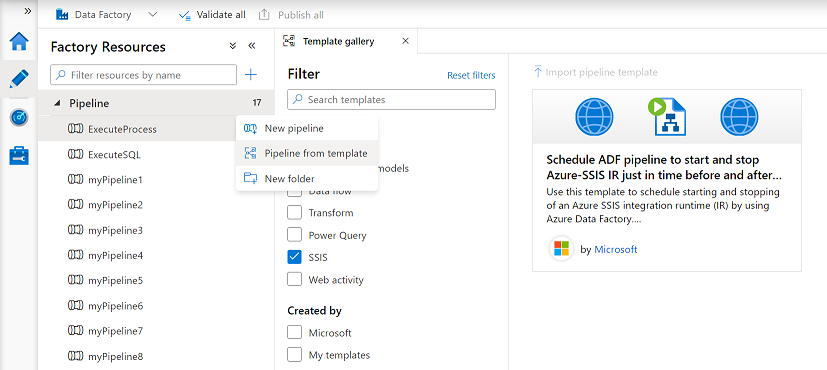
Instead of manually creating the third pipeline, you can also automatically create it from a template:
- Select the ellipsis (...) next to Pipeline to open a dropdown menu of pipeline actions. Then select the Pipeline from template action.
- Select the SSIS checkbox under Category.
- Select the Schedule ADF pipeline to start and stop Azure-SSIS IR just in time before and after running SSIS package template.
- On the Azure-SSIS Integration Runtime dropdown menu, select your IR.
- Select the Use this template button.
After you create your pipeline automatically, only the SSIS package is left for you to assign to the Execute SSIS Package activity.
To make the third pipeline more robust, you can ensure that the web activities to start and stop your IR are retried if there are any transient errors (for example, due to network connectivity). You can also ensure that those web activities are completed only when your IR is actually started or stopped.
To do so, you can replace each web activity with an Until activity. The Until activity contains two web activities: one to start and stop your IR, and another to check your IR status. Let's call the Until activities Start SSIS IR and Stop SSIS IR. The Start SSIS IR Until activity contains Try Start SSIS IR and Get SSIS IR Status web activities. The Stop SSIS IR Until activity contains Try Stop SSIS IR and Get SSIS IR Status web activities.
On the Settings tab of the Start SSIS IR Until activity, for Expression, enter
@equals('Started', activity('Get SSIS IR Status').output.properties.state). On the Settings tab of the Stop SSIS IR Until activity, for Expression, enter@equals('Stopped', activity('Get SSIS IR Status').output.properties.state).
Within both Until activities, the Try Start SSIS IR and Try Stop SSIS IR web activities are similar to those web activities in the first and second pipelines. On the Settings tab for the Get SSIS IR Status web activities, do the following actions:
For URL, enter the following URL for the REST API that gets the Azure-SSIS IR status. Replace
{subscriptionId},{resourceGroupName},{factoryName}, and{integrationRuntimeName}with the actual values for your IR.https://management.azure.com/subscriptions/{subscriptionId}/resourceGroups/{resourceGroupName}/providers/Microsoft.DataFactory/factories/{factoryName}/integrationRuntimes/{integrationRuntimeName}?api-version=2018-06-01For Method, select GET.
For Authentication, select Managed Identity to use the specified system-managed identity for your data factory. For more information, see Managed identity for Azure Data Factory.
For Resource, enter
https://management.azure.com/.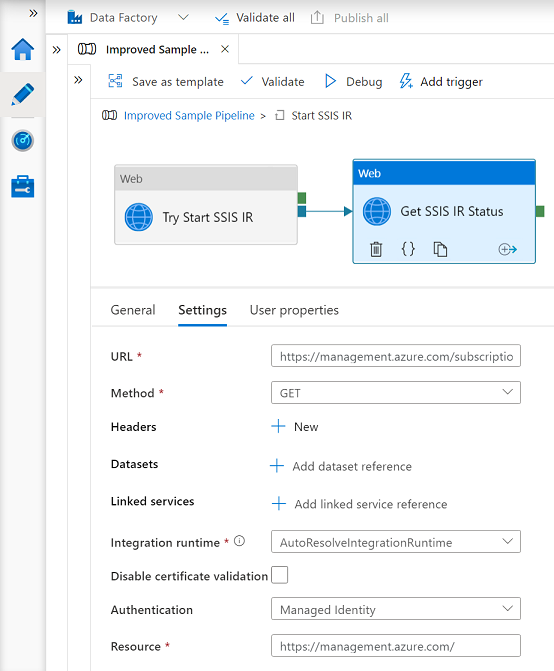
Assign the managed identity for your data factory a Contributor role to itself, so web activities in its pipelines can call the REST API to start and stop Azure-SSIS IRs provisioned in it:
On your Data Factory page in the Azure portal, select Access control (IAM).
Select Add > Add role assignment to open the Add role assignment page.
Assign the following role. For detailed steps, see Assign Azure roles using the Azure portal.
Setting Value Role Contributor Assign access to User, group, or service principal Members Your Data Factory username 
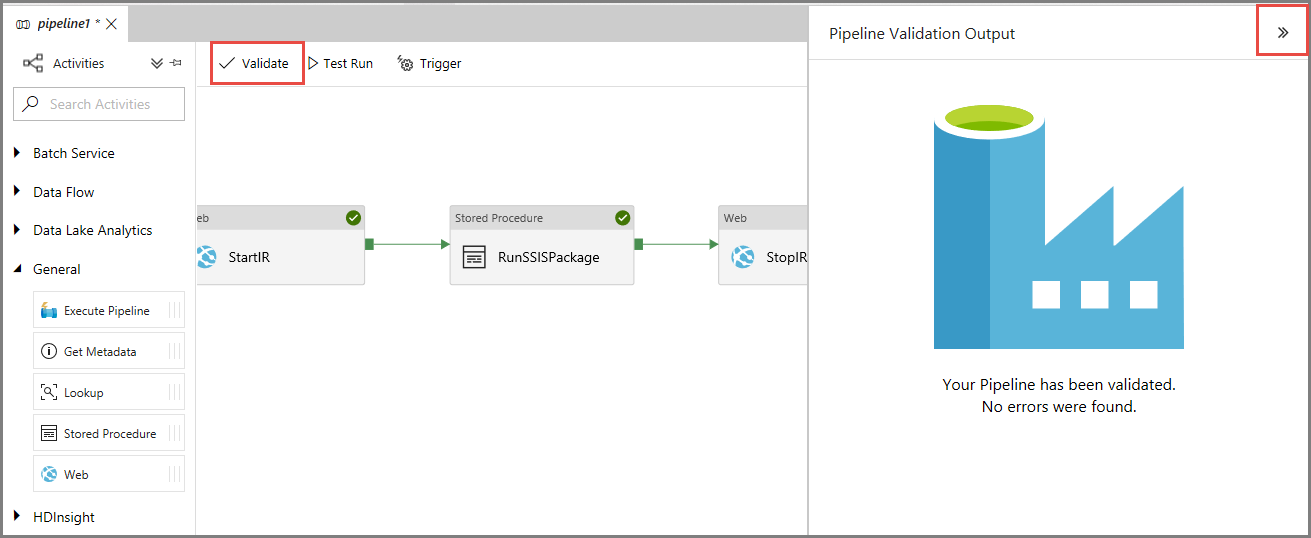
Validate your data factory and all pipeline settings by selecting Validate all or Validate on the factory or pipeline toolbar. Close Factory Validation Output or Pipeline Validation Output by selecting the double arrow (>>) button.
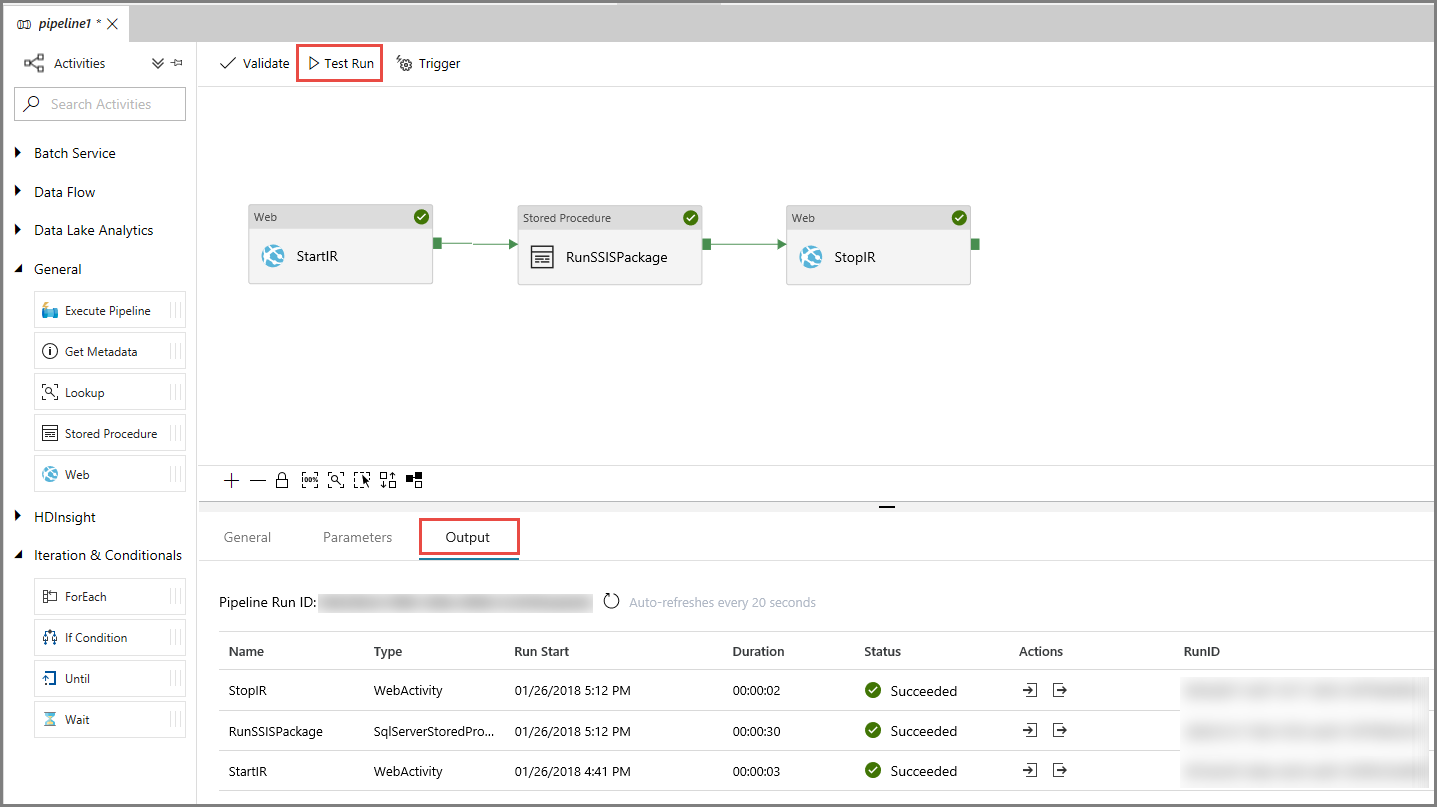
Test run your pipelines
Select Test Run on the toolbar for each pipeline. On the bottom pane, the Output tab lists pipeline runs.
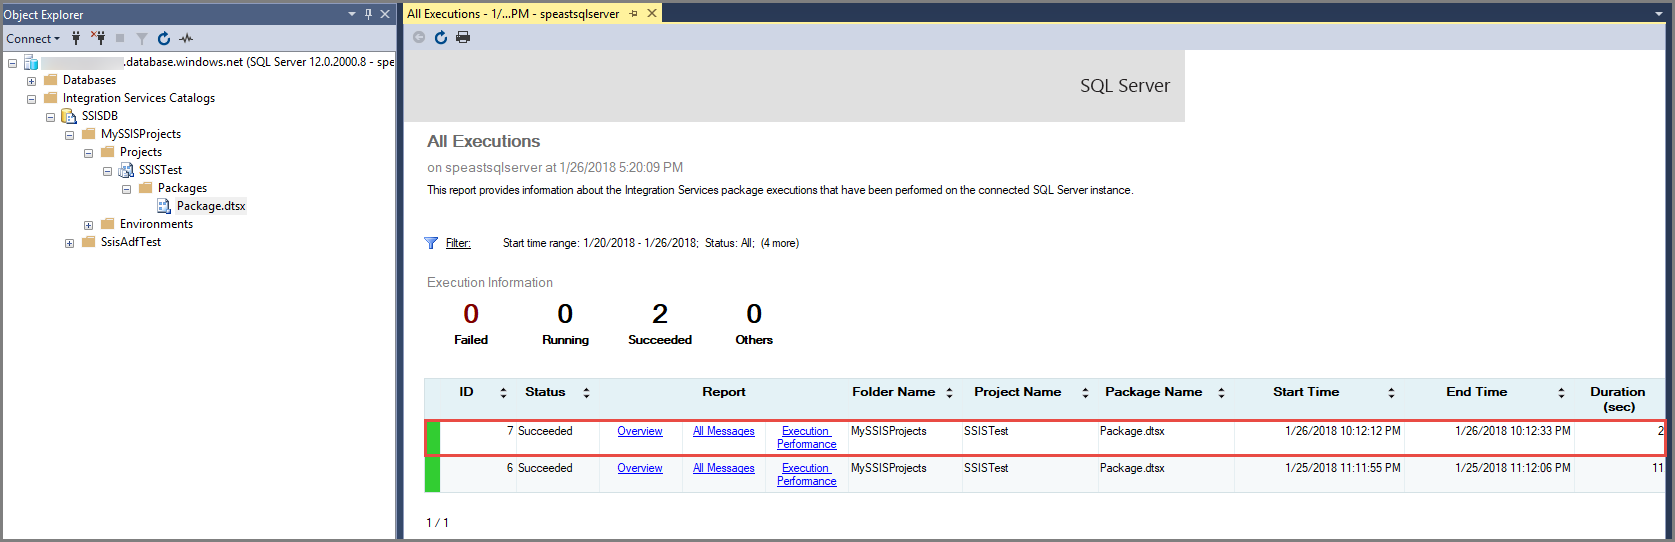
To test the third pipeline, you can use SQL Server Management Studio if you store your SSIS package in the SSIS catalog (SSISDB). In the Connect to Server window, do the following actions:
- For Server name, enter <your server name>.database.windows.net.
- Select Options >>.
- For Connect to database, select SSISDB.
- Select Connect.
- Expand Integration Services Catalogs > SSISDB > your folder > Projects > your SSIS project > Packages.
- Right-click the specified SSIS package to run, and then select Reports > Standard Reports > All Executions.
- Verify that the package ran.
Schedule your pipelines
Now that your pipelines work as you expected, you can create triggers to run them at specified cadences. For details about associating triggers with pipelines, see Configure schedules for pipelines.
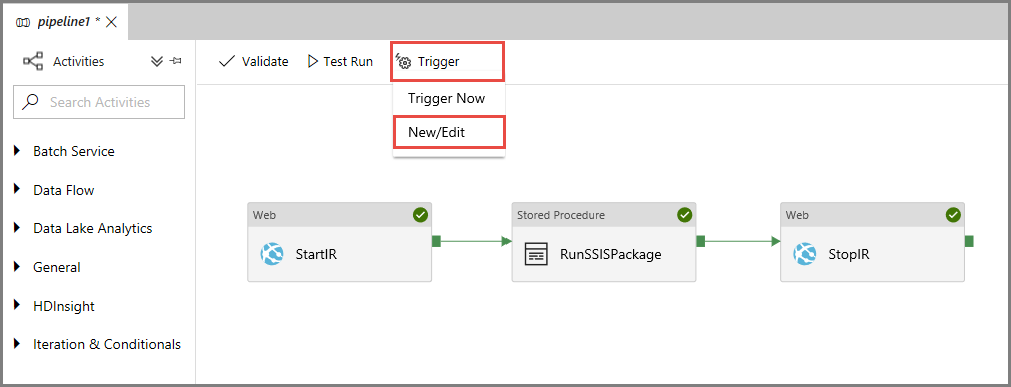
On the pipeline toolbar, select Trigger, and then select New/Edit.
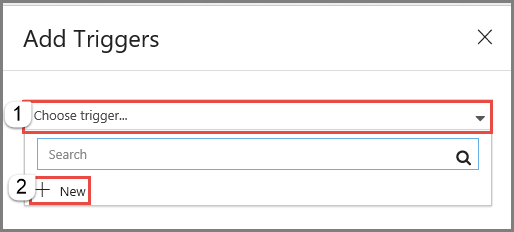
On the Add Triggers pane, select + New.
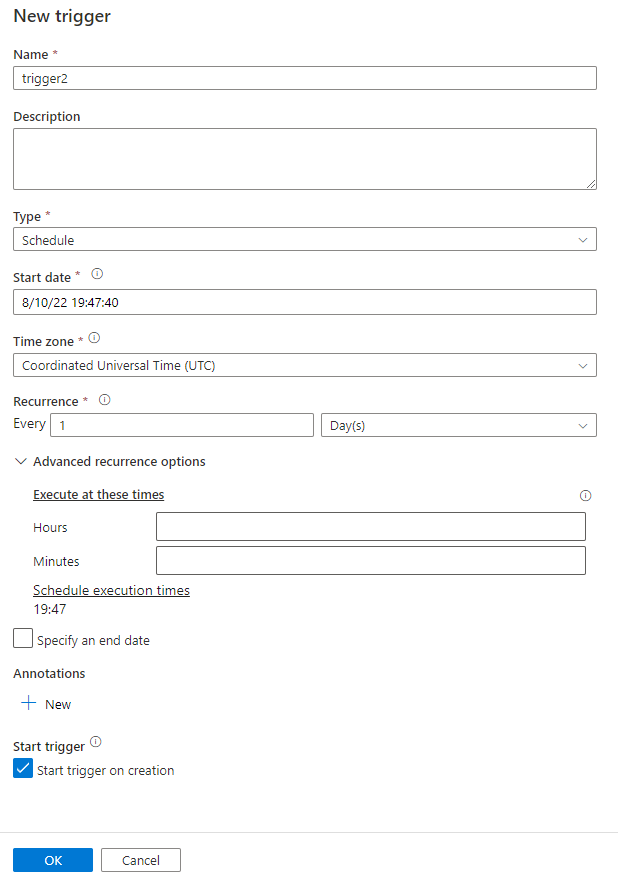
On the New Trigger pane, do the following actions:
- For Name, enter a name for the trigger. In the following example, trigger2 is the trigger name.
- For Type, select Schedule.
- For Start date, enter a start date and time in UTC.
- For Recurrence, enter a cadence for the trigger. In the following example, it's once every day.
- If you want the trigger to have an end date, select Specify an end date, and then select a date and time.
- Select Start trigger on creation to activate the trigger immediately after you publish all the Data Factory settings.
- Select OK.
On the Trigger Run Parameters page, review any warnings, and then select Finish.
Publish all the Data Factory settings by selecting Publish all on the factory toolbar.
Monitor your pipelines and triggers in the Azure portal
To monitor trigger runs and pipeline runs, use the Monitor tab on the left side of the Data Factory UI or app. For detailed steps, see Visually monitor Azure Data Factory.
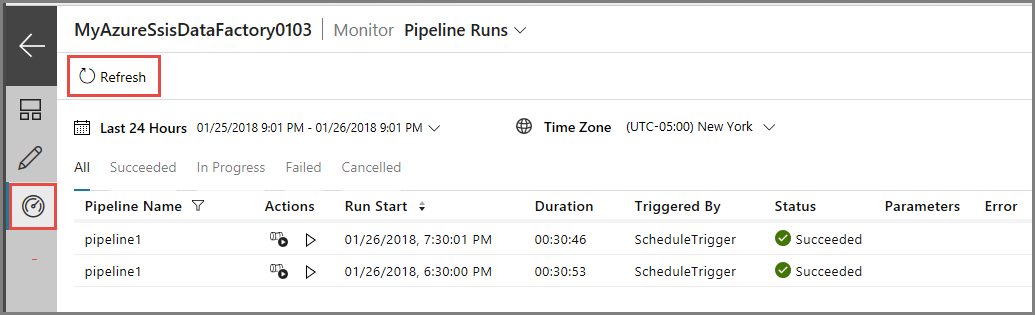
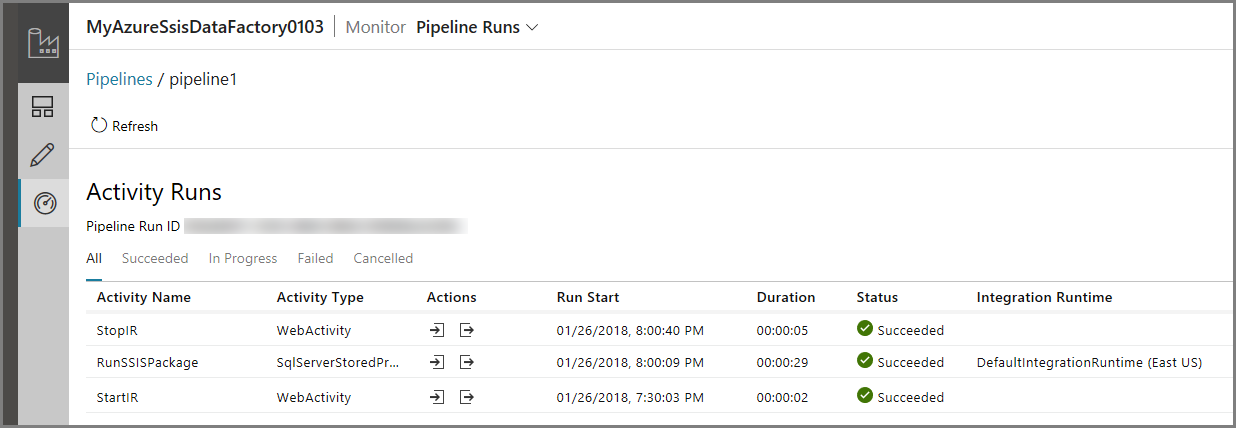
To view the activity runs associated with a pipeline run, select the first link (View Activity Runs) in the Actions column. For the third pipeline, three activity runs appear: one for each chained activity in the pipeline (web activity to start your IR, Execute SSIS Package activity to run your package, and web activity to stop your IR). To view the pipeline runs again, select the Pipelines link at the top.
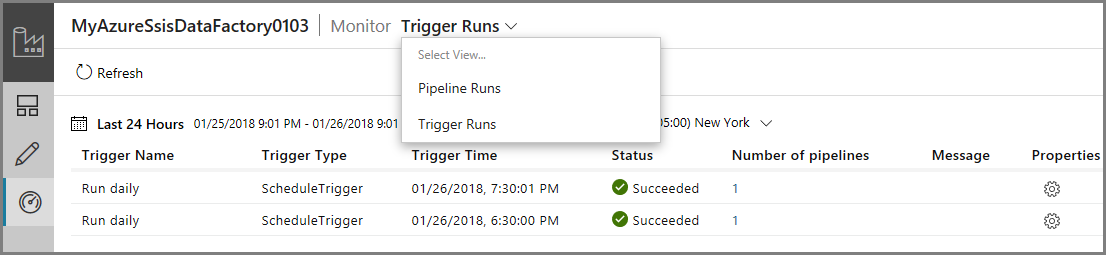
To view the trigger runs, select Trigger Runs from the dropdown list under Pipeline Runs at the top.
Monitor your pipelines and triggers by using PowerShell
Use scripts like the following examples to monitor your pipelines and triggers:
Get the status of a pipeline run:
Get-AzDataFactoryV2PipelineRun -ResourceGroupName $ResourceGroupName -DataFactoryName $DataFactoryName -PipelineRunId $myPipelineRunGet info about a trigger:
Get-AzDataFactoryV2Trigger -ResourceGroupName $ResourceGroupName -DataFactoryName $DataFactoryName -Name "myTrigger"Get the status of a trigger run:
Get-AzDataFactoryV2TriggerRun -ResourceGroupName $ResourceGroupName -DataFactoryName $DataFactoryName -TriggerName "myTrigger" -TriggerRunStartedAfter "2018-07-15" -TriggerRunStartedBefore "2018-07-16"
Create and schedule an Azure Automation runbook that starts and stops an Azure-SSIS IR
In this section, you learn how to create Azure Automation runbook that runs a PowerShell script to start and stop your Azure-SSIS IR on a schedule. This information is useful when you want to run additional scripts before or after starting and stopping your IR for pre-processing and post-processing.
Create your Azure Automation account
If you don't have an Azure Automation account, create one by following the instructions in this section. For detailed steps, see Create an Azure Automation account.
As part of this process, you create an Azure Run As account (a service principal in Microsoft Entra ID) and assign it a Contributor role in your Azure subscription. Ensure that it's the same subscription that contains your data factory with the Azure-SSIS IR. Azure Automation will use this account to authenticate to Azure Resource Manager and operate on your resources.
Open the Microsoft Edge or Google Chrome web browser. Currently, the Data Factory UI is supported only in these browsers.
Sign in to the Azure portal.
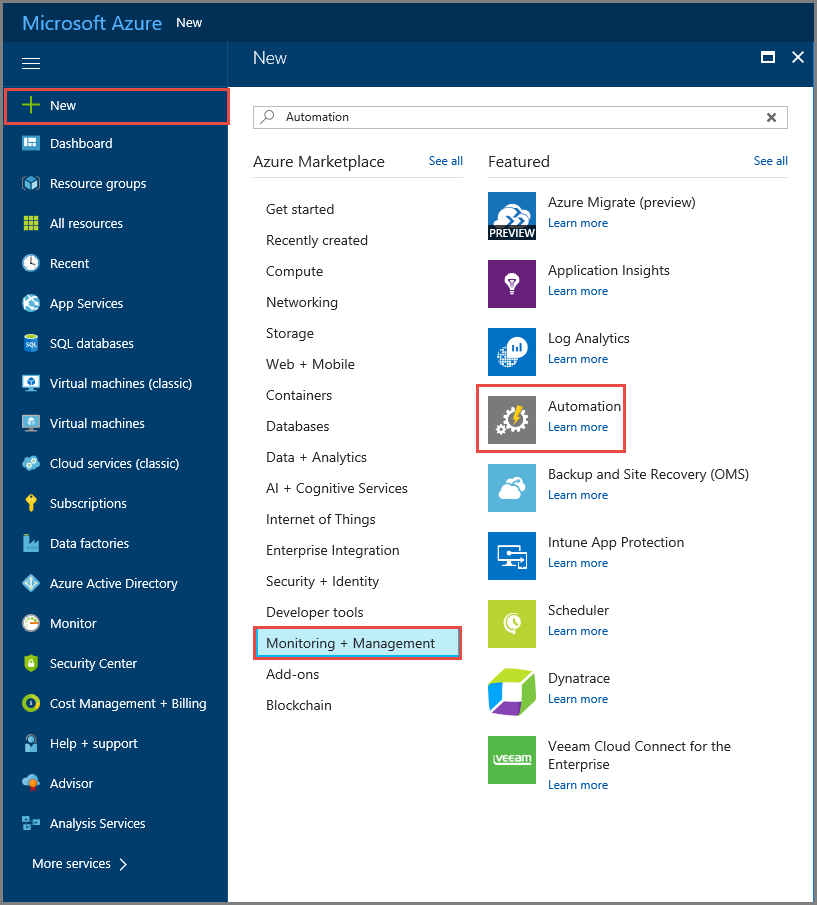
Select New on the left menu, select Monitoring + Management, and then select Automation.
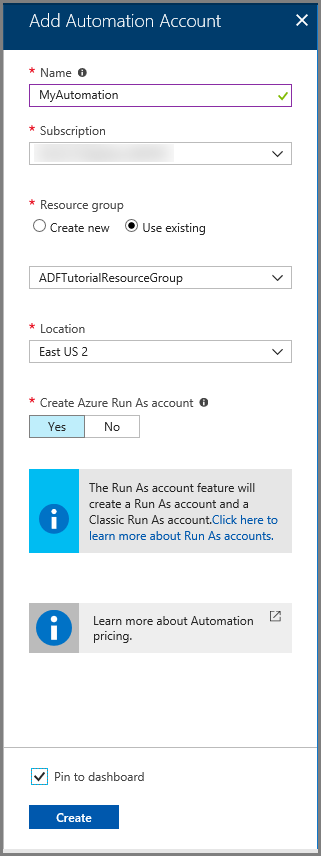
On the Add Automation Account pane, do the following actions:
- For Name, enter a name for your Azure Automation account.
- For Subscription, select the subscription that has your data factory with the Azure-SSIS IR.
- For Resource group, select Create new to create a new resource group, or select Use existing to use an existing one.
- For Location, select a location for your Azure Automation account.
- For Create Azure Run As account, select Yes. A service principal will be created in your Microsoft Entra instance and assigned a Contributor role in your Azure subscription.
- Select Pin to dashboard to display the account permanently on the Azure dashboard.
- Select Create.
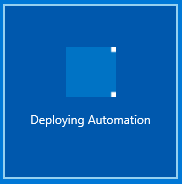
Monitor the deployment status of your Azure Automation account on the Azure dashboard and in notifications.
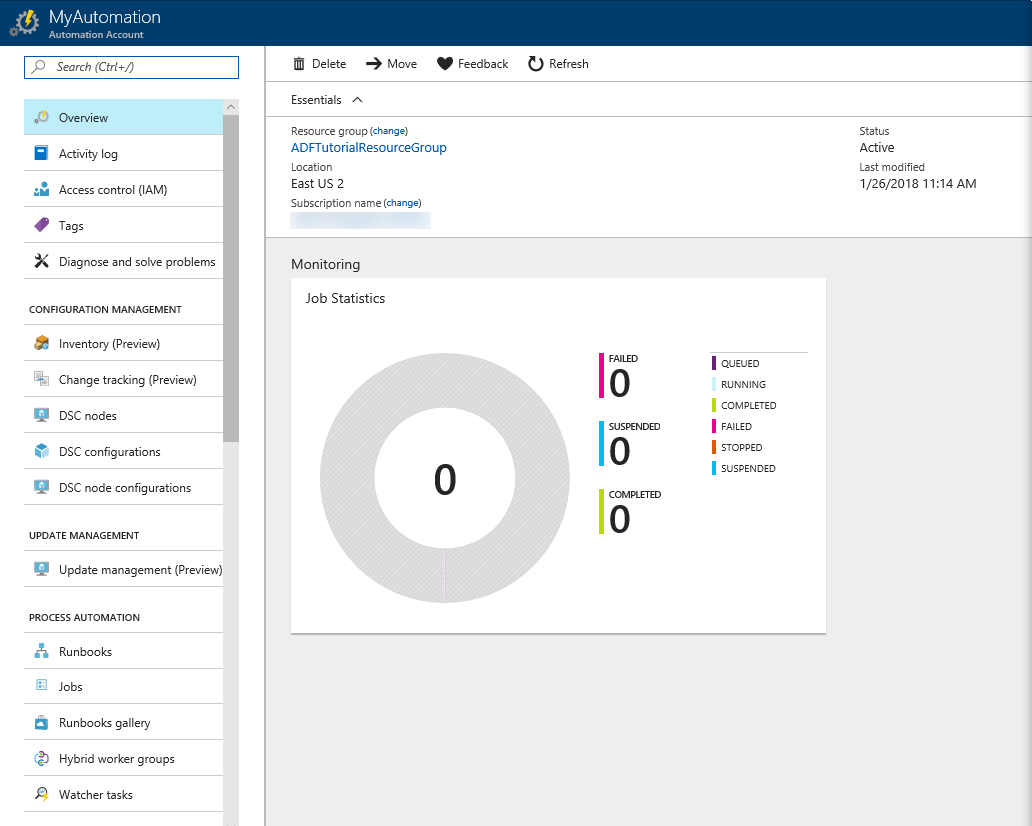
Confirm that the home page of your Azure Automation account appears. It means you created the account successfully.
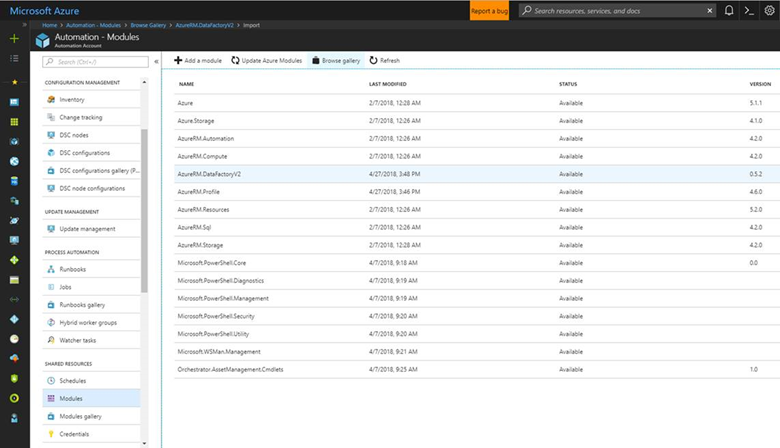
Import Data Factory modules
On the left menu, in the SHARED RESOURCES section, select Modules. Verify that you have Az.DataFactory and Az.Profile in the list of modules. They're both required.
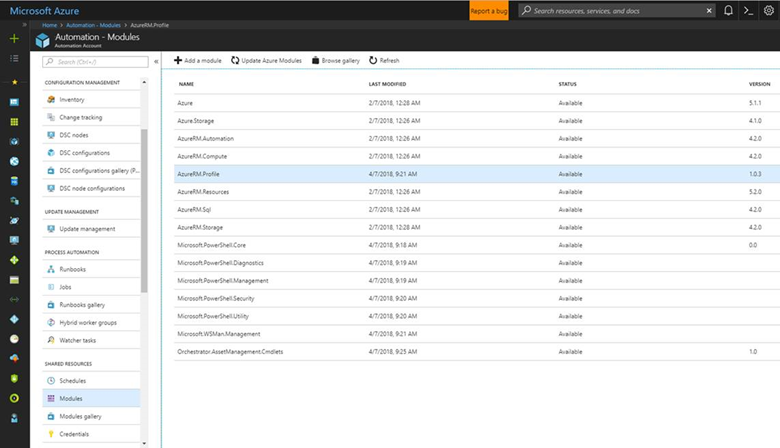
If you don't have Az.DataFactory:
Go to the Az.DataFactory module in the PowerShell Gallery.
Select Deploy to Azure Automation, select your Azure Automation account, and then select OK.
Go back to view Modules in the SHARED RESOURCES section on the left menu. Wait until STATUS for the Az.DataFactory module changes to Available.
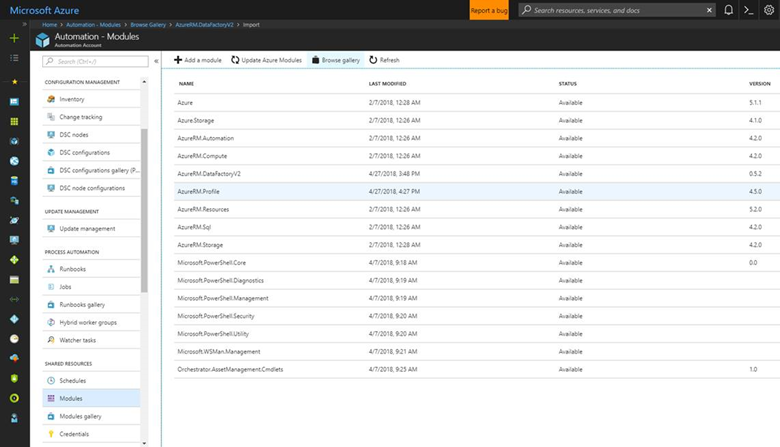
If you don't have Az.Profile:
Go to the Az.Profile module in the PowerShell Gallery.
Select Deploy to Azure Automation, select your Azure Automation account, and then select OK.
Go back to view Modules in the SHARED RESOURCES section on the left menu. Wait until STATUS for the Az.Profile module changes to Available.
Create your PowerShell runbook
This section provides steps for creating a PowerShell runbook. The script associated with your runbook either starts or stops the Azure-SSIS IR, based on the command that you specify for the OPERATION parameter.
The following steps don't provide the complete details for creating a runbook. For more information, see Create a runbook.
Switch to the Runbooks tab and select + Add a runbook from the toolbar.
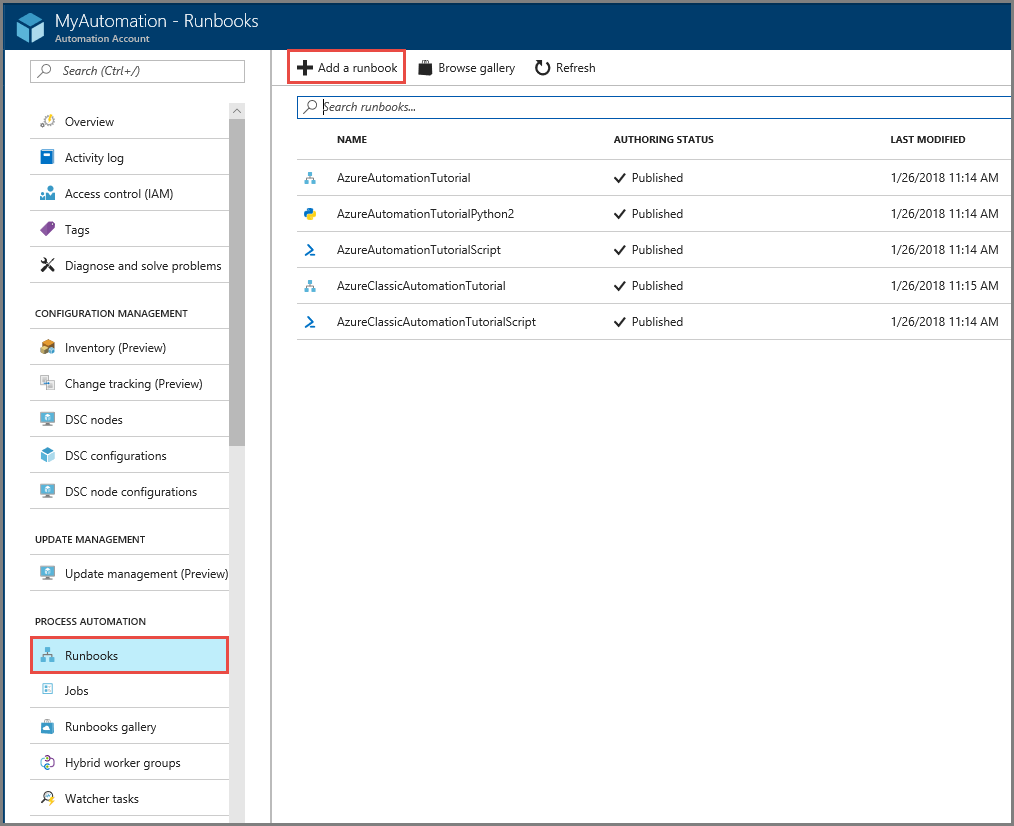
Select Create a new runbook, and then do the following actions:
- For Name, enter StartStopAzureSsisRuntime.
- For Runbook type, select PowerShell.
- Select Create.

Copy and paste the following PowerShell script into your runbook script window. Save and then publish your runbook by using the Save and Publish buttons on the toolbar.
Note
This example uses a system-assigned managed identity. If you're using a Run As account (service principal) or a user-assigned managed identity, refer to Azure Automation sample scripts for the login part.
Enable appropriate role-based access control (RBAC) permissions for the managed identity of this Automation account. For more information, see Roles and permissions for Azure Data Factory.
Param
(
      [Parameter (Mandatory= $true)]
      [String] $ResourceGroupName,

      [Parameter (Mandatory= $true)]
      [String] $DataFactoryName,

      [Parameter (Mandatory= $true)]
      [String] $AzureSSISName,

      [Parameter (Mandatory= $true)]
      [String] $Operation
)

$ErrorActionPreference = "Stop"

try
{
    "Logging in to Azure..."
    Connect-AzAccount -Identity
}
catch {
    Write-Error -Message $_.Exception
    throw $_.Exception
}

if($Operation -eq "START" -or $operation -eq "start")
{
    "##### Starting #####"
    Start-AzDataFactoryV2IntegrationRuntime -ResourceGroupName $ResourceGroupName -DataFactoryName $DataFactoryName -Name $AzureSSISName -Force
}
elseif($Operation -eq "STOP" -or $operation -eq "stop")
{
    "##### Stopping #####"
    Stop-AzDataFactoryV2IntegrationRuntime -DataFactoryName $DataFactoryName -Name $AzureSSISName -ResourceGroupName $ResourceGroupName -Force
}
"##### Completed #####"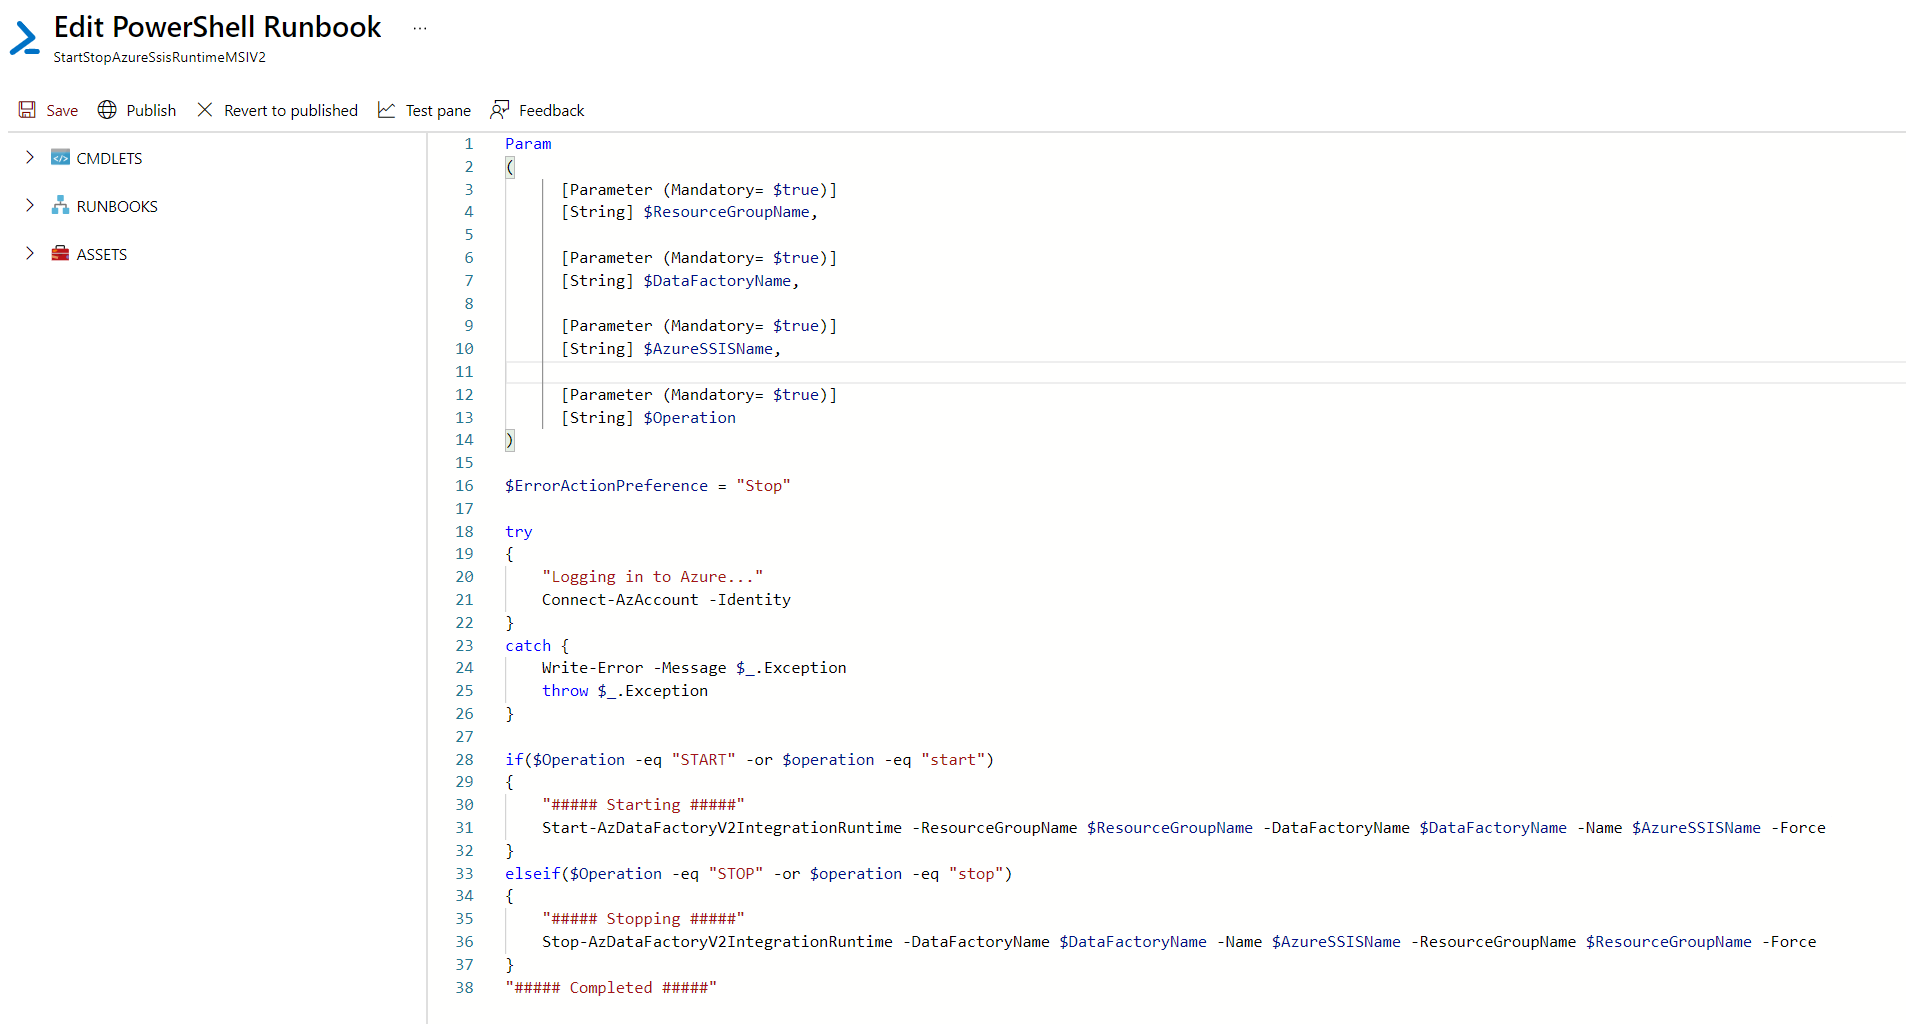
Test your runbook by selecting the Start button on the toolbar.
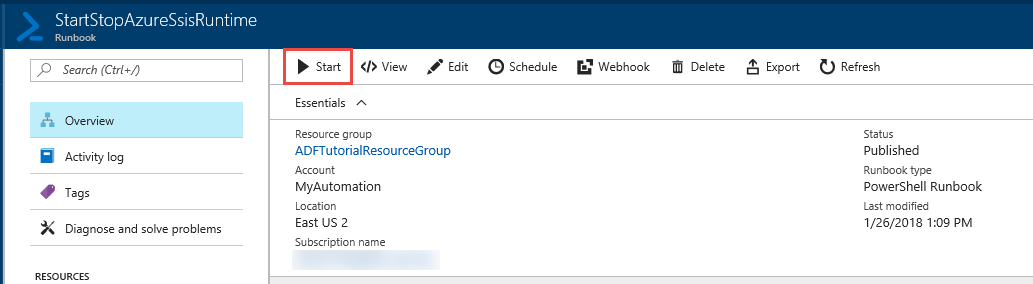
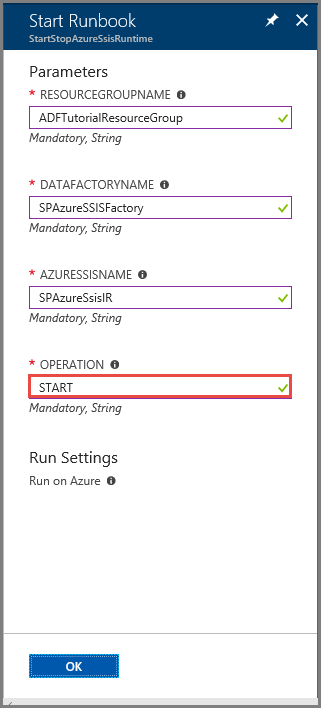
On the Start Runbook pane, do the following actions:
- For RESOURCEGROUPNAME, enter the name of resource group that has your data factory with the Azure-SSIS IR.
- For DATAFACTORYNAME, enter the name of your data factory with the Azure-SSIS IR.
- For AZURESSISNAME, enter the name of the Azure-SSIS IR.
- For OPERATION, enter START.
- Select OK.
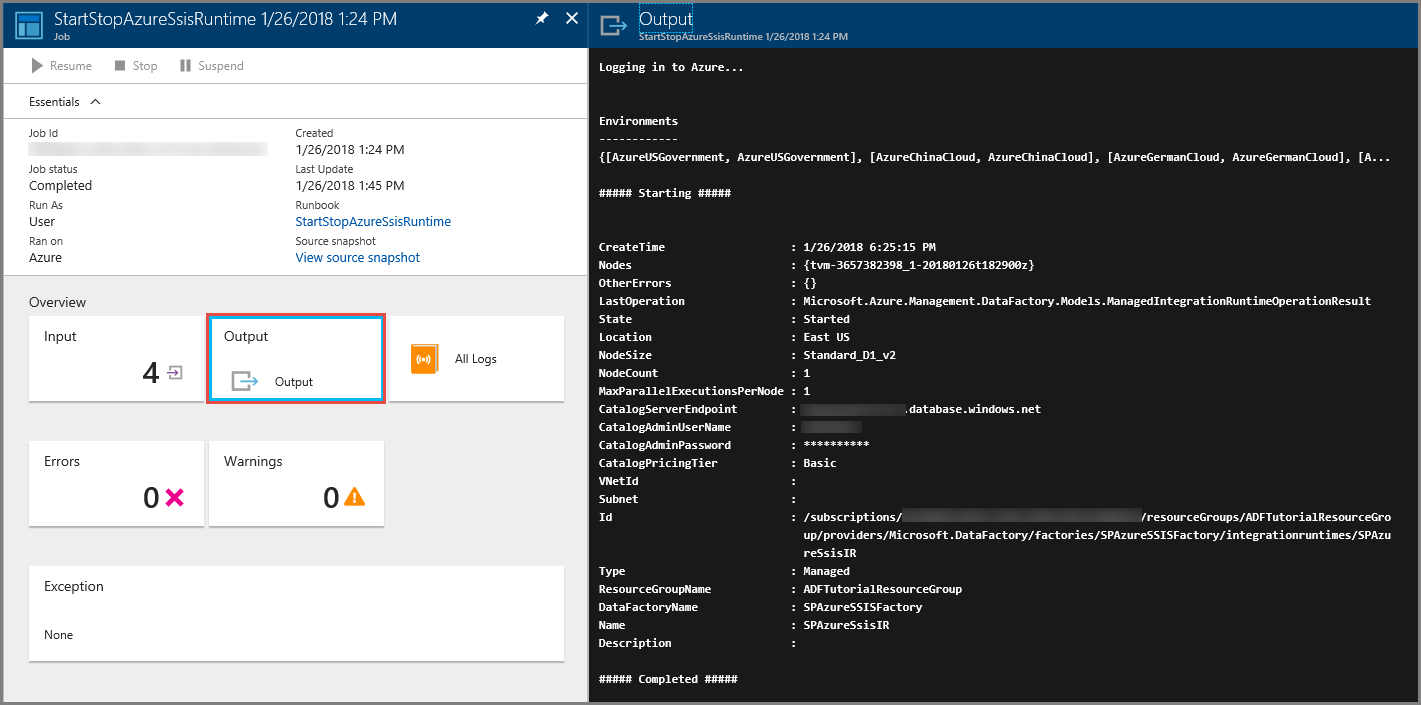
On the Job pane, select the Output tile. On the Output pane, wait for the message ##### Completed ##### after you see ##### Starting #####. Starting an Azure-SSIS IR takes about 20 minutes. Close the Job pane and get back to the Runbook page.
Repeat the previous two steps by using STOP as the value for OPERATION. Start your runbook again by selecting the Start button on the toolbar. Enter your resource group, data factory, and Azure-SSIS IR names. For OPERATION, enter STOP. On the Output pane, wait for the message ##### Completed ##### after you see ##### Stopping #####. Stopping an Azure-SSIS IR does not take as long as starting it. Close the Job pane and get back to the Runbook page.
You can also trigger your runbook via a webhook. To create a webhook, select the Webhooks menu item. Or you can create the webhook on a schedule by selecting the Schedules menu item, as specified in the next section.
Create schedules for your runbook to start and stop an Azure-SSIS IR
In the previous section, you created an Azure Automation runbook that can either start or stop an Azure-SSIS IR. In this section, you create two schedules for your runbook. When you're configuring the first schedule, you specify START for OPERATION. When you're configuring the second one, you specify STOP for OPERATION. For detailed steps to create schedules, see Create a schedule.
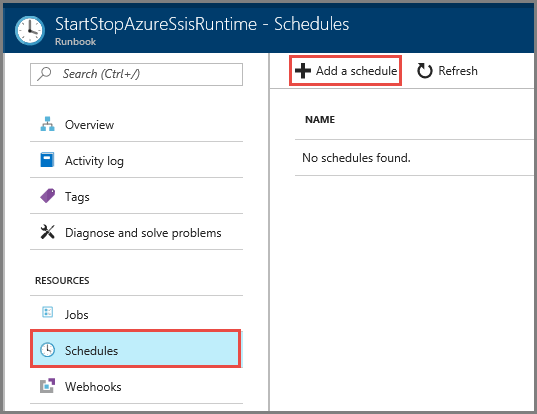
On the Runbook page, select Schedules, and then select + Add a schedule on the toolbar.
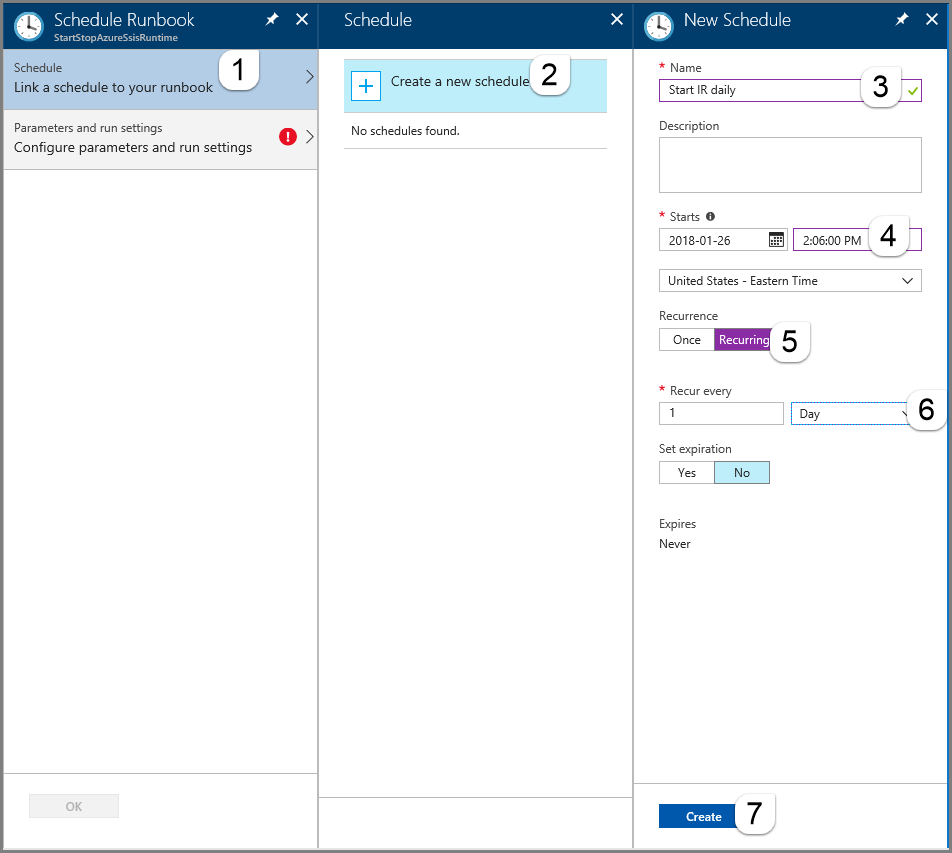
On the Schedule Runbook pane, do the following actions:
- Select Link a schedule to your runbook.
- Select Create a new schedule.
- On the New Schedule pane, enter Start IR daily for Name.
- For Starts, enter a time that's a few minutes past the current time.
- For Recurrence, select Recurring.
- For Recur every, enter 1 and select Day.
- Select Create.
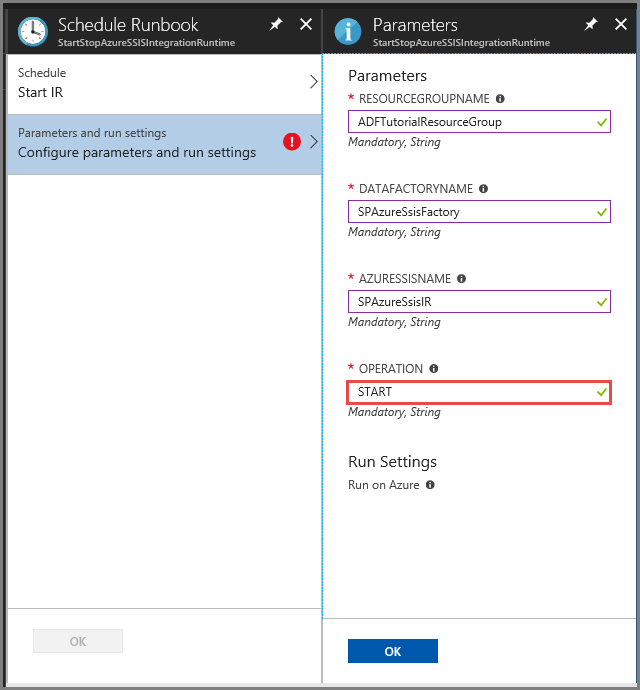
Switch to the Parameters and run settings tab. Specify your resource group, data factory, and Azure-SSIS IR names. For OPERATION, enter START, and then select OK. Select OK again to see the schedule on the Schedules page of your runbook.
Repeat the previous two steps to create a schedule named Stop IR daily. Enter a time that's at least 30 minutes after the time that you specified for the Start IR daily schedule. For OPERATION, enter STOP, and then select OK. Select OK again to see the schedule on the Schedules page of your runbook.
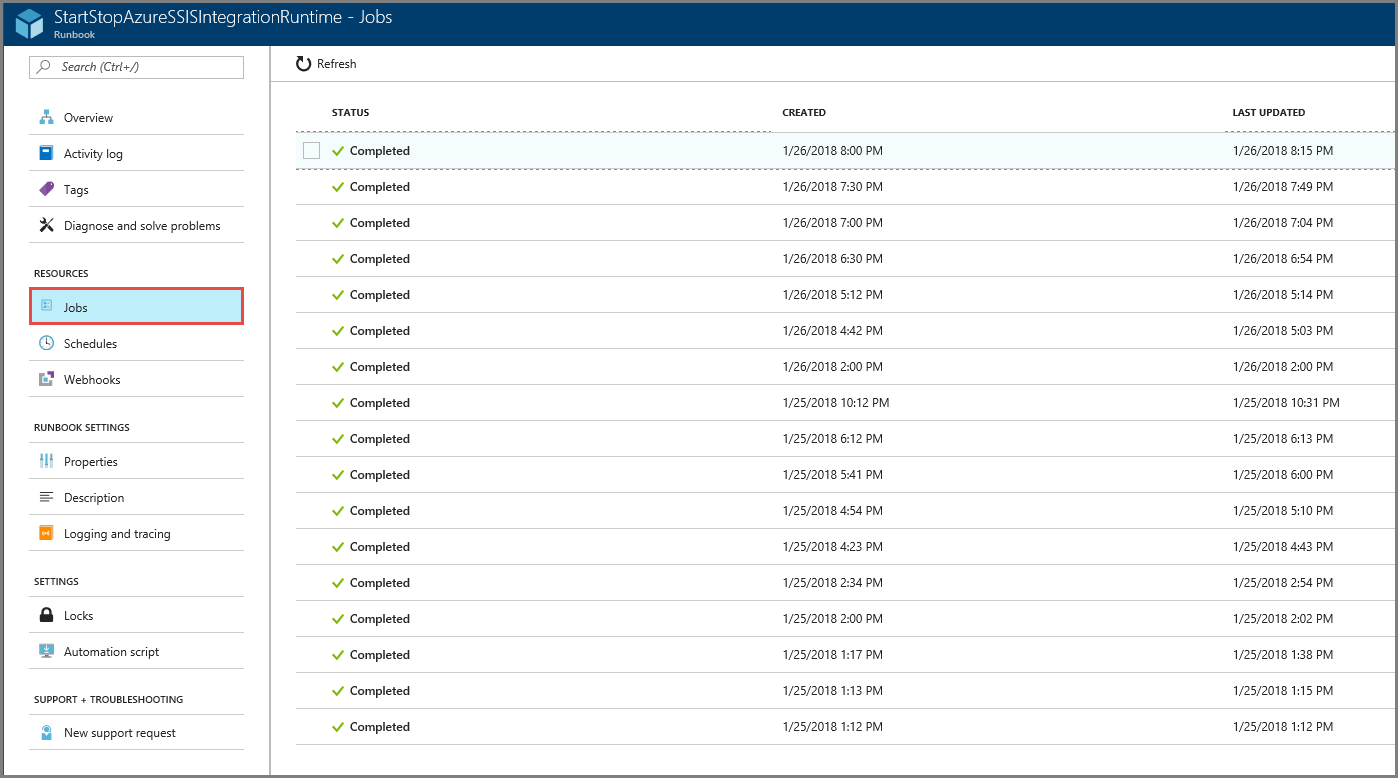
On the Runbook page, select Jobs on the left menu. The page that opens lists the jobs created by your schedules at the specified times, along with their statuses. You can see the job details, such as its output, similar to what appeared after you tested your runbook.
When you finish testing, disable your schedules by editing them. Select Schedules on the left menu, select Start IR daily/Stop IR daily, and then select No for Enabled.
Related content
See the following blog post:
See the following articles from SSIS documentation: