Note
Access to this page requires authorization. You can try signing in or changing directories.
Access to this page requires authorization. You can try changing directories.
You can disable Microsoft Defender for Cloud plans on your connected environments to manage your security costs. When you disable a plan, the associated security features, recommendations, and alerts for that plan stop appearing in Defender for Cloud.
Each Defender for Cloud plan has a different pricing structure based on attached resources and enabled subplans. For more information, see the Defender for Cloud pricing page. You can also estimate costs with the Defender for Cloud cost calculator.
Disable plans on the subscription level
Disabling a plan at the subscription level affects all resources under that subscription unless resource-level overrides are active.
If you created a resource to support a plan, such as a Log Analytics workspace or a Storage Account, delete it manually when it's no longer needed.
To disable plans at the subscription level:
Sign in to the Azure portal.
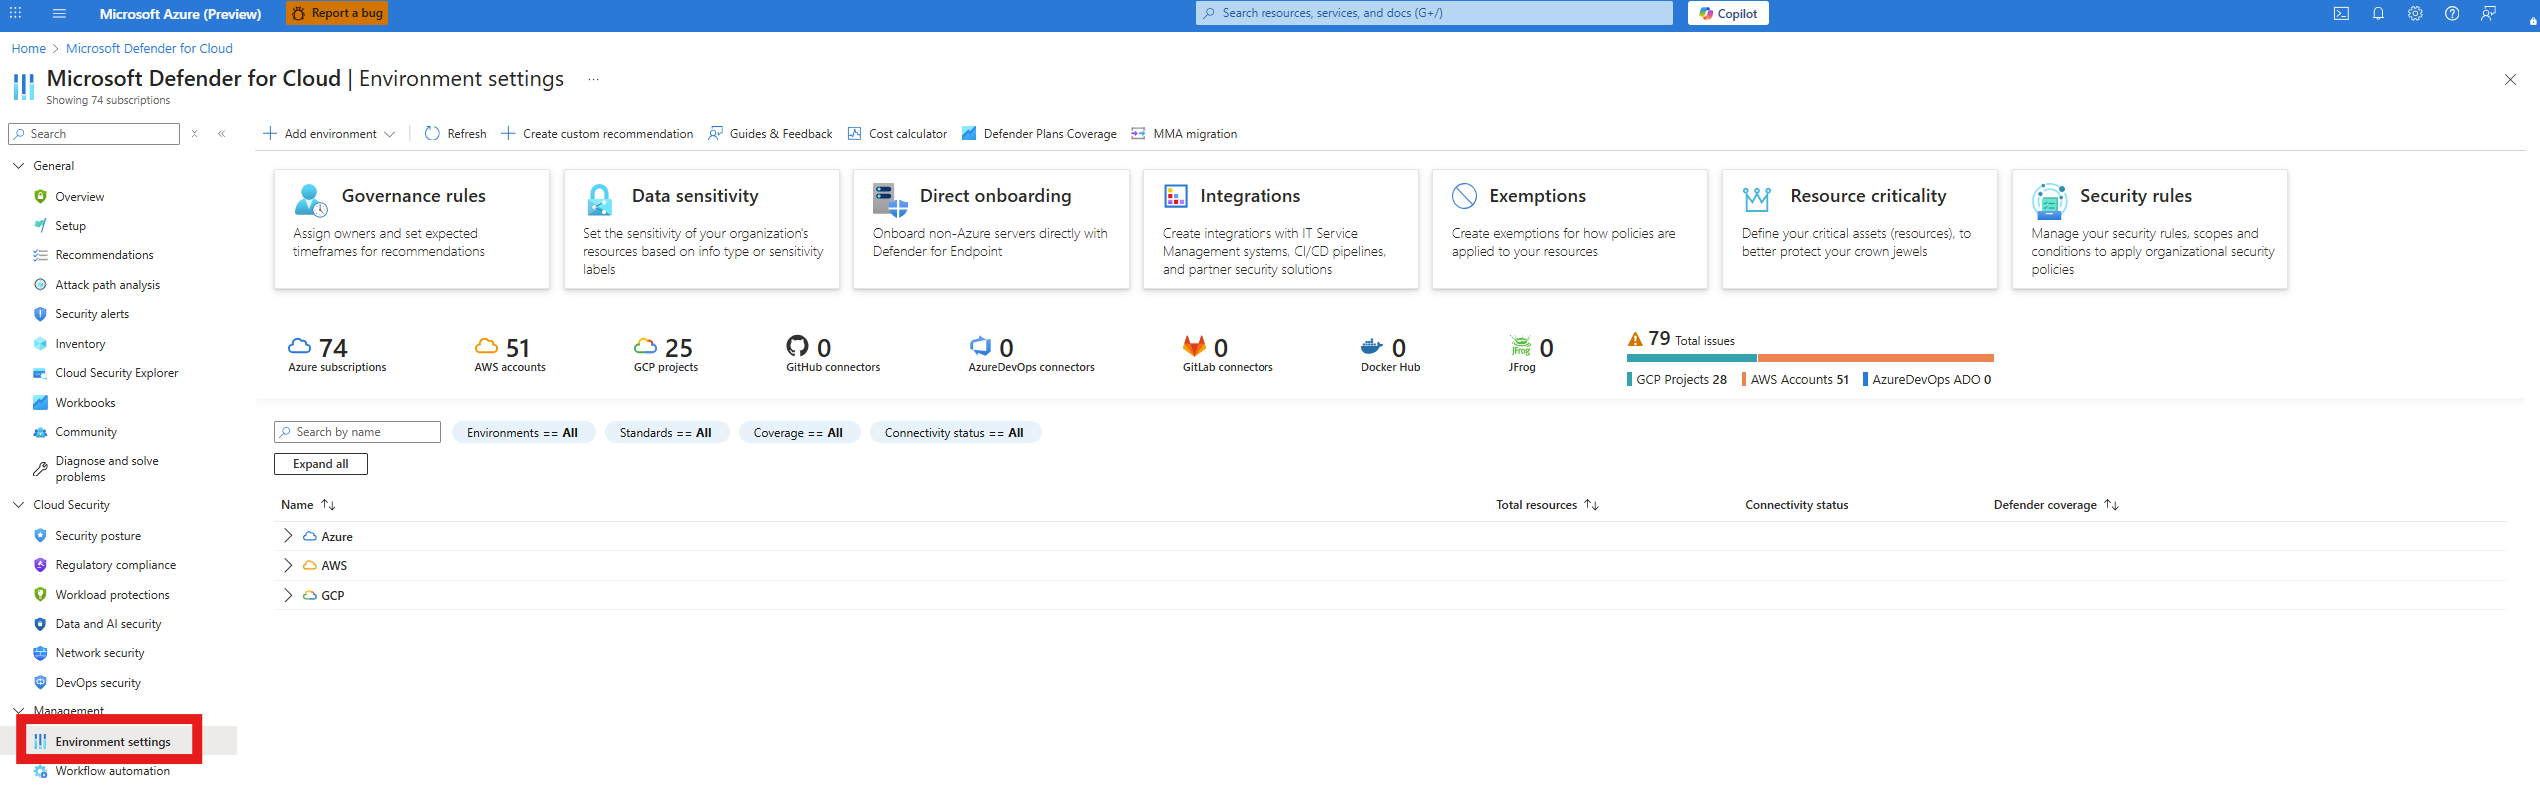
Go to Microsoft Defender for Cloud > Environment settings.
Select the relevant Azure, Amazon Web Services (AWS), or Google Cloud Project (GCP) subscription.

Disable plans by multicloud environment
To continue, select the relevant multicloud environment.
Find the plans you want to disable and toggle the switch to Off.
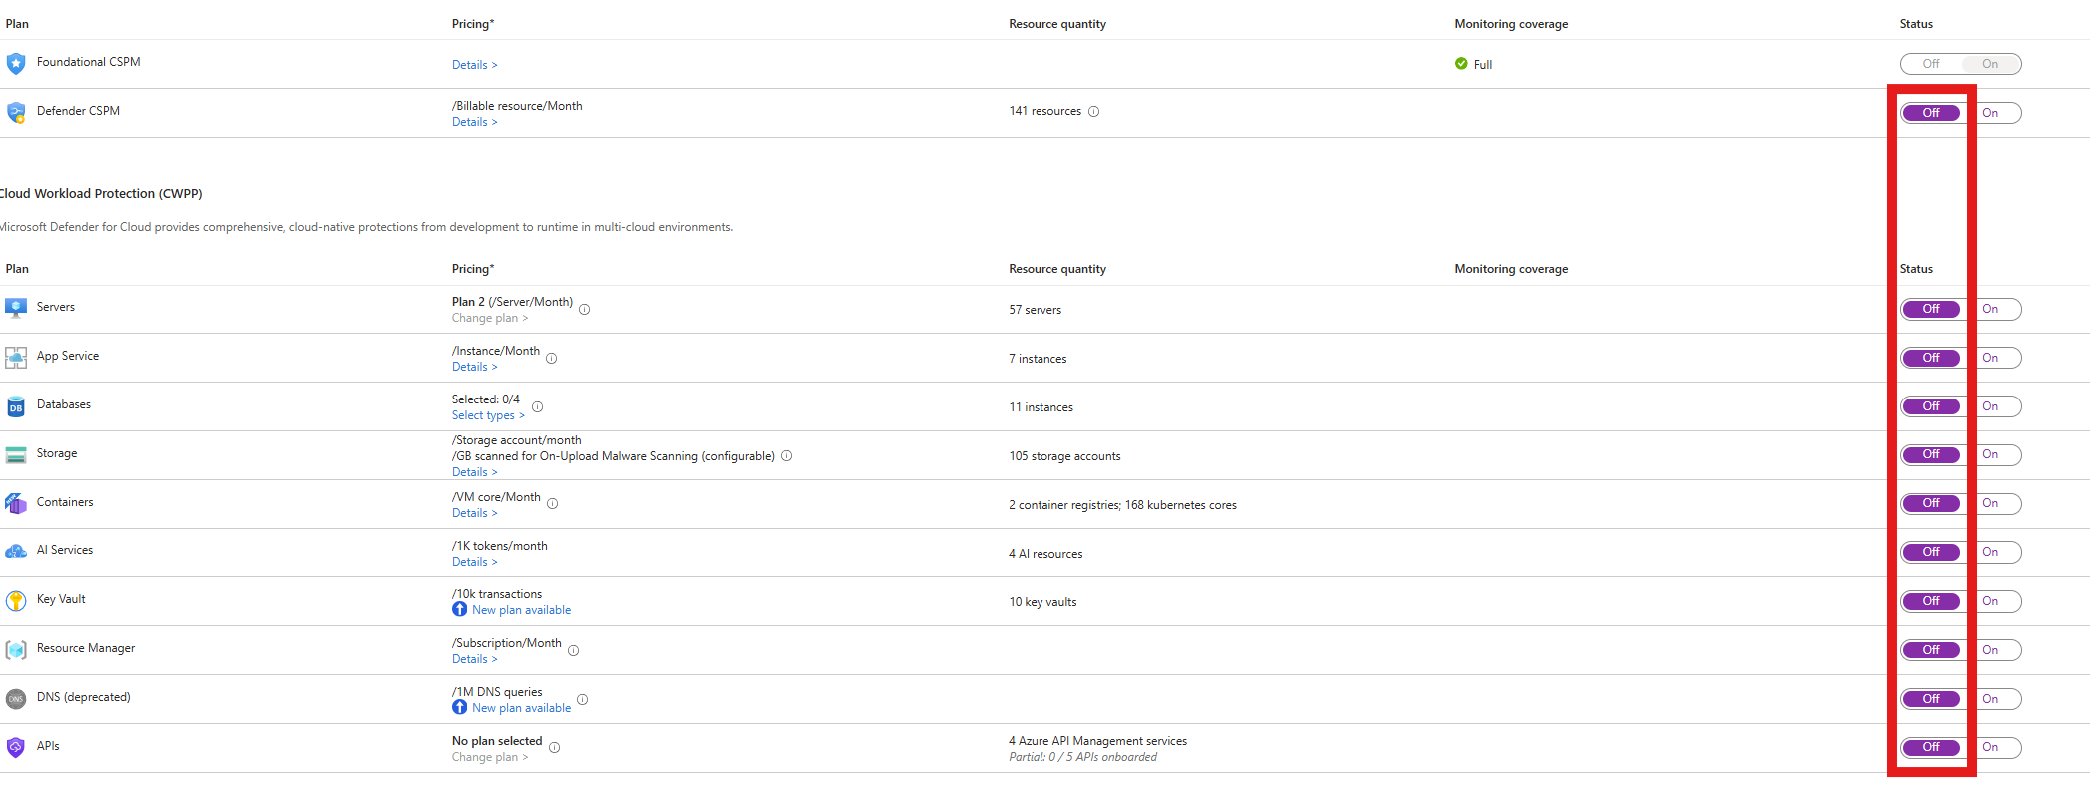
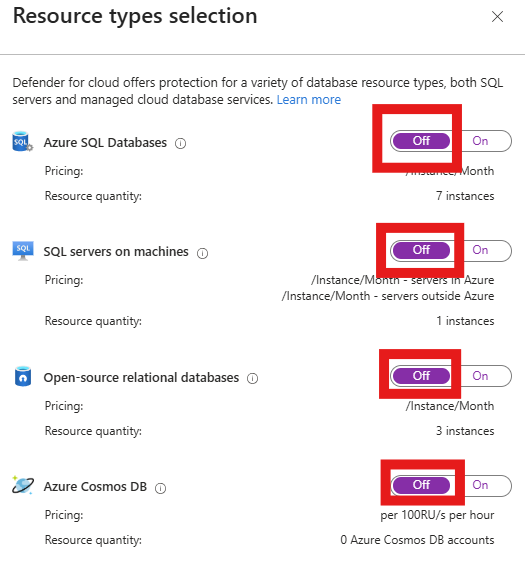
(Optional) To disable the Defender for Databases plan, use the pop-up to turn off all four Defender for Databases subplans.
Select Continue.
Select Save.


Important
Defender for Cloud stops monitoring and onboarding all your resources after you disable all plans in your environment.
Disabling plans doesn't cancel your subscription. To cancel your subscription, use the Azure subscription cancellation process.
Ensure plans are fully disabled
Turning off a plan at the subscription level doesn't prevent it from being turned on for a specific resource, which can generate charges. To fully disable a plan for a specific resource, check the resource-level configuration for that plan.
For security purposes, Defender for Cloud has multiple features that can re-enable themselves. Those mechanisms include:
- Autoprovisioning (agents/extensions that get reinstalled)
- Azure Policy assignments that redeploy Defender for Cloud components
- Resource-level settings
Note
To confirm that charges stop, check your billing meters in Cost Management + Billing.
Autoprovisioning can silently reinstall agents or extensions after you turn off plans. To prevent reinstallation, disable autoprovisioning for Endpoint protection and Guest Configuration agent in Defender for Cloud settings.
Sign in to the Azure portal.
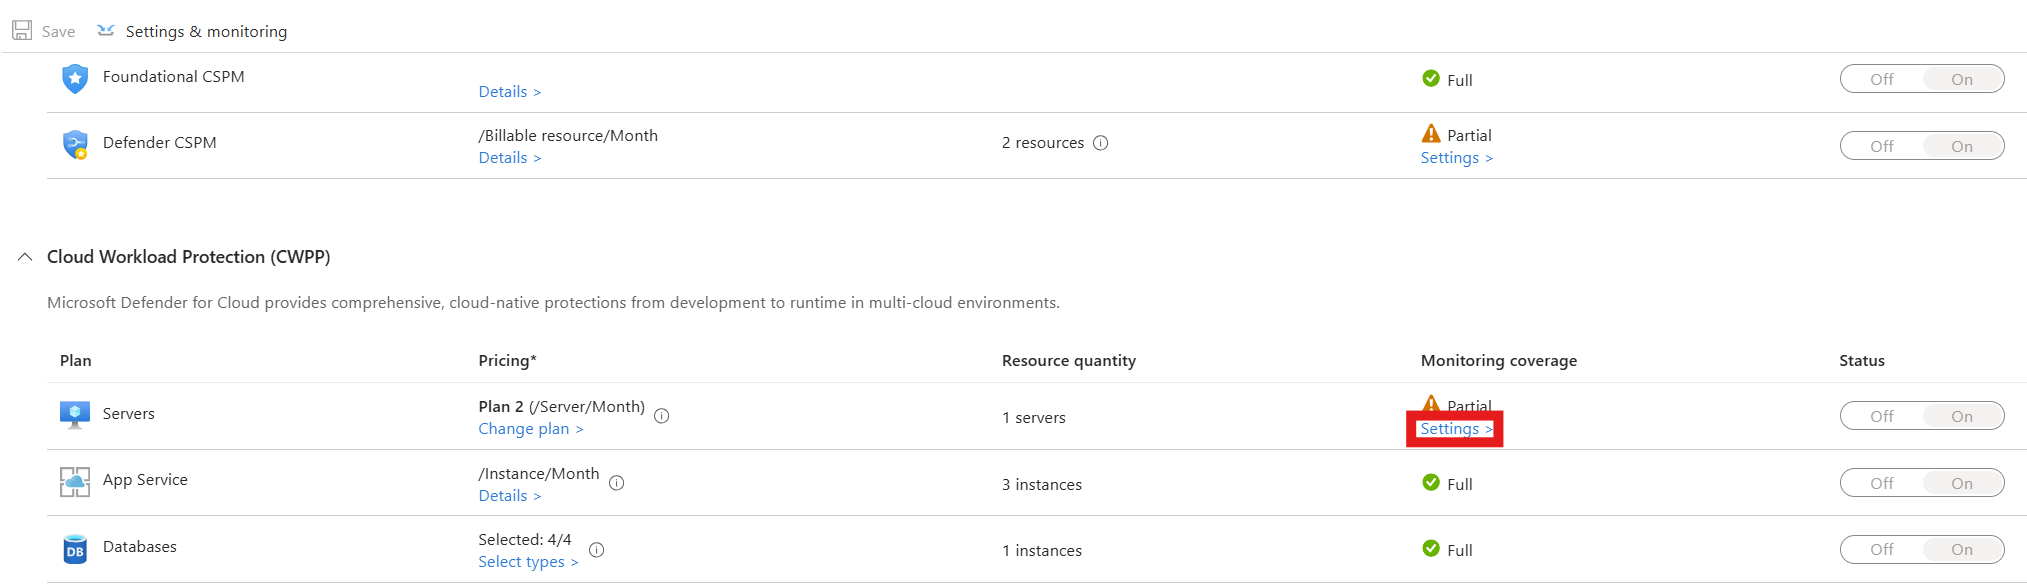
Go to Microsoft Defender for Cloud > Environment settings > relevant subscription or resource.
Select Settings for the relevant plans.
Toggle Guest configuration agent to Off.
Toggle Endpoint protection to Off.
Select Continue.
Select Save.


Check resource-level settings
You can enable Microsoft Defender for Cloud for individual resources, even if you turn off the subscription-level plan. To fully stop charges, check and disable Microsoft Defender for Cloud on each supported resource type.
To check and disable Defender for Cloud at the resource level:
Sign in to the Azure portal.
Open the specific Azure resource.
Locate and select Microsoft Defender for Cloud.
Turn Defender for Cloud to Off.
Select Save.
Resource-specific instructions
The following resource types are the most common where Defender for Cloud stays enabled.
App Service is the most common place where Defender for Cloud stays enabled accidentally. You pay for Defender for App Service per App Service plan. It can stay enabled even when the subscription plan is off.
Sign in to the Azure portal.
Open the App Service plan (not the individual app).
Select Microsoft Defender for Cloud.
Set Defender for App Service to Off.
Select Save.


Confirm resource-level Defender is off
To confirm that resource-level Defender is truly off, use billing as the source of truth.
Sign in to the Azure portal.
Go to Cost Management + Billing > Cost analysis.
Filter by Service name and Meter name.
Look for meters such as:
Defender for App ServiceDefender for StorageDefender for ServersDefender CSPM(Cloud Security Posture Management)
If charges still appear, there's at least one resource with Defender still enabled, or a policy or autoprovisioning rule is re-enabling it.
Confirm you're no longer covered
After you disable the plans and confirm that you're no longer billed, use the Coverage workbook to verify your current coverage.