Discover Enterprise IoT devices with an Enterprise IoT network sensor (Public preview)
Important
Registering a new Enterprise IoT network sensor as described in this article is no longer available. For customers with the Azure Consumption Revenue (ACR) or legacy license, Defender for IoT maintains existing Enterprise IoT network sensors.
This article describes how to register an Enterprise IoT network sensor in Microsoft Defender for IoT.
Microsoft Defender XDR customers with an Enterprise IoT network sensor can see all discovered devices in the Device inventory in either Microsoft Defender XDR or Defender for IoT. You'll also get extra security value from more alerts, vulnerabilities, and recommendations in Microsoft Defender XDR for the newly discovered devices.
If you're a Defender for IoT customer working solely in the Azure portal, an Enterprise IoT network sensor provides extra device visibility to Enterprise IoT devices, such as Voice over Internet Protocol (VoIP) devices, printers, and cameras, which might not be covered by your OT network sensors.
Defender for IoT alerts and recommendations for devices discovered by the Enterprise IoT sensor only are available only in the Azure portal.
For more information, see Securing IoT devices in the enterprise.
Important
The Enterprise IoT Network sensor is currently in PREVIEW. See the Supplemental Terms of Use for Microsoft Azure Previews for additional legal terms that apply to Azure features that are in beta, preview, or otherwise not yet released into general availability.
Prerequisites
This section describes the prerequisites required before deploying an Enterprise IoT network sensor.
Azure requirements
To view Defender for IoT data in Microsoft Defender XDR, including devices, alerts, recommendations, and vulnerabilities, you must have Enterprise IoT security turned on in Microsoft Defender XDR.
If you only want to view data in the Azure portal, you don't need Microsoft Defender XDR. You can also turn on Enterprise IoT security in Microsoft Defender XDR after registering your network sensor to bring extra device visibility and security value to your organization.
Make sure you can access the Azure portal as a Security admin, Contributor, or Owner user. If you don't already have an Azure account, you can create your free Azure account today.
Network requirements
Identify the devices and subnets you want to monitor so that you understand where to place an Enterprise IoT sensor in your network. You might want to deploy multiple Enterprise IoT sensors.
Configure traffic mirroring in your network so that the traffic you want to monitor is mirrored to your Enterprise IoT sensor. Supported traffic mirroring methods are the same as for OT monitoring. For more information, see Choose a traffic mirroring method for traffic monitoring.
Physical or virtual machine requirements
Allocate a physical appliance or a virtual machine (VM) to use as your network sensor. Make sure that your machine has the following specifications:
| Tier | Requirements |
|---|---|
| Minimum | To support up to 1 Gbps of data: - 4 CPUs, each with 2.4 GHz or more - 16-GB RAM of DDR4 or better - 250 GB HDD |
| Recommended | To support up to 15 Gbps of data: - 8 CPUs, each with 2.4 GHz or more - 32-GB RAM of DDR4 or better - 500 GB HDD |
Your machine must also have:
The Ubuntu 18.04 Server operating system. If you don't yet have Ubuntu installed, download the installation files to an external storage, such as a DVD or disk-on-key, and then install it on your appliance or VM. For more information, see the Ubuntu Image Burning Guide.
Network adapters, at least one for your switch monitoring (SPAN) port, and one for your management port to access the sensor's user interface
Your Enterprise IoT sensor must have access to the Azure cloud using a direct connection. Direct connections are configured for Enterprise IoT sensors using the same procedure as for OT sensors. For more information, see Provision sensors for cloud management.
Prepare a physical appliance or VM
This procedure describes how to prepare your physical appliance or VM to install the Enterprise IoT network sensor software.
To prepare your appliance:
Connect a network interface (NIC) from your physical appliance or VM to a switch as follows:
Physical appliance - Connect a monitoring NIC to a SPAN port directly by a copper or fiber cable.
VM - Connect a vNIC to a vSwitch, and configure your vSwitch security settings to accept Promiscuous mode. For more information, see, for example Configure a SPAN monitoring interface for a virtual appliance.
Sign in to your physical appliance or VM and run the following command to validate incoming traffic to the monitoring port:
ifconfigThe system displays a list of all monitored interfaces.
Identify the interfaces that you want to monitor, which are usually the interfaces with no IP address listed. Interfaces with incoming traffic show an increasing number of RX packets.
For each interface you want to monitor, run the following command to enable Promiscuous mode in the network adapter:
ifconfig <monitoring port> up promiscWhere
<monitoring port>is an interface you want to monitor. Repeat this step for each interface you want to monitor.Ensure network connectivity by opening the following ports in your firewall:
Protocol Transport In/Out Port Purpose HTTPS TCP In/Out 443 Cloud connection DNS TCP/UDP In/Out 53 Address resolution Make sure that your physical appliance or VM can access the cloud using HTTPS on port 443 to the following Microsoft endpoints:
- EventHub:
*.servicebus.windows.net - Storage:
*.blob.core.windows.net - Download Center:
download.microsoft.com - IoT Hub:
*.azure-devices.net
Tip
You can also download and add the Azure public IP ranges so your firewall will allow the Azure endpoints that are specified above, along with their region.
The Azure public IP ranges are updated weekly. New ranges appearing in the file will not be used in Azure for at least one week. To use this option, download the new json file every week and perform the necessary changes at your site to correctly identify services running in Azure.
- EventHub:
Register an Enterprise IoT sensor in Defender for IoT
This section describes how to register an Enterprise IoT sensor in Defender for IoT. When you're done registering your sensor, you continue on with installing the Enterprise IoT monitoring software on your sensor machine.
To register a sensor in the Azure portal:
Go to Defender for IoT > Sites and sensors, and then select Onboard sensor > EIoT.
On the Set up Enterprise IoT Security page, enter the following details, and then select Register:
- In the Sensor name field, enter a meaningful name for your sensor.
- From the Subscription drop-down menu, select the subscription where you want to add your sensor.
A Sensor registration successful screen shows your next steps and the command you'll need to start the sensor installation.
For example:
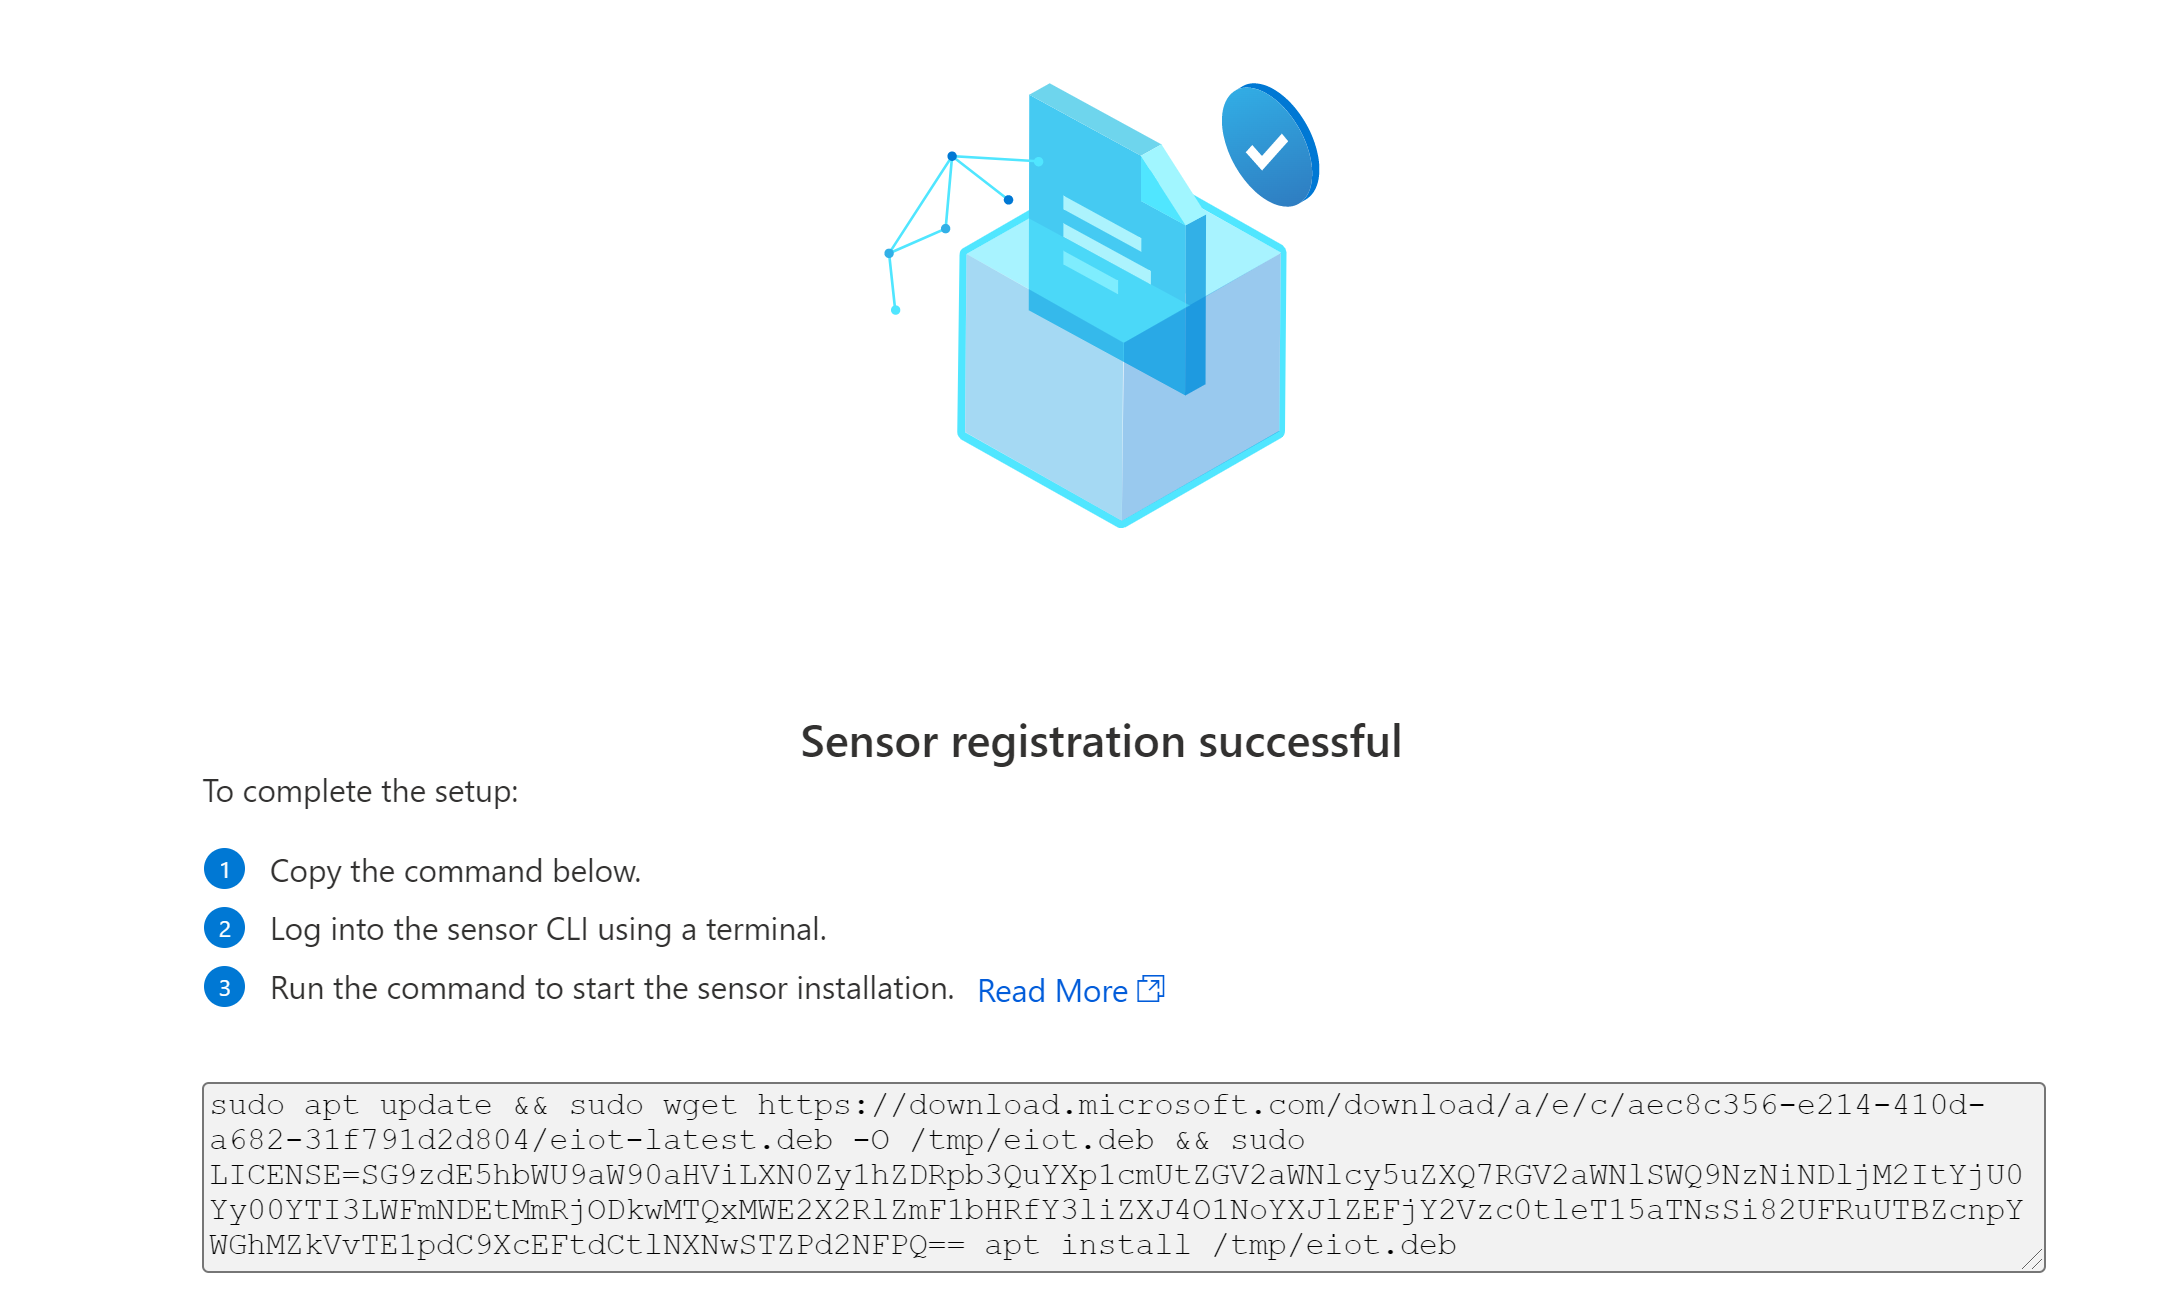
Copy the command to a safe location, where you're able to copy it to your physical appliance or VM in order to install sensor software.
Install Enterprise IoT sensor software
This procedure describes how to install Enterprise IoT monitoring software on your sensor machine, either a physical appliance or VM.
Note
While this procedure describes how to install sensor software on a VM using ESXi, enterprise IoT sensors are also supported using Hyper-V.
To install sensor software:
On your sensor machine, sign in to the sensor's CLI using a terminal, such as PuTTY, or MobaXterm.
Run the command that you'd copied from the sensor registration step. For example:
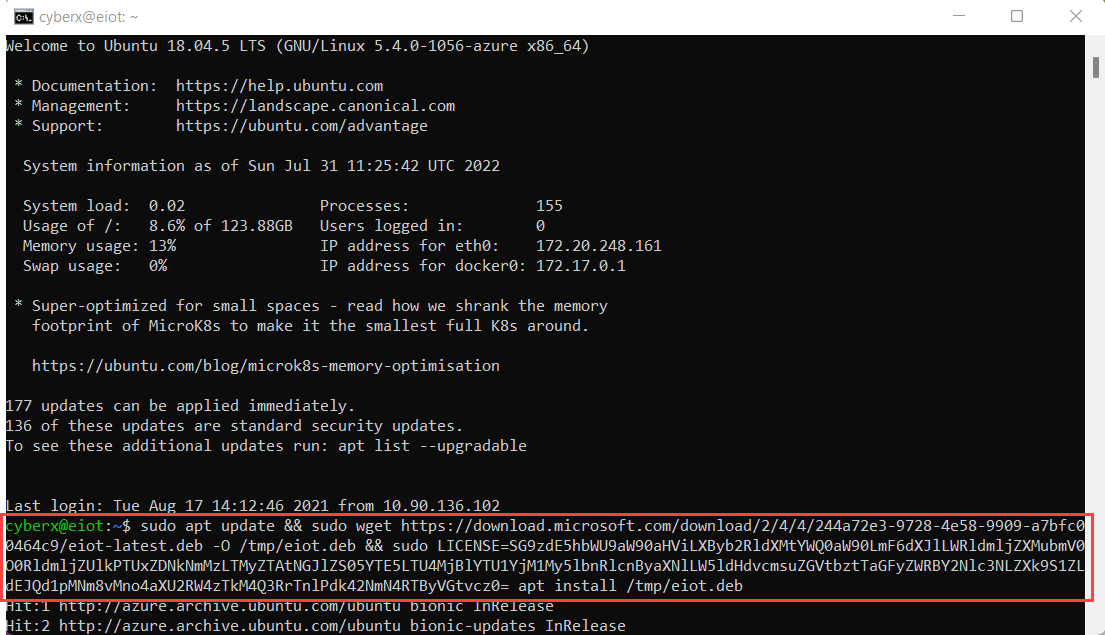
The process checks to see if the required Docker version is already installed. If it’s not, the sensor installation also installs the latest Docker version.
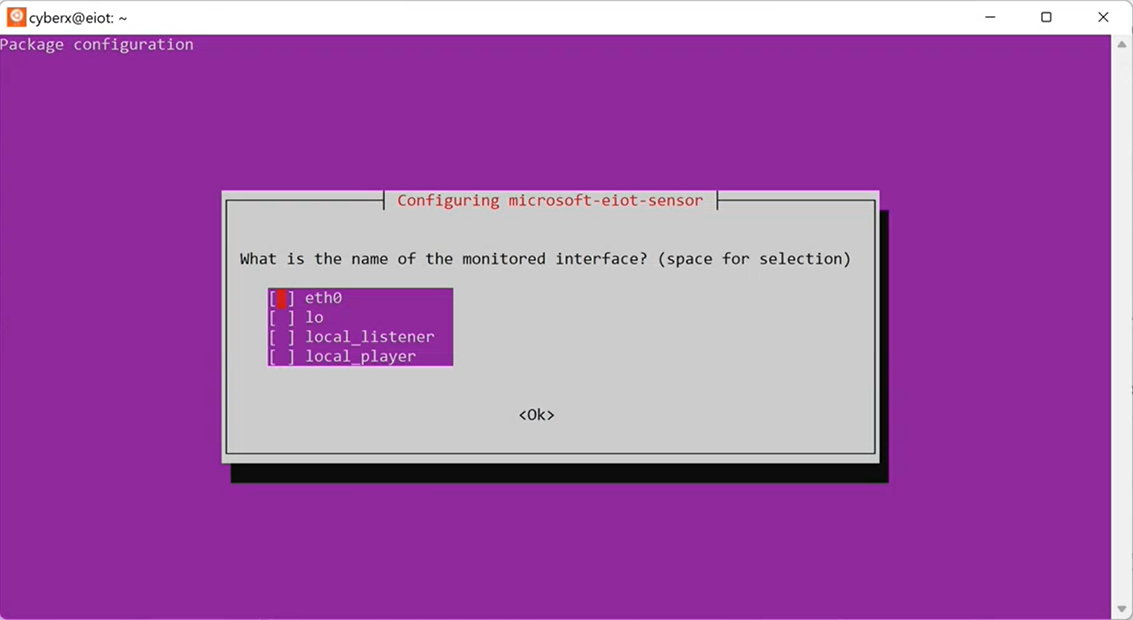
When the command process completes, the Ubuntu Configure microsoft-eiot-sensor wizard appears. In this wizard, use the up or down arrows to navigate, and the SPACE bar to select an option. Press ENTER to advance to the next screen.
In the Configure microsoft-eiot-sensor wizard, in the What is the name of the monitored interface? screen, select one or more interfaces that you want to monitor with your sensor, and then select OK.
For example:
In the Set up proxy server? screen, select whether to set up a proxy server for your sensor. For example:
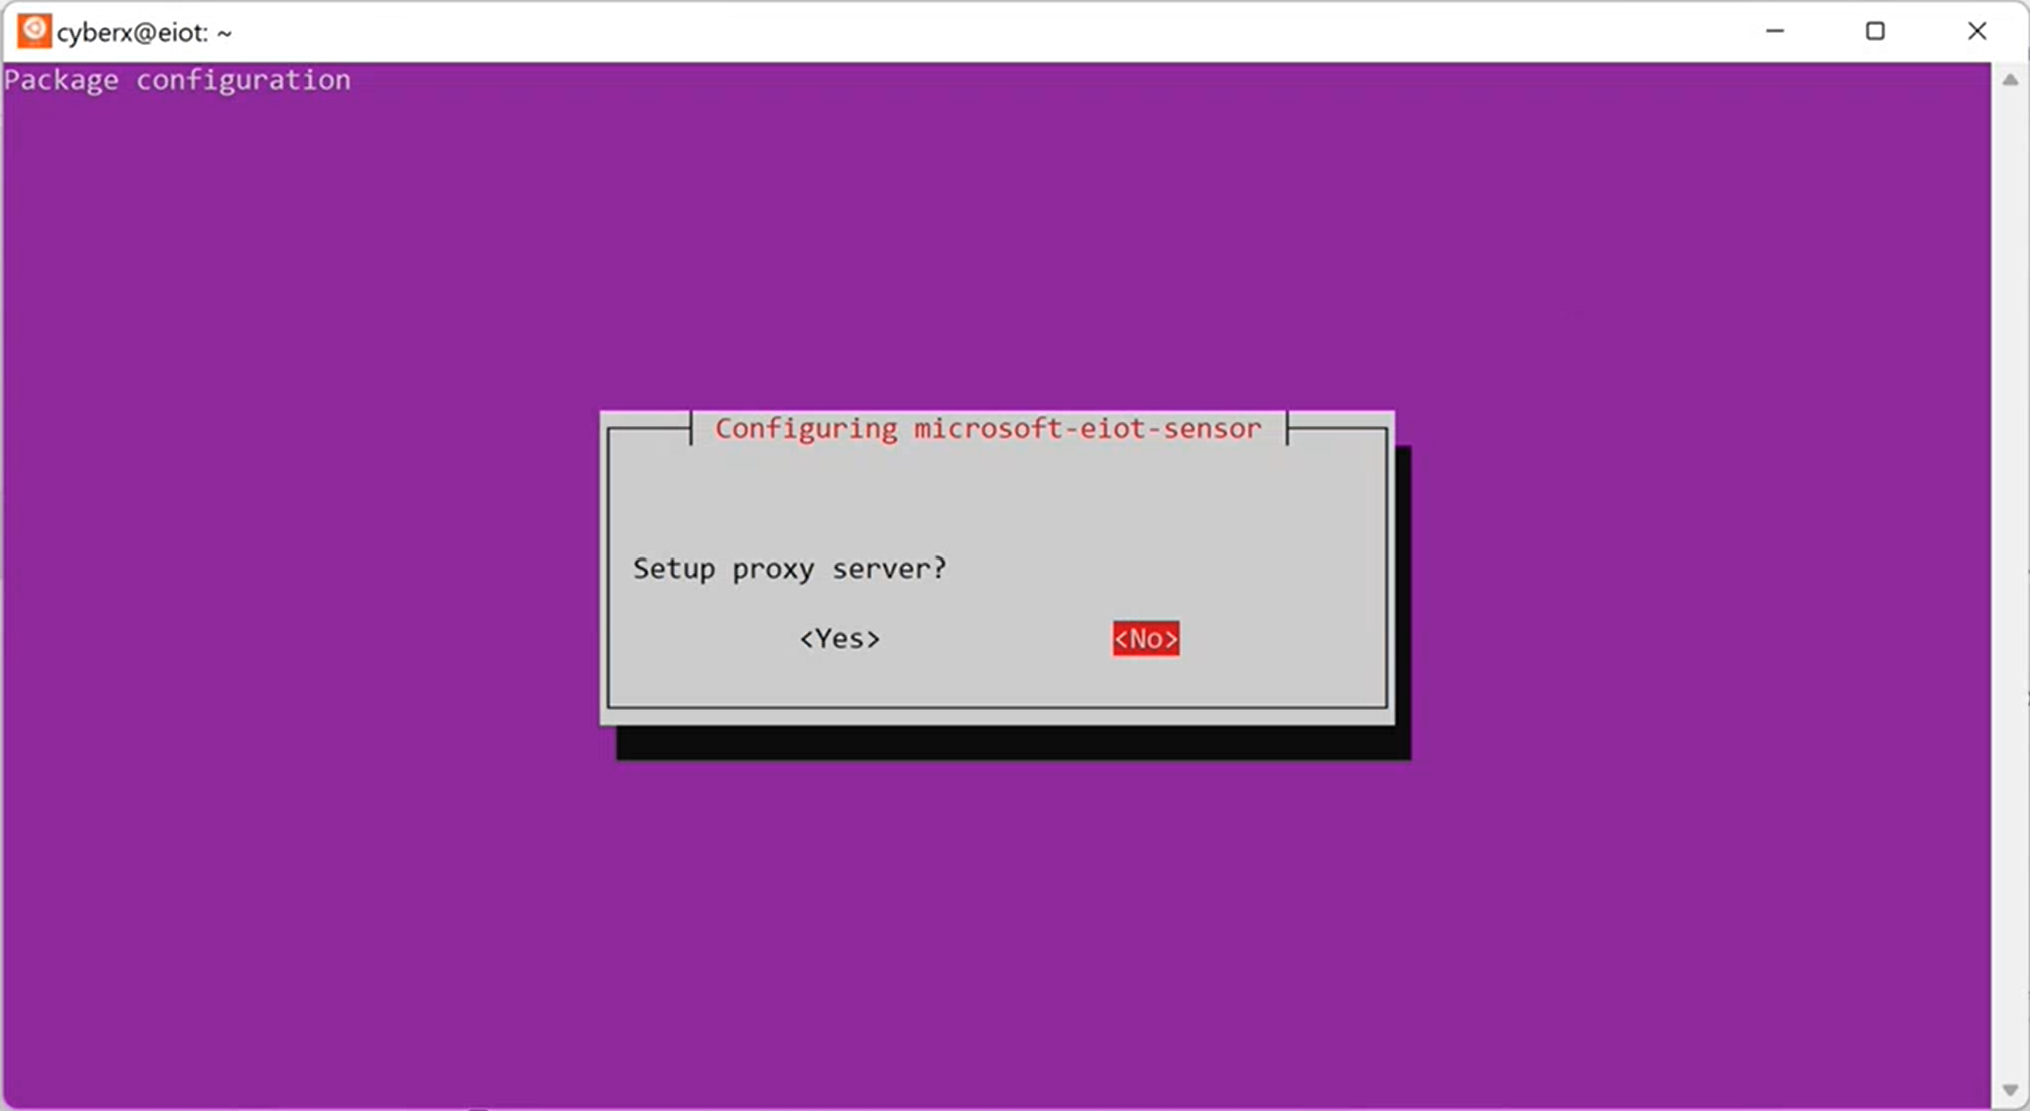
If you're setting up a proxy server, select Yes, and then define the proxy server host, port, username, and password, selecting Ok after each option.
The installation takes a few minutes to complete.
In the Azure portal, check that the Sites and sensors page now lists your new sensor.
For example:
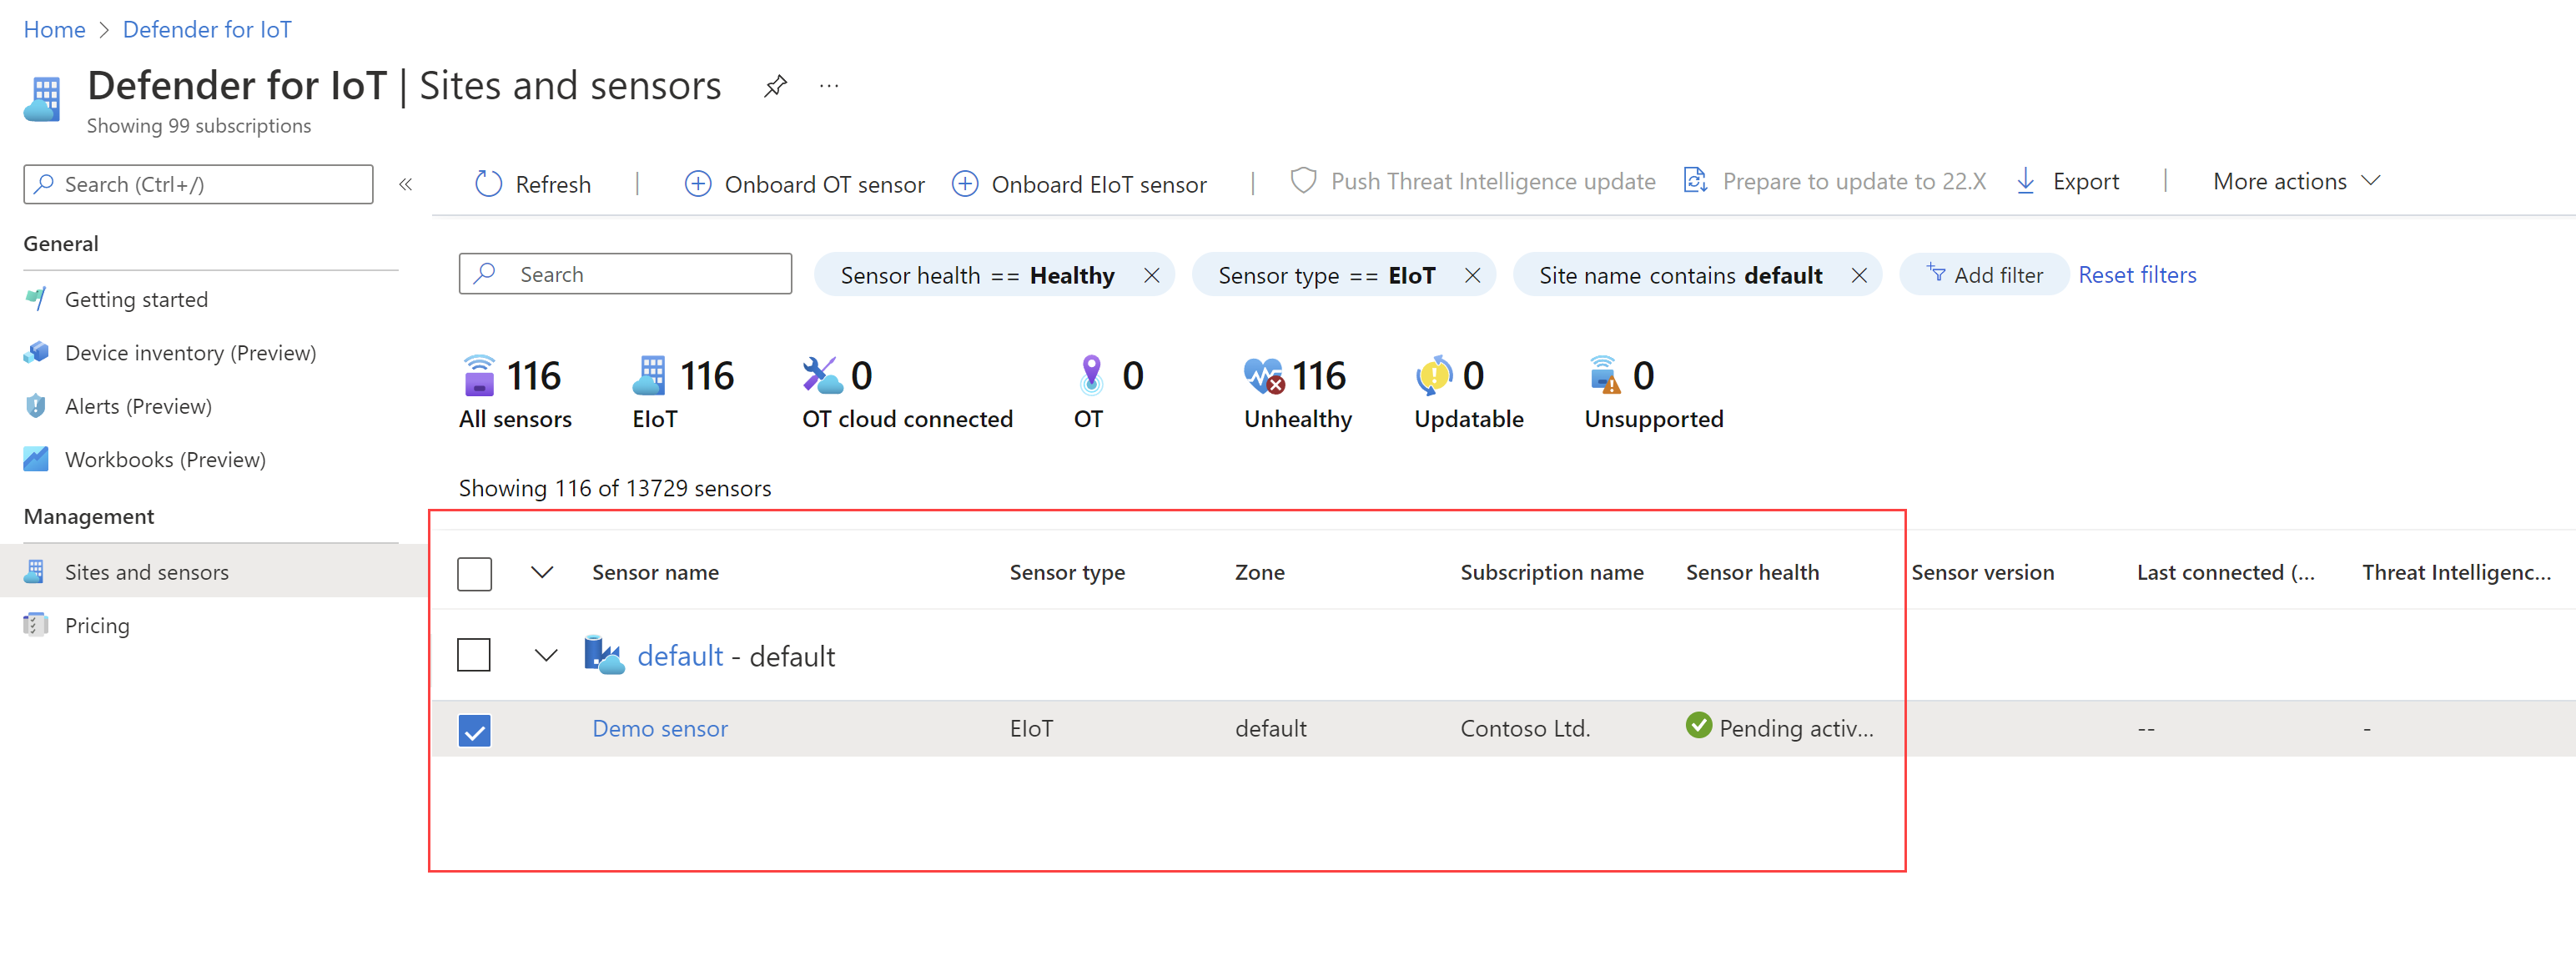
In the Sites and sensors page, Enterprise IoT sensors are all automatically added to the same site, named Enterprise network. For more information, see Manage sensors with Defender for IoT in the Azure portal.
Tip
If you don't see your Enterprise IoT data in Defender for IoT as expected, make sure that you're viewing the Azure portal with the correct subscriptions selected. For more information, see Manage Azure portal settings.
If you still don't view your data as expected, validate your sensor setup from the CLI.
View newly detected Enterprise IoT devices
Once you've validated your setup, the Defender for IoT Device inventory page will start to populate with new devices detected by your sensor after 15 minutes.
If you're a Defender for Endpoint customer with a legacy Enterprise IoT plan, you're able to view all detected devices in the Device inventory pages, in both Defender for IoT and Microsoft Defender XDR. Detected devices include both devices detected by Defender for Endpoint and devices detected by the Enterprise IoT sensor.
For more information, see Manage your device inventory from the Azure portal and Microsoft Defender XDR device discovery.
Delete an Enterprise IoT network sensor
Delete a sensor if it's no longer in use with Defender for IoT.
From the Sites and sensors page on the Azure portal, locate your sensor in the grid.
In the row for your sensor, select the ... options menu > Delete sensor.
For more information, see Manage sensors with Defender for IoT in the Azure portal.
Tip
You can also remove your sensor manually from the CLI. For more information, see Extra steps and samples for Enterprise IoT deployment.
If you want to cancel enterprise IoT security with Microsoft Defender XDR, do so from the Microsoft Defender Portal. For more information, see Turn off enterprise IoT security.
Next steps
Feedback
Coming soon: Throughout 2024 we will be phasing out GitHub Issues as the feedback mechanism for content and replacing it with a new feedback system. For more information see: https://aka.ms/ContentUserFeedback.
Submit and view feedback for