Quickstart: Enable Microsoft Defender for IoT on your Azure IoT Hub
This article explains how to enable Microsoft Defender for IoT on an Azure IoT hub.
Azure IoT Hub is a managed service that acts as a central message hub for communication between IoT applications and IoT devices. You can connect millions of devices and their backend solutions reliably and securely. Almost any device can be connected to an IoT Hub. Defender for IoT integrates into Azure IoT Hub to provide real-time monitoring, recommendations, and alerts.
Prerequisites
An Azure account with an active subscription. Create an account for free.
The ability to create a standard tier IoT Hub.
For the resource group and access management setup process, you need the following roles:
- To add role assignments, you need the Owner, Role Based Access Control Administrator and User Access Administrator roles.
- To register resource providers, you need th Owner and Contributor roles.
Learn more about privileged administrator roles in Azure.
Note
Defender for IoT currently only supports standard tier IoT Hubs.
Create an IoT Hub with Microsoft Defender for IoT
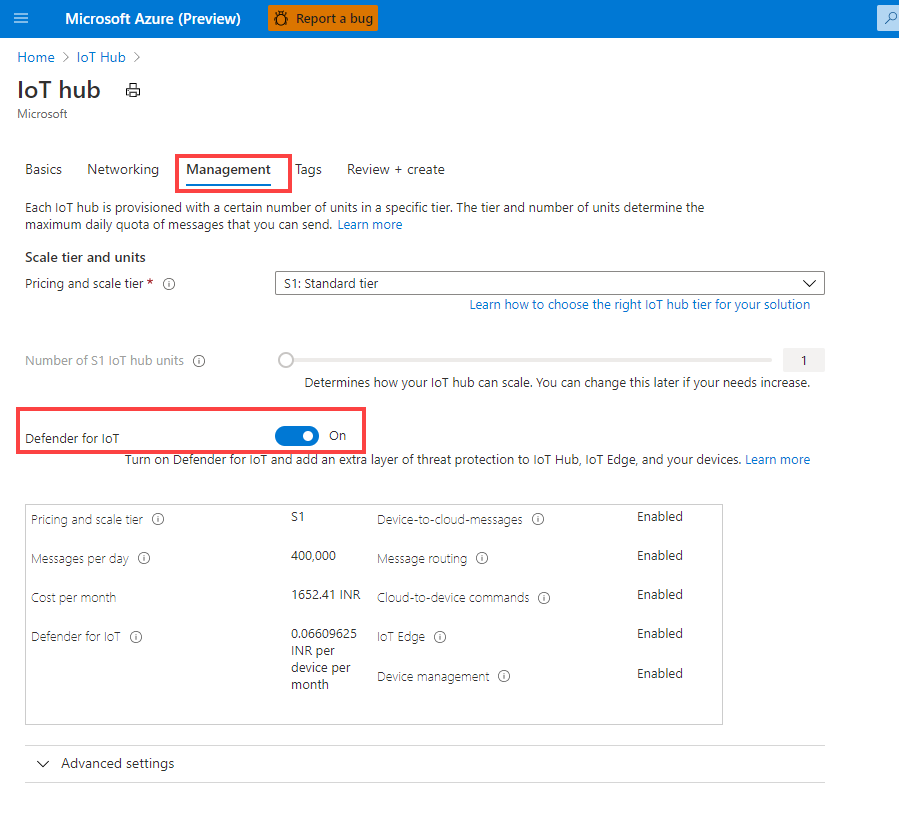
You can create a hub in the Azure portal. For all new IoT hubs, Defender for IoT is set to On by default.
To create an IoT Hub:
Follow the steps to create an IoT hub using the Azure portal.
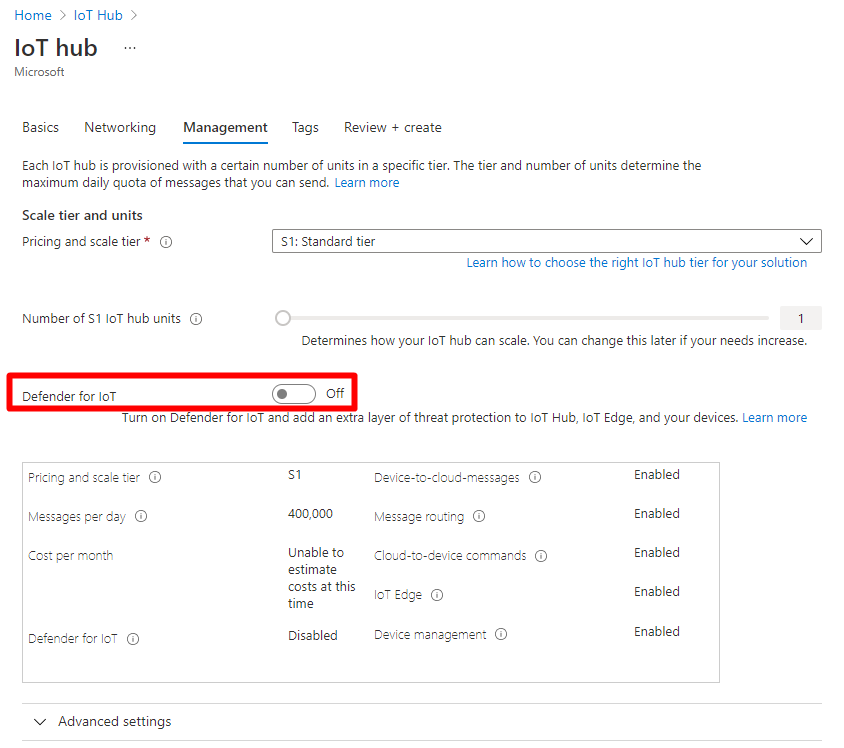
Under the Management tab, ensure that Defender for IoT is set to On. By default, Defender for IoT will be set to On .
Follow these steps to allow access to the IoT Hub.
Enable Defender for IoT on an existing IoT Hub
You can onboard Defender for IoT to an existing IoT Hub, where you can then monitor the device identity management, device to cloud, and cloud to device communication patterns.
To enable Defender for IoT on an existing IoT Hub:
Sign in to the Azure portal.
Follow these steps to allow access to the IoT Hub.
Navigate to IoT Hub >
Your hub> Defender for IoT > Overview.Select Secure your IoT solution, and complete the onboarding form.
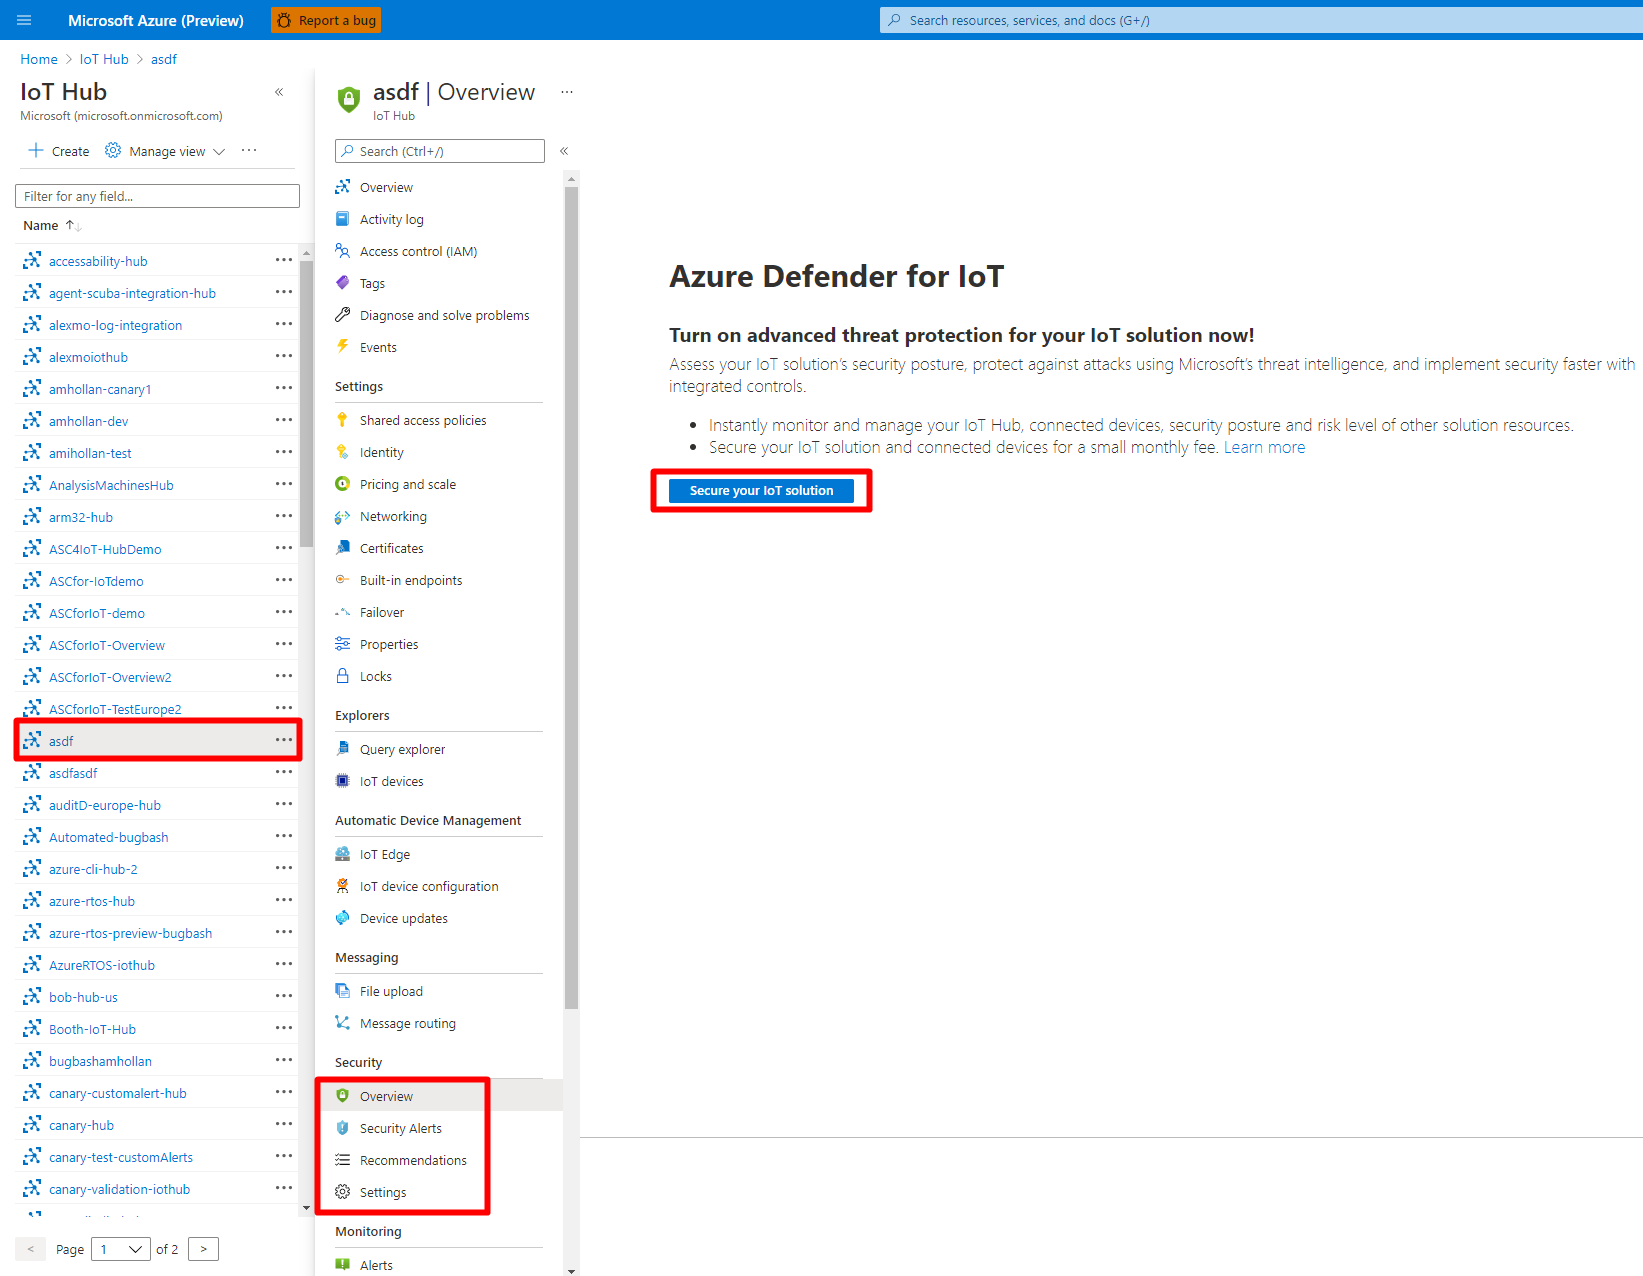
The Secure your IoT solution button will only appear if the IoT Hub hasn't already been onboarded, or if you set the Defender for IoT toggle to Off while onboarding.

Verify that Defender for IoT is enabled
To verify that Defender for IoT is enabled:
Sign in to the Azure portal.
Navigate to IoT Hub >
Your hub> Defender for IoT > Overview.The Threat prevention and Threat detection screen will appear.


Configure data collection
Configure data collection settings for Defender for IoT in your IoT hub, such as a Log Analytics workspace and other advanced settings.
To configure Defender for IoT data collection:
In your IoT hub, select Defender for IoT > Settings. The Enable Microsoft Defender for IoT option is toggled on by default.
In the Workspace configuration area, toggle the On option to connect to a Log Analytics workspace, and then select the Azure subscription and Log Analytics workspace you want to connect to.
If you need to create a new workspace, select the Create New Workspace link.
Select Access to raw security data to export raw security events from your devices to the Log Analytics workspace that you'd selected above.
In the Advanced settings area, the following options are selected by default. Clear the selection as needed:
In-depth security recommendations and custom alerts. Allows Defender for IoT access to the device's twin data in order to generate alerts based on that data.
IP data collection. Allows Defender for IoT access to the device's incoming and outgoing IP addresses to generate alerts based on suspicious connections.
Select Save to save your settings.
Set up resource providers and access control
To set up permissions needed to access the IoT hub:
- Set up resource providers and access control for the IoT hub.
- To allow access to a Log Analytics workspace, also set up resource providers and access control for Log Analytics workspace.
Learn more about resource providers and resource types.
Allow access to the IoT Hub
To allow access to the IoT Hub:
Set up resource providers for the IoT hub
Sign in to the Azure portal and navigate to the Subscriptions page.
In the subscriptions table, select your subscription.
In the subscription page that opens, from the left menu bar, select Resource providers.
In the search bar, type: Microsoft.iot.
Select the Microsoft.IoTSecurity provider and verify that its status is Registered.
Set up access control for the IoT hub
In your IoT hub, from the left menu bar, select Access control (IAM), and from the top menu, select Add > Add role assignment.
In the Role tab, select the Privileged administrator roles tab, and select the Contributor role.
Select the Members tab, and next to Members, select Select members.
In the Select members page, in the Select field, type Azure security, select Azure Security for IoT, and select Select at the bottom.
Back in the Members tab, select Review + assign at the bottom of the tab, in the Review and assign tab, select Review + assign at the bottom again.
Allow access to a Log Analytics workspace
To connect to a Log Analytics workspace:
Set up resource providers for the Log Analytics workspace
In the Azure portal, navigate to the Subscriptions page.
In the subscriptions table, select your subscription.
In the subscription page that opens, from the left menu bar, select Resource providers.
In the search bar, type: Microsoft.OperationsManagement.
Select the Microsoft.OperationsManagement provider and verify that its status is Registered.
Set up access control for the Log Analytics workspace
In the Azure portal, search for and navigate to the Log analytics workspaces page, select your workspace, and from the left menu, select Access control (IAM).
From the top menu, select Add > Add role assignment.
In the Role tab, under Job function roles, search for Log analytics, and select the Log Analytics Contributor role.
Select the Members tab, and next to Members, select Select members.
In the Select members page, in the Select field, type Azure security, select Azure Security for IoT, and select Select at the bottom.
Back in the Members tab, select Review + assign at the bottom of the tab, in the Review and assign tab, select Review + assign at the bottom again.
Enable Defender for IoT
In your IoT hub, from the left menu, select Settings, and in the Settings page, select Data Collection.
Toggle on Enable Microsoft Defender for IoT, and select Save at the bottom.
Under Choose the Log Analytics workspace you want to connect to, set the toggle to On.
Select the subscription for which you set up the resource provider and workspace.
Next steps
Advance to the next article to add a resource group to your solution.