Note
Access to this page requires authorization. You can try signing in or changing directories.
Access to this page requires authorization. You can try changing directories.
In this quickstart, you will set up resources for your Microsoft Discovery project, such as agents and shared sessions to run your first AI-powered scientific research. You will complete the following tasks:
- Log in to Microsoft Discovery Studio
- Access Microsoft Discovery project
- (Optional) Create a custom agent
- Create a shared session
- And then start a chat in your shared session
Prerequisites
- An existing and functional Microsoft Discovery Workspace and Project.
- Review Get started with Microsoft Discovery Infrastructure before you begin this tutorial.
- The Scientist or Platform Administrator persona role set assigned to the user. For the recommended one-step assignment, see Assign Microsoft Discovery persona roles with a PowerShell script.
1. Log in to Microsoft Discovery Studio
Microsoft Discovery Studio is a secure, AI-powered research environment that enables scientists and engineers to accelerate innovation through autonomous agents, simulation workflows, and integrated data tools—all within a unified interface.
After your infrastructure is set up, you can log in to Microsoft Discovery Studio directly via the URL, or find the URL in the Workspace overview page in the Azure portal.
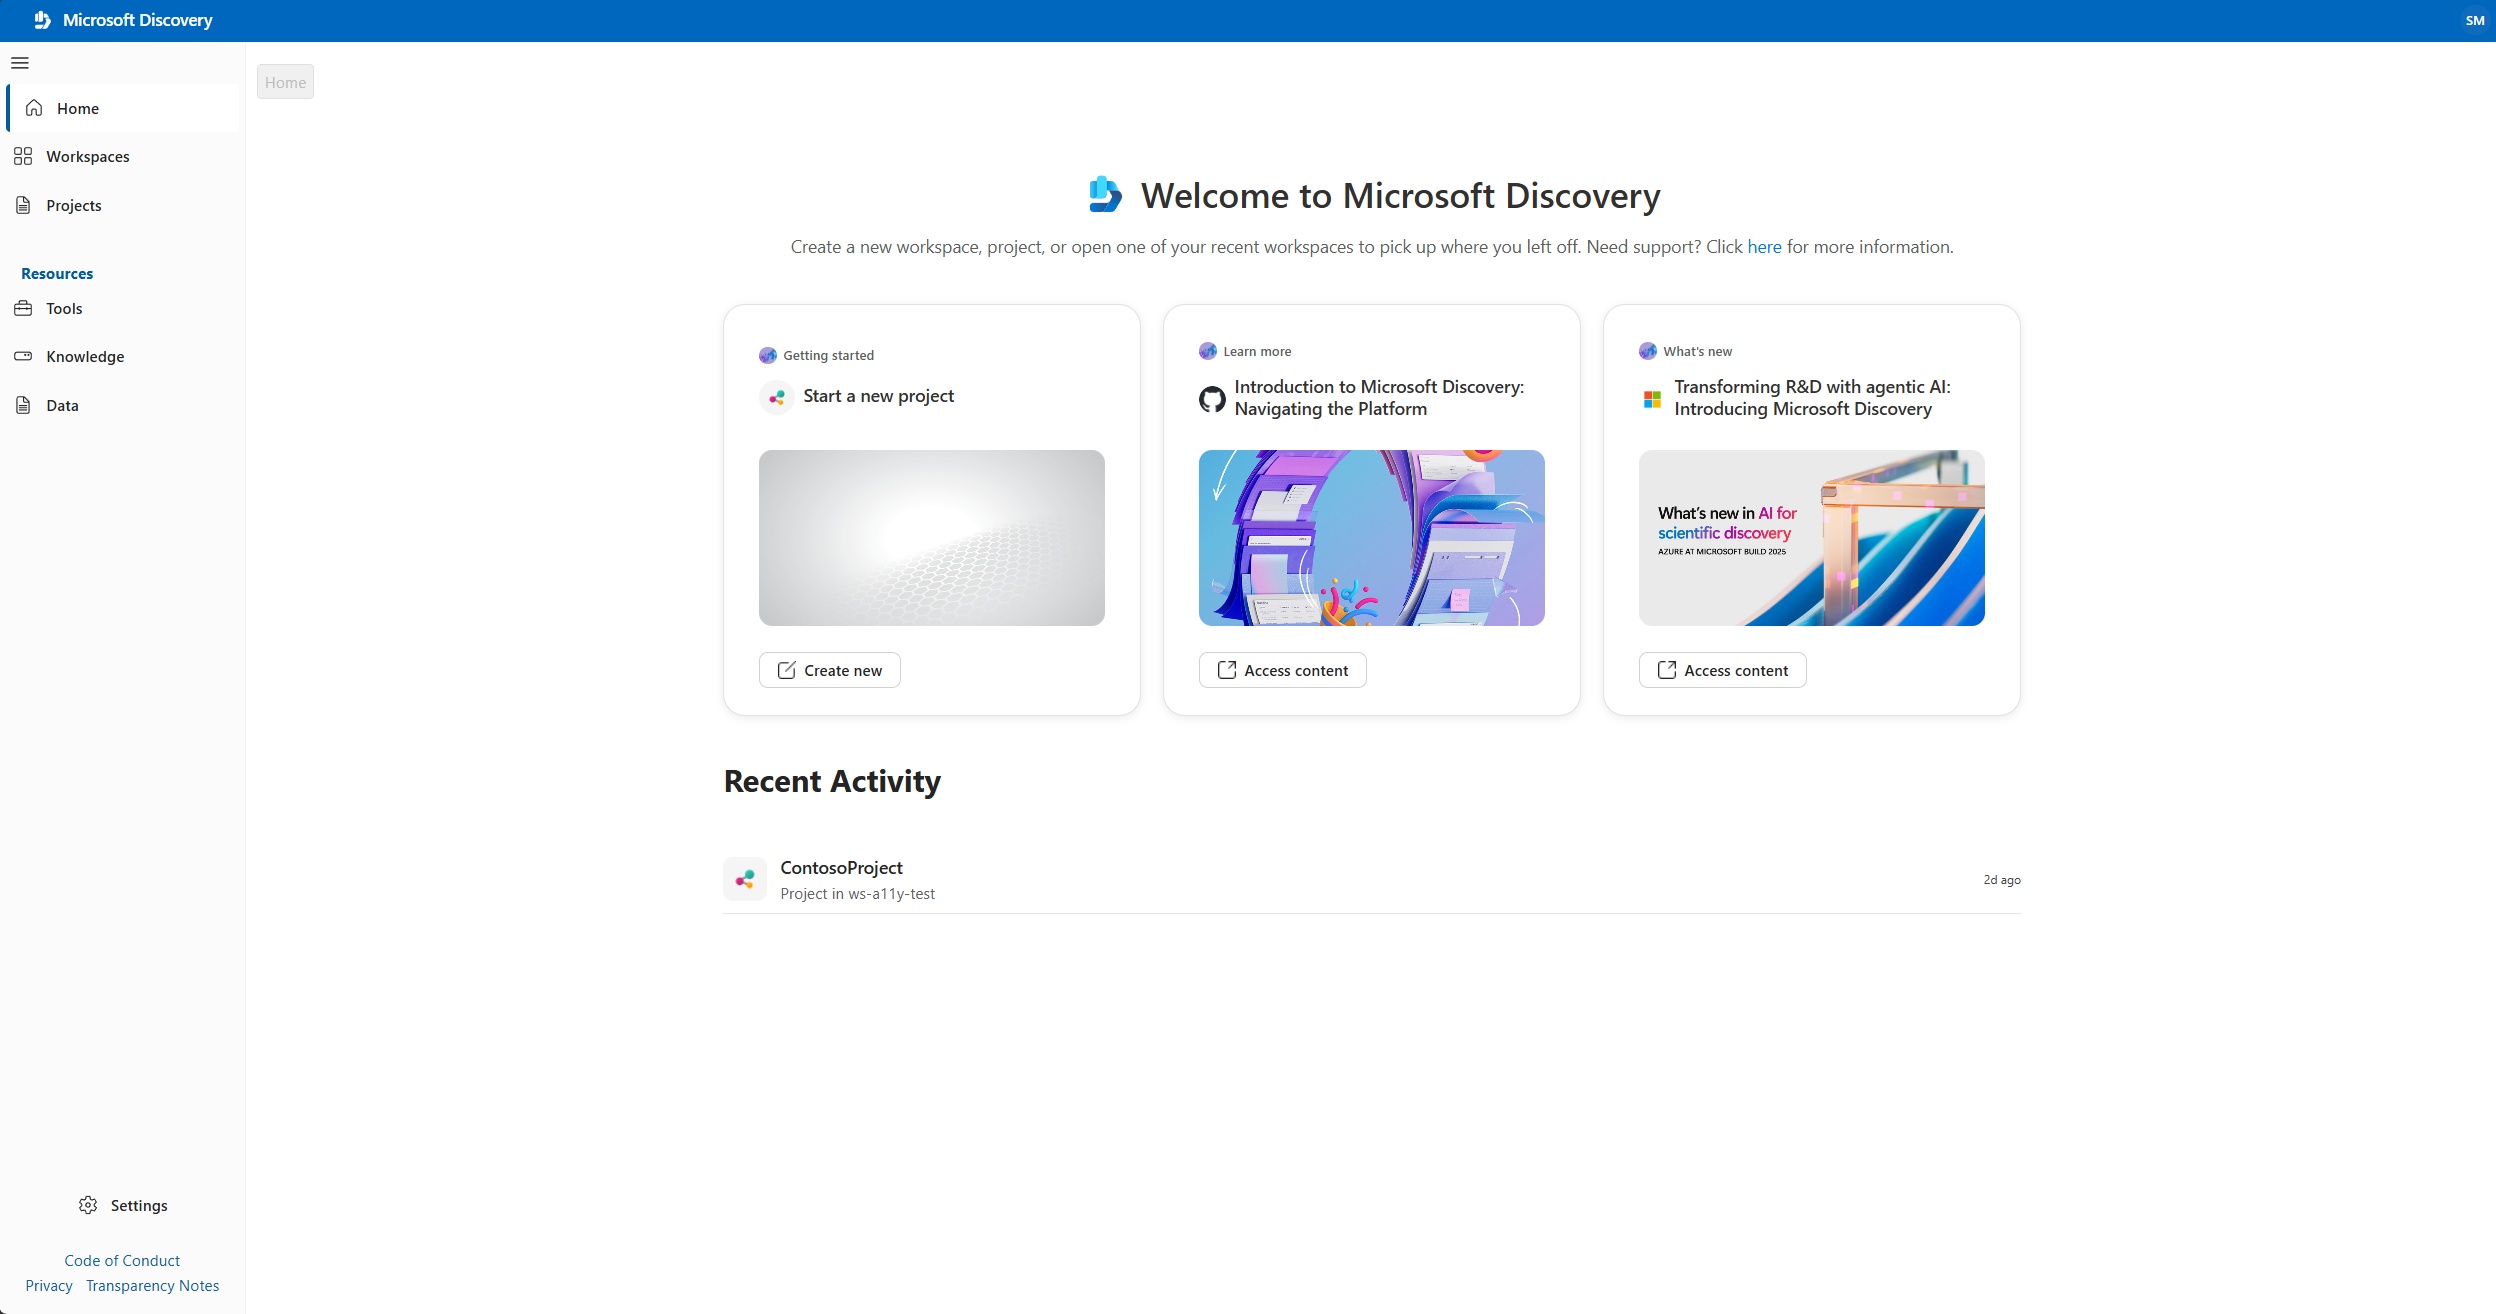
After signing in, you land on the Discovery tab, which provides quick access to recent shared sessions and common actions like creating new project or links to the official documentation.
You must sign in with your Entra ID (work or school account) credentials. Microsoft Discovery Studio supports single sign-on (SSO) with Entra ID so that you don't have to explicitly provide credentials if you're already signed in to another service with your Entra ID in the same browser.
Note
If you have access to multiple Entra tenants, make sure the right tenant is selected when signing in by selecting your profile icon on the top right corner of the page.
2. (Optional) Create a custom agent
Every project comes with a default Discovery agent that you can use immediately to start chatting. If you want to create a custom agent tailored to a specific domain, follow the steps below. Otherwise, skip to step 3.
Agents are autonomous, AI-powered systems that perform specific scientific tasks on behalf of users. Powered by large language models (LLMs), agents can use tools, models, and other agents to achieve a goal. In the Microsoft Discovery architecture, agents are the primary functional unit of execution.
In this example, create a basic Chemistry Agent that answers questions about chemical properties of molecules and provides a plan to calculate any property.
- Sign in to Microsoft Discovery Studio.
- Select the Projects tab in the left navigation pane.
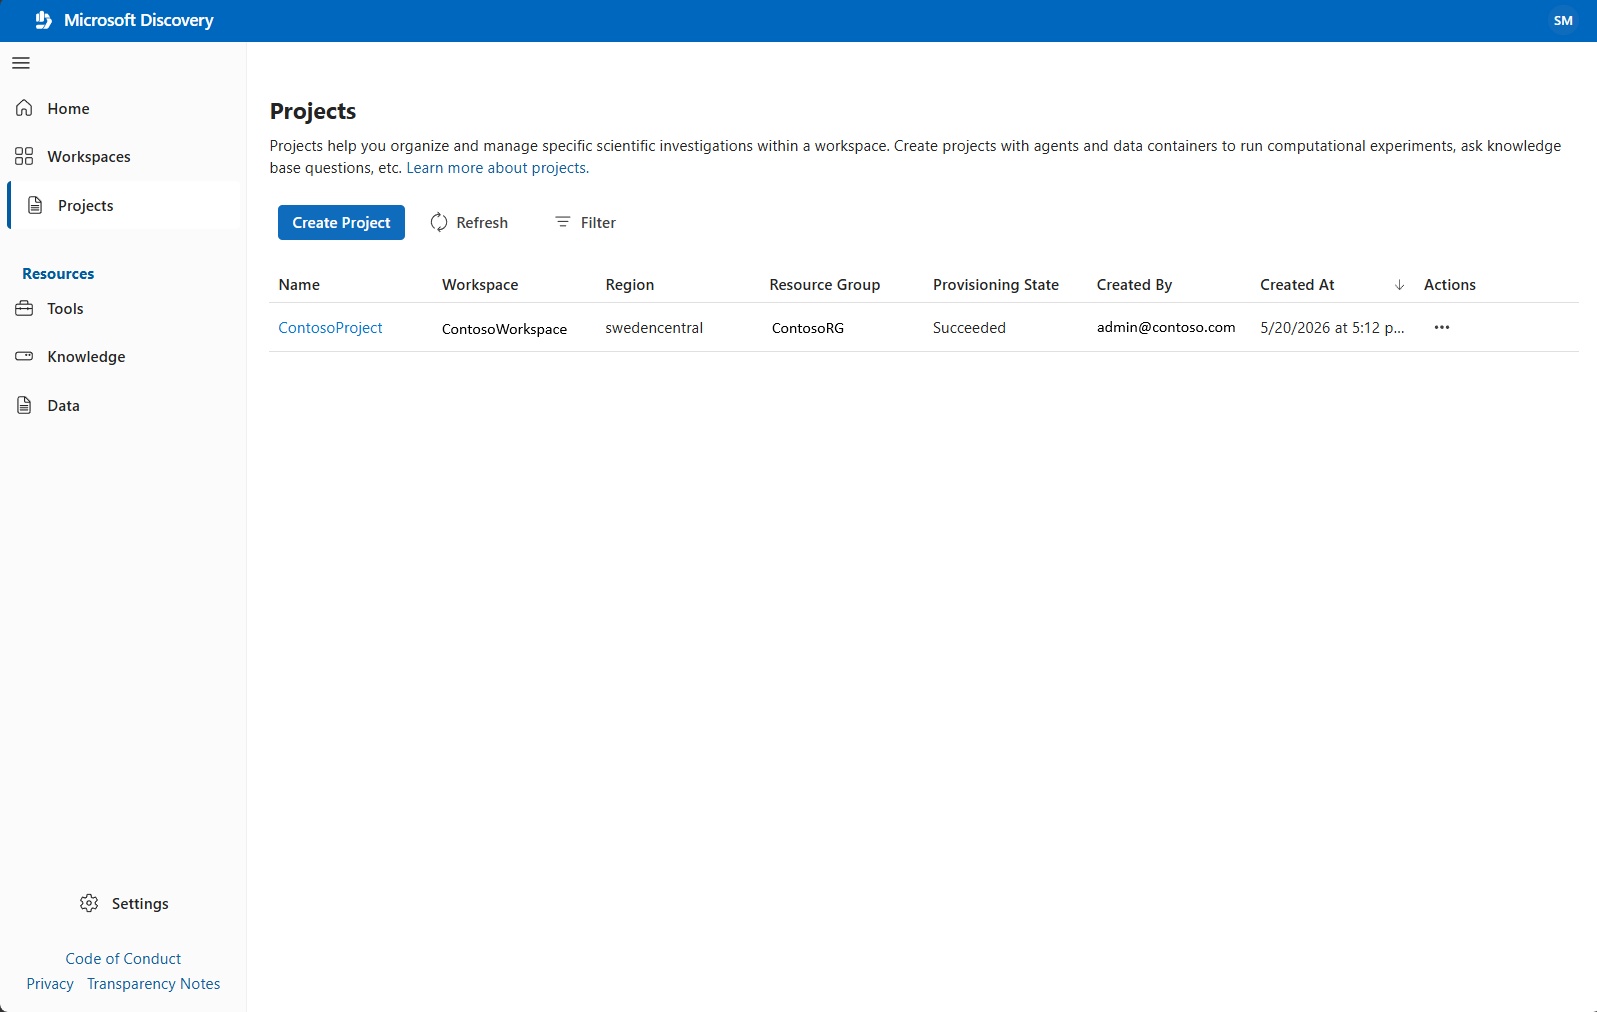
- Open the project that we created in the previous tutorial by selecting the name. It will open the project in a new tab.
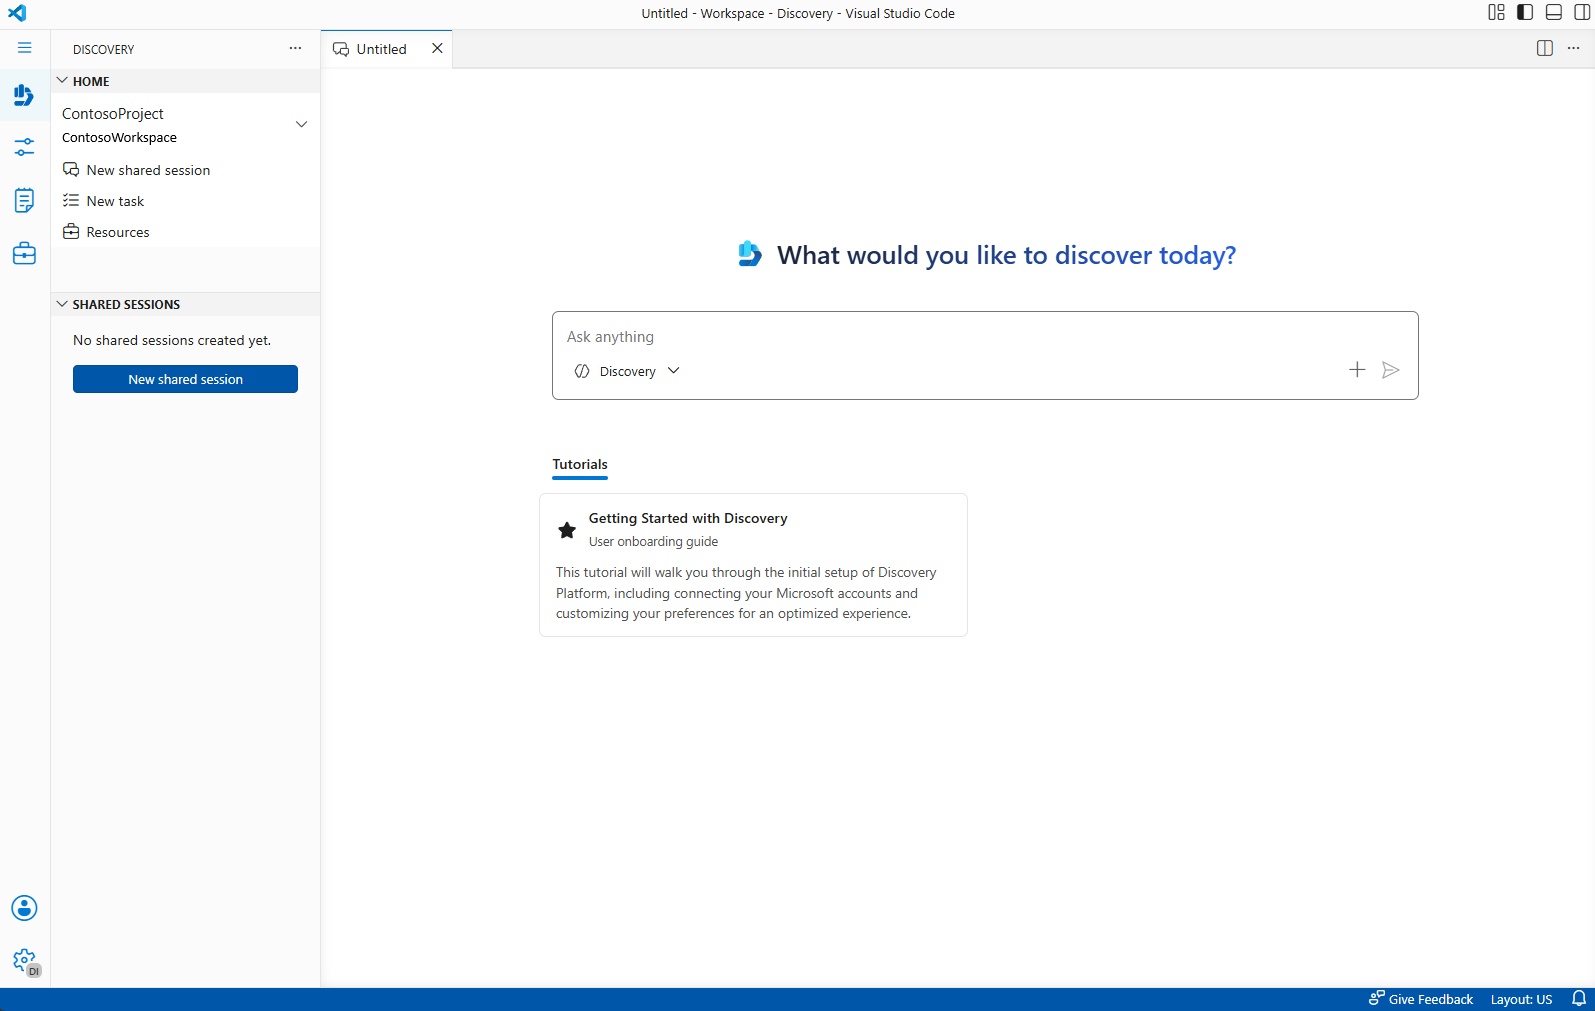
- In the Resources tab in the left navigation pane, select the + button next to AGENTS (FOUNDRY) to create a new agent.
- Enter a Name and Description for the agent. For example:
- Name:
ChemistryAgent - Description:
A chemistry expert agent that answers questions about chemical properties of molecules and provides high-level plans for computational needs.
- Name:
- Under Chat model, select the model deployment created in the previous tutorial.
- Enter the agent Instructions. For example:
You are a chemistry expert agent who can answer questions about chemical properties of molecules and provide high-level plans for the user's computational needs. - Select Create agent.
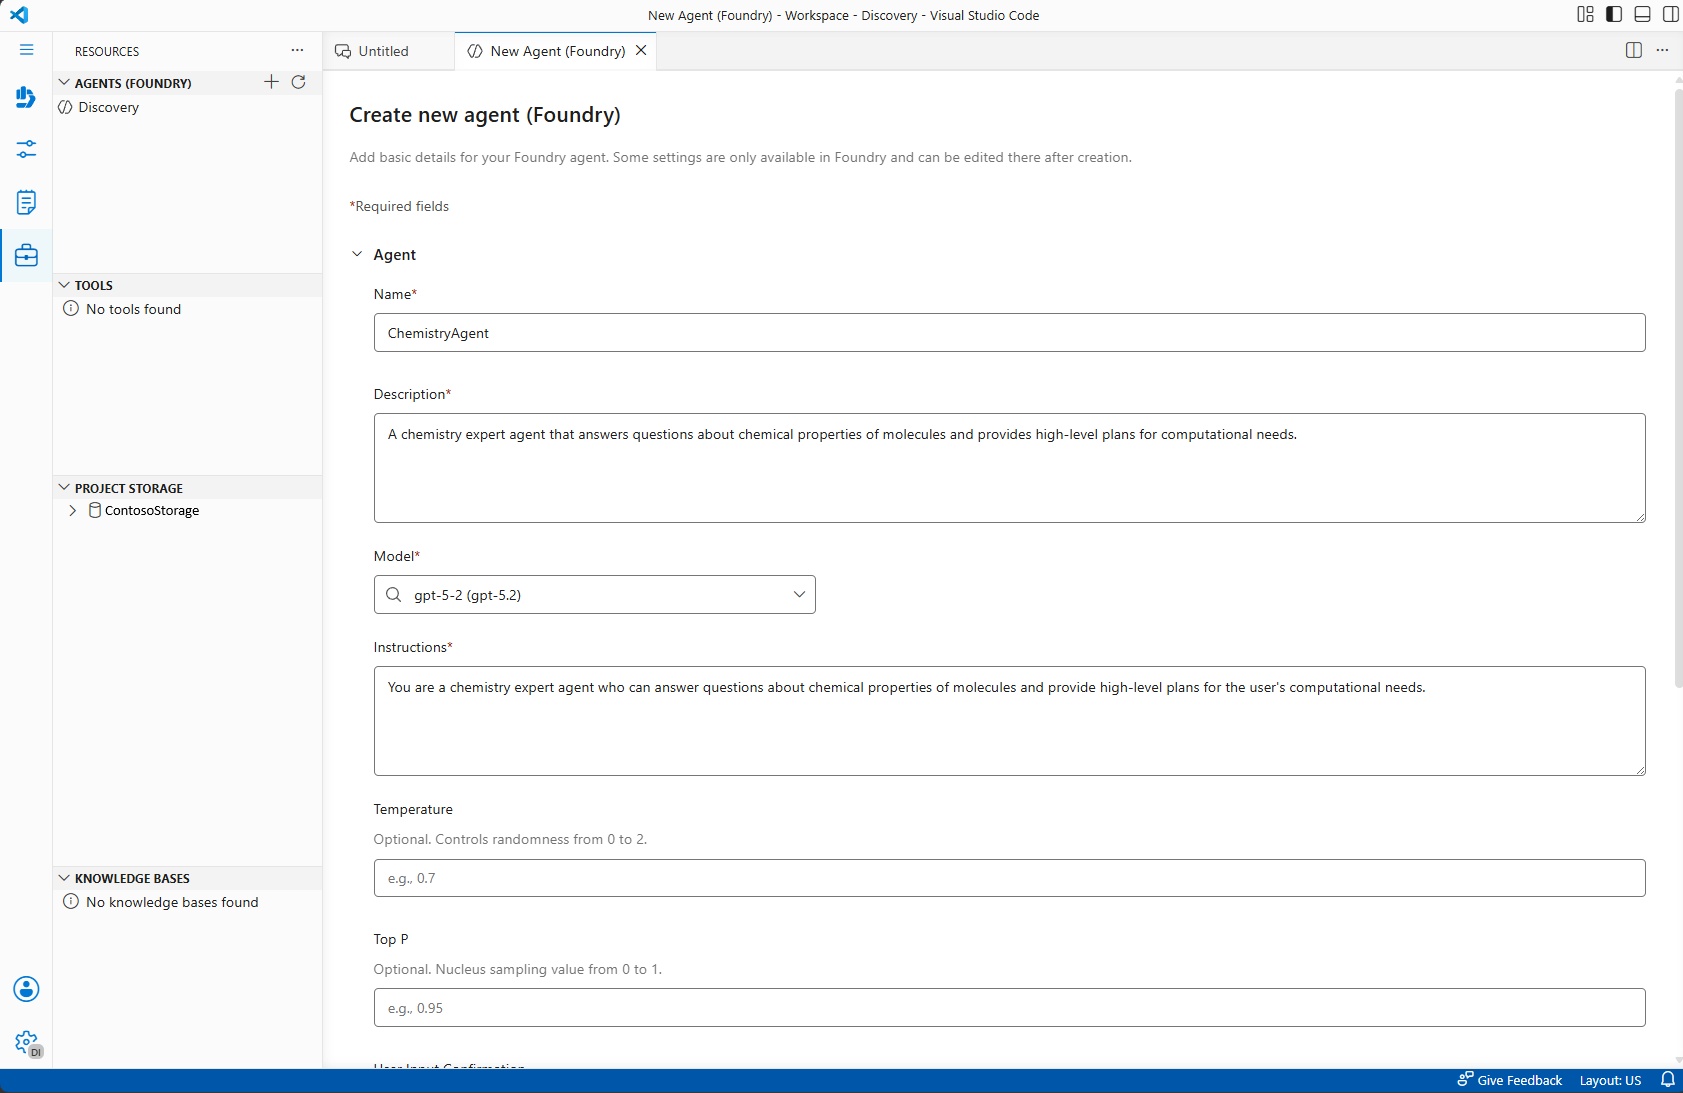
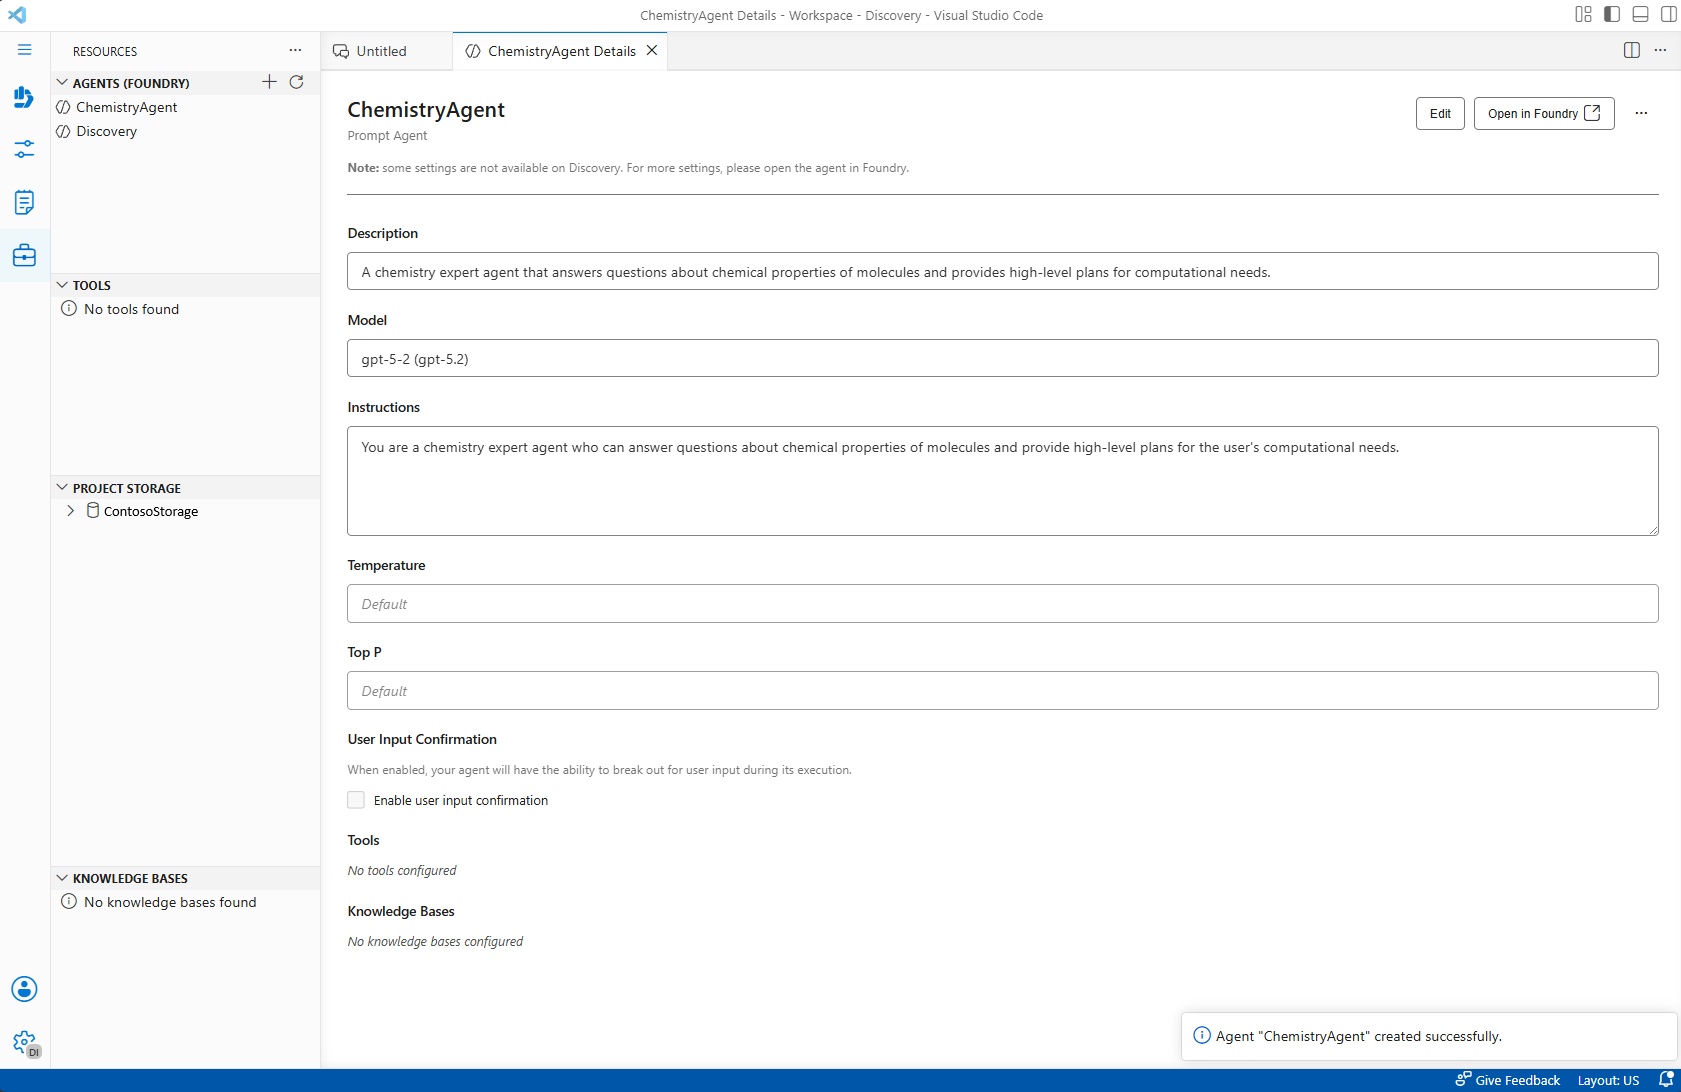
Note
Once your agent is created, you can create more agents to the project from the Resources pane. Just select the + button next to Agents and select Create new agent and repeat the process.
3. Create a shared session
Shared sessions are research studies within a project where you can chat with your agents, run computational analyses, and get data-driven insights to scientific questions.
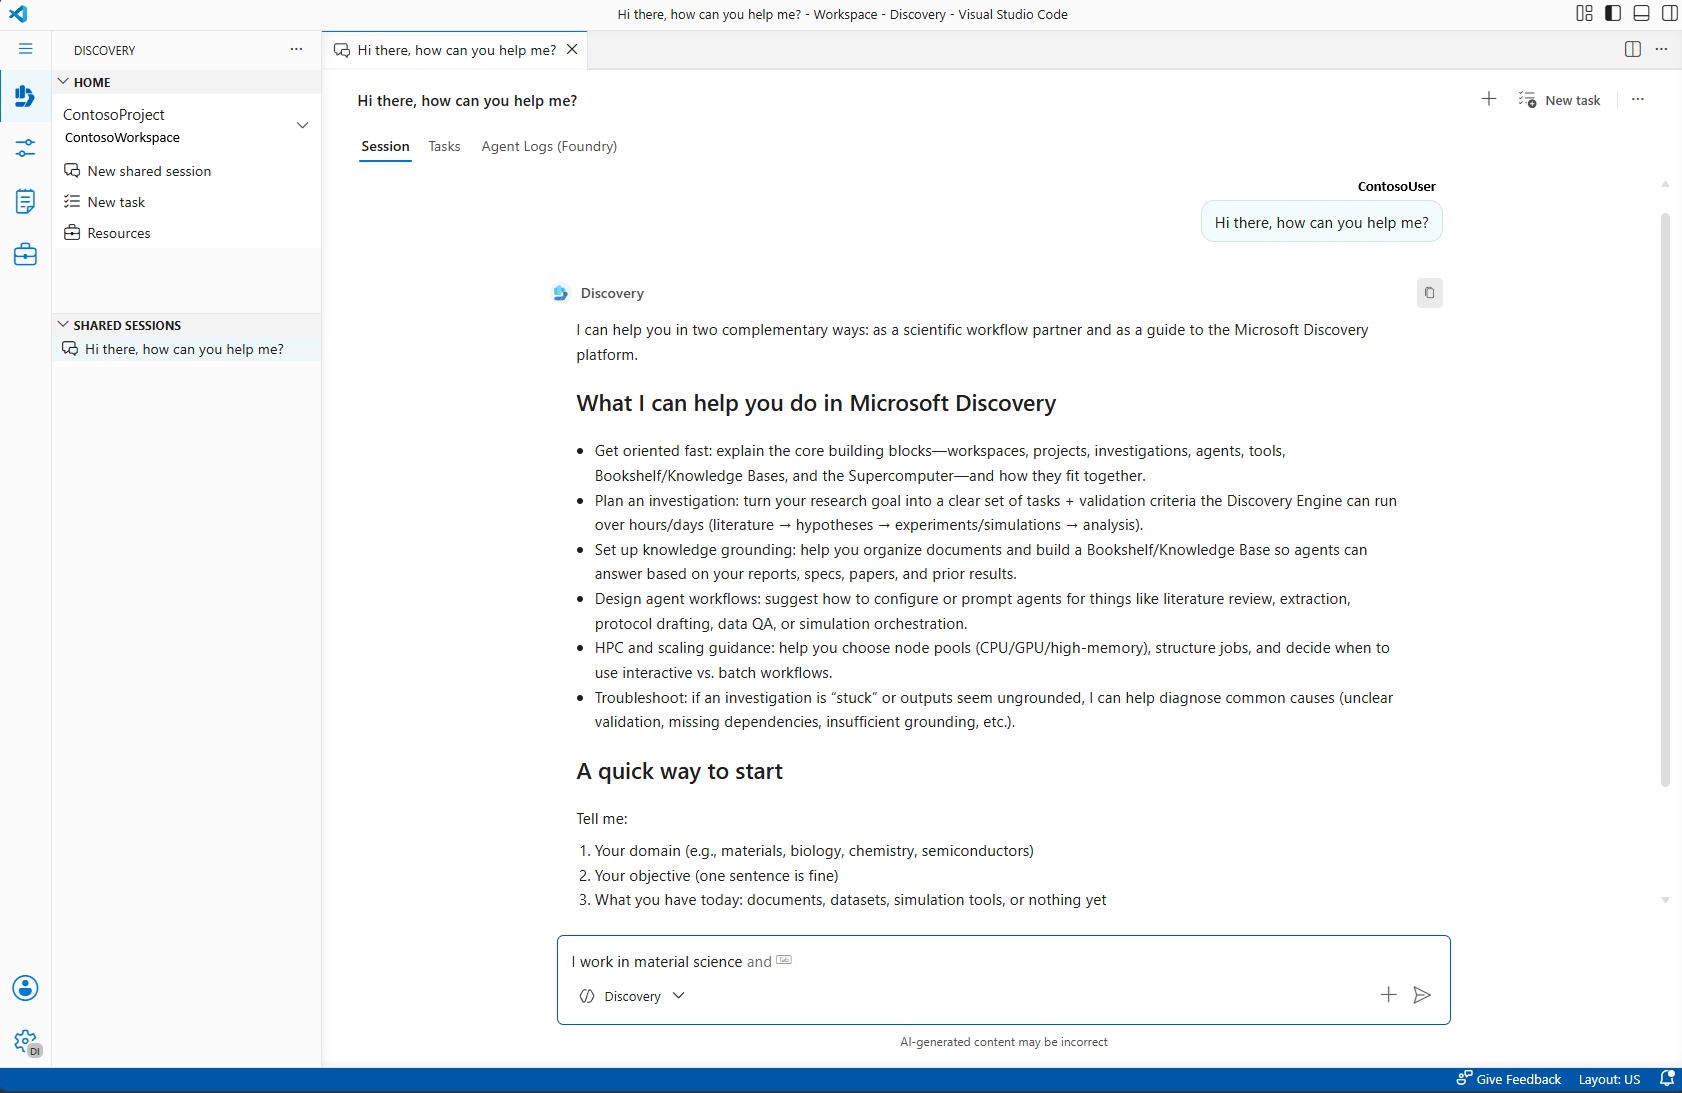
To create a shared session, simply type a prompt in the chat box on the Welcome page and select Send. A new shared session is automatically created and the agent responds to your prompt. By default, the Discovery agent is selected.
Alternatively, you can select New shared session from the Discovery tab in the left navigation pane.
4. Start a chat
After your shared session is created, follow these steps:
- In the chat input box, select an agent using the agent selector dropdown. The default Discovery agent is preselected, or you can choose a custom agent created in step 2.
- Enter a prompt and select Send to get a response using the selected agent.
Next steps
- Explore Microsoft Discovery agents to understand agent capabilities in depth.