Note
Access to this page requires authorization. You can try signing in or changing directories.
Access to this page requires authorization. You can try changing directories.
In this tutorial, you connect your ServiceNow instance to Azure SRE Agent so the agent can receive, investigate, and update incidents automatically. You can choose between OAuth 2.0 (recommended for production) or basic authentication.
Tip
What you accomplish in this tutorial:
- Connect your ServiceNow instance to receive and manage incidents automatically.
- Choose between basic authentication (username/password) or OAuth 2.0 (token-based, recommended for production).
- Once connected, your agent acknowledges, investigates, and updates ServiceNow incidents.
Estimated time: 15 minutes
Prerequisites
Before you begin, make sure you have the following resources and access:
- An Azure SRE Agent created and running
- A ServiceNow instance with admin access
- For OAuth 2.0: An OAuth application registered in ServiceNow (see Prepare ServiceNow for OAuth)
- For basic authentication: A ServiceNow user with incident management permissions
Choose your authentication method
Use the following table to select the right authentication method for your environment.
| Method | Security | Best for | Setup time |
|---|---|---|---|
| OAuth 2.0 | Token-based, automatic refresh, no stored passwords | Production environments, security-conscious teams | ~10 min |
| Basic authentication | Username and password stored | Quick setup, dev/test environments | ~5 min |
Note
Use OAuth 2.0 for production. Azure API Connections automatically refresh tokens, and your agent configuration doesn't store any passwords.
Option A: Connect by using OAuth 2.0
This section shows you how to register an OAuth application in ServiceNow and then connect it from the Azure SRE Agent portal.
Prepare ServiceNow for OAuth
Before you connect from the portal, register an OAuth application in your ServiceNow instance.
- In your ServiceNow instance, go to System OAuth > Application Registry.
- Select New then select Create an OAuth API endpoint for external clients.
- Fill in the following fields:
- Name: A descriptive name (for example,
Azure SRE Agent). - Redirect URL: Use the format
https://logic-apis-<REGION>.consent.azure-apim.net/redirect, where<REGION>is your agent's Azure region (for example,eastus2). You can also get this URL from the portal in the next section. - Active: Checked.
- Name: A descriptive name (for example,
- Select Submit and note the following values:
- Client ID: Displayed on the application page.
- Client Secret: Select the lock icon to reveal the secret, then copy it immediately.
Warning
Some ServiceNow versions show the client secret only once. Copy it before you go to another page.
Configure OAuth in the portal
Follow these steps to connect ServiceNow with OAuth 2.0 from the Azure SRE Agent portal.
Go to your agent in the Azure SRE Agent portal.
In the left navigation, go to Settings > Incident platform.
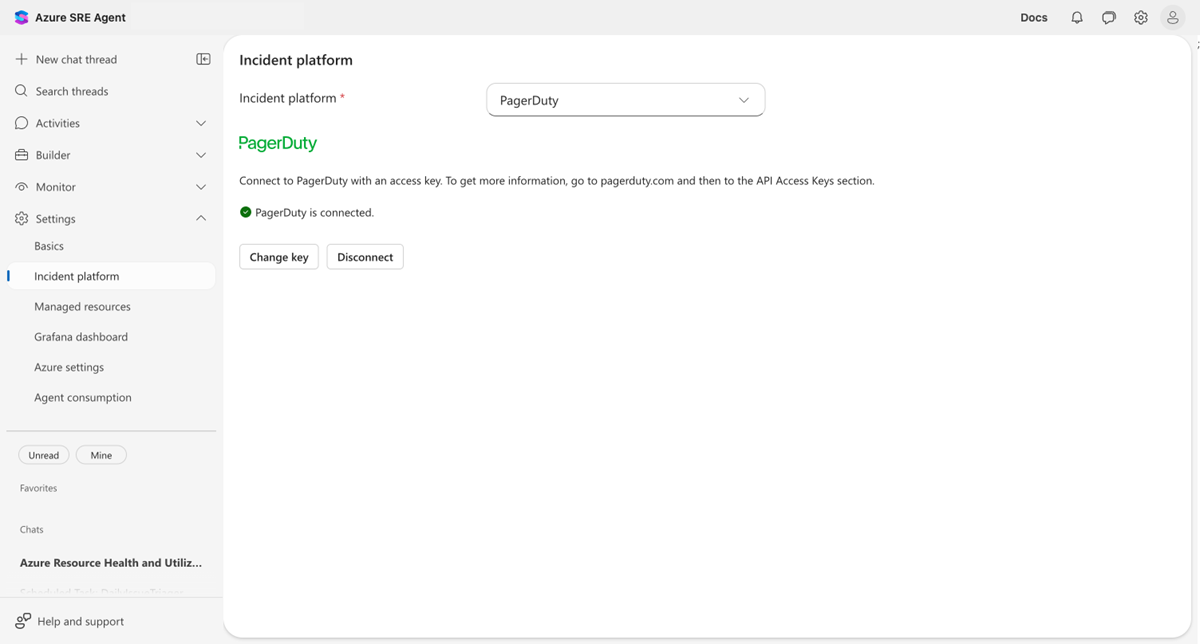
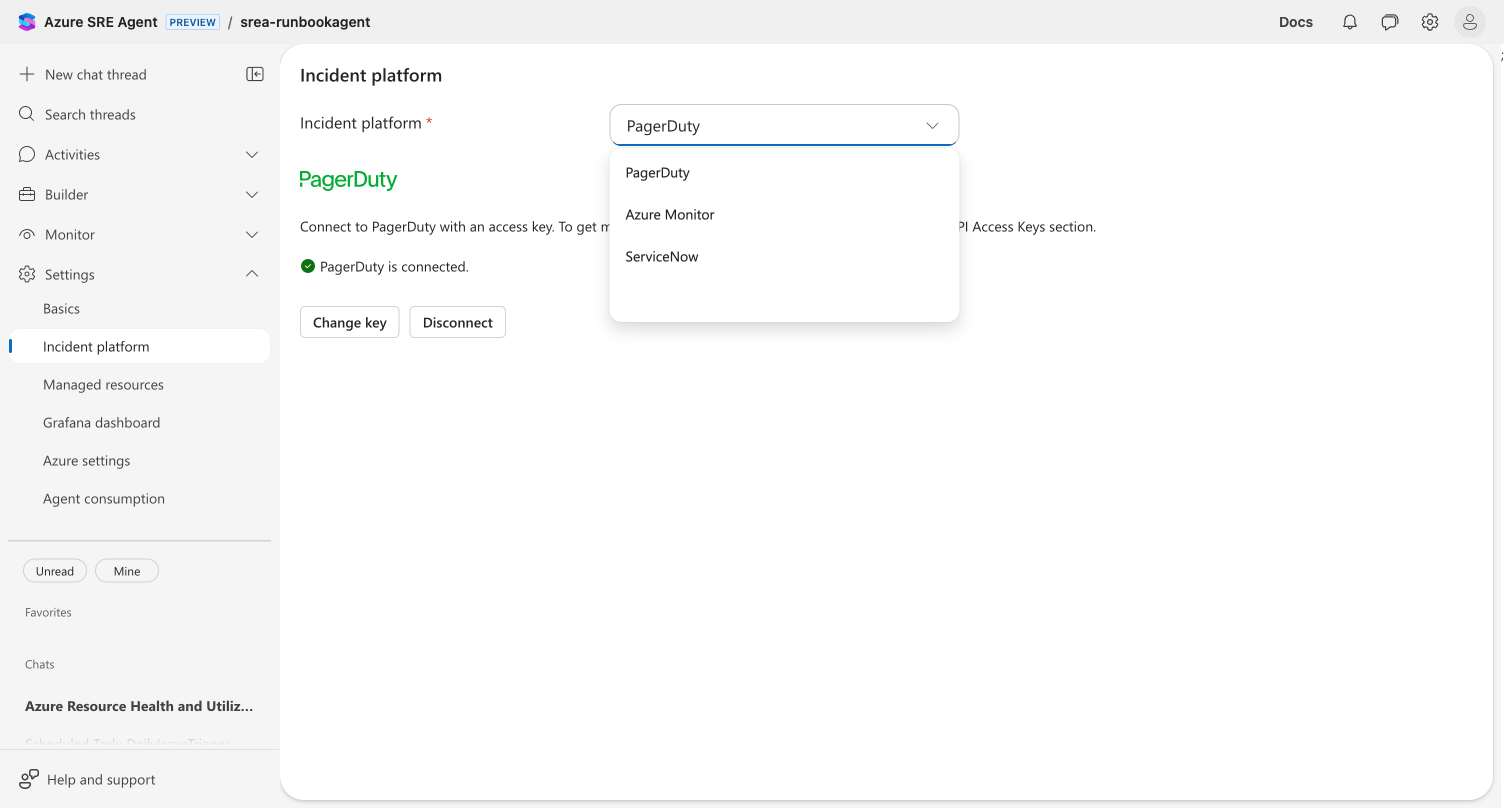
Select ServiceNow from the Incident platform dropdown.
Note
If another platform is already connected, a confirmation dialog appears. Confirm to disconnect the current platform before proceeding. Only one incident platform can be active at a time.
Set Authentication Type to OAuth 2.0.
A yellow info box appears with a redirect URL. Copy this URL and add it to your ServiceNow OAuth application (from the previous section). The redirect URL follows this pattern:
https://logic-apis-<REGION>.consent.azure-apim.net/redirectEnter your ServiceNow details:
- ServiceNow endpoint: Your instance URL (for example,
https://your-instance.servicenow.com). - OAuth Client ID: From your ServiceNow OAuth application.
- OAuth Client Secret: From your ServiceNow OAuth application.
- ServiceNow endpoint: Your instance URL (for example,
Select Authorize.
Authorize the connection
Complete the OAuth authorization flow to finalize the connection.
- The portal creates an Azure API Connection and opens a ServiceNow sign-in popup.
- Sign in to ServiceNow in the popup window to authorize the connection.
- Wait for authorization to complete. A spinner appears on the form while the connection is being set up.
- When authorization succeeds, the Authorize button changes to Save, which indicates the connection is authorized.
- Select Save to save the configuration.
Verify the OAuth connection
After authorization, confirm that the connection is active.
The settings page shows a green status indicator with "ServiceNow is connected." Your agent can now receive and manage incidents from ServiceNow.
Tip
Your agent can now automatically receive, investigate, and update ServiceNow incidents. Set up response plans to control which incidents your agent handles.
Option B: Connect with basic authentication
Use basic authentication for quick setup in development or test environments.
Create a ServiceNow integration user
Create a dedicated user in ServiceNow for the agent.
- In ServiceNow, go to User Administration > Users.
- Create a new user with the following properties:
- A recognizable username (for example,
sre-agent-integration). - A strong password.
- Roles:
itiland incident management permissions (or equivalent).
- A recognizable username (for example,
Configure basic authentication in the portal
Follow these steps to connect ServiceNow with basic authentication.
- Go to your agent in the Azure SRE Agent portal.
- In the left navigation, go to Settings > Incident platform.
- Select ServiceNow from the Incident platform dropdown.
- Don't change Authentication Type - keep it as Basic Authentication (default).
- Enter your ServiceNow details:
- ServiceNow endpoint: Your instance URL (for example,
https://your-instance.servicenow.com). - Username: The integration user's username.
- Password: The integration user's password.
- ServiceNow endpoint: Your instance URL (for example,
- Select Save.
Verify the basic authentication connection
The portal automatically validates connectivity. You should see a green status indicator with "ServiceNow is connected."
Set up response plans
After you connect ServiceNow, create response plans to define how your agent handles incidents.
Optionally, you can enable Quickstart response plan during setup. This option automatically creates a default response plan for high-priority incidents.
When you enable Quickstart response plan, your agent creates a default plan based on the platform:
| Platform | Default plan handles | Autonomy level |
|---|---|---|
| ServiceNow | High (Priority 2) incidents | Autonomous |
| Azure Monitor | Sev3 alerts | Autonomous |
| PagerDuty | P1 incidents | Autonomous |
The following table shows ServiceNow priority values and their labels:
| Priority | ServiceNow value | Label |
|---|---|---|
| Critical | 1 | Critical |
| High | 2 | High |
| Moderate | 3 | Moderate |
| Low | 4 | Low |
| Planning | 5 | Planning |
What your agent can do with ServiceNow
Once connected, your agent interacts with ServiceNow incidents throughout their lifecycle.
| Capability | Description |
|---|---|
| Read incidents | Fetch incident details, related records, and discussion history |
| Post discussion entries | Add investigation findings and updates to incident work notes |
| Acknowledge incidents | Mark incidents as acknowledged when investigation begins |
| Change priority | Adjust incident priority based on investigation findings |
| Resolve incidents | Close incidents with resolution notes after successful mitigation |
Change credentials
To update your ServiceNow connection, follow these steps.
- Go to Settings > Incident platform.
- Select Change credentials.
- Update your endpoint, authentication type, or credentials.
- Select Save (or Authorize for OAuth).
Disconnect ServiceNow
To disconnect your ServiceNow integration, follow these steps:
- Go to Settings > Incident platform.
- Select Disconnect.
- Confirm the disconnection.
Warning
Disconnecting permanently removes the connection. Your agent stops receiving and managing ServiceNow incidents. For OAuth connections, the process also deletes the associated Azure API Connection resource.
Update incident fields during investigations (preview)
Important
This feature is in preview. Functionality and behavior may change before general availability.
Once your ServiceNow connection is active, your agent can update incident fields directly during investigations. In an incident investigation thread, ask the agent to update fields like assignment group, category, impact, or priority—the agent handles the ServiceNow API call.
Try it: In an incident investigation thread, ask:
"Update this incident's category to 'Network' and subcategory to 'DNS'"
The agent updates the fields directly in ServiceNow and confirms the changes.
Supported fields: assignment_group, category, subcategory, impact, urgency, priority, short_description, and custom fields (u_* prefix like u_environment).
Priority values: Use string values—"1" (Critical), "2" (High), "3" (Moderate), "4" (Low), "5" (Planning).
Note
Use ServiceNow's snake_case field names (for example, assignment_group, not Assignment Group). The agent handles the mapping automatically when you describe the field in natural language.
State changes use dedicated actions—the update action doesn't change incident state. To acknowledge or resolve incidents, ask the agent directly (for example, "acknowledge this incident" or "resolve this incident").
Troubleshooting
Use the following guidance to resolve common ServiceNow connection issues.
OAuth authorization fails
If OAuth authorization fails, check the following items:
- Verify the redirect URL in your ServiceNow OAuth application matches exactly:
https://logic-apis-<REGION>.consent.azure-apim.net/redirect. - Confirm you set your OAuth application to Active in ServiceNow.
- Double-check your Client ID and Client Secret.
- Ensure your ServiceNow instance allows external OAuth connections.
Connection shows "Not Connected" after setup
If the connection status shows as not connected after initial setup, try the following steps:
- OAuth: The Azure API Connection might need re-authorization. Select Change credentials to re-authorize.
- Basic auth: Verify the endpoint URL, username, and password are correct.
- Confirm the ServiceNow endpoint is reachable from Azure (no firewall blocking).
"Unable to connect to ServiceNow endpoint"
If you see this error, check the following items:
- Verify the endpoint URL format:
https://your-instance.servicenow.com(no trailing slash). - Confirm your ServiceNow instance is accessible from the public internet.
- Check that the integration user has sufficient permissions.
"Invalid OAuth credentials"
If you see this error, check the following items:
- Regenerate the client secret in ServiceNow and try again.
- Verify the Client ID matches the one in your ServiceNow OAuth application.
- Confirm the OAuth application is active and not expired.
What you learned
In this tutorial, you:
- Connected your ServiceNow instance to Azure SRE Agent by using OAuth 2.0 or basic authentication.
- Verified the connection is active and healthy.
- Learned how to set up response plans for ServiceNow incidents.
- Explored what your agent can do with ServiceNow, including reading, posting, acknowledging, and resolving incidents.
- Updated incident fields like assignment group, category, and impact directly from the agent conversation.