Note
Access to this page requires authorization. You can try signing in or changing directories.
Access to this page requires authorization. You can try changing directories.
In this quickstart, you learn how to use the Azure portal to create a container in Azure Storage, and to upload and download block blobs in that container.
Prerequisites
To access Azure Storage, you'll need an Azure subscription. If you don't already have a subscription, create a free account before you begin.
All access to Azure Storage takes place through a storage account. For this quickstart, create a storage account using the Azure portal, Azure PowerShell, or Azure CLI. For help creating a storage account, see Create a storage account.
Create a container
To create a container in the Azure portal, follow these steps:
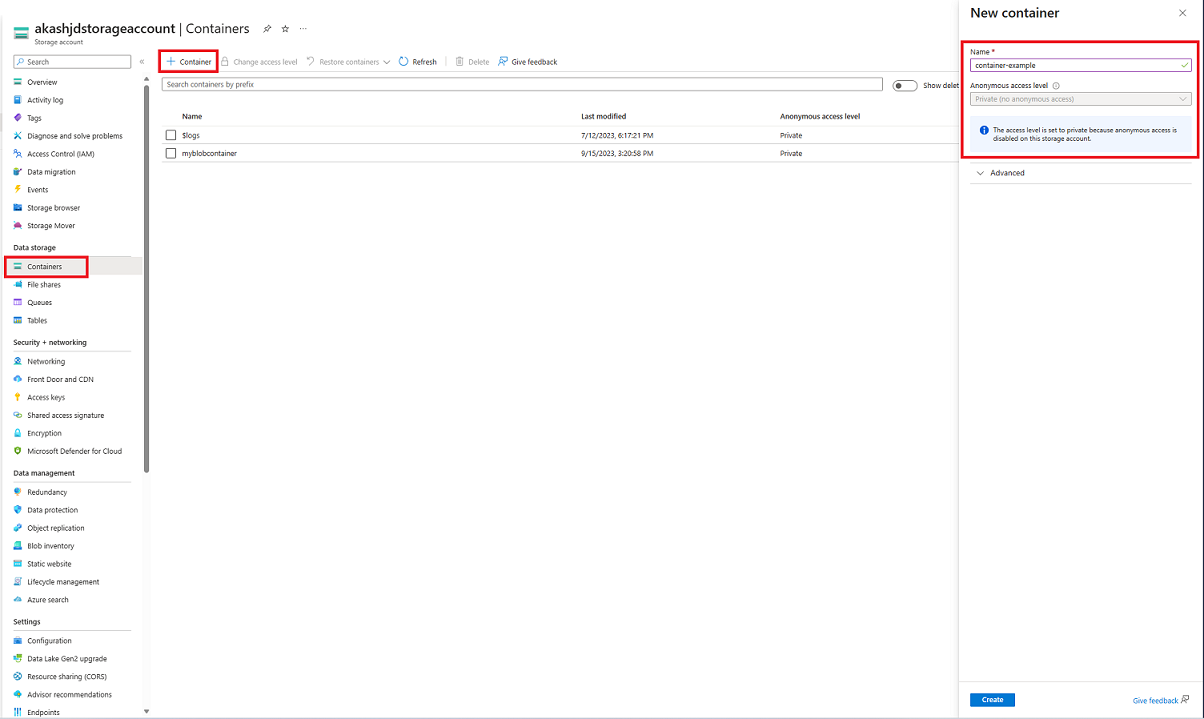
Navigate to your new storage account in the Azure portal.
In the left menu for the storage account, scroll to the Data storage section, then select Containers.
Select the + Container button.
Type a name for your new container. The container name must be lowercase, must start with a letter or number, and can include only letters, numbers, and the dash (-) character. For more information about container and blob names, see Naming and referencing containers, blobs, and metadata.
Set the level of anonymous access to the container. The default level is Private (no anonymous access).
Select Create to create the container.

Upload a block blob
Block blobs consist of blocks of data assembled to make a blob. Most scenarios using Blob storage employ block blobs. Block blobs are ideal for storing text and binary data in the cloud, like files, images, and videos. This quickstart shows how to work with block blobs.
To upload a block blob to your new container in the Azure portal, follow these steps:
In the Azure portal, navigate to the container you created in the previous section.
Select the container to show a list of blobs it contains. This container is new, so it won't yet contain any blobs.
Select the Upload button to open the upload blade and browse your local file system to find a file to upload as a block blob. You can optionally expand the Advanced section to configure other settings for the upload operation. You can, for example, upload a blob into a new or existing virtual folder or by supplying a value in the Upload to folder field.
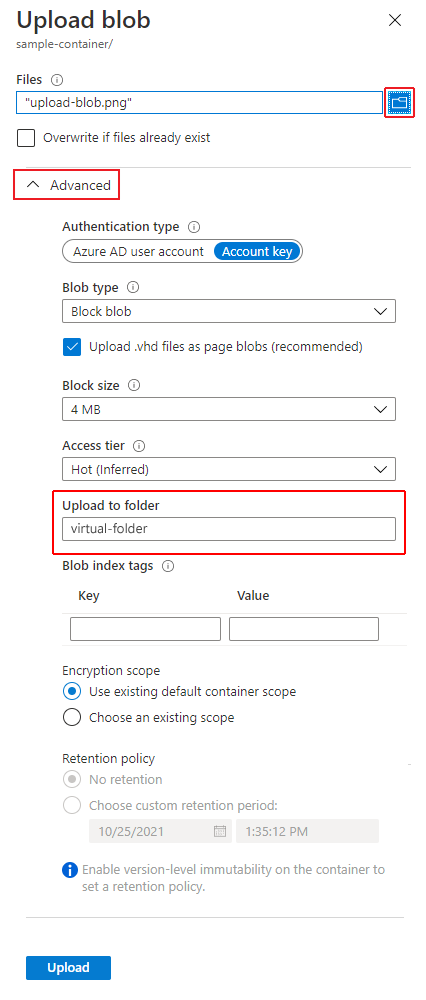
Select the Upload button to upload the blob.
Upload as many blobs as you like in this way. You'll see that the new blobs are now listed within the container.
Download a block blob
You can download a block blob to display in the browser or save to your local file system. To download a block blob, follow these steps:
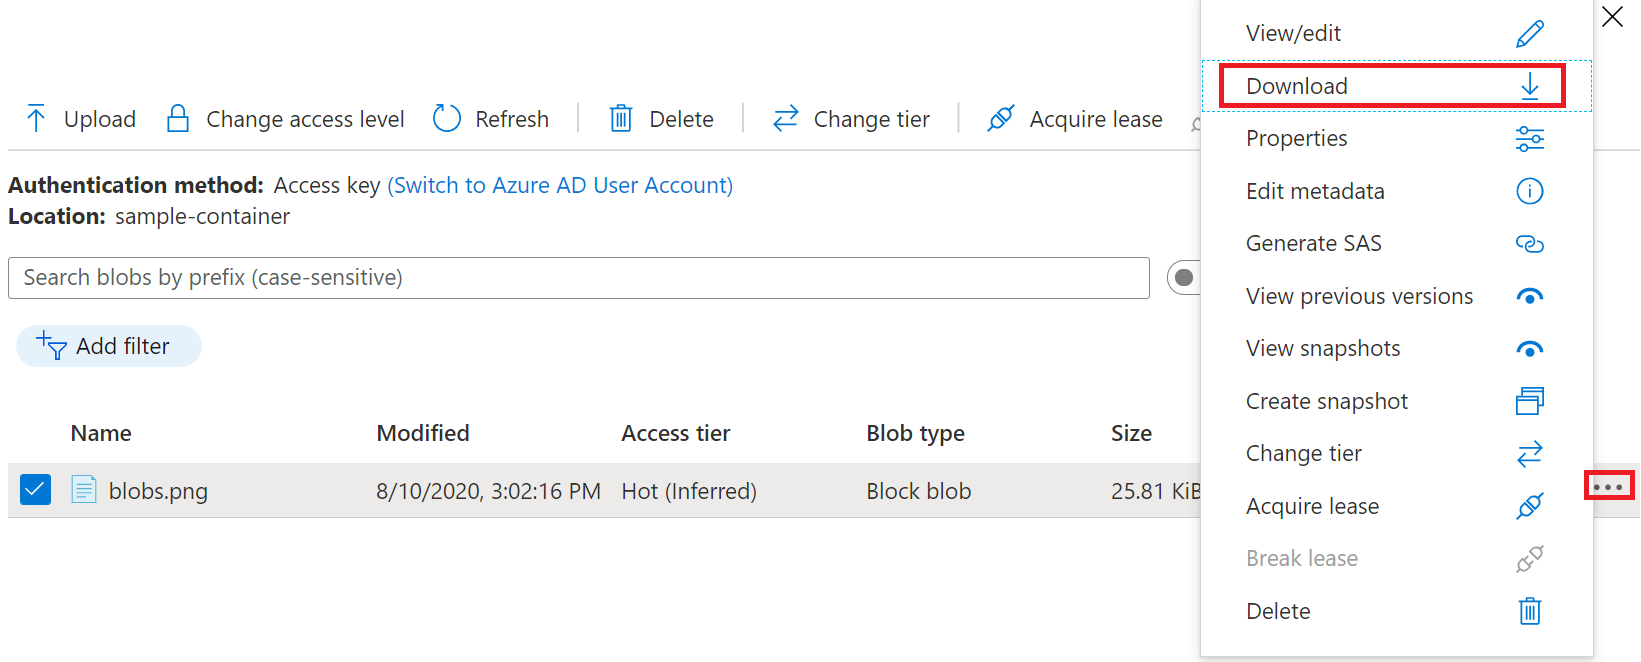
Navigate to the list of blobs that you uploaded in the previous section.
Right-click the blob you want to download, and select Download.
Delete a block blob
To delete one or more blobs in the Azure portal, follow these steps:
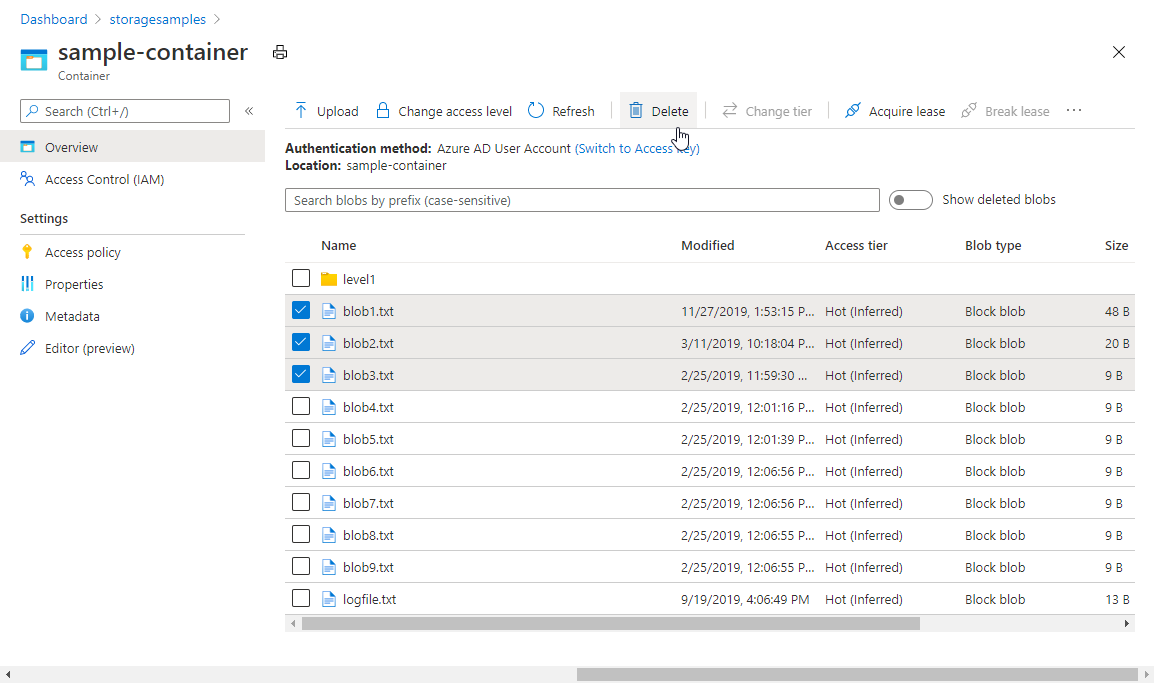
- In the Azure portal, navigate to the container.
- Display the list of blobs in the container.
- Use the checkbox to select one or more blobs from the list.
- Select the Delete button to delete the selected blobs.
- In the dialog, confirm the deletion, and indicate whether you also want to delete blob snapshots.
Clean up resources
To remove all the resources you created in this quickstart, you can simply delete the container. All blobs in the container will also be deleted.
To delete the container:
- In the Azure portal, navigate to the list of containers in your storage account.
- Select the container to delete.
- Select the More button (...), and select Delete.
- Confirm that you want to delete the container.
Next steps
In this quickstart, you learned how to create a container and upload a blob with Azure portal. To learn about working with Blob storage from a web app, continue to a tutorial that shows how to upload images to a storage account.