Quickstart: Create a table in the Azure portal
This quickstart shows how to create tables and entities in the web-based Azure portal. This quickstart also shows you how to create an Azure storage account.
If you don't have an Azure subscription, create an Azure free account before you begin.
Prerequisites
To complete this quickstart, first create an Azure storage account in the Azure portal. For help creating the account, see Create a storage account.
Add a table
To create a table in the Azure portal:
Navigate to your storage account in the Azure portal.
Select Storage Browser in the left-hand navigation panel.
In the Storage Browser tree, select Tables.
Select the Add table button to add a new table.
In the Add table dialog, provide a name for the new table.
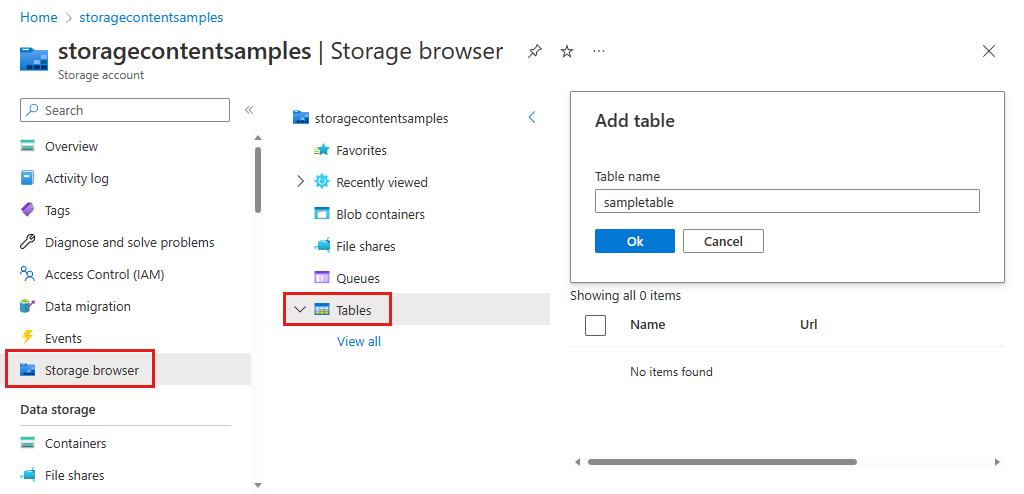
Select Ok to create the new table.
Add an entity to the table
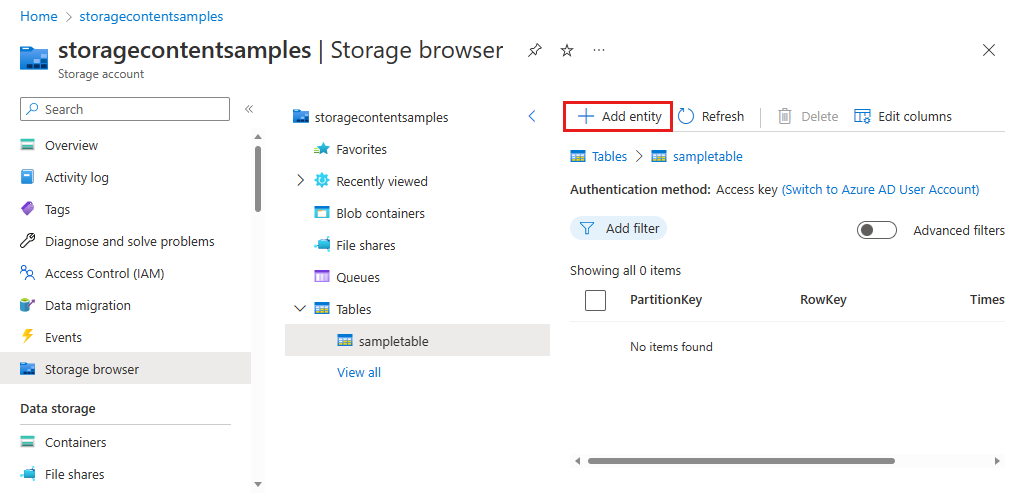
To add an entity to your table from the Azure portal:
In the Storage Browser in the Azure portal, select the table you created previously.
Select the Add entity button to add a new entity.
In the Add entity dialog, provide a partition key and a row key, then add any additional properties for data that you want to write to the entity.
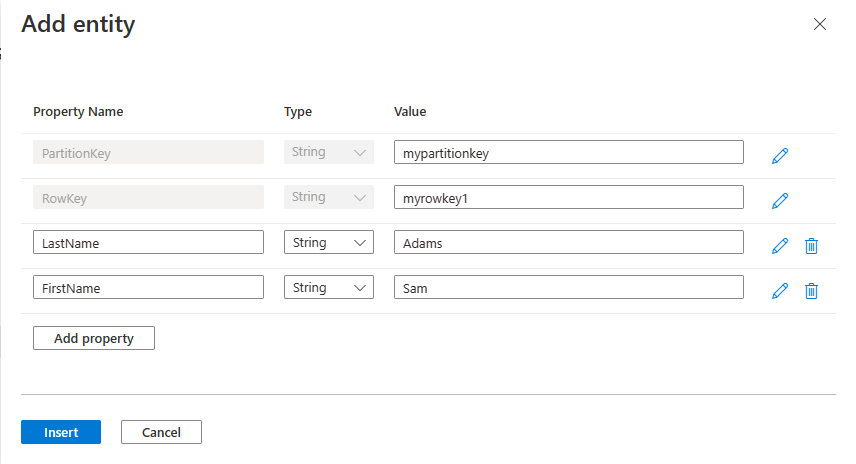
For more information on working with entities and properties, see Understanding the Table service data model.
Next steps
Feedback
Coming soon: Throughout 2024 we will be phasing out GitHub Issues as the feedback mechanism for content and replacing it with a new feedback system. For more information see: https://aka.ms/ContentUserFeedback.
Submit and view feedback for