Cloud discovery anomaly detection policy
A cloud discovery anomaly detection policy enables you to set up and configure continuous monitoring of unusual increases in cloud application usage. Increases in downloaded data, uploaded data, transactions, and users are considered for each cloud application. Each increase is compared to the normal usage pattern of the application as learned from past usage. The most extreme increases trigger security alerts.
This article describes how to create and configure a cloud discovery anomaly detection policy in Microsoft Defender for Cloud Apps.
Important
Starting August 2024, cloud discovery anomaly support for Microsoft Defender for Cloud Apps is retired. As such, the legacy procedure presented in this article is provided for informational purposes only. If you want to receive security alerts similar to anomaly detection, complete the steps in Create app discovery policy.
Create app discovery policy
Although support for cloud discovery anomaly detection is retired, you can receive similar security alerts by creating an app discovery policy:
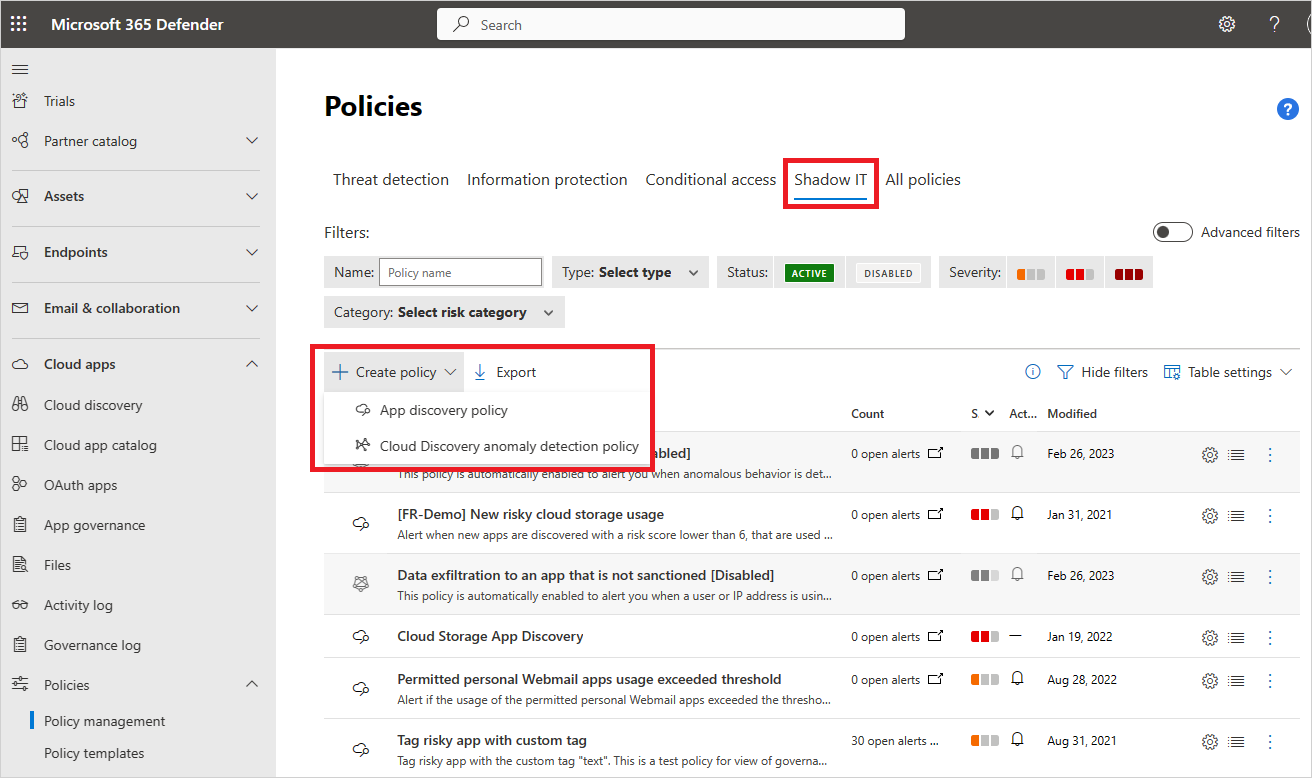
In the Microsoft Defender Portal, expand the Cloud Apps > Policies section on the left menu, and select Policy management.
On the Policies page, select the Shadow IT tab.
Expand the Create policy dropdown menu and select the App discovery policy option.
Select the Trigger a policy match if all the following occur on the same day option:

Configure the associated filters and settings, as described in Create an anomaly detection policy.
(Legacy) Create anomaly detection policy
For each anomaly detection policy, you set filters that enable you to selectively monitor application usage. Filters are available for the application, selected data views, and a selected start date. You can also set the sensitivity and specify how many alerts for the policy to trigger.
Follow the steps to create a cloud discovery anomaly detection policy:
In the Microsoft Defender Portal, expand the Cloud Apps > Policies section on the left menu, and select Policy management.
On the Policies page, select the Shadow IT tab.
Expand the Create policy dropdown menu and select the Cloud Discovery anomaly detection policy option:
The Create Cloud Discovery anomaly detection policy page opens, where you configure parameters for the policy to create.
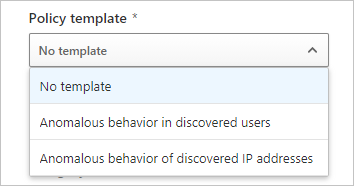
On the Create Cloud Discovery anomaly detection policy page, the Policy template option provides a list of templates that you can choose from to use as a base for the policy. By default, the option is set to No template.
If you want to base the policy on a template, expand the dropdown menu and select a template:
Anomalous behavior in discovered users: Alerts when anomalous behavior is detected in discovered users and apps. You can use this template to check for large amounts of uploaded data compared to other users, or large user transactions compared to the user's history.
Anomalous behavior of discovered IP addresses: Alerts when anomalous behavior is detected in discovered IP addresses and apps. You can use this template to check for large amounts of uploaded data compared to other IP addresses, or large app transactions compared to the IP address's history.
The following image shows how to select a template to use as the base for the new policy in the Microsoft Defender portal:
Enter a Policy name and Description for the new policy.
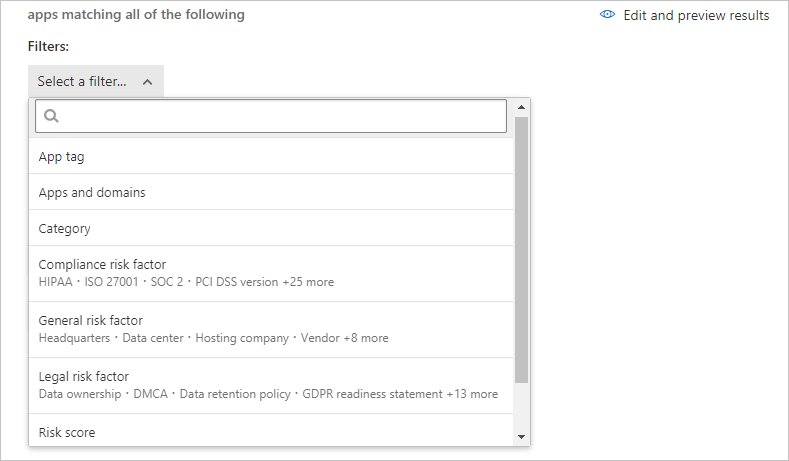
Create a filter for the apps you want to monitor by using the Select a filter option.
Expand the dropdown menu and choose to filter all matching apps by App tag, Apps and domain, Category, various Risk factors, or Risk score.
To create more filters, select Add a filter.
The following image shows how to select a filter for the policy to apply to all matching applications in the Microsoft Defender portal:
Configure application usage filters in the Apply to section:
Use the first dropdown menu to choose how to monitor reports of continuous usage:
All continuous reports (default): Compare each usage increase to the normal usage pattern as learned from all data views.
Specific continuous reports: Compare each usage increase to the normal usage pattern. The pattern is learned from the same data view where the increase was observed.
Use the second dropdown menu to specify monitored associations for every cloud application usage:
Users: Ignore the association of application usage with IP addresses.
IP addresses: Ignore the association of application usage with users.
Users, IP addresses (default): Monitor associate of application usage by users and IP addresses. This option can produce duplicate alerts when a tight correspondence exists between users and IP addresses.
The following image shows how to configure application usage filters and the start date for raising usage alerts in the Microsoft Defender portal:
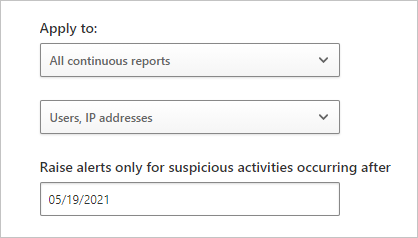
For the Raise alerts only for suspicious activities occurring after option, enter the date to begin raising application usage alerts.
Any increase in application usage before the specified start date is ignored. However, usage activity data from before the start date is learned to establish the normal usage pattern.
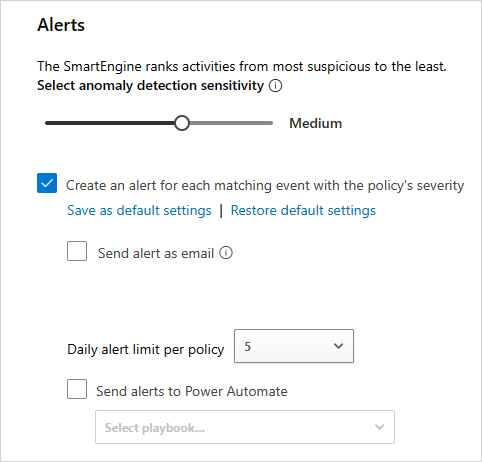
In the Alerts section, configure the alert sensitivity and notifications. There are several ways to control the number of alerts triggered by the policy:
Use the Select anomaly detection sensitivity slider to trigger alerts for the top X anomalous activities per 1,000 users per week. Alerts trigger for the activities with the highest risk.
Select the Create an alert for each matching event with the policy's severity option and set other parameters for the alert:
Send alert as email: Enter the email addresses for alert messages. A maximum of 500 messages can be sent per email address per day. The count resets at midnight in the UTC time zone.
Daily alert limit per policy: Use the dropdown menu and select the desired limit. This option restricts the number of alerts raised on a single day to the specified value.
Send alerts to Power Automate: Choose a playbook to run actions when an alert triggers. You can also open a new playbook by selecting Create a playbook in Power Automate.
To set your organization's default settings to use your values for the Daily alert limit and email settings, select Save as default settings.
To use your organization's default settings for the Daily alert limit and email settings, select Restore default settings.
The following image shows how to configure alerts for the policy, including sensitivity, email notifications, and a daily limit in the Microsoft Defender portal:
Confirm your configuration choices, and select Create.

Work with an existing policy
When you create a policy, it's enabled by default. You can disable a policy and perform other actions like Edit and Delete.
On the Policies page, locate the policy to update in the list of policies.
In the list of policies, scroll to the right on the policy row, and select More options (...).
On the popup menu, select the action to perform on the policy.
Next step
If you run into any problems, we're here to help. To get assistance or support for your product issue, please open a support ticket.