How Defender for Cloud Apps helps protect your Smartsheet
As a productivity and collaboration cloud solution, Smartsheet holds sensitive information to your organization. Any abuse of Smartsheet by a malicious actor or any human error may expose your most critical assets and services to potential attacks.
Connecting Smartsheet to Defender for Cloud Apps gives you improved insights into your Smartsheet activities and provides threat detection for anomalous behavior.
Main threats
Compromised accounts and insider threats
Data leakage
Insufficient security awareness
Unmanaged bring your own device (BYOD)
How Defender for Cloud Apps helps to protect your environment
Detect cloud threats, compromised accounts, and malicious insiders
Use the audit trail of activities for forensic investigations
Control Smartsheet with policies
| Type | Name |
|---|---|
| Built-in anomaly detection policy | Unusual file share activities Unusual file deletion activities Unusual administrative activities Unusual multiple file download activities |
| Activity policy | Build a customized policy by the Smartsheet Audit Log activities |
Note
- Login/Logouts activities are not supported by Smartsheet.
- Smartsheet activities does not contain IP addresses.
For more information about creating policies, see Create a policy.
Automate governance controls
In addition to monitoring for potential threats, you can apply and automate the following Smartsheet governance actions to remediate detected threats:
| Type | Action |
|---|---|
| User governance | Notify user on alert (via Microsoft Entra ID) Require user to sign in again (via Microsoft Entra ID) Suspend user (via Microsoft Entra ID) |
For more information about remediating threats from apps, see Governing connected apps.
Protect Smartsheet in real time
Review our best practices for securing and collaborating with external users and blocking and protecting the download of sensitive data to unmanaged or risky devices.
Connect Smartsheet to Microsoft Defender for Cloud Apps
This section describes how to connect Microsoft Defender for Cloud Apps to your existing Smartsheet via the App Connector APIs. The resulting connection gives you visibility into and control over your organization's use of Smartsheet.
Prerequisites
- The Smartsheet user used to log in to Smartsheet must be a System Admin.
- Event Reporting must be enabled by Smartsheet, either through standalone purchase or via an Enterprise plan with the Advance Platinum package.
Configure Smartsheet
Note
The Smartsheet license must be an Enterprise plan with the Platinum package.
Smartsheet accounts hosted in the EU region (the .eu domain suffix) aren't currently supported.
Register to add Developer Tools to your existing Smartsheet account:
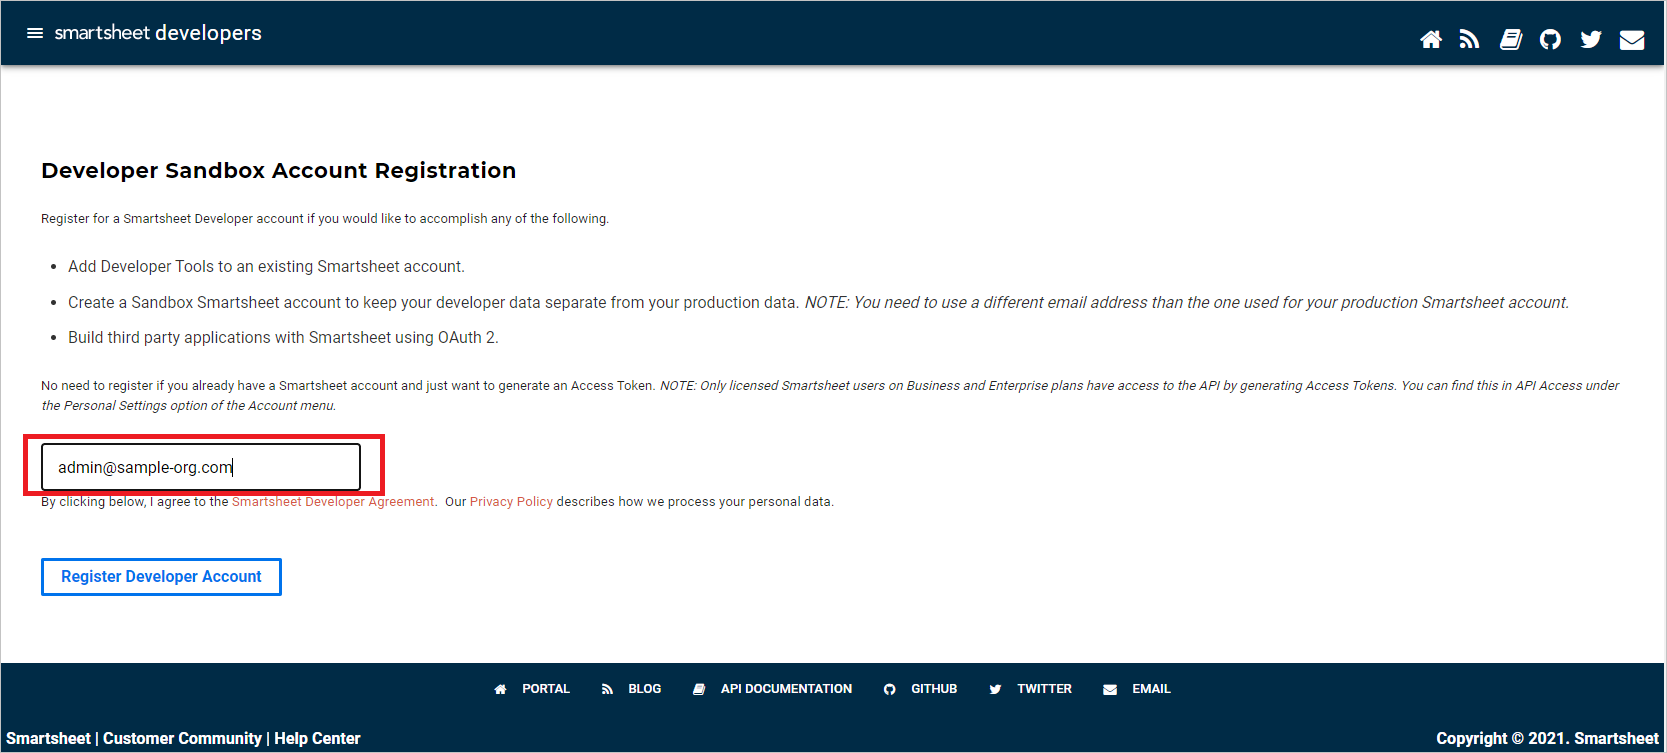
Go to the Developer Sandbox Account Registration page.
Enter your Smartsheet email address in the text box:
An activation mail will appear in your mailbox. Activate Developer Tools by using the activation mail.
In Smartsheet, select Create Developer Profile. Enter your name and email address. Select Save and then Close:
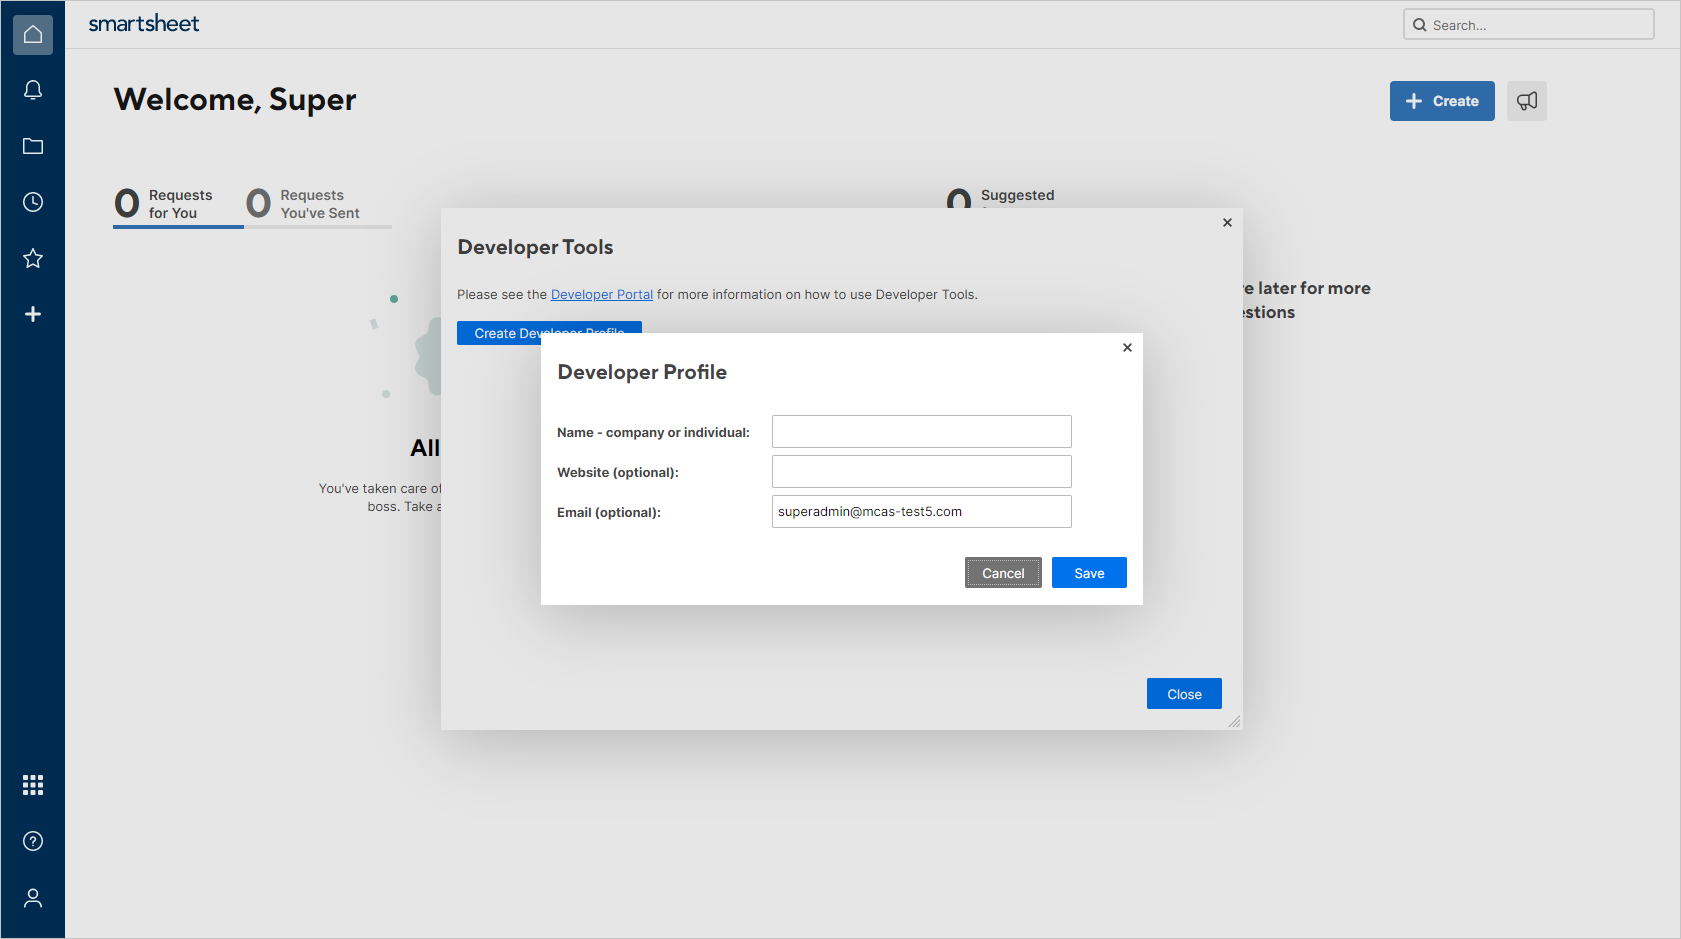
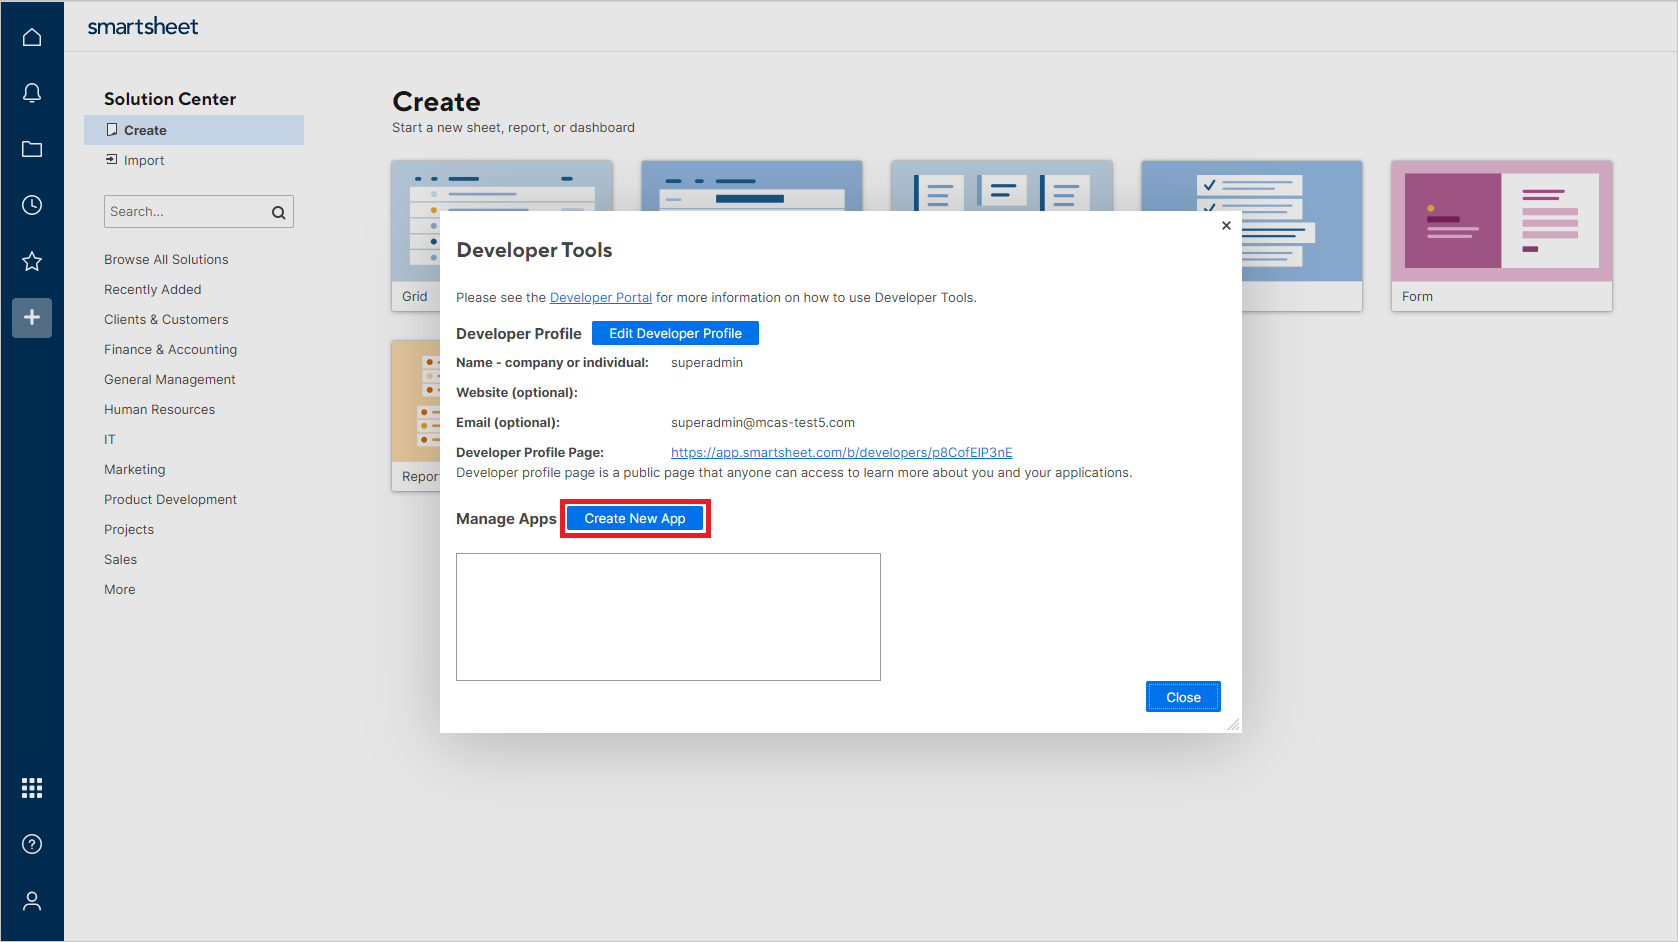
In Smartsheet, select Developer Tools:

In the Developer Tools dialog, select Create New App:
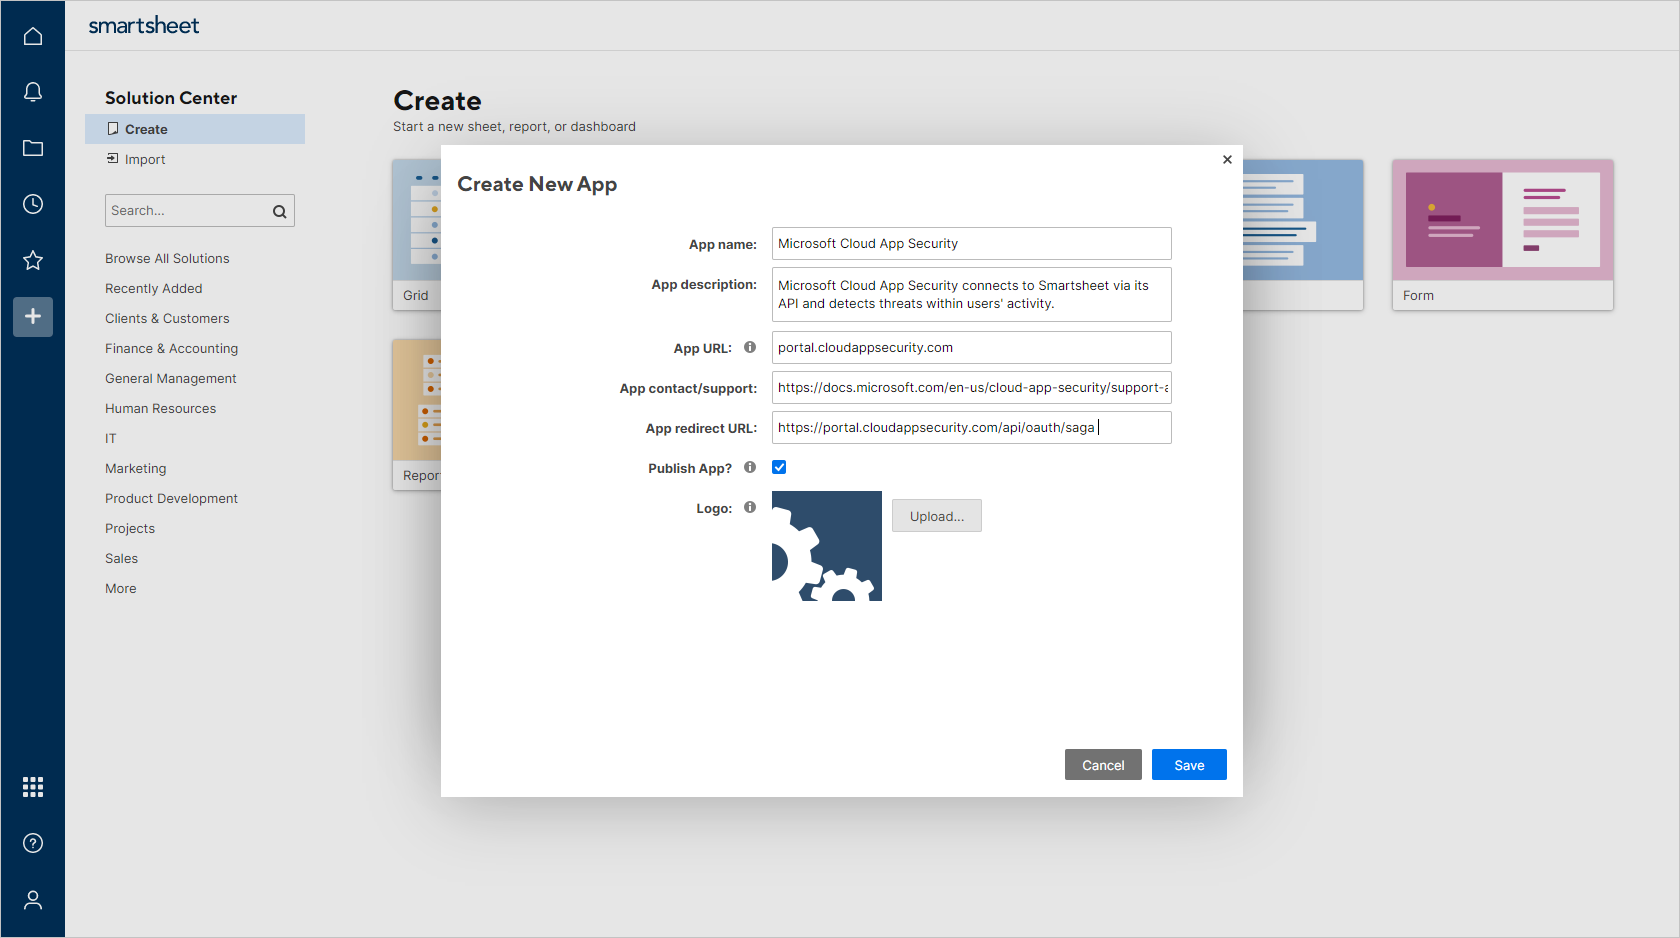
In the Create New App dialog, provide the following values:
App name: For example, Microsoft Defender for Cloud Apps.
App description: For example, Microsoft Defender for Cloud Apps connects to Smartsheet via its API and detects threats within users' activity.
App URL:
https://portal.cloudappsecurity.comApp contact/support:
https://learn.microsoft.com/cloud-app-security/support-and-tsApp redirect URL:
https://portal.cloudappsecurity.com/api/oauth/sagaNote
- For US Government GCC customers, enter the following value:
https://portal.cloudappsecuritygov.com/api/oauth/saga - For US Government GCC High customers, enter the following value:
https://portal.cloudappsecurity.us/api/oauth/saga
- For US Government GCC customers, enter the following value:
Publish App?: Select.
Logo: Leave blank.
Select Save. Copy the App client id and the App secret that are generated. You'll need them in the following steps.
Configure Defender for Cloud Apps
Note
The Smartsheet user configuring the integration must always remain a Smartsheet admin, even after the connector is installed.
In the Microsoft Defender Portal, select Settings. Then choose Cloud Apps. Under Connected apps, select App Connectors.
On the App connectors tab, select +Connect an app, and then select Smartsheet.
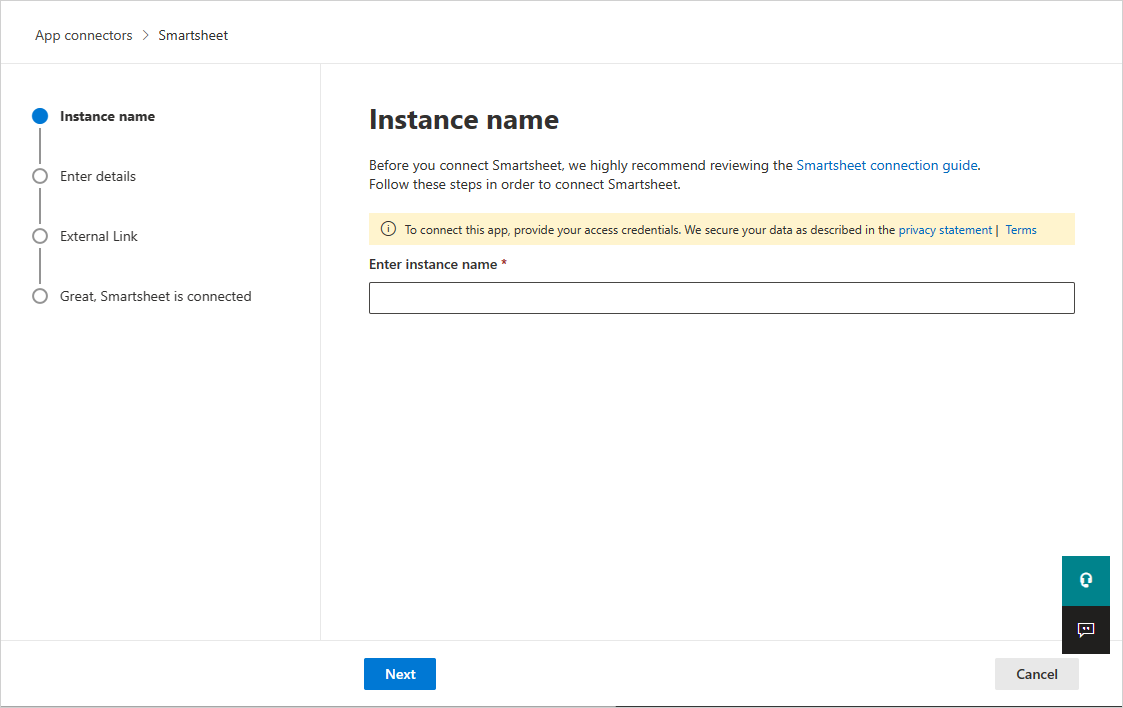
In the next window, give the connector a descriptive name, and then select Next.
On the Enter details screen, enter these values and select Next:
- Client ID: The app client ID that you saved earlier.
- Client Secret: The app secret that you saved earlier.
On the External Link page, select Connect Smartsheet.
In the Microsoft Defender Portal, select Settings. Then choose Cloud Apps. Under Connected apps, select App Connectors. Make sure the status of the connected App Connector is Connected.
The first connection can take up to four hours to get all users and their activities in the seven days before the connection.
After the connector's Status is marked as Connected, the connector is live and works.
Rate limits and limitations
The default rate limit is 300 requests per minute. For more information, see the Smartsheet documentation.
Limitations include:
- Log in and log out activities aren't supported by Smartsheet.
- Smartsheet activities don't contain IP addresses.
- System activities are shown with the Smartsheet account name.
Next steps
If you run into any problems, we're here to help. To get assistance or support for your product issue, please open a support ticket.