Set expiration dates for selected email tiles in a customer journey
Important
This article only applies to outbound marketing, which will be removed from the product on June 30, 2025. To avoid interruptions, transition to real-time journeys before this date. More information: Transition overview
Some of your customer journeys may include email messages with time-sensitive content. Time-sensitive emails could include time-limited offers, holiday promotions, or a two-week reminder for an upcoming event. Because contacts might join the journey at any time, you can now prevent delivering outdated information by setting an expiration date for one or more selected email messages. Any contact who enters an email tile after its expiration date has passed will pass through the tile without being sent the message. In other words, any contact who enters an email tile after the expiration date will not receive any message produced by the expired email tile and will continue to be processed by the subsequent tiles.
Set an expiration date for an email message
Select the email tile in your customer journey.
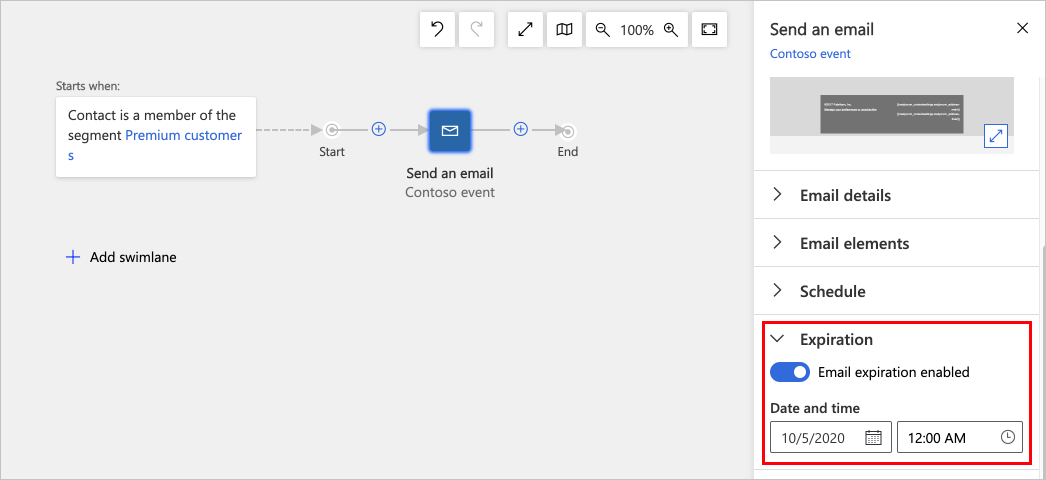
Select the email tile, then open the Expiration category in the email properties pane on the right side of the window. Switch the Email expiration toggle to On.
Set the static expiration Date and time (for example, October 5, 2020 at 12:00 AM). Specified expiry times use the customer journey's time zone.

Once a journey is live, the expiration date is shown above the email tile:
Identify expired-message results in insights
Each time a customer journey skips sending an expired message, the event is noted in the following insights:
- The message is counted as sent, but blocked (because of the expiration date).
- In accumulated KPIs and charts, expired messages are counted as blocked.
- In detailed insights, expired messages are listed under Blocked > Other reasons.