Manage your accounts and contacts
In Dynamics 365 Sales, you use accounts to store information about the companies you do business with. Use contacts to store information about the people you work with at those companies. You can add multiple contacts to an account, but you can associate only one account with a contact. You can create accounts and contacts manually or import them from a spreadsheet or other supported files.
Work with accounts
- Create an account
- Add contacts to an account
- View opportunities associated with an account
- View invoices associated with an account
- Deactivate an account
- View relationship analytics and KPIs for an account
Create an account
In the sitemap of your sales app, select Accounts.
In the command bar, select New.
On the Summary tab, enter the information you have about the company. Only the Account Name is required. All other details are optional.
Optionally, add contacts to the account.
Select Save & Close.
Fill in the address from suggestions
(Applicable for Sales Enterprise and Sales Premium only)
If your administrator has turned on address suggestions, Bing Maps can fill in the account's address details so that you don't have to. Address suggestion works with contacts, accounts, and leads.
Open an account, contact, or lead.
On the Summary tab, scroll down to the Address box and start typing the street address.

Select an address from the list of suggestions provided by Bing Maps.
View opportunities associated with an account
In the sitemap of your sales app, select Accounts.
Select an account in the list.
Select the Related tab. Scroll down to the Related - Sales group, and then select Opportunities.
View invoices associated with an account
In the sitemap of your sales app, select Accounts.
Select an account in the list.
Select the Related tab. Scroll down to the Related - Sales group, and then select Invoices.
Deactivate an account
You can deactivate an account if you no longer do business with it. Deactivating an account makes the account read-only and hides it from most views but retains the account's history. The related contacts, opportunities, and other records remain active. However, you can't create new records from the existing ones. For example, you can't create a quote from an active opportunity that's associated with the deactivated account.
- In the sitemap of your sales app, select Accounts.
- Select the account you want to deactivate.
- In the command bar, select Deactivate and confirm the deactivation.
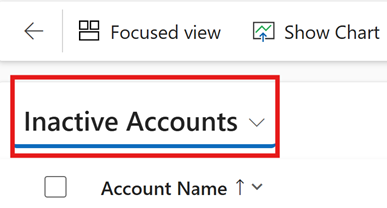
The account is deactivated and listed under the Inactive Accounts view.

Work with contacts
- Create a contact
- Add contacts to an account
- View opportunities associated with a contact
- Get introduced to a contact
- View relationship analytics and KPIs for a contact
Create a contact
In the sitemap of your sales app, select Contacts.
In the command bar, select New.
On the Summary tab, enter the information you have about the company. Only the First Name and Last Name are required. All other details are optional.
Bing Maps can fill in the contact's address details for you if your administrator has turned on address suggestions.
Optionally, associate the contact with an account. Scroll down to Company and select an account from the list.
A contact can be associated with only one account at a time.
Select Save & Close.
Add contacts to an account
In the sitemap of your sales app, select Accounts.
Select an account.
On the Summary tab, scroll down to the Contacts section.
Associate a contact:
- To create a contact and associate it with the account at the same time, select New Contact.
- To associate an existing contact, select More commands (⋮) > Add Existing Contact. Search for and select one or more contacts, and then select Add.
You can associate a contact with only one account. If you select a contact who is already associated with a different account, you get an error message.
Select Save & Close.
View opportunities associated with a contact
In the sitemap of your sales app, select Contacts.
Select a contact in the list.
On the Summary tab, scroll down to the Opportunities section.
Or, select the Related tab. Scroll down to the Related - Sales group, and then select Opportunities.
Deactivate a contact
You can deactivate a contact if you no longer work with them. Deactivating a contact makes the contact read-only and hides it from most views but retains the contact's history. The related opportunities, activities, and other records remain active.
- In the sitemap of your sales app, select Contacts.
- Select the contact you want to deactivate.
- In the command bar, select Deactivate and confirm the deactivation. The contact is deactivated and listed under the Inactive Contacts view.
Import accounts or contacts from Excel, CSV, and XML Files
You can add accounts and contacts by importing them from a Microsoft Excel, CSV, or XML file or from Microsoft Exchange. Learn how to import data into Dynamics 365 Sales