Set and use date tables in Power BI Desktop
Power BI Desktop works behind the scenes to automatically identify columns that represent dates, and then creates date hierarchies and other enabling metadata for your model, on your behalf. You can then use those built-in hierarchies when creating report features like visuals, tables, quick measures, slicers, and so on. Power BI Desktop generates this data by creating hidden tables on your behalf, which you can then use for your reports and DAX expressions.
For more information about this automatic behavior, see Apply auto date/time in Power BI Desktop.
Many data analysts prefer to create their own date tables, which is fine. In Power BI Desktop, you can specify the table you want your model to use as its date table, and then create date-related visuals, tables, quick measures, and so on, by using that table's date data. When you specify your own date table, you control the date hierarchies created in your model, and use them in quick measures and other operations that use your model's date table.
Benefits of setting your own date table
The Time intelligence functions in Power BI require some understanding of date calculations in your model. Setting your own date table or using auto date/time enables these functions to work. There are specific situations in which you do need set your own date table:
- The relationships between the date table and other tables in your model are based on columns of a different data type than Datetime. For example, if you load data from a source such as a data warehouse, specific columns that represent dates are often provided. These columns (also called surrogate keys) are often stored as a whole number and formatted as yyyymmdd (for example: 20201231 to represent the 31st of December 2020). If you have relationships between the date table and other tables in your model that leverage such columns, you will need to set your own date table in order use the time intelligence capabilities.
- If you want to use advanced date filters in Excel PivotTables or PivotCharts based on Power BI data.
Set your own date table
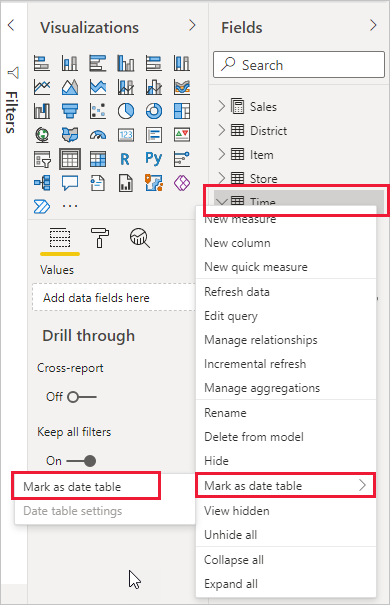
To set a date table, select the table you want to use as a date table in the Fields pane, then right-click the table and choose Mark as date table > Mark as date table in the menu that appears, as shown in the following image.
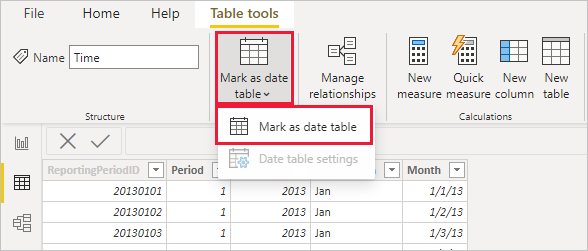
You can also select the table and then choose Mark as date table from the Table tools ribbon, shown here.
When you specify your own date table, Power BI Desktop performs the following validations of that column and its data, to ensure that the data:
- Contains unique values.
- Contains no null values.
- Contains contiguous date values (from beginning to end).
- If it's a Date/Time data type, it has the same timestamp across each value.
There are two likely scenarios for creating your own date table, either of which is a reasonable approach:
The first scenario is when you use a canonical, or basic date table and hierarchy. This scenario would use a table in your data that meets the previously described validation criteria for a date table.
The second scenario is where you use a table from Analysis Services, for example, with a dim date field that you want to use as your date table.
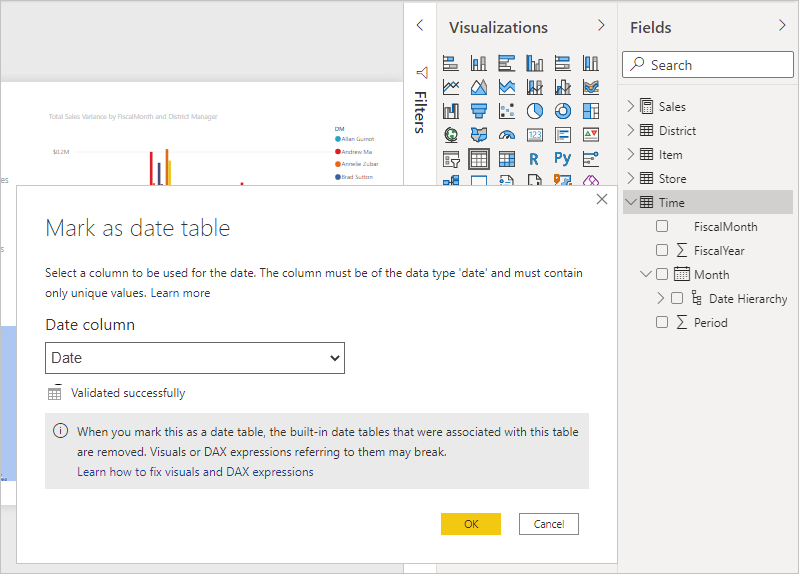
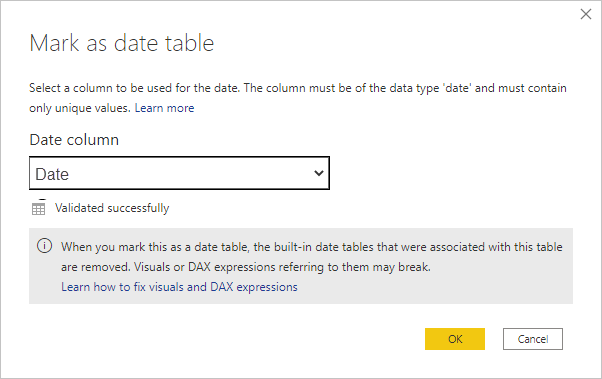
After you specify a date table, you can select which column in that table is the date column. You can specify which column to use by selecting the table in the Fields pane, then right-click the table and choose Mark as date table > Date table settings. The following window appears, where you can select the column to use as the date table from the dropdown.
It's important to note that when you specify your own date table, Power BI Desktop doesn't auto-create the hierarchies that it would otherwise build into your model on your behalf. If you later deselect your date table (and no longer have a manually set date table), Power BI Desktop recreates the automatically created built-in date tables for you, for the date columns in the table.
Also important to note is that when you mark a table as a date table, Power BI Desktop removes the built-in (automatically created) date table. And any visuals or DAX expressions you previously created based on those built-in tables will no longer work properly.
Mark your date table as the appropriate data type
When you specify your own date table, you need to make sure the data type is properly set. You want to set the Data type to Date/Time or Date. Take the following steps to do so:
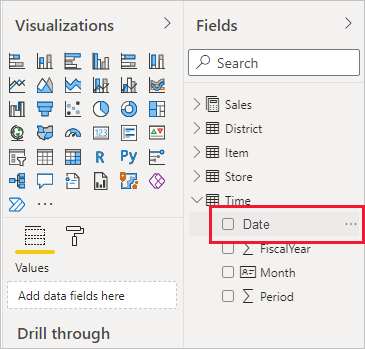
Select your date table from the Fields pane, expand it if necessary, and then choose the column to be used as the date.
On the Column tools tab, select Data type and then choose the dropdown arrow to show available data types.
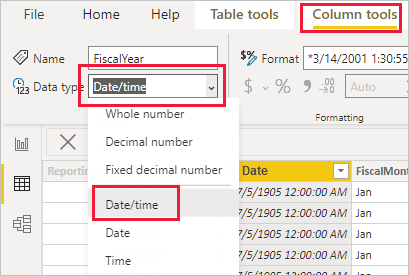
Specify the data type for your column.
Related content
For more information related to this article, see the following resources: