Note
Access to this page requires authorization. You can try signing in or changing directories.
Access to this page requires authorization. You can try changing directories.
Microsoft Copilot Studio agents created from Power Pages use Generic OAuth 2 authentication with implicit flow by default. This configuration limits access to the Power Pages site and supports all configured identity providers.
If your organization requires Microsoft Entra ID-exclusive authentication and you need to test agents directly in Copilot Studio, you can configure Microsoft Entra ID authentication. This configuration enables:
- Secure authentication through Microsoft Entra ID
- Direct testing capabilities in Copilot Studio
- Single sign-on (SSO) integration with Power Pages
This article walks you through the configuration process, which involves creating app registrations, configuring permissions, and updating site settings to establish secure authentication between your Power Pages site and Copilot Studio agent.
Prerequisites
Before you begin, ensure that:
- You created or added a site agent to Power Pages. For more information, see Add an agent from the setup workspace.
- You have a Microsoft 365 administrator account with permission to create and manage app registrations in Microsoft Entra ID.
Overview of configuration process
This configuration uses two app registrations. One app registration is preconfigured during Power Pages site provisioning (site app), and you create the other app registration during setup (agent app) to use for configuring the agent. The configuration process consists of the following steps:
- Create a new app registration for Copilot Studio authentication.
- Update the Power Pages site–associated app registration to pass the SSO token.
- Configure authentication settings in Copilot Studio.
- Update Power Pages site settings.
- Add the Copilot authentication app client ID to the bot consumer record.
Step 1: Update the Power Pages site app registration
- Sign in to Power Pages.
- Select + Edit.
- Go to the Set up workspace.
- Copy the Application ID associated with the site.
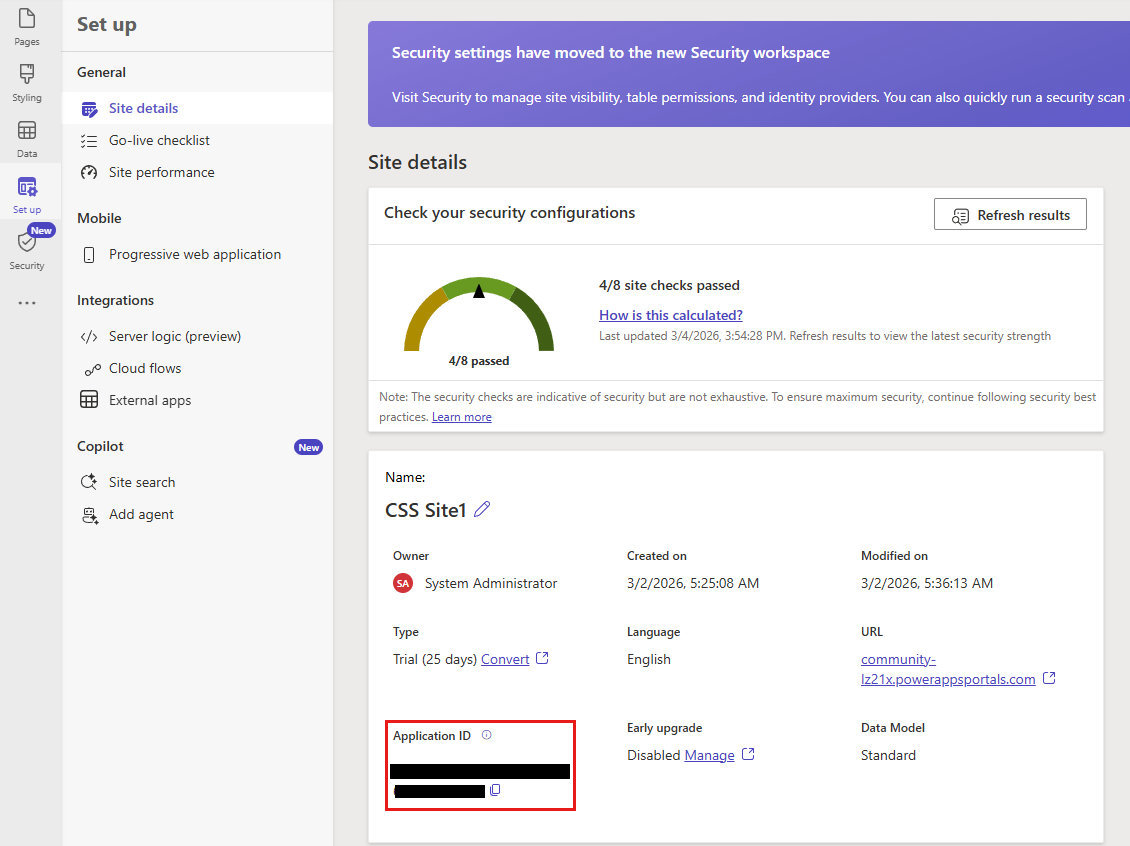
- In the Azure portal, find the app registration with the same Application ID.
Add required API permissions
Add the following delegated permissions:
- Under Manage, select API Permissions.
- Select Add permission and then select Microsoft Graph.
- Select Delegated permissions.
- Expand OpenId permissions and turn on openid and profile.
- Select Add permissions.
- Select Add permission and select APIs my organization uses.
- Search Power Platform API and select it.
- Select Delegated permissions.
- Expand CopilotStudio and select CopilotStudio.Copilots.Invoke.
- Select Add permissions.
- Select Grant admin consent.
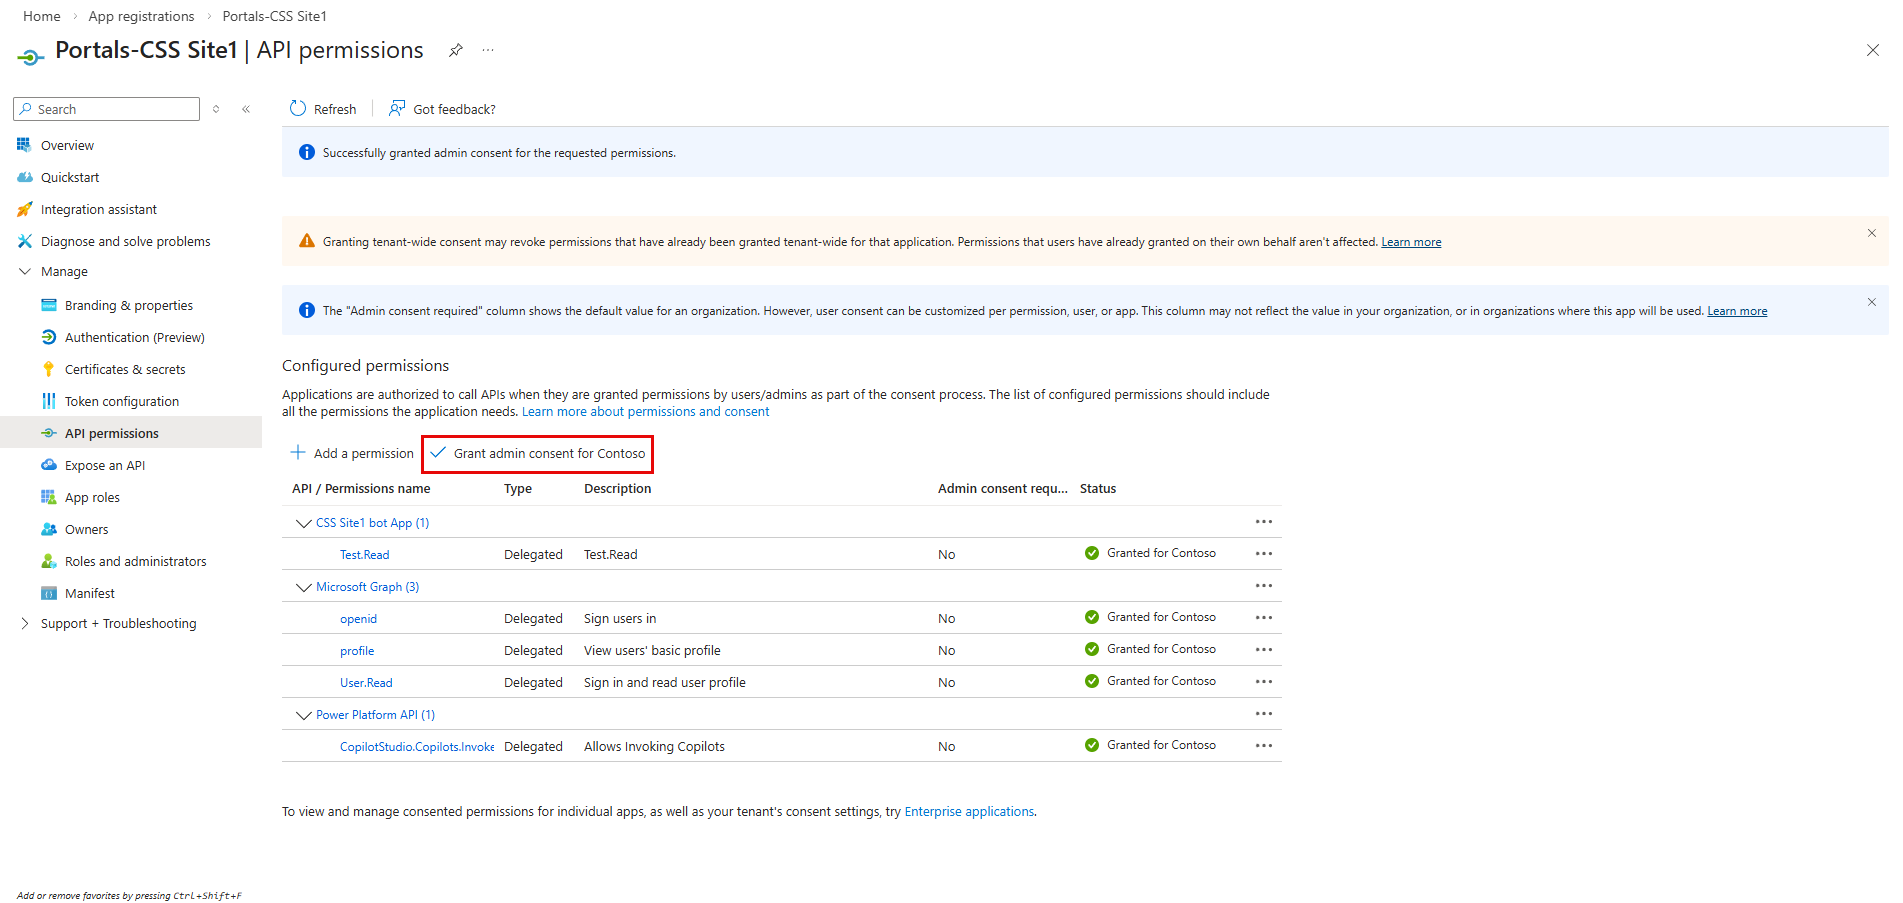
Step 2: Configure Microsoft Entra ID for agent
Refer to detailed steps in Configure user authentication with Microsoft Entra ID for configuring authentication for an agent associated with Power Pages.
The app registration you use to configure the agent should allow token exchange between Power Pages site and agent. Follow these steps to enable it:
Add the redirect URL
Add the Power Pages site URL as the redirect URL to the app you configured for the agent.
- Under Manage, select Authentication.
- Under Redirect URI Configuration, select Add Redirect URI , and then select Single-page Application.
- Enter the Power Pages site URL (for example,
https://contoso.powerappsportals.com).
Add API permissions
- Under Manage, select API Permissions.
- Select Add permission and select APIs my organization uses.
- Search for Power Platform API and select it.
- Select Delegated permissions.
- Expand CopilotStudio and select CopilotStudio.Copilots.Invoke.
- Select Add permissions.
- Select Add a permission and select APIs my organization uses.
- Search for Power Pages site Application (client) ID and select it.
- Select Delegated permissions.
- Expand Permissions and select scope name defined in Agent App (for example,
user_impersonation). - Select Add permission.
- Select Grant admin consent.
Enable single sign-on
- Under Manage, select Expose an API.
- Under Authorized client applications, select Add a client application.
- Add the Power Pages site Application (client) ID.
- Select Authorized scopes checkbox.
- Select Add permission.
- Copy the scope.
Step 3: Update custom scopes of Power Pages site app registration
This step is optional and required to call Power Pages API from the agent. If you created an agent from a Power Pages site, you must:
In the Azure portal, select Site App registration.
Under Manage, select API permissions.
Select Add a permission and select APIs my organization uses.
Search for Agent App Application (client) ID and select it.
Select Delegated permissions.
Expand Test and select scope name defined in Agent App (for example,
Test.Read).Select Add permission.
Select Grant admin consent.
Select Expose an API and select the Edit button next to Application ID URI.
Note
The Application ID URI must be in the format
api://<client id of the current application>. This value might be different. Modify this value to properly reflect the current application.Copy the scope.
Step 4: Update scopes in Agent security configuration
You copied two scopes, one from each app registration. These scopes enable single sign-on (SSO) for the Power Pages site and grant the agent permission to access the Power Pages Web API.
- Open Agent added to site.
- Under Settings, select Security > Authentication.
- Paste the Agent App scope under Token exchange URL (required for SSO).
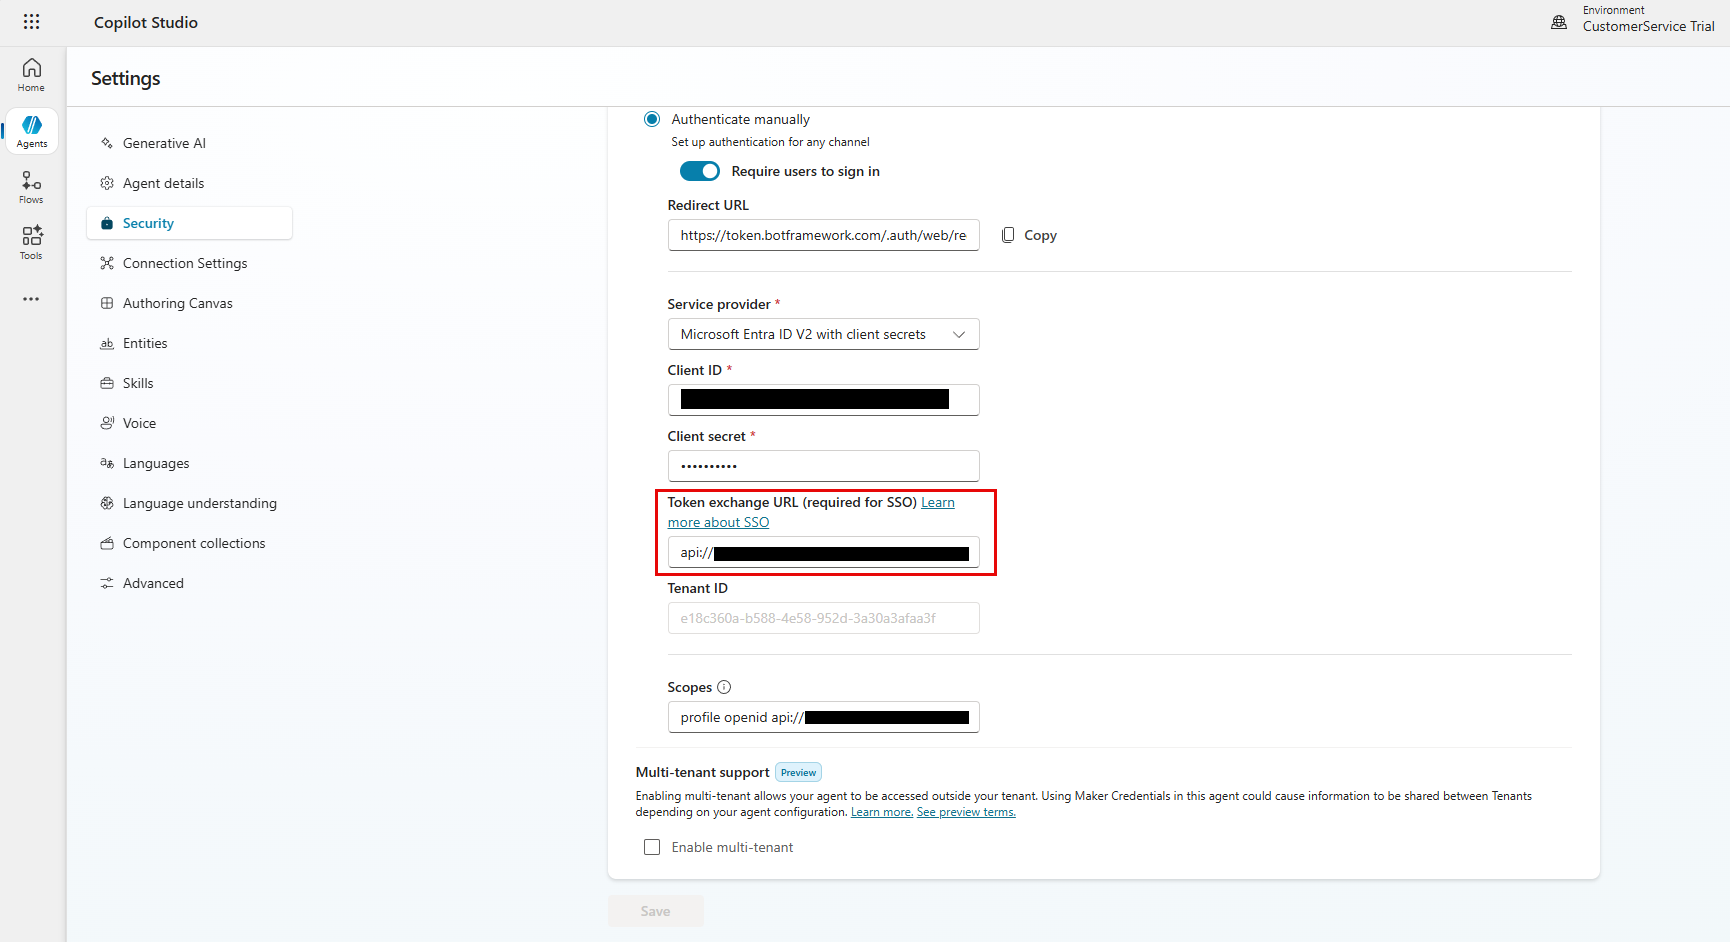
- Paste the Site App scope next to the existing scope.
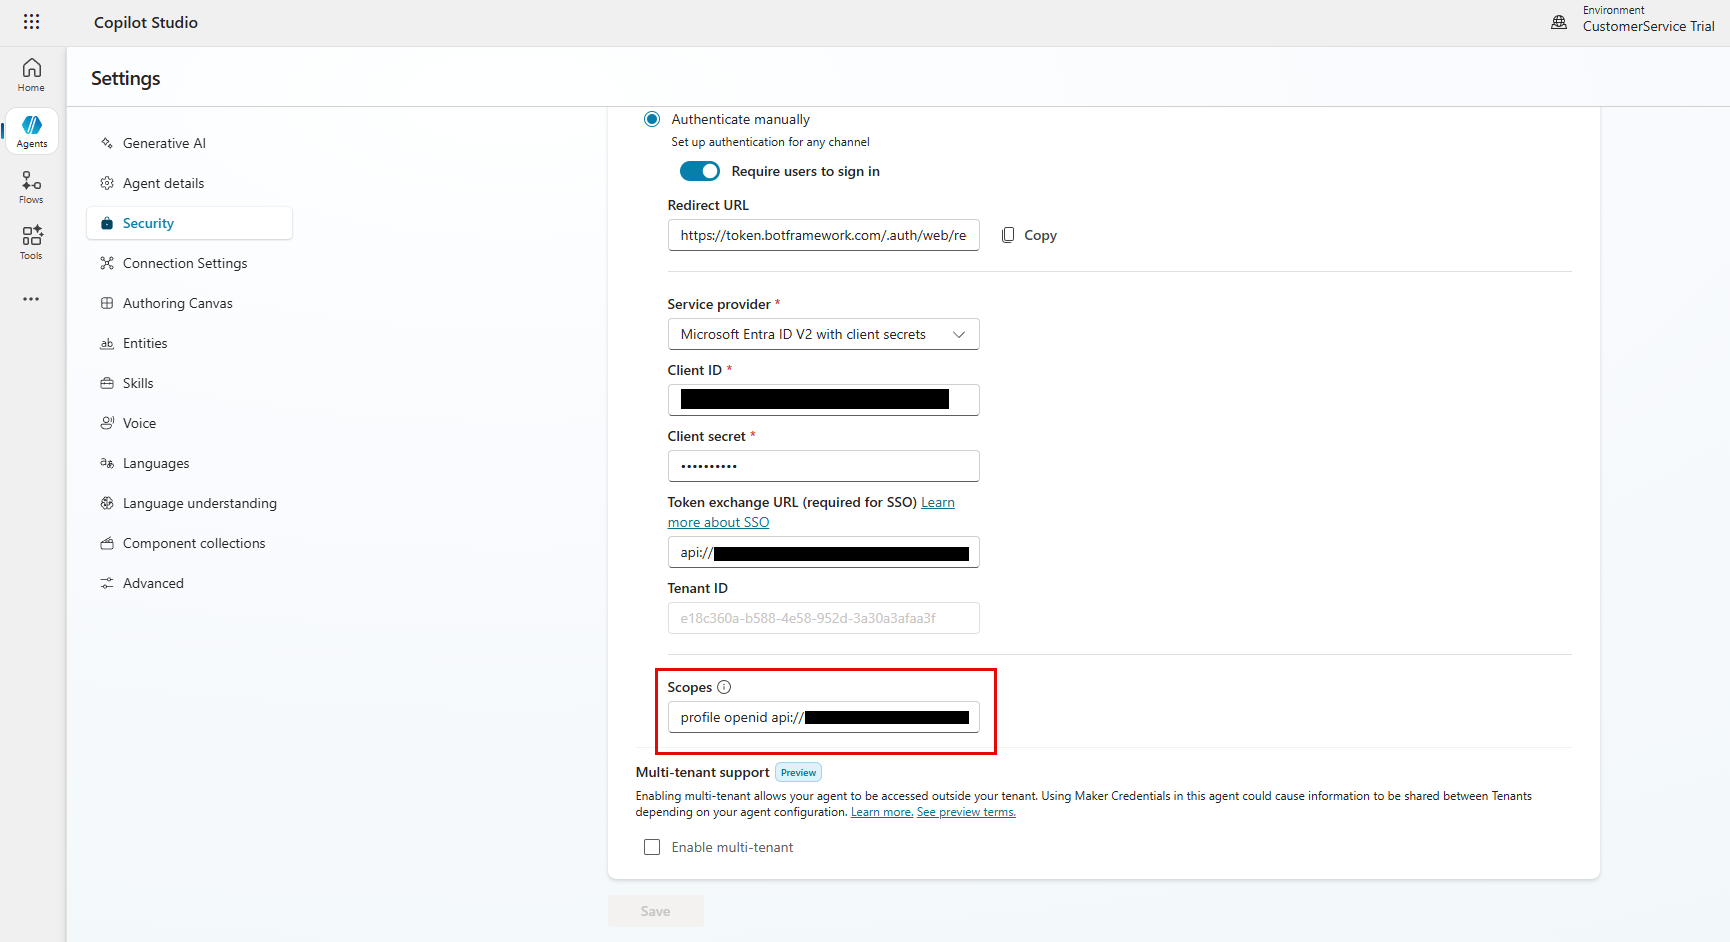
- Select Save.
- Close the Settings page.
- Publish agent.
Step 5: Configure Power Pages site settings
In Power Pages, add or update the following site settings:
| Name | Value |
|---|---|
| Authentication/BearerAuthentication/Enabled | true |
| Authentication/BearerAuthentication/Provider | AzureAD |
| Authentication/BearerAuthentication/UseEntraV2Issuer | true |
| Authentication/BearerAuthentication/ValidIssuer | https://login.microsoftonline.com/<tenant-id>/v2.0 |
| SiteCopilot/PVA/AuthenticationMethod | OpenIdConnect |
Step 6: Add the Copilot authentication client ID to the bot consumer
- Open the Power Pages site in edit mode.
- Determine site datamodel.
- Go to the Data workspace.
- Update Agent App ClientId to corresponding agent record.
Search for and select the Bot consumer table.
Locate the row with the selected website name and agent schema name.
Add the following value
"clientId": "<AgentAppClientID>"as shown in the following example.{"botSchemaName":"cr720_agentSchema","clientId":"00000000-0000-0000-0000-000000000000"}Save the record.