Import an update to Device Update for IoT Hub
Learn how to obtain a new update and import it into Device Update for IoT Hub. If you haven't already, be sure to review the key import concepts and how to prepare an update to be imported.
Prerequisites
- Access to an IoT Hub with Device Update for IoT Hub enabled.
- An IoT device (or simulator) provisioned for Device Update within IoT Hub.
- PowerShell 5 or later (includes Linux, macOS, and Windows installs)
- Supported browsers:
- Microsoft Edge
- Google Chrome
Import an update
Note
The following instructions show how to import an update via the Azure portal UI. You can also use the Device Update for IoT Hub APIs to import an update instead.
Log in to the Azure portal and navigate to your IoT Hub with Device Update.
On the left-hand side of the page, select
UpdatesunderDevice Management.
Select the
Updatestab from the list of tabs across the top of the screen.
Select
+ Import a new updatebelow theAvailable Updatesheader.
Select
+ Select from storage container. The Storage accounts UI is shown. Select an existing account, or create an account using+ Storage account. This account is used for a container to stage your updates for import.
Once you've selected a Storage account, the Containers UI is shown. Select an existing container, or create a container using
+ Container. This container is used to stage your update files for importing Recommendation: use a new container each time you import an update to avoid accidentally importing files from previous updates. If you don't use a new container, be sure to delete any files from the existing container before you complete this step.
In your container, select
Upload. The Upload UI is shown.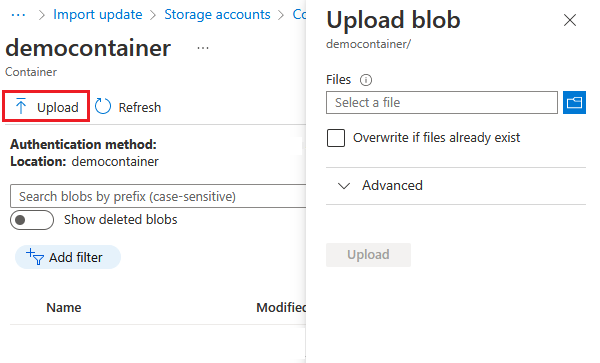
Select the folder icon on the right side of the
Filessection under theUpload blobheader. Use the file picker to navigate to the location of your update files and import manifest, select all of the files, then selectOpen. You can hold the Shift key and click to multi-select files.
When you've selected all your update files, select
Upload.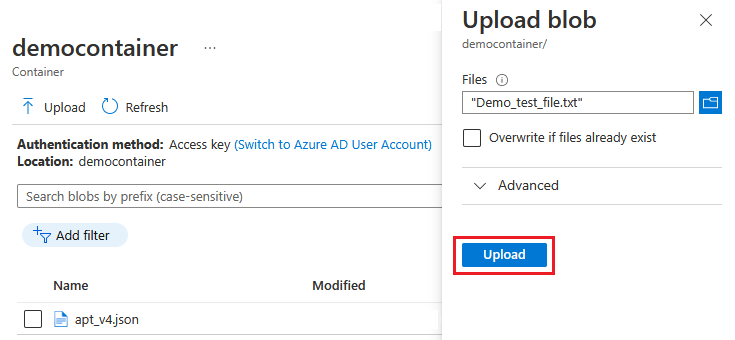
Select the uploaded files to designate them to be imported . Then click the
Selectbutton to return to theImport updatepage.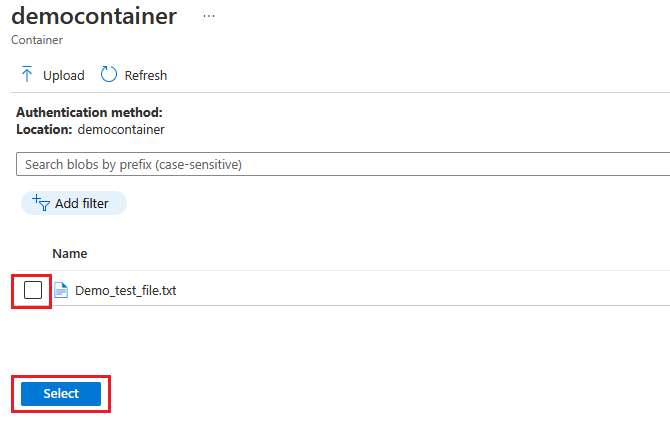
On the Import update page, review the files to be imported. Then select
Import updateto start the import process. To resolve any errors, see the Proxy Update Troubleshooting page .
The import process begins, and the screen switches to the
Import Historysection. SelectRefreshto view progress until the import process completes (depending on the size of the update, the process might complete in a few minutes but could take longer).
When the
Statuscolumn indicates that the import has succeeded, select theAvailable Updatesheader. You should see your imported update in the list now.


If you're importing via APIs instead
In addition to importing via the Azure portal, you can also import an update programmatically by:
- Using
Azure SDKfor .NET, Java, JavaScript or Python - Using Import Update REST API
- Using sample PowerShell modules
Note
Refer to Device update user roles and access for required API permission.
Update files and import manifest must be uploaded to an Azure Storage Blob container for staging. To import the staged files, provide the blob URL, or shared access signature (SAS) for private blobs, to the Device Update API. If using a SAS, be sure to provide a three hour or greater expiration window.
Tip
To upload large update files to Azure Storage Blob container, you may use one of the following for better performance: