How to use Record in PowerPoint
The first step to using Record in PowerPoint is to add the Recorder ribbon. To do this, open PowerPoint and:
- Select File > Options
- Select Customize Ribbon
- From the Choose commands from drop-down menu, select Main Tabs
- From the Main Tabs list, select Record
- Then Select Add in the middle of the two columns
- Select OK and the Record tab should appear as a new ribbon in PowerPoint
Once the Record ribbon is installed, you can begin recording lessons. Open the presentation you created for the lesson and select the Record ribbon to access the many options.
You can record your PowerPoint presentation—or just a single slide—and capture voice, ink gestures, and your video presence. The completed recording is like any other presentation. You can play it for your audience in Slide Show or you can export it as a video file. So instead of just handing the deck to someone, people can see your presentation with all your passion and personality intact.
How to record
Activity 1: Prepare Your instructional slides
- Finalize slide content, including visuals, examples, and prompts.
- Add Speaker Notes to each slide to support scripted instruction.
- Chunk content into short segments (5–10 minutes per concept).
Tip
Speaker Notes appear as a teleprompter during recording.
Activity 2: Open the recording experience
- Open your presentation in PowerPoint.
- Select Record from the top app bar or the Record tab.
- Choose From Beginning (full lesson) or From Current Slide (single concept).
Activity 3: Configure recording settings
Before recording, adjust your setup:
- Microphone: On (recommended for all lessons)
- Camera: Optional (use Cameo for instructor presence)
- View options:
- Teleprompter View–best for scripted instruction
- Presenter View–shows notes and upcoming content
Tip
For elementary and high school students, audio-only narration often reduces cognitive load.
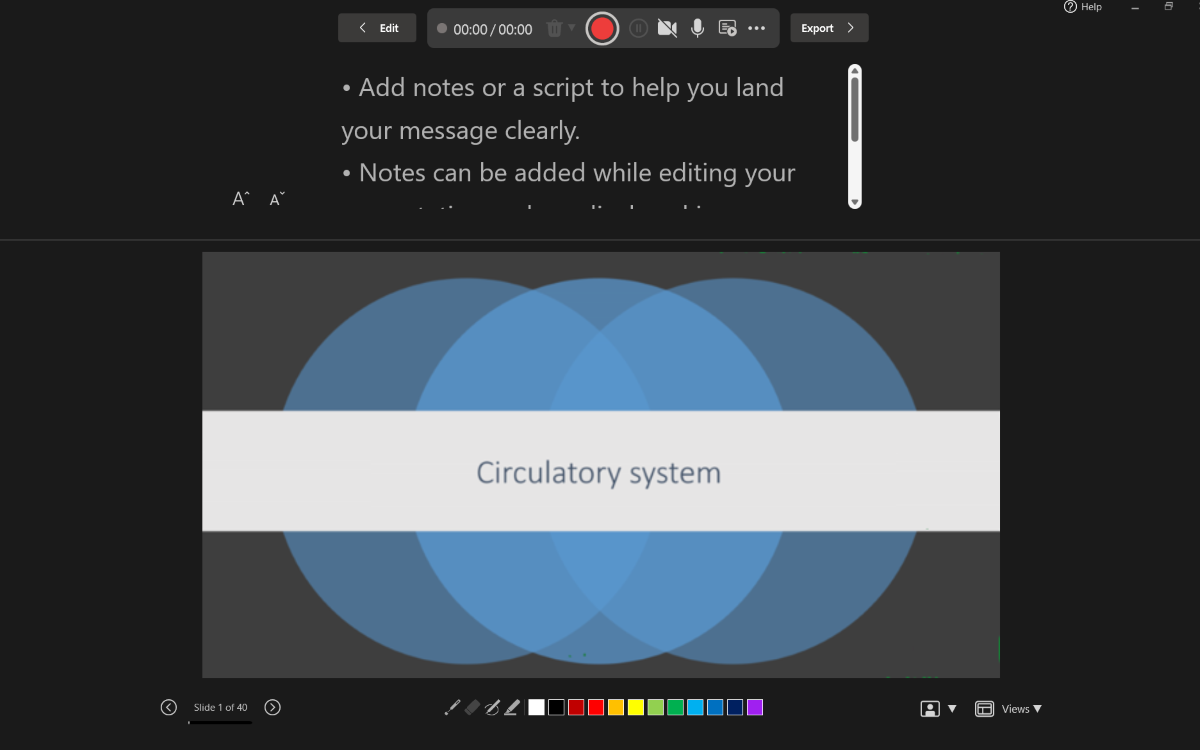
Activity 4: Record the lesson
- Select the Record button and wait for the countdown.
- Teach as you normally would:
- Advance slides
- Use Pen, Highlighter, or Laser Pointer to annotate
- Pause briefly when changing slides—narration isn't recorded during transitions.
- Select Stop when finished.
Activity 5: Review and revise
- Select Play to preview the recording for each slide.
- Check for:
- Clear audio
- Appropriate pacing
- Visible annotations
- Use Clear or Delete to re-record a single slide or the entire lesson.
- Use Reset to Cameo to keep camera styling while re recording narration.
Activity 6: Share with learners
Choose the format that fits your learning environment:
- PowerPoint (.pptx)
- Best for Microsoft Teams, OneDrive, SharePoint
- Narration plays automatically in Slide Show mode
- Export to Video (.mp4)
- Ideal for LMS platforms (Canvas, Moodle, Google Classroom)
- Upload to Microsoft Stream for captions and sharing
Learn more about how to Record your presentation.
Accessibility considerations
- Export videos and add closed captions
- Speak clearly and at a moderate pace
- Use high contrast ink colors when annotating
- Avoid reading text verbatim from slides
Education best practices
- Chunk instruction: Record 5–10 minute segments per concept.
- Accessibility: Export to video and add captions for accessibility.
- Assessment alignment: Pair recorded slides with Forms or LMS quizzes.
- Student use: Students can record presentations or reflections using the same workflow.