Starting from a new project
Since MRTK3 is a collection of loosely coupled packages, consuming MRTK3 is done differently than the way you consume MRTK 2.x. We don't ship MRTK as a Unity project, so you have to manually add MRTK3 packages to your project in order to consume them.
You're not expected to consume every MRTK package. See which features are useful to you and add only the dependencies that matter.
Setting up a new Unity project with MRTK3
1. Create a new Unity project
Create a new Unity project with Unity 2021.3.21f1 or newer. Close the Unity project before proceeding to the next step.
2. Import required dependencies and MRTK3 packages with Mixed Reality Feature Tool
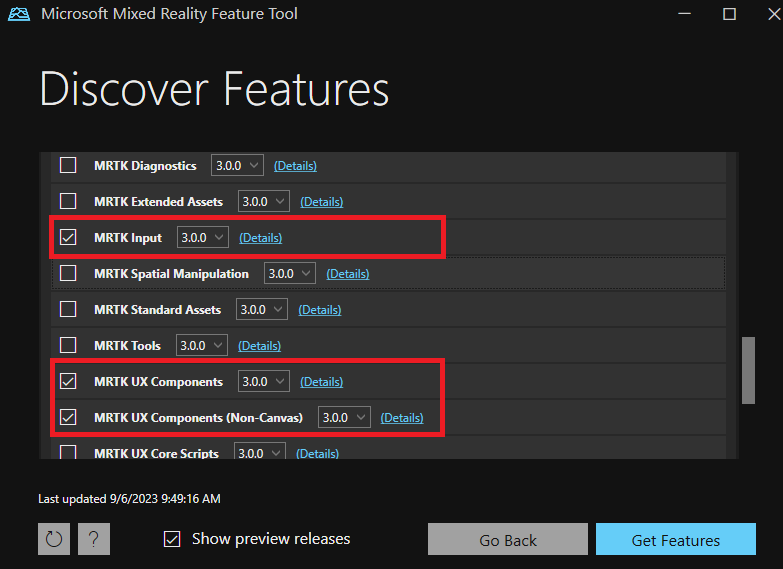
There are a handful of packages that MRTK3 uses that aren't part of this toolkit. To obtain these packages, use the Mixed Reality Feature Tool and select the latest versions of the following in the Discover Features step.
- Platform Support → Mixed Reality OpenXR Plugin
- Spatial Audio → Microsoft Spatializer (Optional)
For MRTK3 packages, we highly recommend the following two packages to help you get started quickly:
- MRTK3 → MRTK Input (Required for this setup)
- MRTK3 → MRTK UX Components
These two packages, along with their dependencies (automatically added by the Feature Tool), will enable you to explore most of our UX offerings and create projects ready to be deployed to various XR devices. You can always come back to the Feature Tool and add more packages to your project later.
Be sure to select the org.mixedrealitytoolkit.* packages, and not the deprecated packages. The com.microsoft.mrtk.* packages have been deprecated, and are no longer supported.
Note
For more information on MRTK3 packages, see the package overview page.
When you're finished selecting packages, click Get features, and then follow the instructions in the Mixed Reality Feature Tool to import the selected packages into your Unity project.
3. Open the Unity project
Open the Unity project and wait for Unity to finish importing the newly added packages. There may be two pop-up messages in this process:
- The first message asks whether you want to enable the new input backend. Select yes.
- The second message asks whether you want to update XR InteractionLayerMask. Select No Thanks.
Unity might restart a few times during this process--wait for it to finish before proceeding.
4. Configure MRTK profile after import
Once imported, MRTK3 requires a profile to be set for the standalone target platform and each additional target platform.
Navigate to Edit > Project Settings.
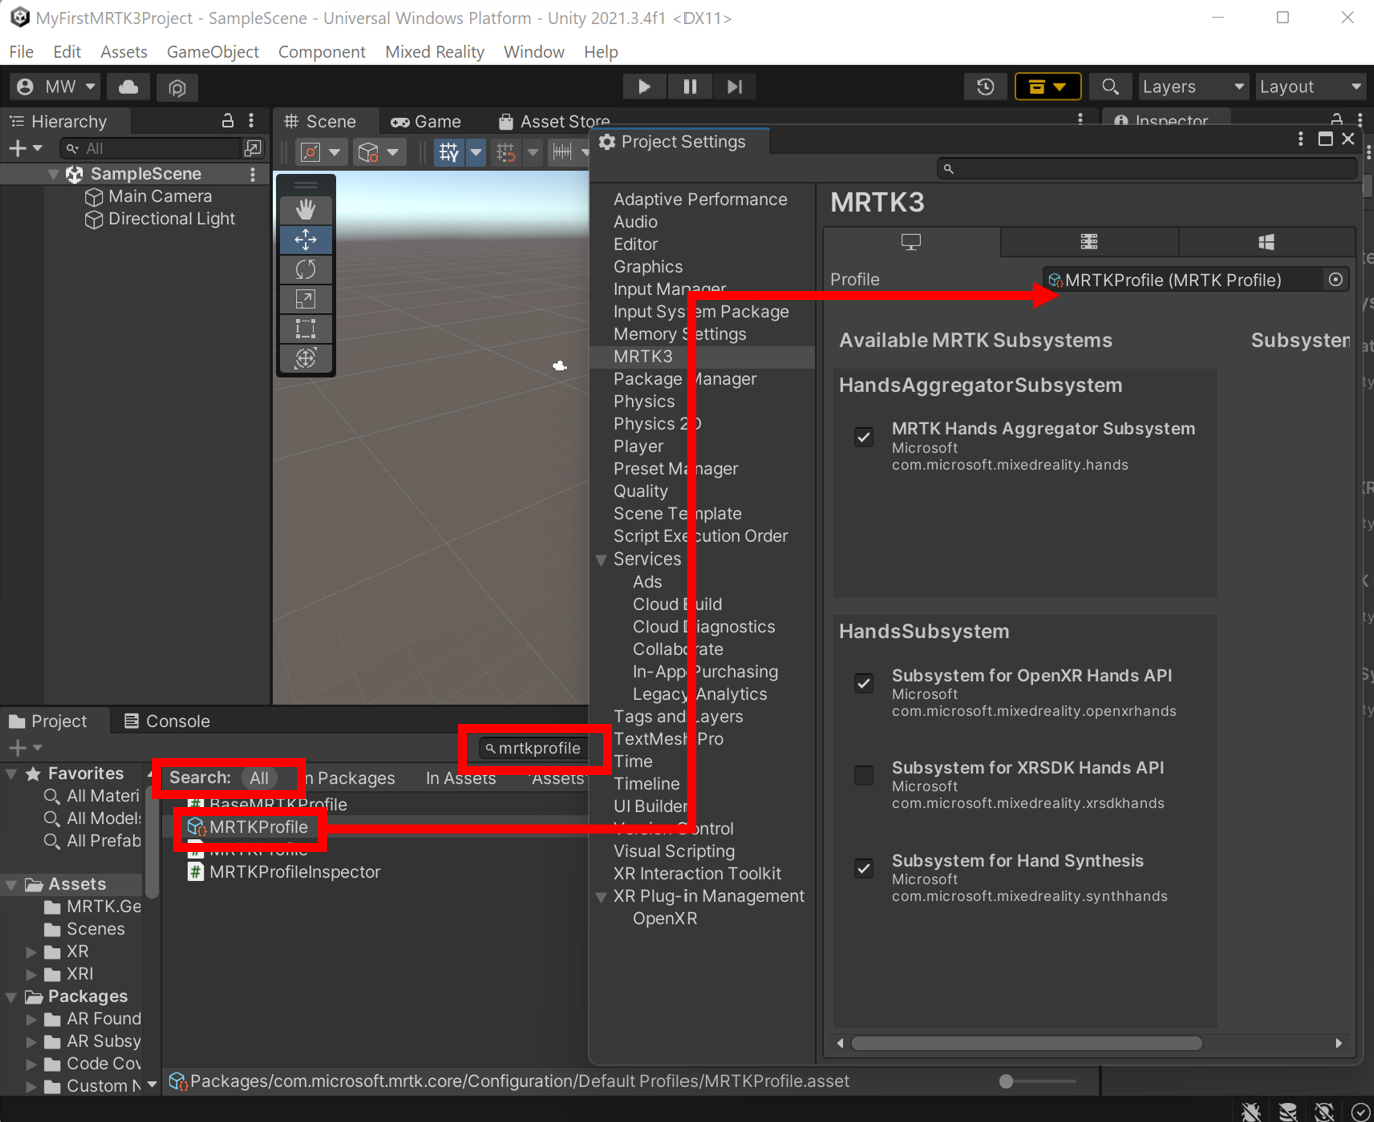
Under Project Settings, navigate to MRTK3 and then switch to the standalone tab. Note that the profile is initially unspecified.
Populate the field with the default MRTK profile that ships with the core package. You can type in the keyword "MRTKprofile" in the search bar of the project window; make sure you search in
All. Alternatively, you can find the profile underPackages/org.mixedrealitytoolkit.core/Configuration/Default Profiles/MRTKProfile.asset.Note
Not all of the MRTK subsystems are shown in the screenshot below. The MRTK subsystems that you see may be different depending on the MRTK3 packages you've added to your project.
Switch to the tabs of other build target(s) you want to use (for example, UWP, Android) and check to see if the profile is assigned. If not, repeat the previous step on the current tab.
5. Configure OpenXR-related settings
Once imported, MRTK3 requires some configuration on OpenXR if you're targeting an XR device such as HoloLens 2 or Quest.
Note
The following instructions apply to HoloLens 2 or WMR headsets. If you're targeting Quest, refer to the instructions on the Quest deployment page.
Navigate to Edit > Project Settings.
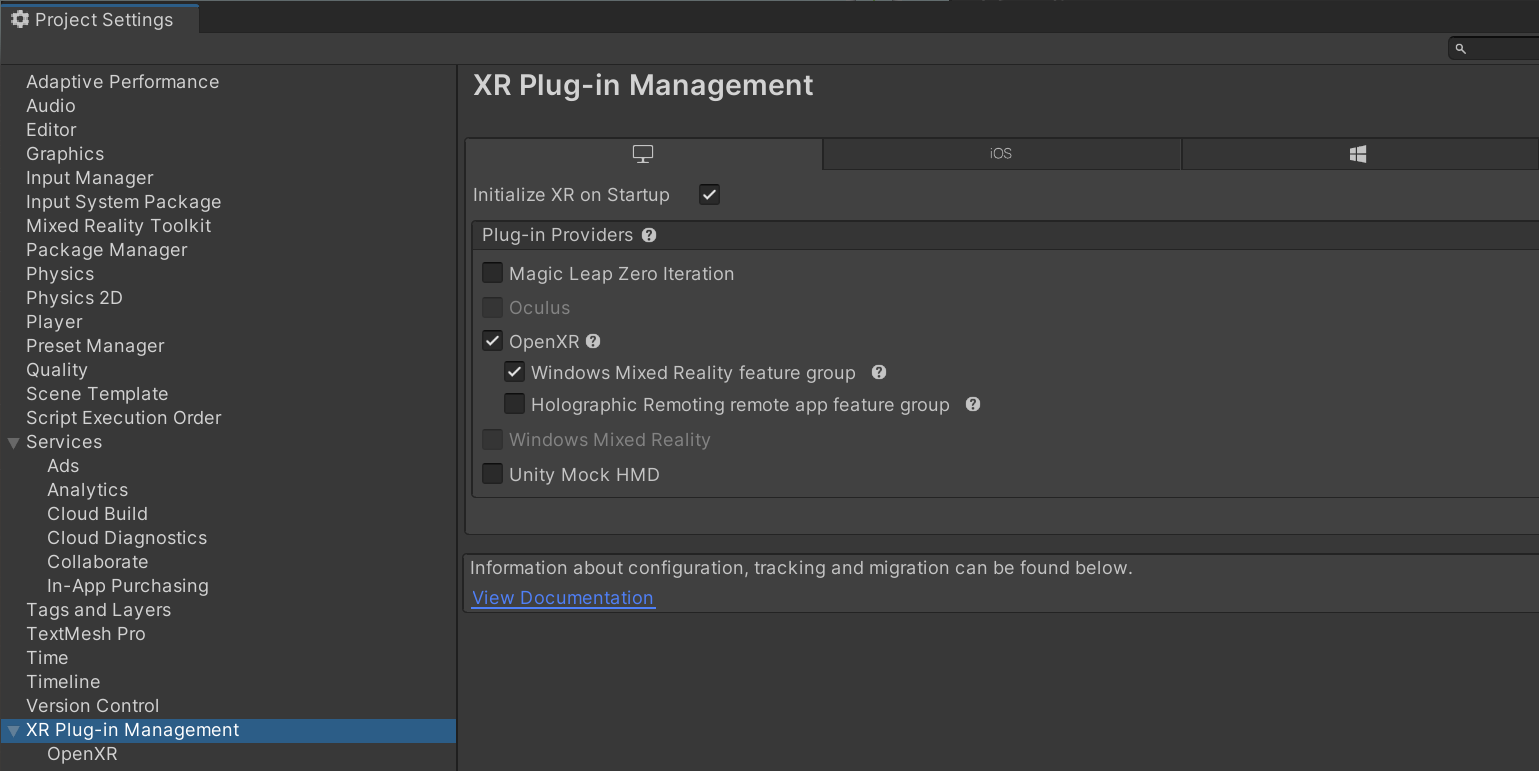
Under Project Settings, navigate to XR Plug-in Management and enable OpenXR under both the Standalone and UWP tabs. Under each tab, ensure that Initialize XR on Startup is selected and that the Windows Mixed Reality feature group under Standalone and the Microsoft HoloLens feature group under UWP are enabled.
Note
A yellow warning icon may appear after checking the OpenXR option. Click that icon to open the OpenXR Project Validation tool. Click Fix all and ignore the interaction profile issue that can't be auto-fixed. The profiles will be added in the step below.
For standalone:
For UWP:

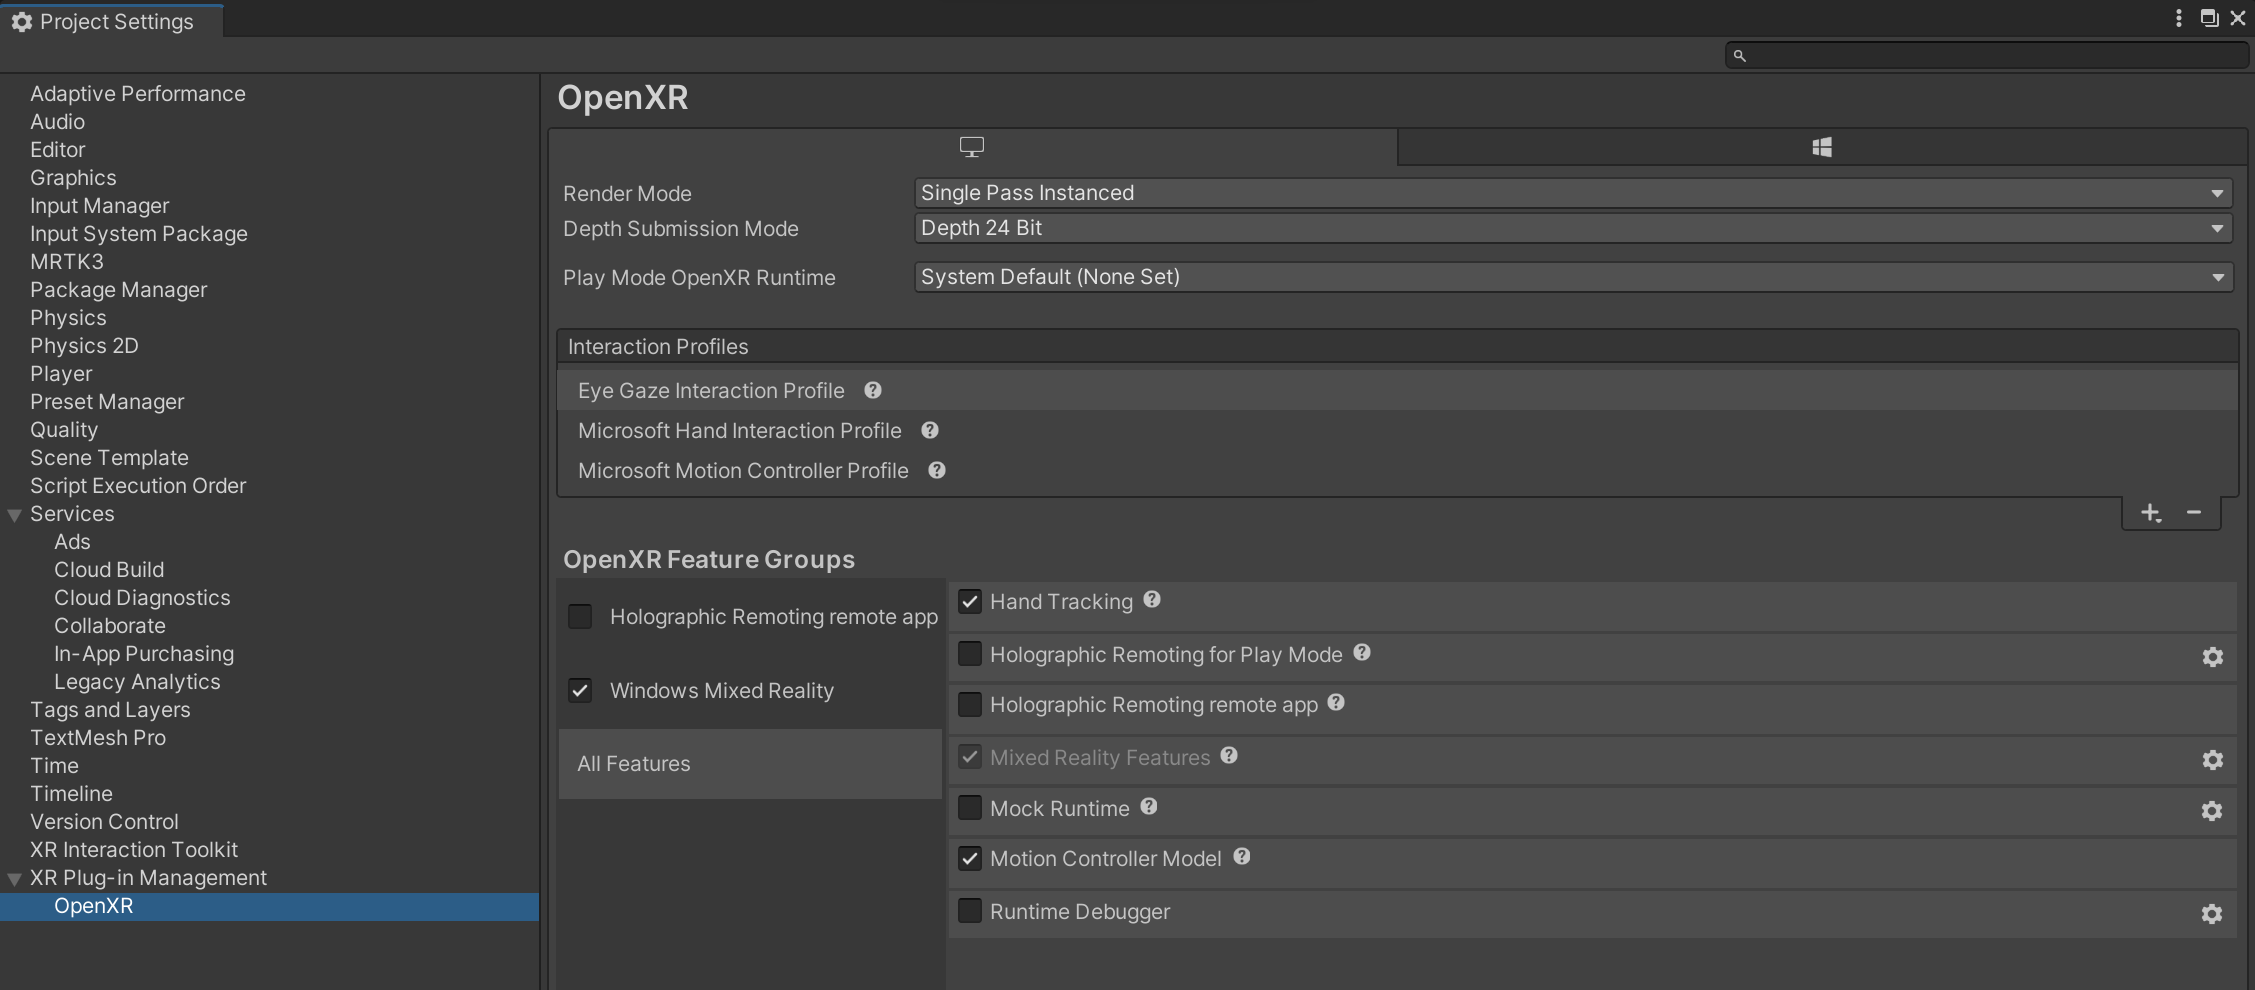
Under Project Settings, navigate to XR Plug-in Management > OpenXR > Interaction Profiles and add the following three profiles for UWP and Standalone:
- Eye Gaze Interaction Profile
- Microsoft Hand Interaction Profile
- Microsoft Motion Controller Profile
Note
You might need to use the OpenXR Project Validation tool to eliminate the yellow triangle. Some of the warnings may be resolved manually:
1. Under Project Settings, navigate to Player > Resolution and Presentation. Ensure that Run in Background is unchecked.
2. For UWP, under Player > Publishing Settings > Capabilities, ensure that WebCam, Microphone, SpatialPerception, and GazeInput are checked if these features are needed by the application. For more information about Window's App Capabilities see App capability declarations.For standalone:
For UWP:
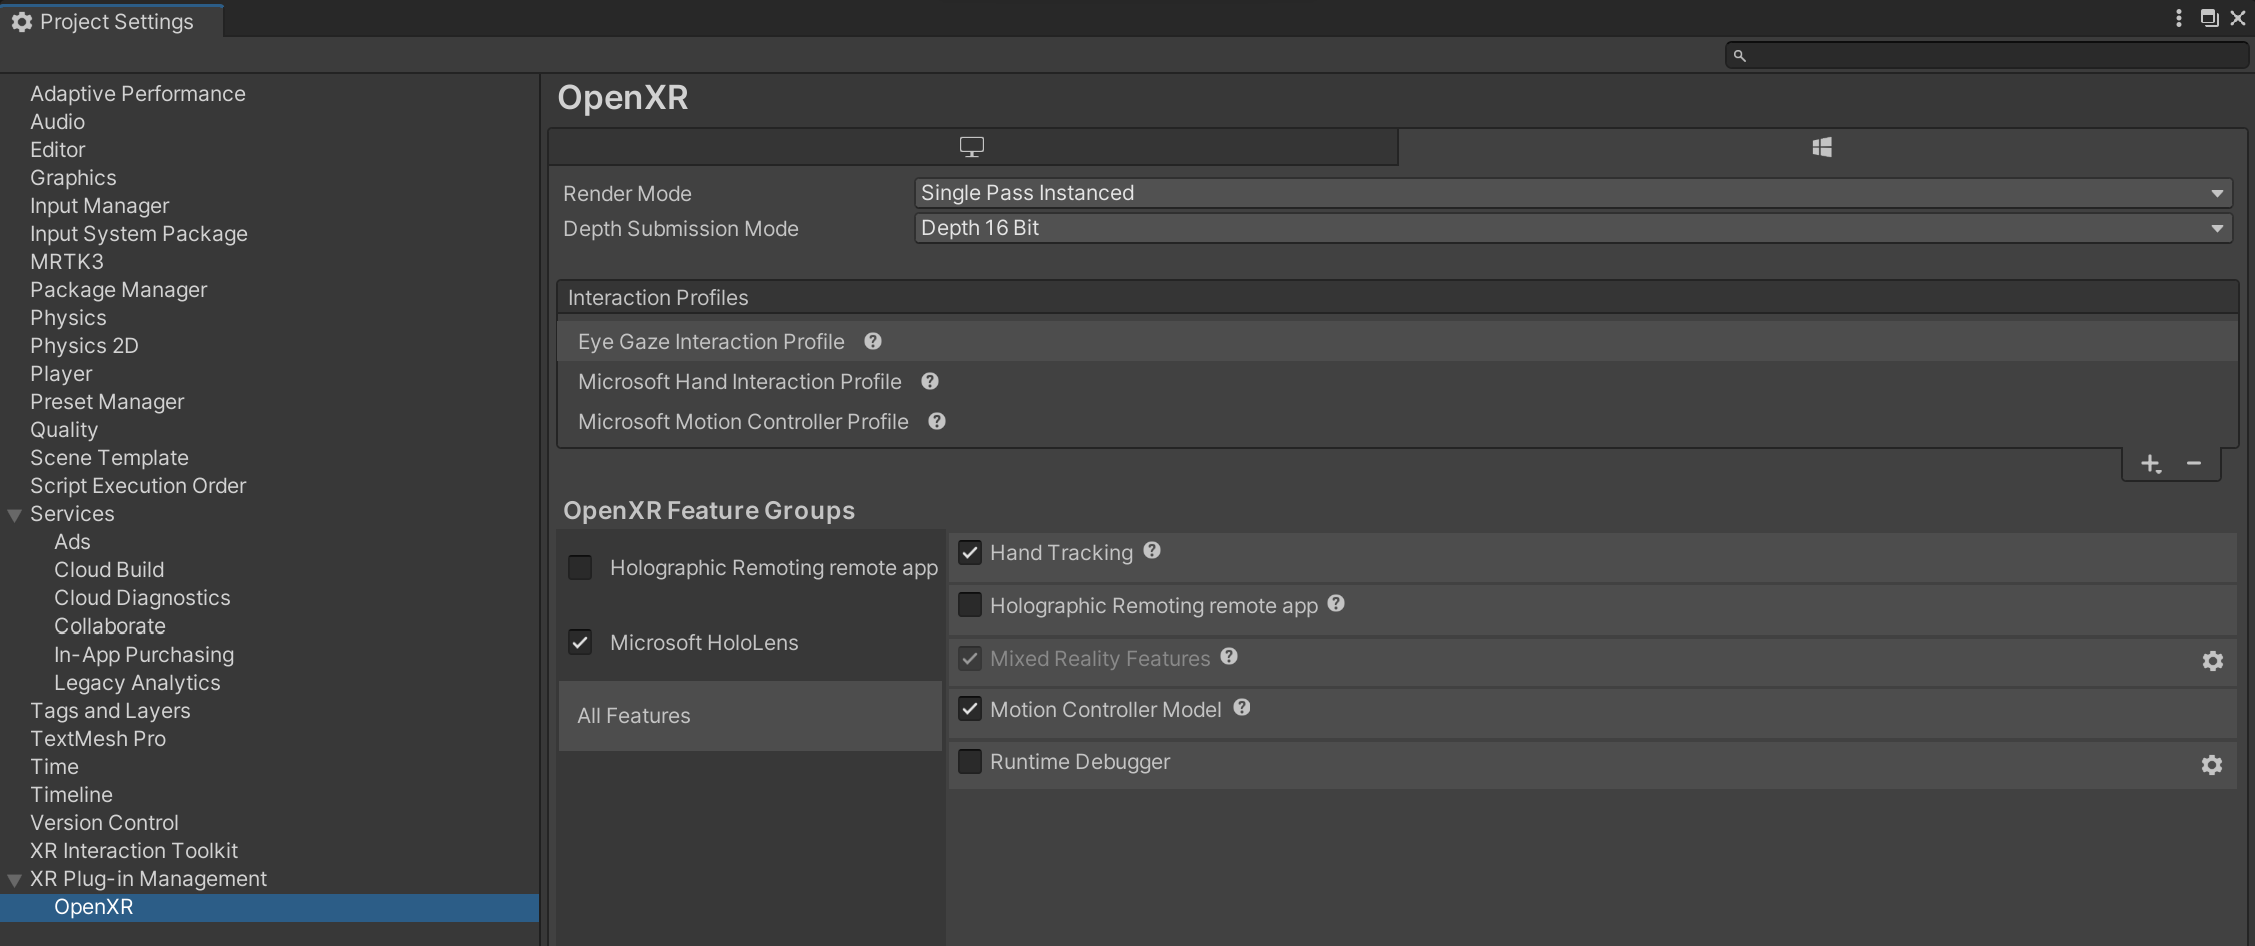
For HoloLens 2, we recommend that you set Depth Submission Mode to 16-bit in the settings above.
For immersive headsets, you can use 24-bit depth submission. See the Microsoft development docs for Unity for more info.
6. Congratulations, the project setup is now finished
Proceed to creating a new MRTK3 scene.
Next steps
Once you've finished setting up your Unity project, learn how to experience your application on a device
Feedback
Coming soon: Throughout 2024 we will be phasing out GitHub Issues as the feedback mechanism for content and replacing it with a new feedback system. For more information see: https://aka.ms/ContentUserFeedback.
Submit and view feedback for