Note
Access to this page requires authorization. You can try signing in or changing directories.
Access to this page requires authorization. You can try changing directories.
Roles are how you manage user permissions and navigation in PlayFab's Game Manager. A role is a named collection of permissions that you assign to the people in your studio, on a per-title basis. Define a role once, assign it to as many users as you like, and update everyone's access at once by editing the role.
This article covers the three things you'll do most: creating a role, configuring its permissions, and assigning it to users.
How roles work
PlayFab uses a fine-grained permissions model with hundreds of individual permissions, so you can decide exactly what each person is allowed to do. Areas of Game Manager can be turned off entirely, set to read-only, or opened up for editing.
A few examples of where this comes in handy:
- A Customer Service rep can edit player profiles but never see revenue data.
- A Product Manager can view revenue dashboards but can't upload multiplayer server builds.
- A Data Scientist can read every event and dashboard while having no write access anywhere.
Because permissions live on the role rather than on each individual user, a policy change is a single edit: update the role, and everyone who holds it picks up the change immediately.
Roles are assigned per title, and a user can hold multiple roles on the same title. So you might give someone both a Customer Support role and a Data Scientist role, and they'll get the combined permissions of both. The same person can also be a Title Admin on one title, a Product Manager on another, and a Customer Service rep on a third — all within the same studio.
Built-in roles and admin levels
Every studio comes with three predefined roles:
- Title Admin — full permissions for a given title
- Dashboard — permission to view the title's dashboard, and nothing else
- Commercial admin — permission to view the title's dashboard, edit settings, see Economy payouts, and manage product activation
There are two special, studio-wide permissions that affect title access.
- Studio Admin — Create titles, define and edit roles, and automatically have title admin rights on every title in the studio. You need to be a Studio Admin to create roles or assign them to users.
- Commercial admin — Have some control of the billing process of the studio, and automatically have commercial admin rights on every title in the studio.
Creating a role
- Sign in to PlayFab with your developer account.
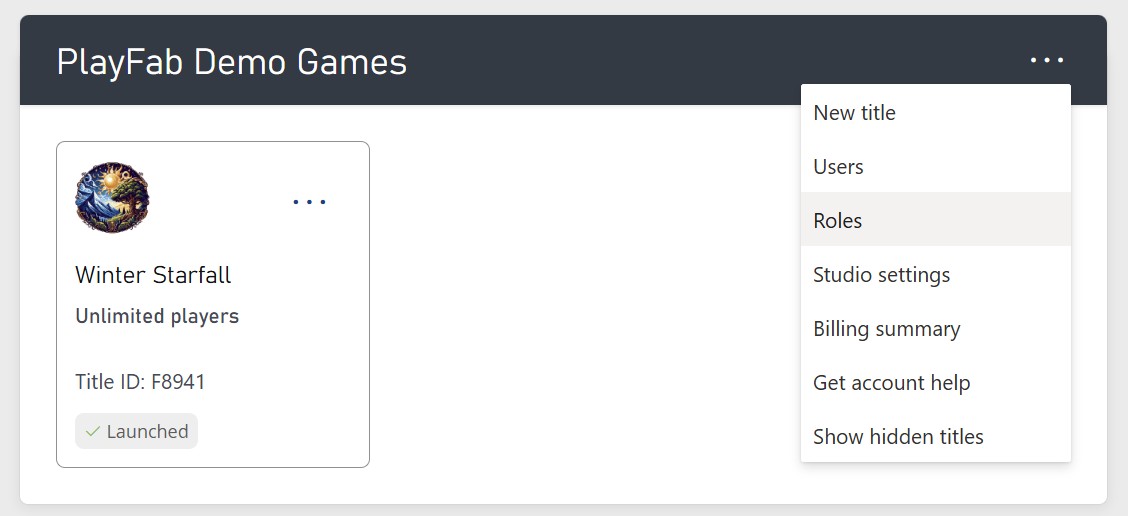
- From My Studios and Titles, select the triple-dot (...) menu to the right of your studio and choose Roles.
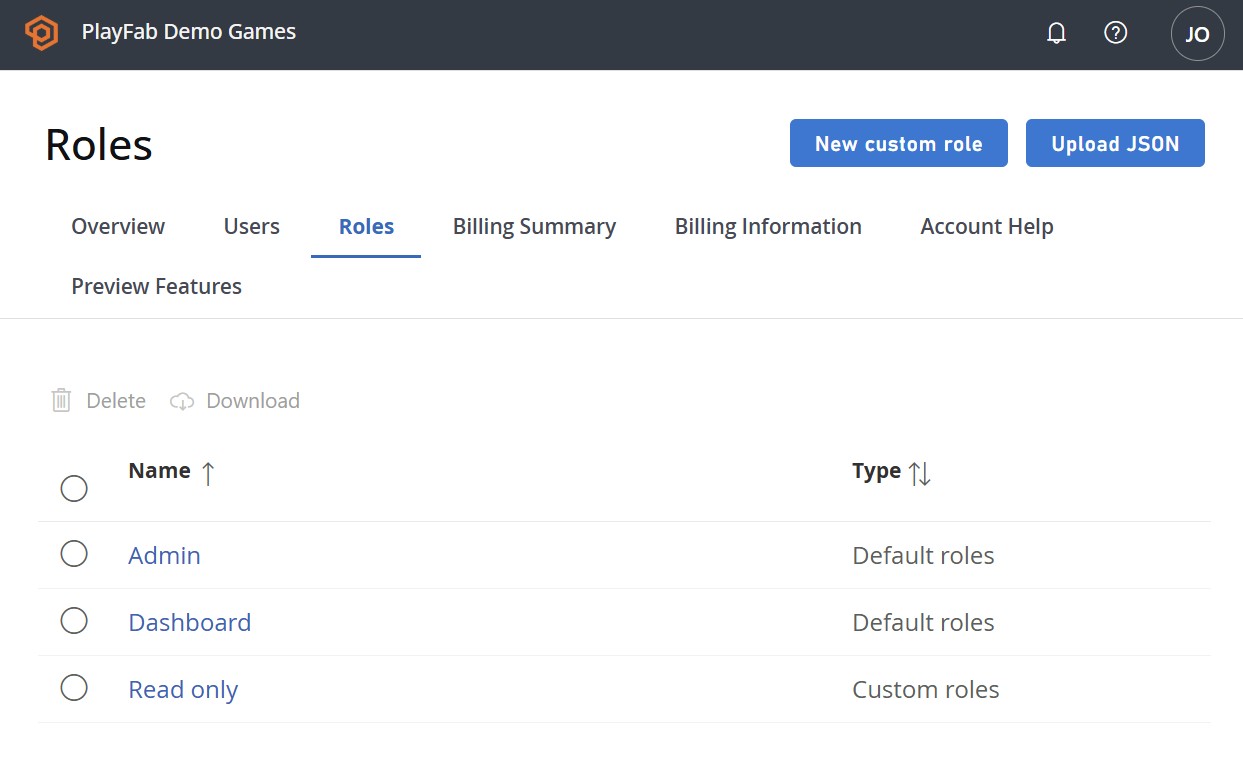
- You'll see the list of roles that already exist in your studio. Select New custom role to start a custom one.
- Under Role details, give the role a clear Role title. This is what you'll pick from when assigning the role later, so make it descriptive (for example, Customer Support or Build Engineer).
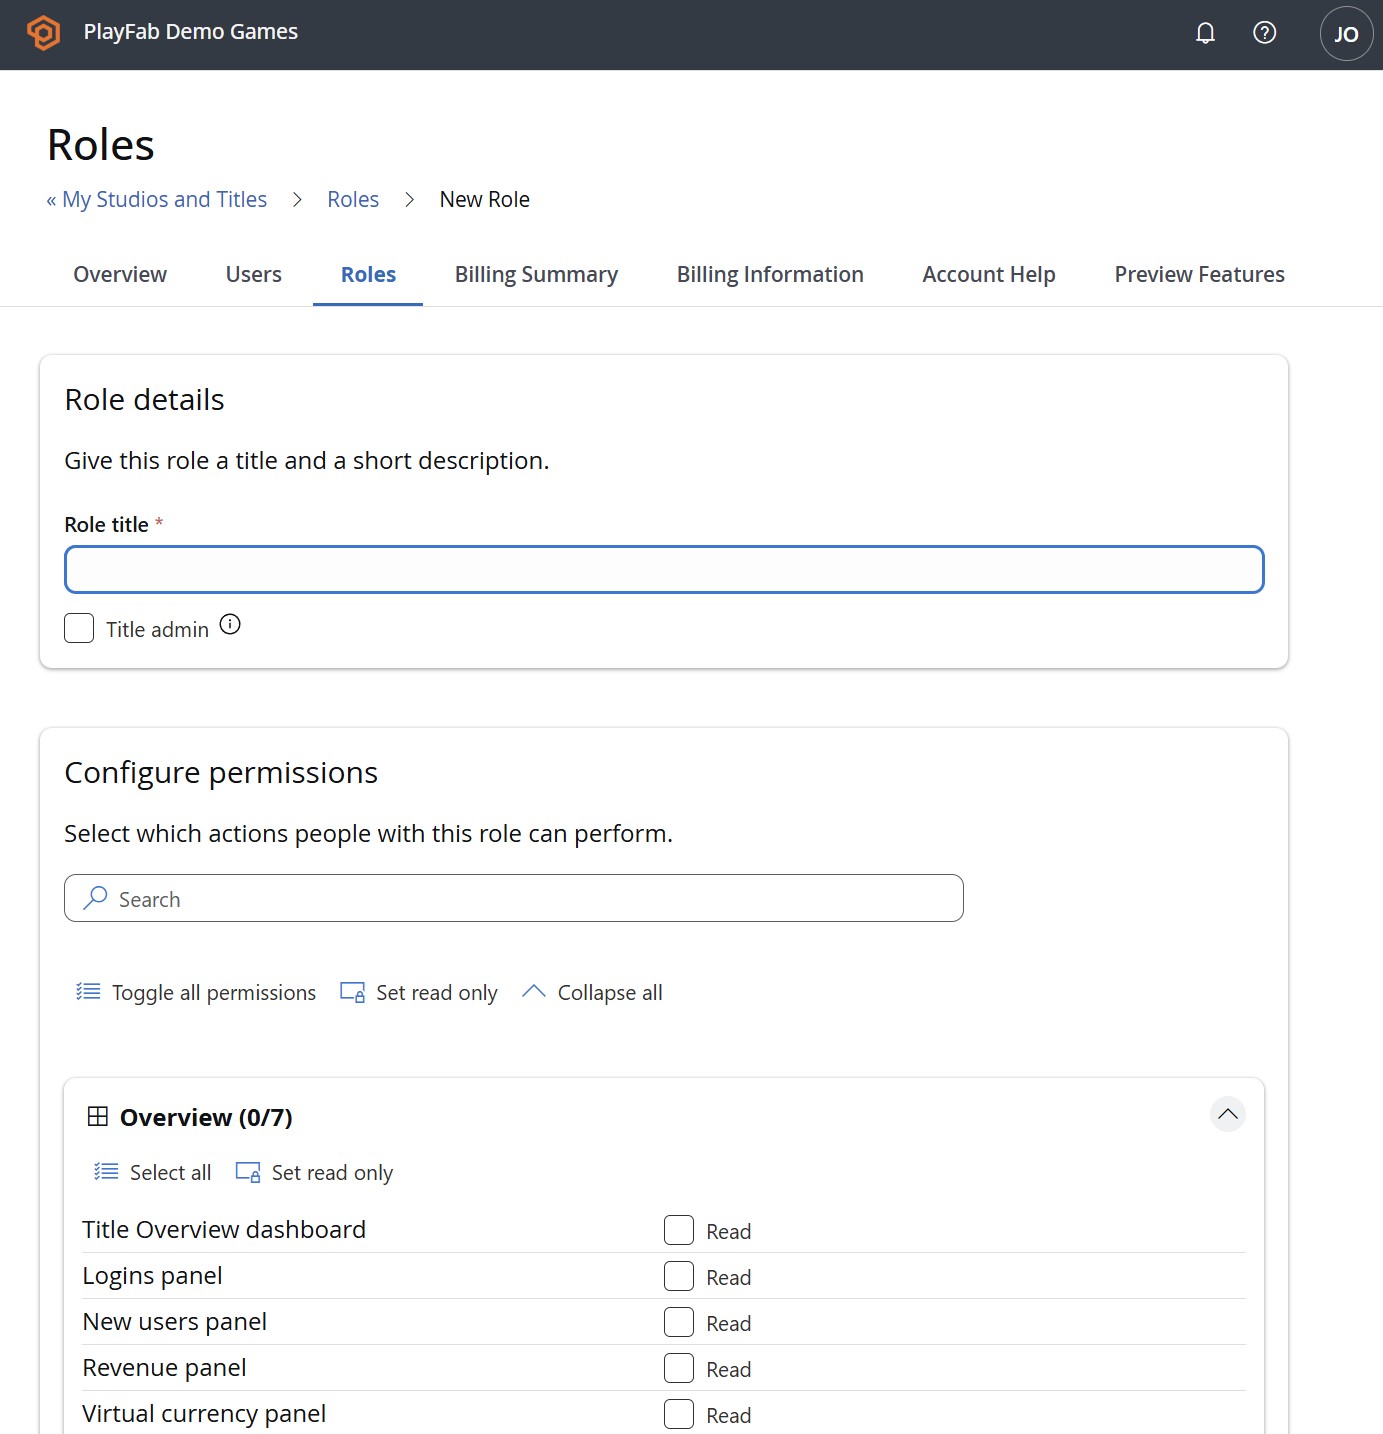
- If this role should have unrestricted access to the title, check Title admin. This grants full permissions for the title and overrides the individual permission selections below.
Configuring permissions
The Configure permissions section is where you choose exactly what the role can do. Permissions are organized into groups such as Overview, Identity, Economy, and more, with a counter on each group (for example, Overview (0/7)) showing how many of its permissions are currently selected.
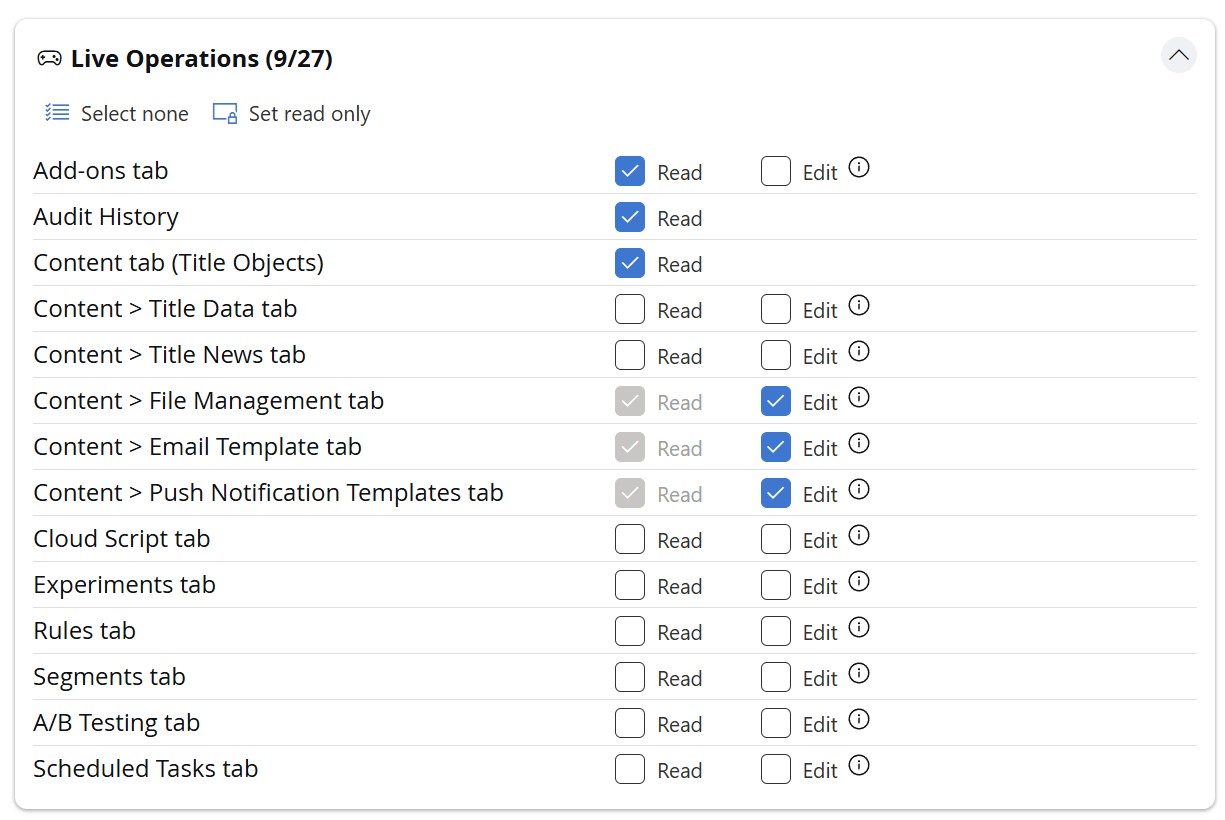
Each permission offers one or more access levels:
- Read — view the data or area
- Edit — create and modify
- Delete — remove
Not every permission has all three. Some areas add their own purpose-built actions, such as Activate, Submit, or Review. When you're unsure what an action covers, hover the (i) tooltip next to it for a full description — for instance, the Review action on the Payouts tab explains that it lets you "Approve and reject payouts."
To move quickly, use the bulk controls:
- Search — filter the permission list to find a specific item.
- Toggle all permissions — select or clear every permission at once.
- Set read only — check just the Read boxes across the scope, leaving Edit/Delete off.
- Collapse all — hide the contents of every group for a cleaner view.
Each group also has its own Select all and Set read only so you can configure one area at a time.
When the permissions look right, scroll to the bottom and click Save Role.
Assigning roles to users
You can assign roles two ways: from a user, or from a role.
From a user:
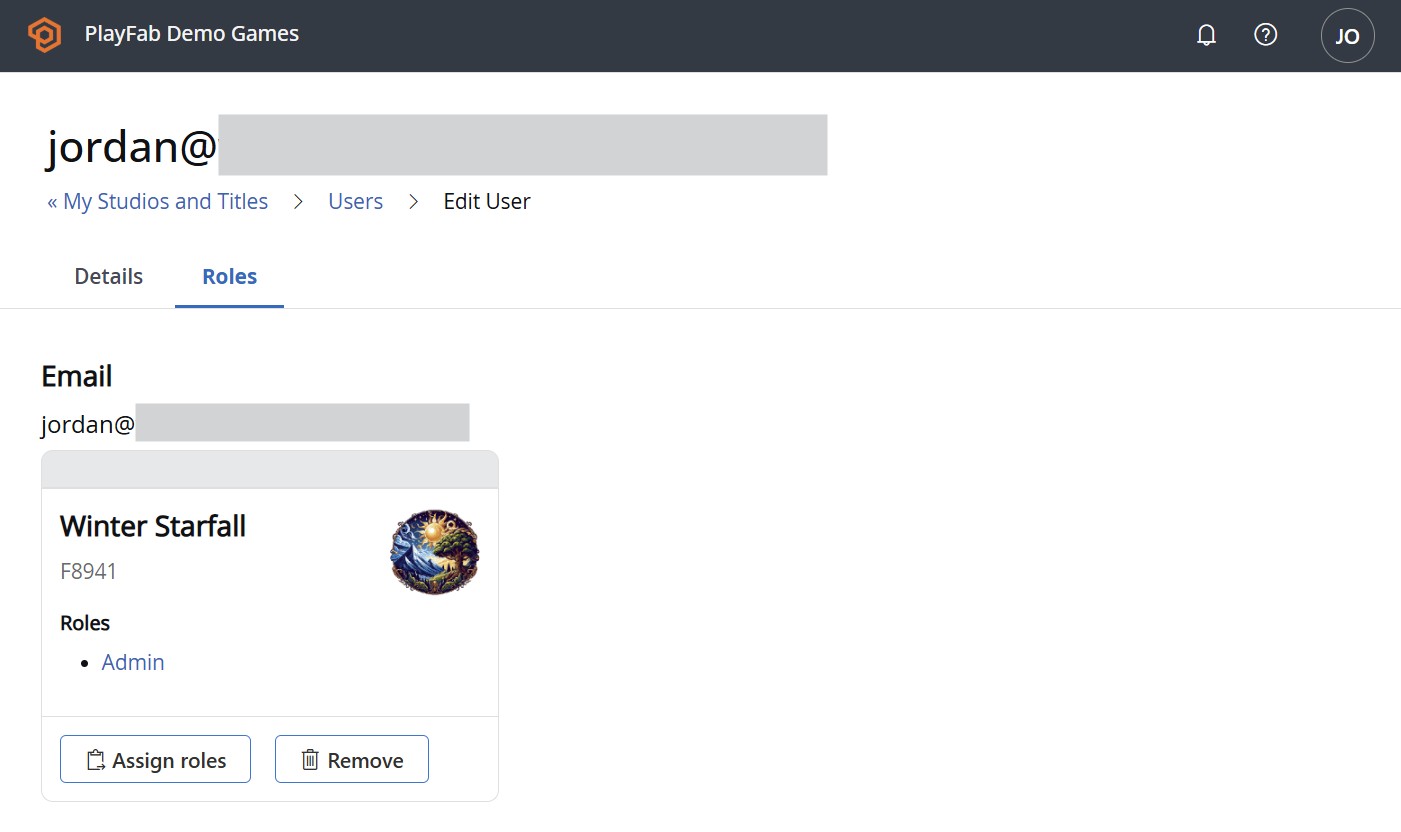
- From My Studios and Titles, select the triple-dot (...) menu next to your studio and choose Users.
- Open the user you want to update, and select their roles per title. Because roles are scoped to a title, assign the role for each title where the user needs it.
- Save your changes.
From a role:
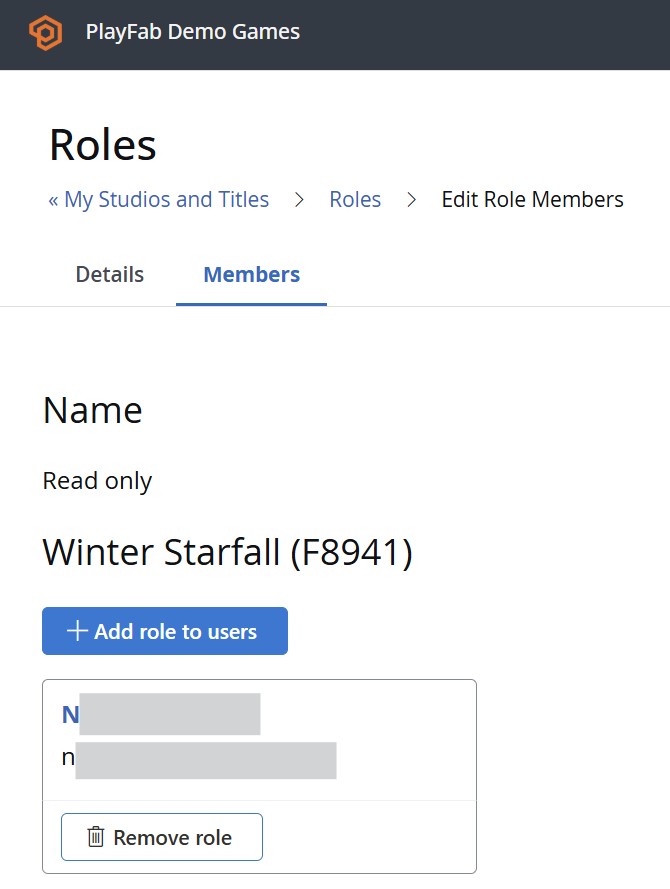
Open an existing role and select its Members tab. There you can pick which users in your studio should hold this role, and for which titles — handy when you're onboarding several people into the same role at once.
Summary
Roles give you flexible, studio-wide control over who can do what in Game Manager. Define a role, dial in its permissions with the Read/Edit/Delete (and area-specific) controls, and assign it to your team per title. Update the role once, and everyone who holds it stays in sync.