Use predict action in Power Automate
You can use dedicated actions for each AI Builder model in Power Automate. However, the predict action lets you use many AI Builder model types.
Use a custom or prebuilt model
Sign in to Power Automate.
Select My flows in the left pane, and then select New flow > Instant cloud flow.
Name your flow, select Manually trigger a flow under Choose how to trigger this flow, and then select Create.
Select + New step, and then enter predict in the search bar.
Select Predict from AI Builder or Predict using AI Builder models from Microsoft Dataverse. Both actions offer the same features.
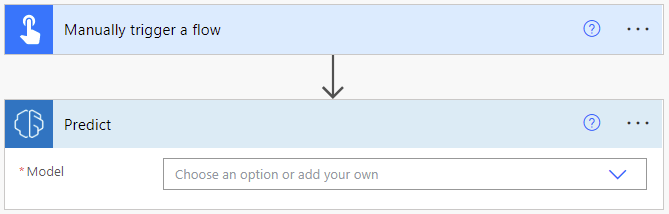
In the Model input, select a custom model you created or choose a prebuilt model. Here is the list of the prebuilt models available:
- Business card reader: BusinessCard model
- Category classification (prebuilt): Category/Classification model
- Entity extraction (prebuilt): EntityExtraction model
- Key phrase extraction: KeyPhraseExtraction model
- Language detection: LanguageDetection model
- Sentiment analysis: SentimentAnalysis model
- Text recognition: TextRecognition model
- Text generation (prebuilt): GptPromptEngineering model
Note
To learn more about the input and output parameters of each model, refer to the documentation explaining how to use the selected model in the following documentation sections:
- Use a custom AI Builder model in Power Automate
- Use a prebuilt AI Builder model in Power Automate
Use a dynamic model ID (advanced)
For some complex use cases, you may need to pass a model ID dynamically to the predict action. For example, if you want to process different types of invoices using different models, you may want to automatically choose a model depending on the type of invoice.
In this section, we'll explain how to configure the AI Builder predict action for this specific purpose depending on the model type.
Sign in to Power Automate.
Select My flows in the left pane, and then select New flow > Instant cloud flow.
Name your flow, select Manually trigger a flow under Choose how to trigger this flow, and then select Create.
Select + New step.
Enter Initialize variable in the search bar, and then select it in the Actions tab.
Enter model id in the Name input, String in the Type input, and the actual model ID in the Value input.
The model ID can be found in the URL of the model's detail page in Power Apps: make.powerapps.com/environment/[environment id]/aibuilder/models/[model id]
Select + New step, search for predict and then select Predict from AI Builder.
Select the input > Enter custom value, and then enter model id from step 6.
The Infer request column value depends on the model type.
Document processing model
In the step Manually trigger a flow, add a File input, and set its name to File Content.
In the step Manually trigger a flow, add a Text input, and set its name to Mime Type.
In the step Initialize variable, enter a document processing model ID.
In the step Predict, enter following value in the Infer request column:
{
    "version": "2.0",
    "requestv2": {
    "@@odata.type": "Microsoft.Dynamics.CRM.expando",
    "mimeType": "@{triggerBody()['text']}",
    "base64Encoded": "@{string(triggerBody()?['file']?['contentBytes'])}",
    "pageRange": "1"
    }
}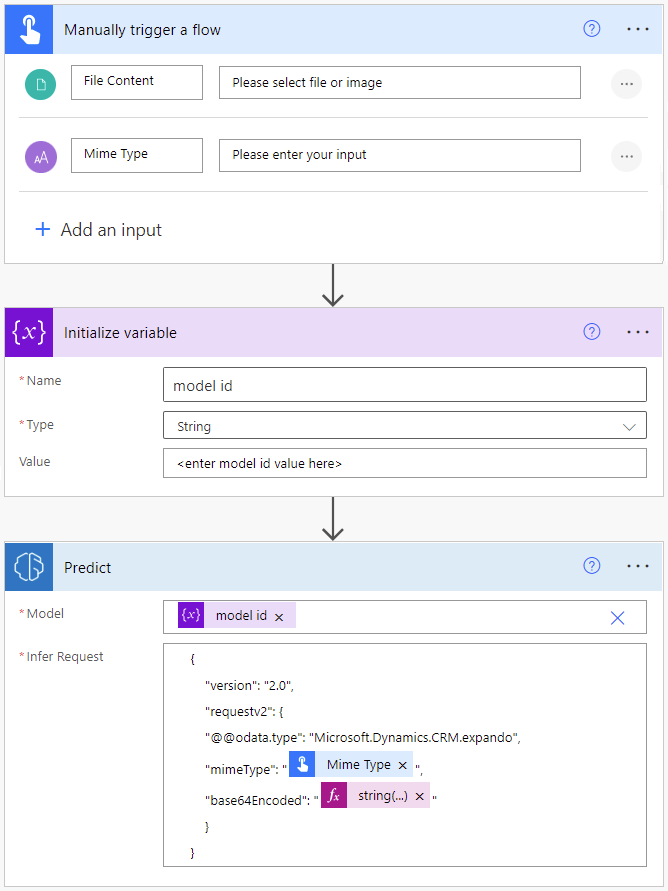
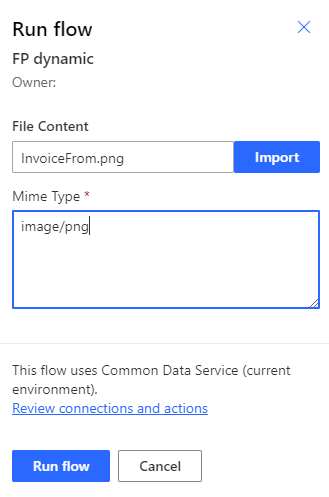
Select Save in the upper-right corner, and then select Test to try out your flow:
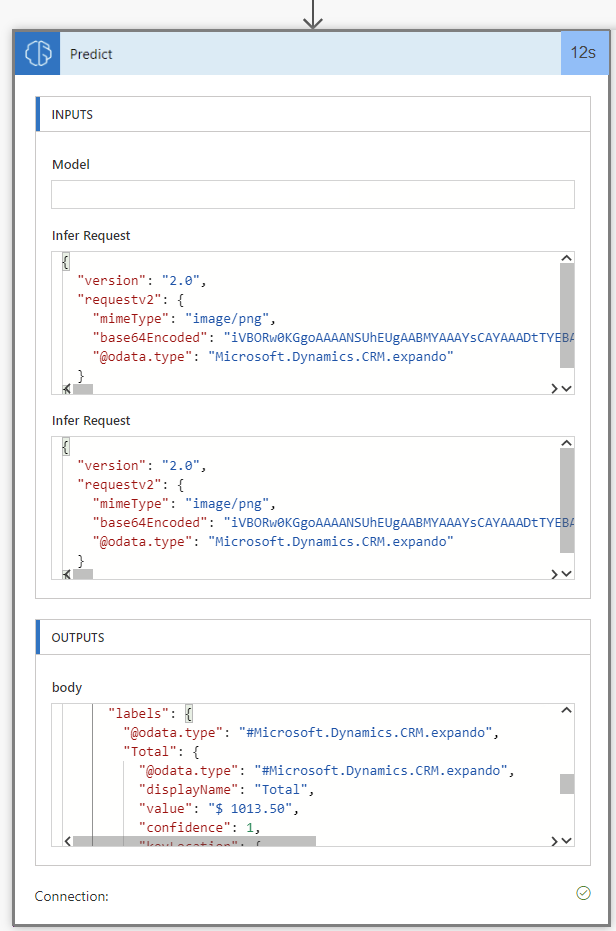
In the flow run details, get the model JSON output in the OUTPUTS section of the predict action. This output is useful to build downstream actions using values of the model.
Go back to your flow in edit mode.
Select + New step and select the Compose action (or any other action to process your model output). Let's say your model output has the Total column. You can get it with the following formula:
@{outputs('Predict')?['body/responsev2/predictionOutput/labels/Total/value']}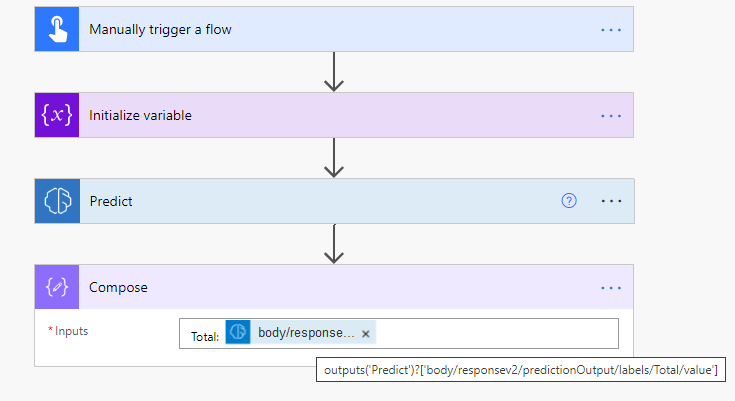
Object detection model
This process is similar to the infer request in step 4 in the Document processing model section:
{
    "version": "2.0",
    "requestv2": {
        "@@odata.type": "Microsoft.Dynamics.CRM.expando",
        "base64Encoded": "@{string(triggerBody()?['file']?['contentBytes'])}"
    }
}
Category classification model
This process is similar to the infer request in step 4 in the Document processing model section:
{
    "version": "2.0",
    "requestv2": {
        "@@odata.type": "Microsoft.Dynamics.CRM.expando",
        "language": "Detect automatically",
        "text": "The text to categorize"
    }
}
Feedback
Coming soon: Throughout 2024 we will be phasing out GitHub Issues as the feedback mechanism for content and replacing it with a new feedback system. For more information see: https://aka.ms/ContentUserFeedback.
Submit and view feedback for