Load Balanced Test Bed Part 3-Creating the Nodes
Creating the Nodes
Part 3 of 5: For overall context, please see the introduction to this series
In this part of the procedure, we'll create a differencing disk using the BaseOS.vhd as the parent disk. We will then create a Hyper-V machine that uses the differencing disk as its hard disk.
Create a Differencing Disk
Logon to your Hyper-V host machine and start Server Manager.
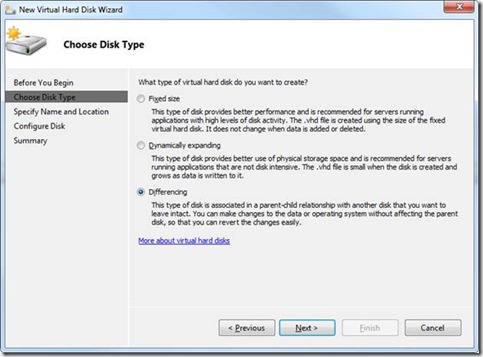
In the left navigation tree, expand Roles, Hyper-V, Hyper-V Manager, and right-click on your host machine name. Choose New, Hard Disk… from the context menu.
Create a differencing disk using the wizard (see below):
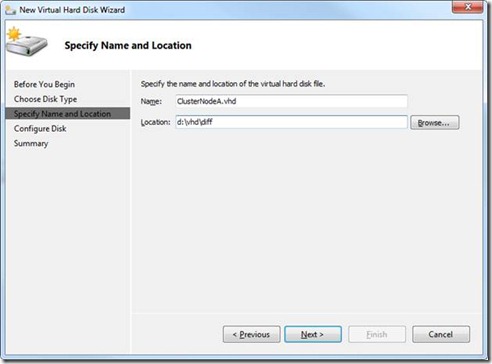
To improve performance, I chose to place my differencing VHD on a different physical disk (located on physical drive D:) from the BaseOS VHD (located on drive G:) in order to spilt the IO across multiple physical disks:
Next point it to the BaseOS VHD as the parent disk. If you followed the earlier procedure, Creating a Base Image, the VHD I created was g:\vm\BaseOS\BaseOS.vhd, so it will be my parent VHD.
Click Finish to complete the creation of the differencing disk.
You now have the VHD that will be used for the Hyper-V cluster node, which you'll create now.
Create the Node Virtual Machine
Logon to your Hyper-V host machine and start Server Manager.
In the left side navigation tree, expand the Roles branch, Hyper-V branch, Hyper-V Manager branch, then right-click on your host machine’s name, and choose New, Virtual Machine…
Name the virtual machine “ClusterNodeA”, specify the location to store the VM, and click Next.
I assigned it 1500M of RAM and clicked Next
Set the connection to the “Local Area Network – Virtual Network” and click Next
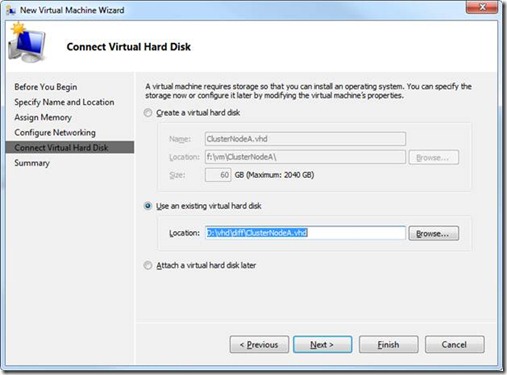
Connect the VM to the differencing disk (not the parent) you created above by choosing “Use an existing virtual hard disk” and specifying the path to the differencing disk. In my case, the path was d:\vhd\diff\ClusterNodeA.vhd, as shown below:
You now have a Hyper-V machine that will later be used as an NLB cluster node.


