Configure a SAML app to receive tokens with claims from an external store (preview)
This article describes how to configure a SAML application to receive tokens with external claims from your custom claims provider.
Prerequisites
Before configuring a SAML application to receive tokens with external claims, first follow these sections:
Configure a SAML application that receives enriched tokens
Individual app administrators or owners can use a custom claims provider to enrich tokens for existing applications or new applications. These apps can use tokens in either JWT (for OpenID connect) or SAML formats.
The following steps are for registering a demo XRayClaims application so you can test whether it can receive a token with enriched claims.
Add a new SAML application
Tip
Steps in this article might vary slightly based on the portal you start from.
Add a new, non-gallery SAML application in your tenant:
Sign in to the Microsoft Entra admin center as at least an Cloud Application Administrator.
Browse to Identity > Applications > Enterprise applications.
Select New application and then Create your own application.
Add a name for the app. For example, AzureADClaimsXRay. Select the Integrate any other application you don't find in the gallery (Non-gallery) option and select Create.
Configure single sign-on with SAML
Set up single sign-on for the app:
In the Overview page, select Set up Single Sign-On and then SAML. Select Edit in Basic SAML Configuration.
Select Add identifier and add "urn:microsoft:adfs:claimsxray" as the identifier. If that identifier is already used by another application in your organization, you can use an alternative like urn:microsoft:adfs:claimsxray12
Select reply URL and add
https://adfshelp.microsoft.com/ClaimsXray/TokenResponseas the Reply URL.Select Save.
Configure claims
Attributes that return by your custom claims provider API aren't automatically included in tokens returned by Microsoft Entra ID. You need to configure your application to reference attributes returned by the custom claims provider and return them as claims in tokens.
On the Enterprise applications configuration page for that new app, go to the Single sign-on pane.
Select on Edit for the Attributes & Claims section
Expand the Advanced settings section.
Select on Configure for Custom claims provider.
Select the custom authentication extension you registered previously in the Custom claims provider dropdown. Select Save.
Select Add new claim to add a new claim.
Provide a name to the claim you want to be issued, for example "DoB". Optionally set a namespace URI.
For Source, select Attribute and pick the attribute provided by the custom claims provider from the Source attribute dropdown. Attributes shown are the attributes defined as 'to be made available' by the custom claims provider in your custom claims provider configuration. Attributes provided by the custom claims provider are prefixed with customclaimsprovider. For example, customclaimsprovider.DateOfBirth and customclaimsprovider.CustomRoles. These claims can be single or multi-valued depend on your API response.
Select Save to add the claim to the SAML token configuration.
Close the Manage claim and Attributes & Claims windows.
Assign a user or group to the app
Before testing the user sign-in, you must assign a user or group of users to the app. If you don't, the AADSTS50105 - The signed in user is not assigned to a role for the application error returns when signing in.
In the application Overview page, select Assign users and groups under Getting started.
In the Users and groups page, select Add user/group.
Search for and select the user to sign in to the app. Select the Assign button.
Test the application
Test that the token is being enriched for users signing in to the application:
In the app overview page, select Single sign-on in the left nav bar.
Scroll down and select Test under Test single sign-on with {app name}.
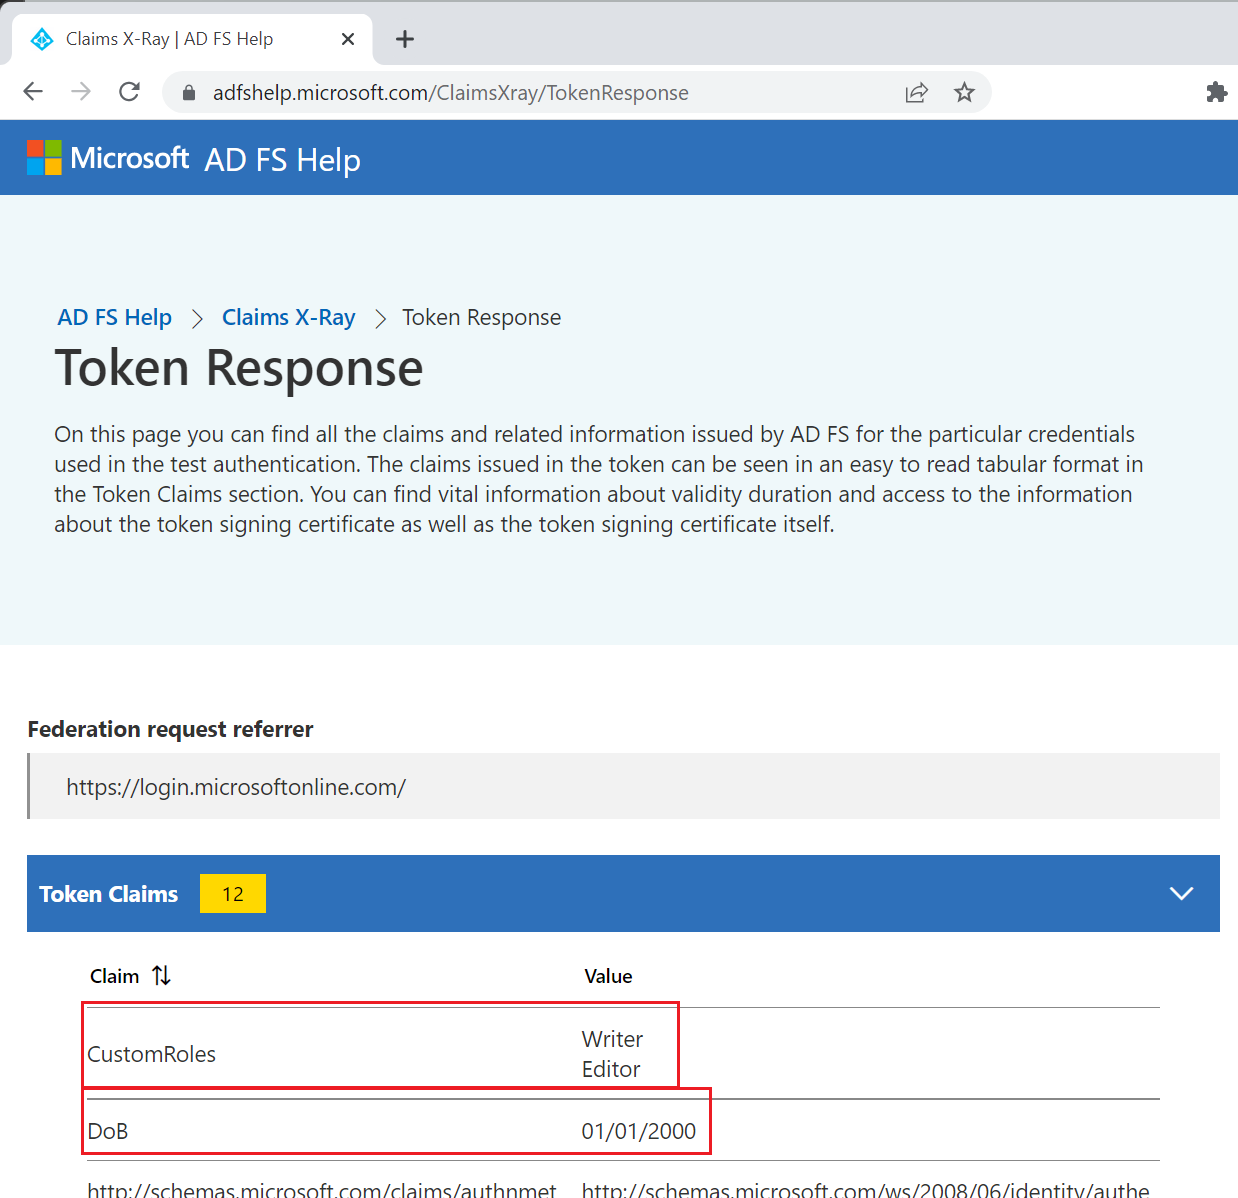
Select Test sign in and sign in. At the end of your sign-in, you should see the Token response Claims X-ray tool. The claims you configured to appear in the token should all be listed if they have non-null values, including any that use the custom claims provider as a source.
Next steps
Troubleshoot your custom claims provider API.
View the Authentication Events Trigger for Azure Functions sample app.
Feedback
Coming soon: Throughout 2024 we will be phasing out GitHub Issues as the feedback mechanism for content and replacing it with a new feedback system. For more information see: https://aka.ms/ContentUserFeedback.
Submit and view feedback for