Deploy an application that uses OpenAI on Azure Kubernetes Service (AKS)
In this article, you learn how to deploy an application that uses Azure OpenAI or OpenAI on AKS. With OpenAI, you can easily adapt different AI models, such as content generation, summarization, semantic search, and natural language to code generation, for your specific tasks. You start by deploying an AKS cluster in your Azure subscription. Then, you deploy your OpenAI service and the sample application.
The sample cloud native application is representative of real-world implementations. The multi-container application is comprised of applications written in multiple languages and frameworks, including:
- Golang with Gin
- Rust with Actix-Web
- JavaScript with Vue.js and Fastify
- Python with FastAPI
These applications provide front ends for customers and store admins, REST APIs for sending data to RabbitMQ message queue and MongoDB database, and console apps to simulate traffic.
Note
We don't recommend running stateful containers, such as MongoDB and Rabbit MQ, without persistent storage for production. We use them here for simplicity, but we recommend using managed services, such as Azure CosmosDB or Azure Service Bus.
To access the GitHub codebase for the sample application, see AKS Store Demo.
Before you begin
- You need an Azure account with an active subscription. If you don't have one, create an account for free.
- For this demo, you can either use Azure OpenAI service or OpenAI service.
- If you plan on using Azure OpenAI service, you need to request access to enable it on your Azure subscription using the Request access to Azure OpenAI Service form.
- If you plan on using OpenAI, sign up on the OpenAI website.
Prerequisites
Use the Bash environment in Azure Cloud Shell. For more information, see Quickstart for Bash in Azure Cloud Shell.

If you prefer to run CLI reference commands locally, install the Azure CLI. If you're running on Windows or macOS, consider running Azure CLI in a Docker container. For more information, see How to run the Azure CLI in a Docker container.
If you're using a local installation, sign in to the Azure CLI by using the az login command. To finish the authentication process, follow the steps displayed in your terminal. For other sign-in options, see Sign in with the Azure CLI.
When you're prompted, install the Azure CLI extension on first use. For more information about extensions, see Use extensions with the Azure CLI.
Run az version to find the version and dependent libraries that are installed. To upgrade to the latest version, run az upgrade.
Create a resource group
An Azure resource group is a logical group in which you deploy and manage Azure resources. When you create a resource group, you're prompted to specify a location. This location is the storage location of your resource group metadata and where your resources run in Azure if you don't specify another region during resource creation.
The following example creates a resource group named myResourceGroup in the eastus location.
Create a resource group using the
az group createcommand.az group create --name myResourceGroup --location eastusThe following example output shows successful creation of the resource group:
{
  "id": "/subscriptions/<guid>/resourceGroups/myResourceGroup",
  "location": "eastus",
  "managedBy": null,
  "name": "myResourceGroup",
  "properties": {
    "provisioningState": "Succeeded"
  },
  "tags": null,
  "type": "Microsoft.Resources/resourceGroups"
}
Create an AKS cluster
The following example creates a cluster named myAKSCluster in myResourceGroup.
Create an AKS cluster using the
az aks createcommand.az aks create --resource-group myResourceGroup --name myAKSCluster --generate-ssh-keysAfter a few minutes, the command completes and returns JSON-formatted information about the cluster.
Connect to the cluster
To manage a Kubernetes cluster, you use the Kubernetes command-line client, kubectl. kubectl is already installed if you use Azure Cloud Shell.
Install
kubectllocally using theaz aks install-clicommand.az aks install-cliNote
If your Linux-based system requires elevated permissions, you can use the
sudo az aks install-clicommand.Configure
kubectlto connect to your Kubernetes cluster using theaz aks get-credentialscommand.This command executes the following operations:
- Downloads credentials and configures the Kubernetes CLI to use them.
- Uses
~/.kube/config, the default location for the Kubernetes configuration file. Specify a different location for your Kubernetes configuration file using --file argument.
az aks get-credentials --resource-group myResourceGroup --name myAKSClusterVerify the connection to your cluster using the
kubectl getcommand. This command returns a list of the cluster nodes.kubectl get nodesThe following example output shows the nodes created in the previous steps. Make sure the node status is Ready.
NAME                                STATUS   ROLES   AGE     VERSION
aks-nodepool1-31469198-vmss000000   Ready    agent   3h29m   v1.25.6
aks-nodepool1-31469198-vmss000001   Ready    agent   3h29m   v1.25.6
aks-nodepool1-31469198-vmss000002   Ready    agent   3h29m   v1.25.6
Note
For private clusters, the nodes might be unreachable if you try to connect to them through the public IP address. In order to fix this, you need to create an endpoint within the same VNET as the cluster to connect from. Follow the instructions to Create a private AKS cluster and then connect to it.
Deploy the application

The AKS Store application manifest includes the following Kubernetes deployments and services:
- Product service: Shows product information.
- Order service: Places orders.
- Makeline service: Processes orders from the queue and completes the orders.
- Store front: Web application for customers to view products and place orders.
- Store admin: Web application for store employees to view orders in the queue and manage product information.
- Virtual customer: Simulates order creation on a scheduled basis.
- Virtual worker: Simulates order completion on a scheduled basis.
- Mongo DB: NoSQL instance for persisted data.
- Rabbit MQ: Message queue for an order queue.
Note
We don't recommend running stateful containers, such as MongoDB and Rabbit MQ, without persistent storage for production. We use them here for simplicity, but we recommend using managed services, such as Azure CosmosDB or Azure Service Bus.
Review the YAML manifest for the application.
Deploy the application using the
kubectl applycommand and specify the name of your YAML manifest.kubectl apply -f https://raw.githubusercontent.com/Azure-Samples/aks-store-demo/main/aks-store-all-in-one.yamlThe following example output shows the successfully created deployments and services:
deployment.apps/mongodb created
service/mongodb created
deployment.apps/rabbitmq created
service/rabbitmq created
deployment.apps/order-service created
service/order-service created
deployment.apps/makeline-service created
service/makeline-service created
deployment.apps/product-service created
service/product-service created
deployment.apps/store-front created
service/store-front created
deployment.apps/store-admin created
service/store-admin created
deployment.apps/virtual-customer created
deployment.apps/virtual-worker created
Deploy OpenAI
You can either use Azure OpenAI or OpenAI and run your application on AKS.
- Enable Azure OpenAI on your Azure subscription by filling out the Request Access to Azure OpenAI Service form.
- In the Azure portal, create an Azure OpenAI instance.
- Select the Azure OpenAI instance you created.
- Select Keys and Endpoints to generate a key.
- Select Model Deployments > Managed Deployments to open the Azure OpenAI studio.
- Create a new deployment using the gpt-35-turbo model.
For more information on how to create a deployment in Azure OpenAI, see Get started generating text using Azure OpenAI Service.
Deploy the AI service
Now that the application is deployed, you can deploy the Python-based microservice that uses OpenAI to automatically generate descriptions for new products being added to the store's catalog.
Create a file named
ai-service.yamland copy in the following manifest:apiVersion: apps/v1 kind: Deployment metadata: name: ai-service spec: replicas: 1 selector: matchLabels: app: ai-service template: metadata: labels: app: ai-service spec: nodeSelector: "kubernetes.io/os": linux containers: - name: ai-service image: ghcr.io/azure-samples/aks-store-demo/ai-service:latest ports: - containerPort: 5001 env: - name: USE_AZURE_OPENAI value: "True" - name: AZURE_OPENAI_DEPLOYMENT_NAME value: "" - name: AZURE_OPENAI_ENDPOINT value: "" - name: OPENAI_API_KEY value: "" resources: requests: cpu: 20m memory: 50Mi limits: cpu: 50m memory: 128Mi --- apiVersion: v1 kind: Service metadata: name: ai-service spec: type: ClusterIP ports: - name: http port: 5001 targetPort: 5001 selector: app: ai-serviceSet the environment variable
USE_AZURE_OPENAIto"True".Get your Azure OpenAI deployment name from Azure OpenAI studio and fill in the
AZURE_OPENAI_DEPLOYMENT_NAMEvalue.Get your Azure OpenAI endpoint and Azure OpenAI API key from the Azure portal by selecting Keys and Endpoint in the left blade of the resource. Update the
AZURE_OPENAI_ENDPOINTandOPENAI_API_KEYin the YAML accordingly.Deploy the application using the
kubectl applycommand and specify the name of your YAML manifest.kubectl apply -f ai-service.yamlThe following example output shows the successfully created deployments and services:
  deployment.apps/ai-service created
  service/ai-service created
Note
Directly adding sensitive information, such as API keys, to your Kubernetes manifest files isn't secure and may accidentally get committed to code repositories. We added it here for simplicity. For production workloads, use Managed Identity to authenticate to Azure OpenAI service instead or store your secrets in Azure Key Vault.
Test the application
Check the status of the deployed pods using the kubectl get pods command.
kubectl get podsMake sure all the pods are Running before continuing to the next step.
NAME                                READY   STATUS    RESTARTS   AGE
makeline-service-7db94dc7d4-8g28l   1/1     Running   0          99s
mongodb-78f6d95f8-nptbz             1/1     Running   0          99s
order-service-55cbd784bb-6bmfb      1/1     Running   0          99s
product-service-6bf4d65f74-7cbvk    1/1     Running   0          99s
rabbitmq-9855984f9-94nlm            1/1     Running   0          99s
store-admin-7f7d768c48-9hn8l        1/1     Running   0          99s
store-front-6786c64d97-xq5s9        1/1     Running   0          99s
virtual-customer-79498f8667-xzsb7   1/1     Running   0          99s
virtual-worker-6d77fff4b5-7g7rj     1/1     Running   0          99s
Get the IP of the store admin web application and store front web application using the
kubectl get servicecommand.kubectl get service store-adminThe application exposes the Store Admin site to the internet via a public load balancer provisioned by the Kubernetes service. This process can take a few minutes to complete. EXTERNAL IP initially shows pending until the service comes up and shows the IP address.
NAME          TYPE           CLUSTER-IP     EXTERNAL-IP     PORT(S)        AGE
store-admin   LoadBalancer   10.0.142.228   40.64.86.161    80:32494/TCP   50m
Repeat the same step for the service named `store-front``.
Open a web browser and browse to the external IP address of your service. In the example shown here, open 40.64.86.161 to see Store Admin in the browser. Repeat the same step for Store Front.
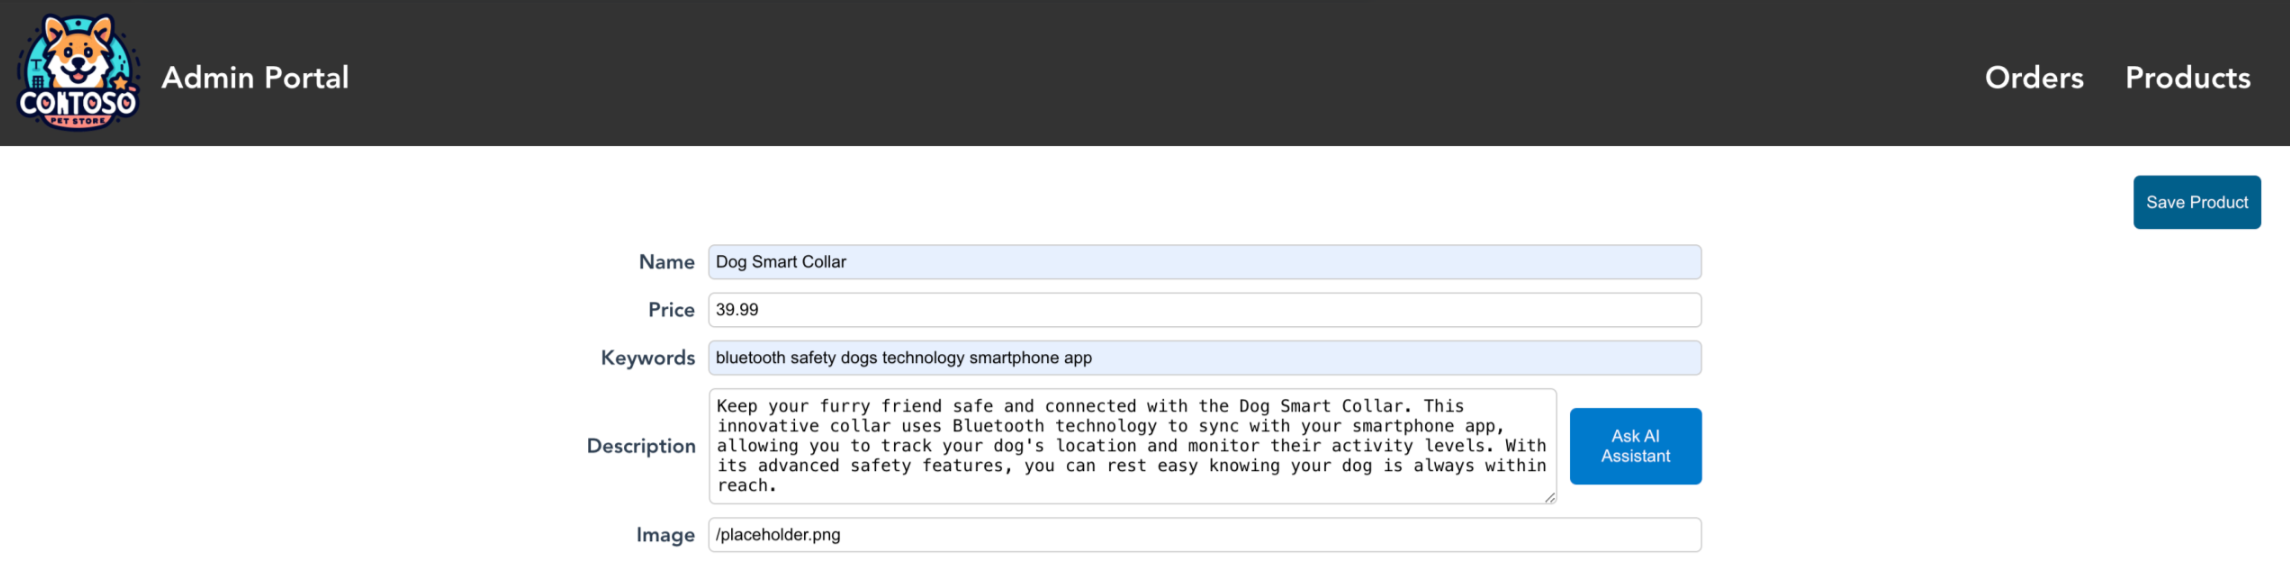
In store admin, select the products tab, then select Add Products.
When the `ai-service`` is running successfully, you should see the Ask OpenAI button next to the description field. Fill in the name, price, and keywords, then generate a product description by selecting Ask OpenAI > Save product.
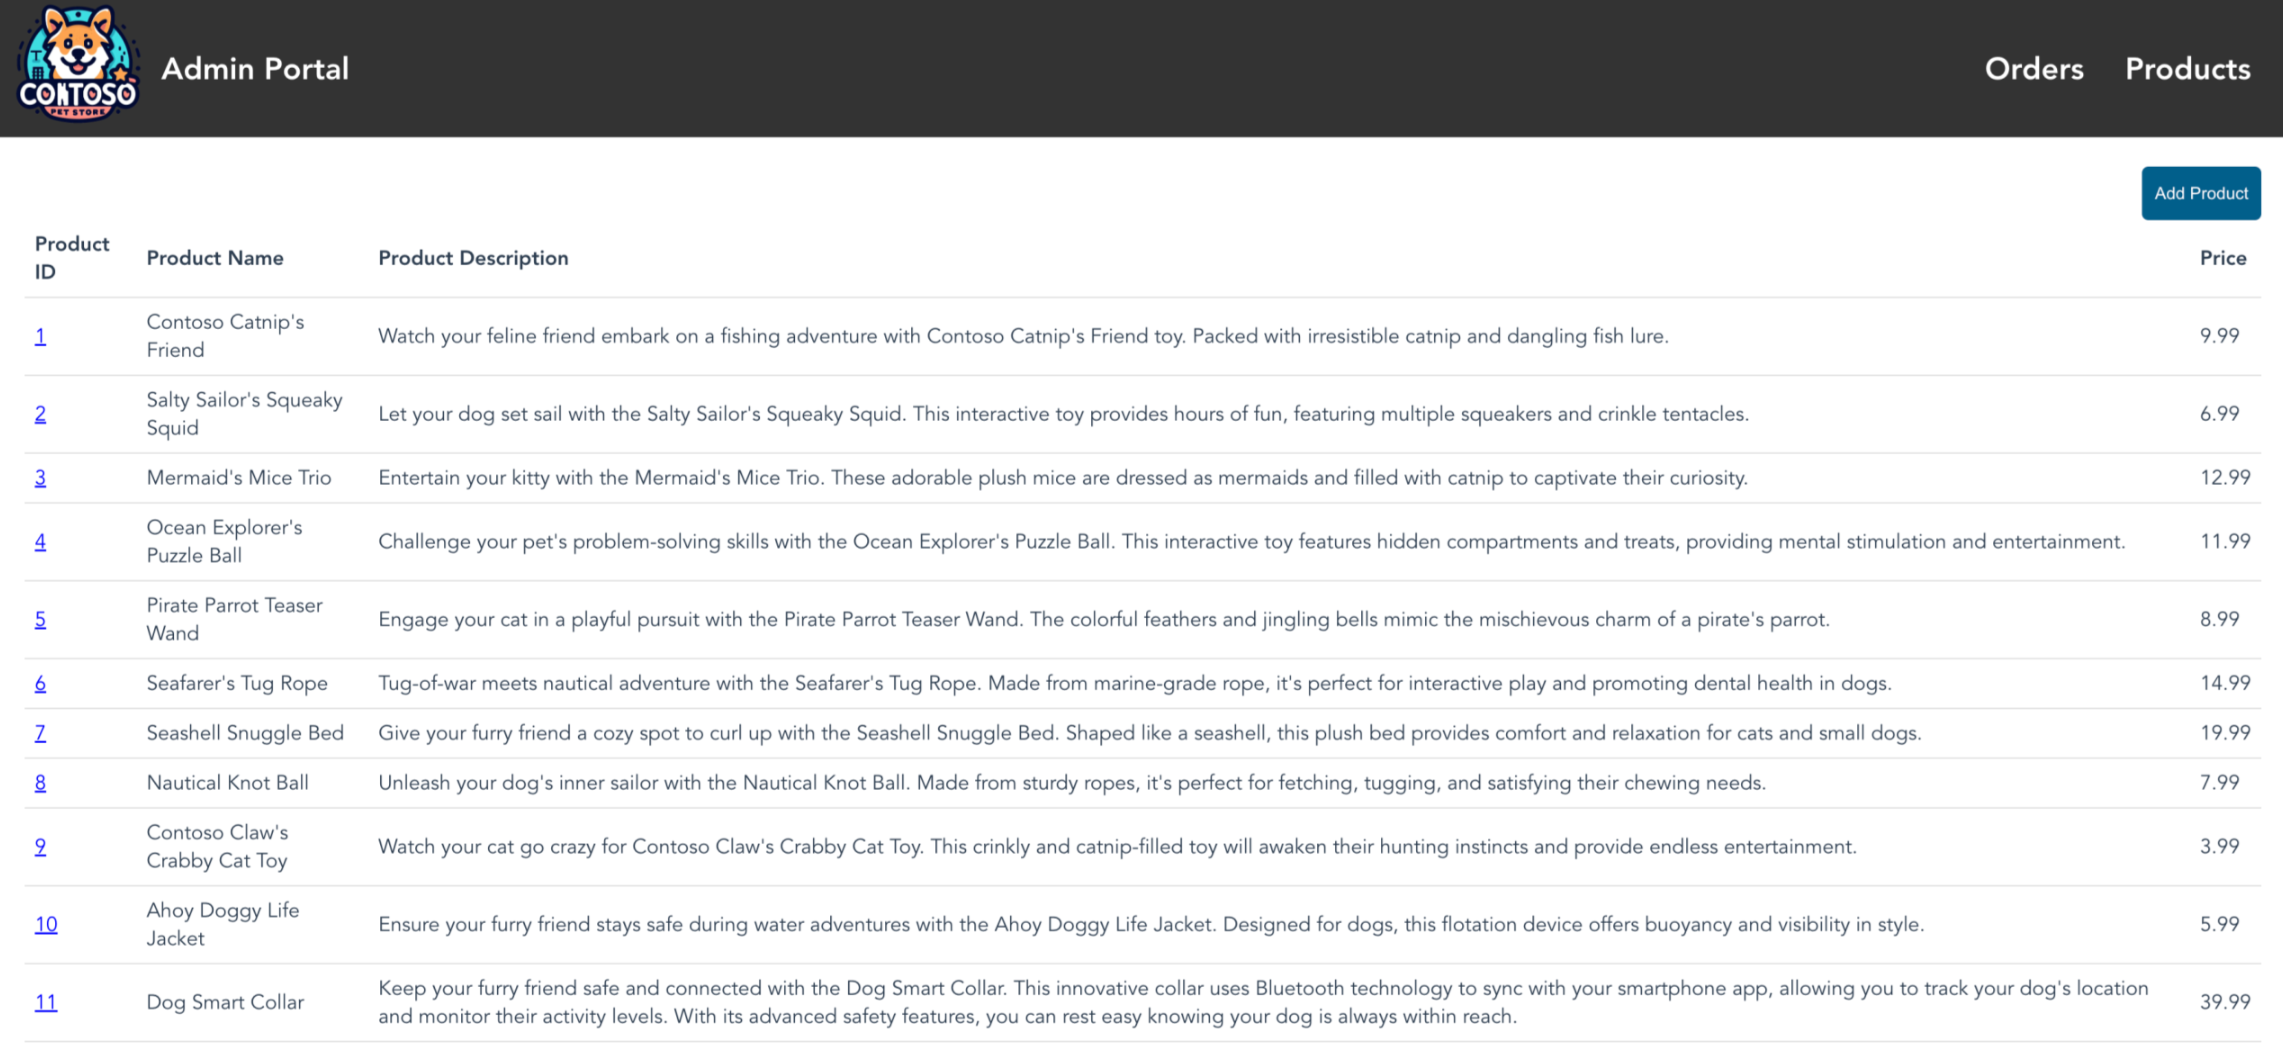
You can now see the new product you created on Store Admin used by sellers. In the picture, you can see Jungle Monkey Chew Toy is added.
You can also see the new product you created on Store Front used by buyers. In the picture, you can see Jungle Monkey Chew Toy is added. Remember to get the IP address of store front using the
kubectl get servicecommand.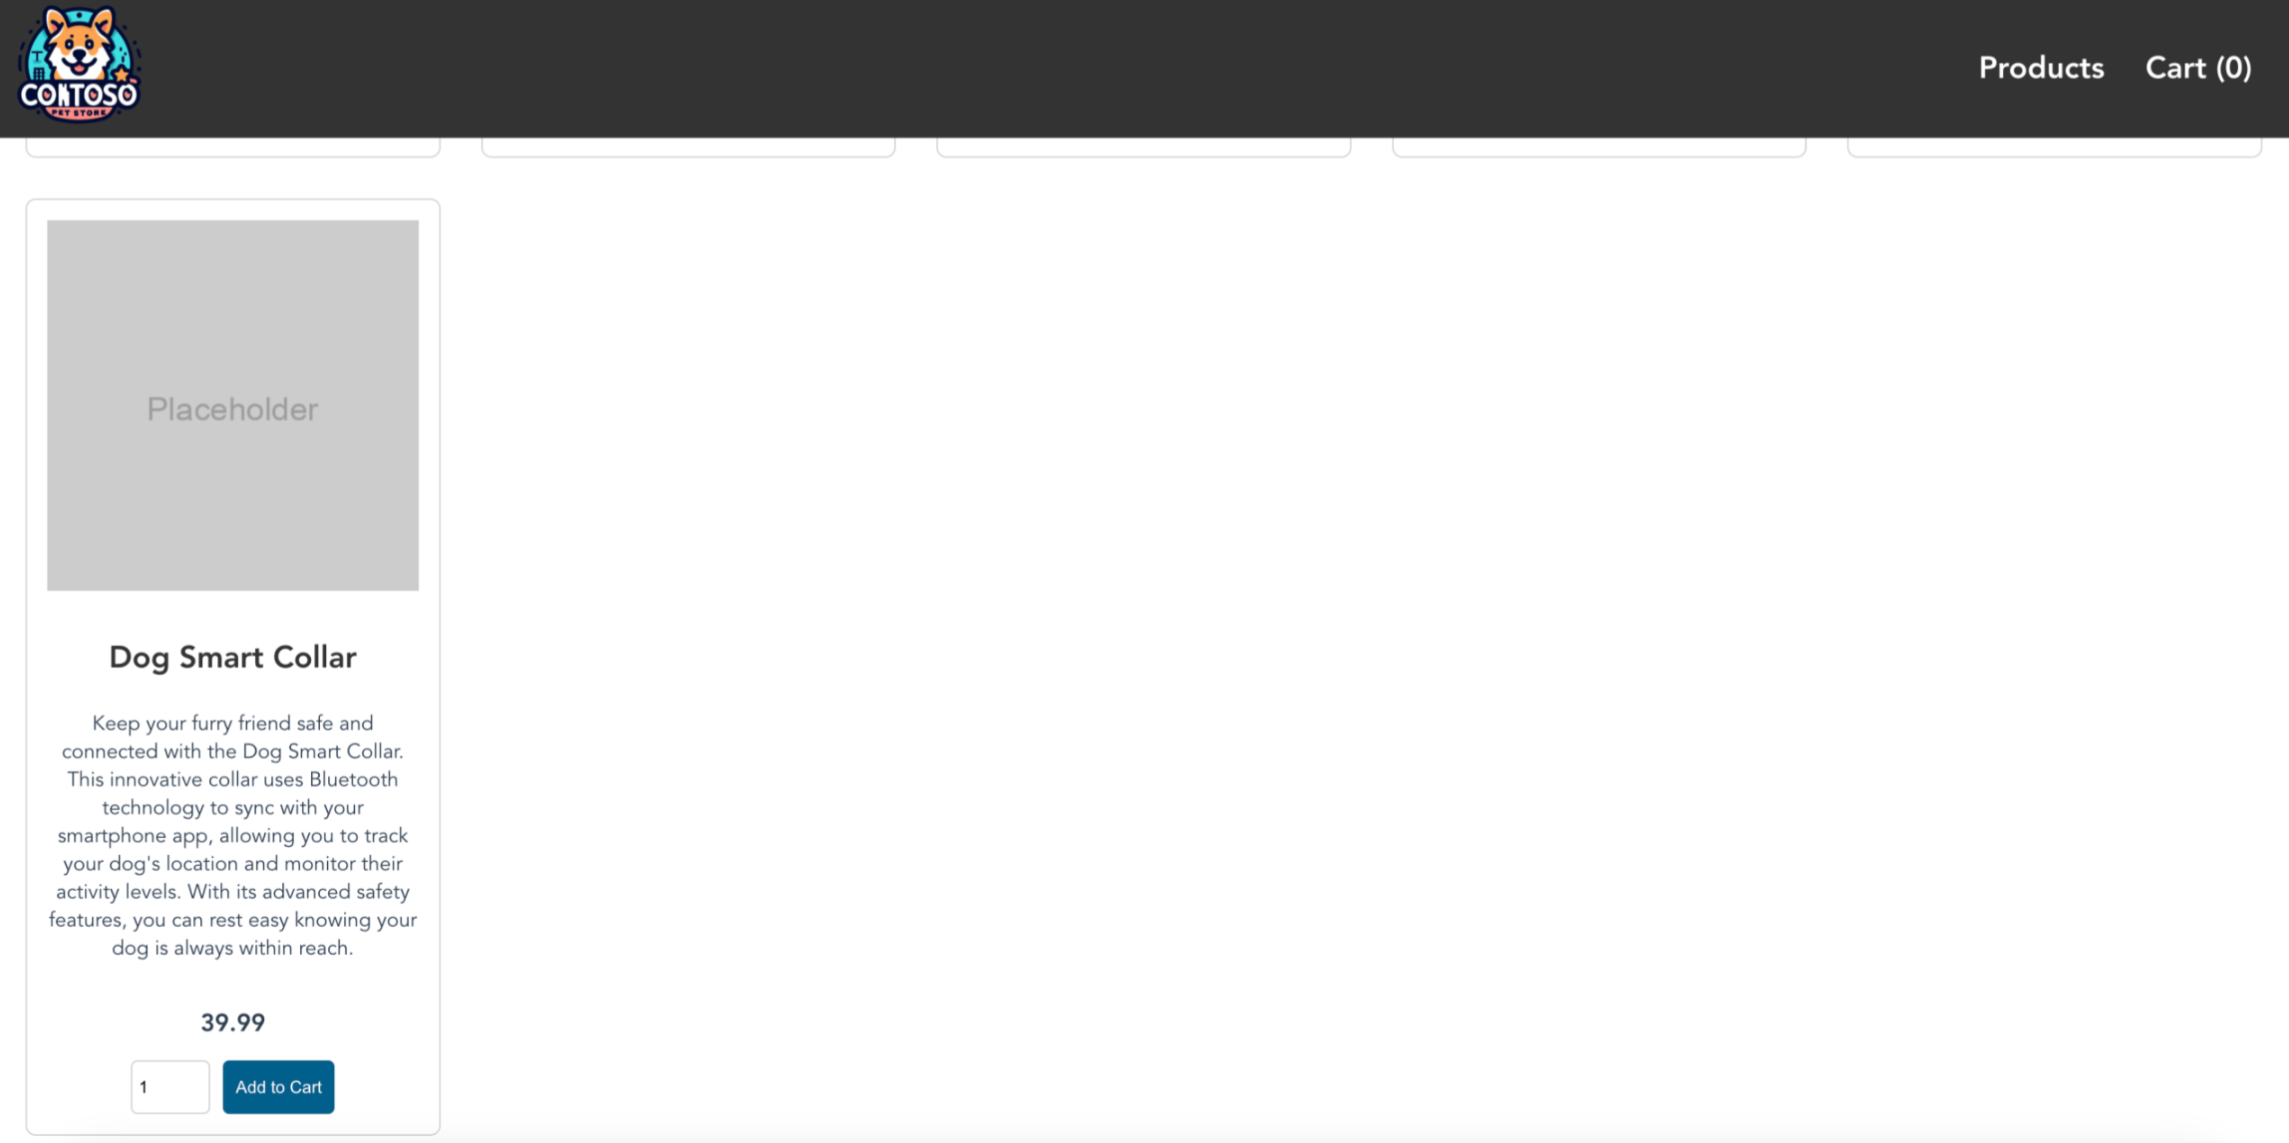
Next steps
Now that you added OpenAI functionality to an AKS application, you can Secure access to Azure OpenAI from Azure Kubernetes Service (AKS).
To learn more about generative AI use cases, see the following resources:

Azure Kubernetes Service