What is Azure Cache for Redis with Azure Private Link?
In this article, you learn how to create a virtual network and an Azure Cache for Redis instance with a private endpoint using the Azure portal. You also learn how to add a private endpoint to an existing Azure Cache for Redis instance.
Azure Private Endpoint is a network interface that connects you privately and securely to Azure Cache for Redis powered by Azure Private Link.
You can restrict public access to the private endpoint of your cache by disabling the PublicNetworkAccess flag.
Important
There is a publicNetworkAccess flag which is Disabled by default.
You can set the value to Disabled or Enabled. When set to enabled, this flag allows both public and private endpoint access to the cache. When set to Disabled, it allows only private endpoint access. Neither the Enterprise nor Enterprise Flash tier supports the publicNetworkAccess flag. For more information on how to change the value, see the FAQ.
Important
Private endpoint is supported on cache tiers Basic, Standard, Premium, and Enterprise. We recommend using private endpoint instead of VNets. Private endpoints are easy to set up or remove, are supported on all tiers, and can connect your cache to multiple different VNets at once.
When using the Basic tier, you might experience data loss when you delete and recreate a private endpoint.
Scope of availability
| Tier | Basic, Standard, Premium | Enterprise, Enterprise Flash |
|---|---|---|
| Available | Yes | Yes |
Prerequisites
- Azure subscription - create one for free
Important
Currently, the portal-based redis console is not supported with private link.
Important
When using private link, you cannot export or import data to a to a storage account that has firewall enabled unless you're using a Premium tier cache with managed identity to autenticate to the storage account. For more information, see What if I have firewall enabled on my storage account?
Create a private endpoint with a new Azure Cache for Redis instance
In this section, you create a new Azure Cache for Redis instance with a private endpoint.
Create a virtual network for your new cache
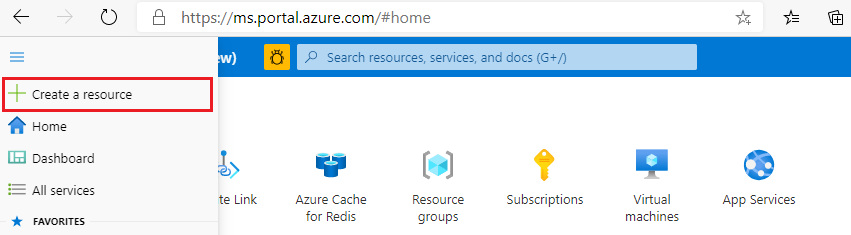
Sign in to the Azure portal and select Create a resource.
On the New page, select Networking and then select Virtual network.
Select Add to create a virtual network.
In Create virtual network, enter or select this information in the Basics tab:
Setting Suggested value Description Subscription Drop down and select your subscription. The subscription under which to create this virtual network. Resource group Drop down and select a resource group, or select Create new and enter a new resource group name. Name for the resource group in which to create your virtual network and other resources. By putting all your app resources in one resource group, you can easily manage or delete them together. Name Enter a virtual network name. The name must: begin with a letter or number; end with a letter, number, or underscore; and contain only letters, numbers, underscores, periods, or hyphens. Region Drop down and select a region. Select a region near other services that use your virtual network. Select the IP Addresses tab or select the Next: IP Addresses button at the bottom of the page.
In the IP Addresses tab, specify the IPv4 address space as one or more address prefixes in CIDR notation (for example, 192.168.1.0/24).
Under Subnet name, select on default to edit the subnet's properties.
In the Edit subnet pane, specify a Subnet name and the Subnet address range. The subnet's address range should be in CIDR notation (for example, 192.168.1.0/24). It must be contained by the address space of the virtual network.
Select Save.
Select the Review + create tab or select the Review + create button.
Verify that all the information is correct and select Create to create the virtual network.
Create an Azure Cache for Redis instance with a private endpoint
To create a cache instance, follow these steps:
Go back to the Azure portal homepage or open the sidebar menu, then select Create a resource.
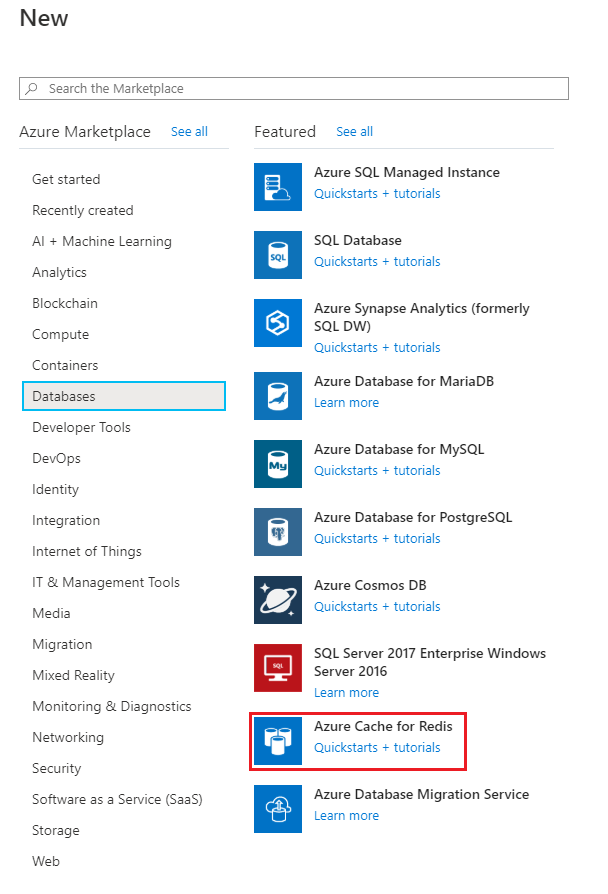
On the New page, select Databases and then select Azure Cache for Redis.
On the New Redis Cache page, configure the settings for your new cache.
Setting Suggested value Description DNS name Enter a globally unique name. The cache name must be a string between 1 and 63 characters. The string must contain only numbers, letters, or hyphens. The name must start and end with a number or letter, and can't contain consecutive hyphens. Your cache instance's host name is <DNS name>.redis.cache.windows.net. Subscription Drop down and select your subscription. The subscription under which to create this new Azure Cache for Redis instance. Resource group Drop down and select a resource group, or select Create new and enter a new resource group name. Name for the resource group in which to create your cache and other resources. By putting all your app resources in one resource group, you can easily manage or delete them together. Location Drop down and select a location. Select a region near other services that use your cache. Pricing tier Drop down and select a Pricing tier. The pricing tier determines the size, performance, and features that are available for the cache. For more information, see Azure Cache for Redis Overview. Select the Networking tab or select the Networking button at the bottom of the page.
In the Networking tab, select Private Endpoint for the connectivity method.
Select the Add button to create your private endpoint.
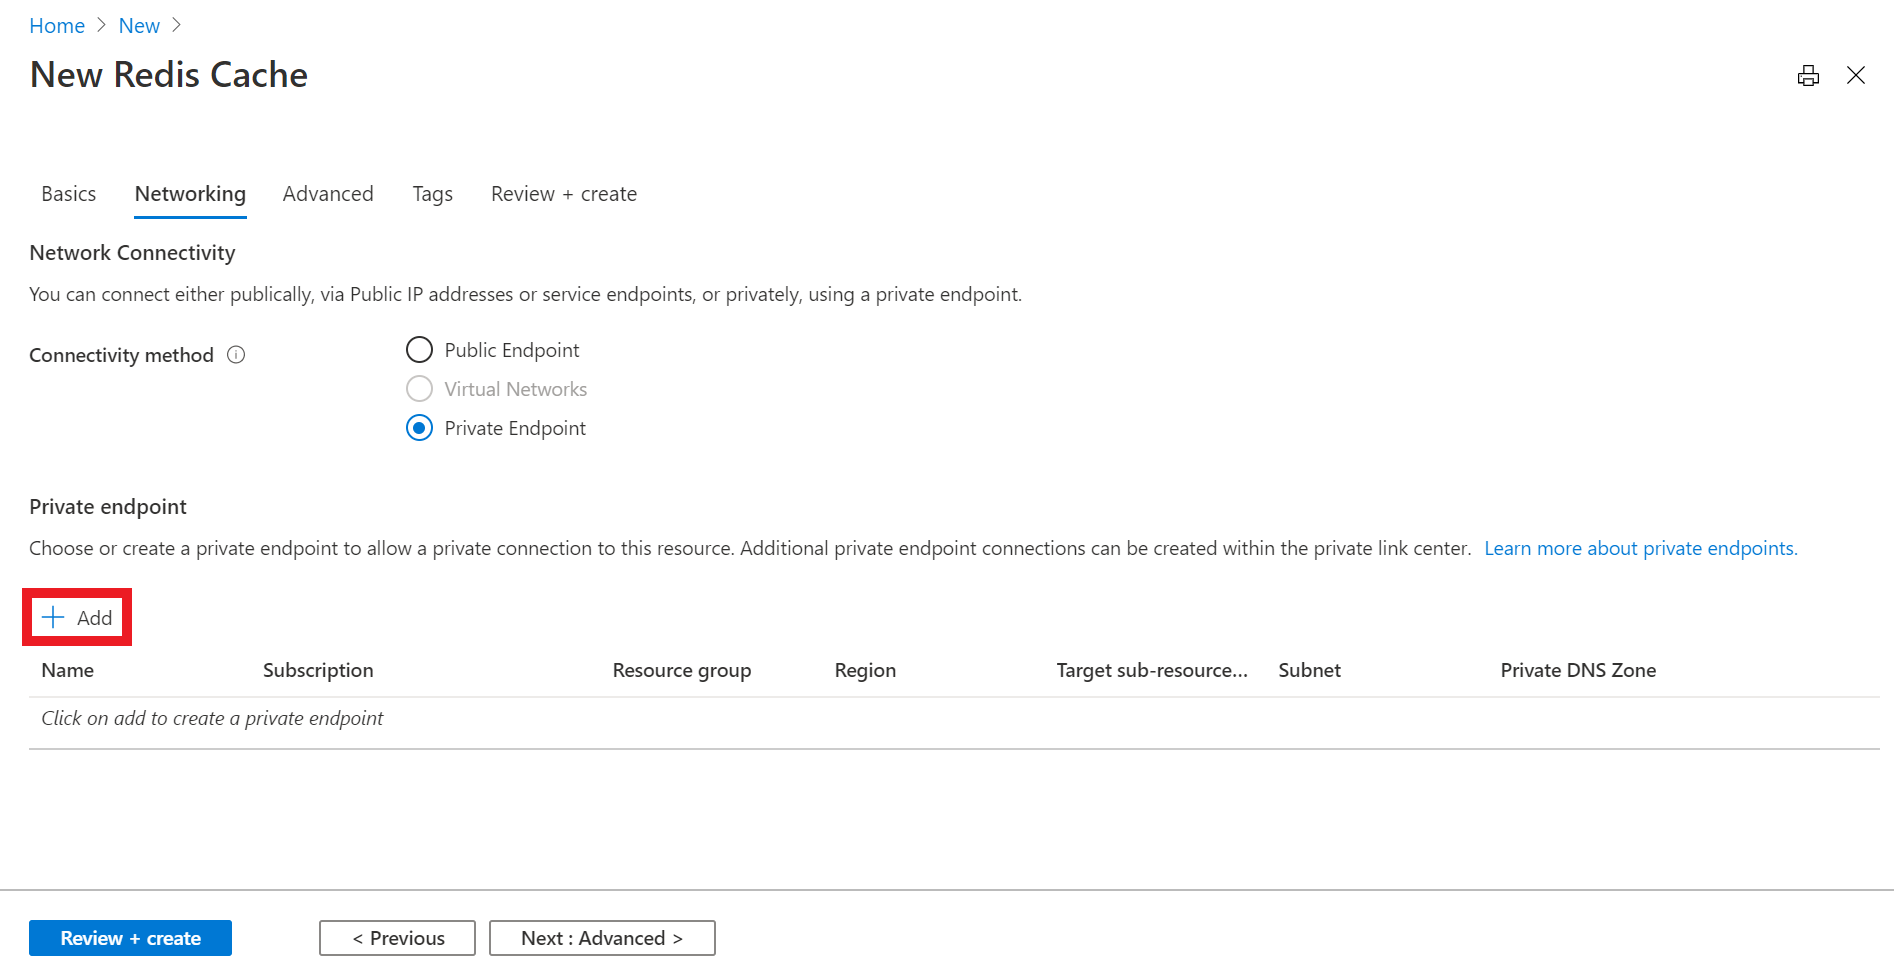
On the Create a private endpoint page, configure the settings for your private endpoint with the virtual network and subnet you created in the last section and select OK.
Select the Next: Advanced tab or select the Next: Advanced button on the bottom of the page.
In the Advanced tab for a basic or standard cache instance, select the enable toggle if you want to enable a non-TLS port.
In the Advanced tab for premium cache instance, configure the settings for non-TLS port, clustering, and data persistence.
Select the Next: Tags tab or select the Next: Tags button at the bottom of the page.
Optionally, in the Tags tab, enter the name and value if you wish to categorize the resource.
Select Review + create. You're taken to the Review + create tab where Azure validates your configuration.
After the green Validation passed message appears, select Create.
It takes a while for the cache to create. You can monitor progress on the Azure Cache for Redis Overview page. When Status shows as Running, the cache is ready to use.
Important
There is a publicNetworkAccess flag which is Disabled by default.
You can set the value to Disabled or Enabled. When set to Enabled, this flag allows both public and private endpoint access to the cache. When set to Disabled, it allows only private endpoint access. For more information on how to change the value, see the FAQ.
Create a private endpoint with an existing Azure Cache for Redis instance
In this section, you add a private endpoint to an existing Azure Cache for Redis instance.
Create a virtual network for your existing cache
To create a virtual network, follow these steps:
Sign in to the Azure portal and select Create a resource.
On the New page, select Networking and then select Virtual network.
Select Add to create a virtual network.
In Create virtual network, enter or select this information in the Basics tab:
Setting Suggested value Description Subscription Drop down and select your subscription. The subscription under which to create this virtual network. Resource group Drop down and select a resource group, or select Create new and enter a new resource group name. Name for the resource group in which to create your virtual network and other resources. By putting all your app resources in one resource group, you can easily manage or delete them together. Name Enter a virtual network name. The name must: begin with a letter or number; end with a letter, number, or underscore; and contain only letters, numbers, underscores, periods, or hyphens. Region Drop down and select a region. Select a region near other services that use your virtual network. Select the IP Addresses tab or select the Next: IP Addresses button at the bottom of the page.
In the IP Addresses tab, specify the IPv4 address space as one or more address prefixes in CIDR notation (for example, 192.168.1.0/24).
Under Subnet name, select on default to edit the subnet's properties.
In the Edit subnet pane, specify a Subnet name and the Subnet address range. The subnet's address range should be in CIDR notation (for example, 192.168.1.0/24). It must be contained by the address space of the virtual network.
Select Save.
Select the Review + create tab or select the Review + create button.
Verify that all the information is correct and select Create to create the virtual network.
Create a private endpoint
To create a private endpoint, follow these steps:
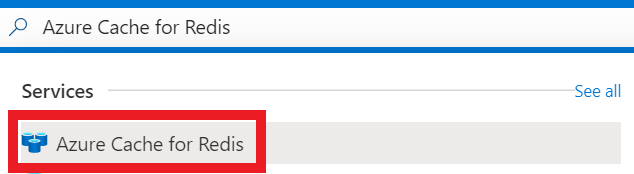
In the Azure portal, search for Azure Cache for Redis. Then, press enter or select it from the search suggestions.
Select the cache instance you want to add a private endpoint to.
On the left side of the screen, select Private Endpoint.
Select the Private Endpoint button to create your private endpoint.

On the Create a private endpoint page, configure the settings for your private endpoint.
Setting Suggested value Description Subscription Drop down and select your subscription. The subscription under which to create this private endpoint. Resource group Drop down and select a resource group, or select Create new and enter a new resource group name. Name for the resource group in which to create your private endpoint and other resources. By putting all your app resources in one resource group, you can easily manage or delete them together. Name Enter a private endpoint name. The name must: begin with a letter or number; end with a letter, number, or underscore; and can contain only letters, numbers, underscores, periods, or hyphens. Region Drop down and select a region. Select a region near other services that use your private endpoint. Select the Next: Resource button at the bottom of the page.
In the Resource tab, select your subscription, choose the resource type as
Microsoft.Cache/Redis, and then select the cache you want to connect the private endpoint to.Select the Next: Configuration button at the bottom of the page.
Select the Next: Virtual Network button at the bottom of the page.
In the Configuration tab, select the virtual network and subnet you created in the previous section.
In the Virtual Network tab, select the virtual network and subnet you created in the previous section.
Select the Next: Tags button at the bottom of the page.
Optionally, in the Tags tab, enter the name and value if you wish to categorize the resource.
Select Review + create. You're taken to the Review + create tab where Azure validates your configuration.
After the green Validation passed message appears, select Create.
Important
There is a publicNetworkAccess flag which is Disabled by default.
You can set the value to Disabled or Enabled. When set to enabled, this flag allows both public and private endpoint access to the cache. When set to Disabled, it allows only private endpoint access. For more information on how to change the value, see the FAQ.
Create a private endpoint using Azure PowerShell
To create a private endpoint named MyPrivateEndpoint for an existing Azure Cache for Redis instance, run the following PowerShell script. Replace the variable values with the details for your environment:
$SubscriptionId = "<your Azure subscription ID>"
# Resource group where the Azure Cache for Redis instance and virtual network resources are located
$ResourceGroupName = "myResourceGroup"
# Name of the Azure Cache for Redis instance
$redisCacheName = "mycacheInstance"

# Name of the existing virtual network
$VNetName = "myVnet"
# Name of the target subnet in the virtual network
$SubnetName = "mySubnet"
# Name of the private endpoint to create
$PrivateEndpointName = "MyPrivateEndpoint"
# Location where the private endpoint can be created. The private endpoint should be created in the same location where your subnet or the virtual network exists
$Location = "westcentralus"

$redisCacheResourceId = "/subscriptions/$($SubscriptionId)/resourceGroups/$($ResourceGroupName)/providers/Microsoft.Cache/Redis/$($redisCacheName)"

$privateEndpointConnection = New-AzPrivateLinkServiceConnection -Name "myConnectionPS" -PrivateLinkServiceId $redisCacheResourceId -GroupId "redisCache"

$virtualNetwork = Get-AzVirtualNetwork -ResourceGroupName  $ResourceGroupName -Name $VNetName

$subnet = $virtualNetwork | Select -ExpandProperty subnets | Where-Object  {$_.Name -eq $SubnetName}

$privateEndpoint = New-AzPrivateEndpoint -ResourceGroupName $ResourceGroupName -Name $PrivateEndpointName -Location "westcentralus" -Subnet  $subnet -PrivateLinkServiceConnection $privateEndpointConnection
Retrieve a private endpoint using Azure PowerShell
To get the details of a private endpoint, use this PowerShell command:
Get-AzPrivateEndpoint -Name $PrivateEndpointName -ResourceGroupName $ResourceGroupName
Remove a private endpoint using Azure PowerShell
To remove a private endpoint, use the following PowerShell command:
Remove-AzPrivateEndpoint -Name $PrivateEndpointName -ResourceGroupName $ResourceGroupName
Create a private endpoint using Azure CLI
To create a private endpoint named myPrivateEndpoint for an existing Azure Cache for Redis instance, run the following Azure CLI script. Replace the variable values with the details for your environment:
# Resource group where the Azure Cache for Redis and virtual network resources are located
ResourceGroupName="myResourceGroup"

# Subscription ID where the Azure Cache for Redis and virtual network resources are located
SubscriptionId="<your Azure subscription ID>"

# Name of the existing Azure Cache for Redis instance
redisCacheName="mycacheInstance"

# Name of the virtual network to create
VNetName="myVnet"

# Name of the subnet to create
SubnetName="mySubnet"

# Name of the private endpoint to create
PrivateEndpointName="myPrivateEndpoint"

# Name of the private endpoint connection to create
PrivateConnectionName="myConnection"

az network vnet create \
    --name $VNetName \
    --resource-group $ResourceGroupName \
    --subnet-name $SubnetName

az network vnet subnet update \
    --name $SubnetName \
    --resource-group $ResourceGroupName \
    --vnet-name $VNetName \
    --disable-private-endpoint-network-policies true

az network private-endpoint create \
    --name $PrivateEndpointName \
    --resource-group $ResourceGroupName \
    --vnet-name $VNetName  \
    --subnet $SubnetName \
    --private-connection-resource-id "/subscriptions/$SubscriptionId/resourceGroups/$ResourceGroupName/providers/Microsoft.Cache/Redis/$redisCacheName" \
    --group-ids "redisCache" \
    --connection-name $PrivateConnectionName
Retrieve a private endpoint using Azure CLI
To get the details of a private endpoint, use the following CLI command:
az network private-endpoint show --name MyPrivateEndpoint --resource-group MyResourceGroup
Remove a private endpoint using Azure CLI
To remove a private endpoint, use the following CLI command:
az network private-endpoint delete --name MyPrivateEndpoint --resource-group MyResourceGroup
FAQ
- How do I connect to my cache with private endpoint?
- Why can't I connect to a private endpoint?
- What features aren't supported with private endpoints?
- How do I verify if my private endpoint is configured correctly?
- How can I change my private endpoint to be disabled or enabled from public network access?
- How can I migrate my VNet injected cache to a Private Link cache?
- How can I have multiple endpoints in different virtual networks?
- What happens if I delete all the private endpoints on my cache?
- Are network security groups (NSG) enabled for private endpoints?
- My private endpoint instance isn't in my VNet, so how is it associated with my VNet?
How do I connect to my cache with private endpoint?
For Basic, Standard, and Premium tier caches, your application should connect to <cachename>.redis.cache.windows.net on port 6380. A private DNS zone, named *.privatelink.redis.cache.windows.net, is automatically created in your subscription. The private DNS zone is vital for establishing the TLS connection with the private endpoint. We recommend avoiding the use of <cachename>.privatelink.redis.cache.windows.net in configuration or connection string.
For Enterprise and Enterprise Flash tier caches, your application should connect to <cachename>.<region>.redisenterprise.cache.azure.net on port 10000.
For more information, see Azure services DNS zone configuration.
Why can't I connect to a private endpoint?
Private endpoints can't be used with your cache instance if your cache is already a VNet injected cache.
For Basic, Standard, and Premium tier caches, you are limited to 100 private links.
On Premium tier caches using clustering, you are limited to one private link.
Enterprise and Enterprise Flash tier caches are limited to 84 private links.
You try to persist data to storage account where firewall rules are applied might prevent you from creating the Private Link.
You might not connect to your private endpoint if your cache instance is using an unsupported feature.
What features aren't supported with private endpoints?
Trying to connect from the Azure portal console is an unsupported scenario where you see a connection failure.
Private links can't be added to caches that are already using passive geo-replication in the Premium tier. To add a private link to a geo-replicated cache: 1. Unlink the geo-replication. 2. Add a Private Link. 3. Last, relink the geo-replication. (Enterprise tier caches using active geo-replication do not have this restriction.)
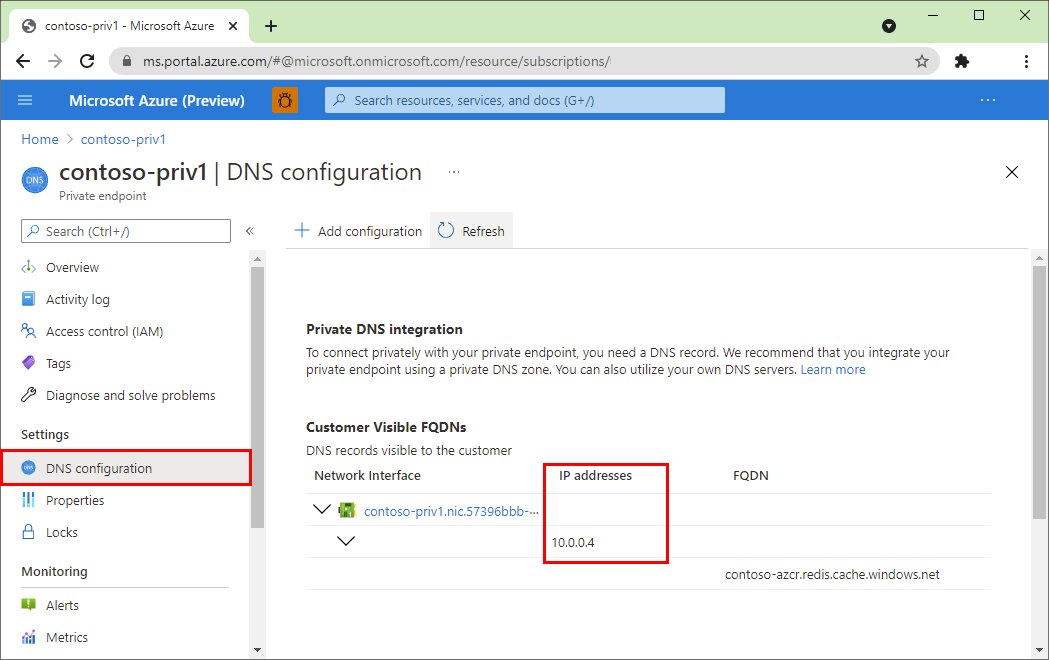
How do I verify if my private endpoint is configured correctly?
Go to Overview in the Resource menu on the portal. You see the Host name for your cache in the working pane. Run a command like nslookup <hostname> from within the VNet that is linked to the private endpoint to verify that the command resolves to the private IP address for the cache.
How can I change my private endpoint to be disabled or enabled from public network access?
There's a publicNetworkAccess flag that is Disabled by default.
When set to Enabled, this flag is allows both public and private endpoint access to the cache. When set to Disabled, it allows only private endpoint access. You can set the value to Disabled or Enabled in the Azure portal or with a RESTful API PATCH request.
To change the value in the Azure portal, follow these steps:
In the Azure portal, search for Azure Cache for Redis. Then, press enter or select it from the search suggestions.
Select the cache instance you want to change the public network access value.
On the left side of the screen, select Private Endpoint.
Select the Enable public network access button.
You can also change the value through a RESTful API PATCH request. For example, use the following code for a Basic, Standard, or Premium tier cache and edit the value to reflect the flag you want for your cache.
PATCH  https://management.azure.com/subscriptions/{subscription}/resourceGroups/{resourcegroup}/providers/Microsoft.Cache/Redis/{cache}?api-version=2020-06-01
{    "properties": {
       "publicNetworkAccess":"Disabled"
   }
}
For more information, see Redis - Update.
How can I migrate my VNet injected cache to a Private Link cache?
Refer to our migration guide for different approaches on how to migrate your VNet injected caches to Private Link caches.
How can I have multiple endpoints in different virtual networks?
To have multiple private endpoints in different virtual networks, the private DNS zone must be manually configured to the multiple virtual networks before creating the private endpoint. For more information, see Azure Private Endpoint DNS configuration.
What happens if I delete all the private endpoints on my cache?
Once you delete the private endpoints on your cache, your cache instance can become unreachable until: you explicitly enable public network access, or you add another private endpoint. You can change the publicNetworkAccess flag on either the Azure portal or through a RESTful API PATCH request. For more information on how to change the value, see the FAQ
Are network security groups (NSG) enabled for private endpoints?
No, they're disabled for private endpoints. While subnets containing the private endpoint can have NSG associated with it, the rules aren't effective on traffic processed by the private endpoint. You must have network policies enforcement disabled to deploy private endpoints in a subnet. NSG is still enforced on other workloads hosted on the same subnet. Routes on any client subnet will be using an /32 prefix, changing the default routing behavior requires a similar UDR.
Control the traffic by using NSG rules for outbound traffic on source clients. Deploy individual routes with /32 prefix to override private endpoint routes. NSG Flow logs and monitoring information for outbound connections are still supported and can be used.
My private endpoint instance isn't in my VNet, so how is it associated with my VNet?
It's only linked to your VNet. Because it's not in your VNet, NSG rules don't need to be modified for dependent endpoints.
Related content
- To learn more about Azure Private Link, see the Azure Private Link documentation.
- To compare various network isolation options for your cache, see Azure Cache for Redis network isolation options documentation.
Feedback
Coming soon: Throughout 2024 we will be phasing out GitHub Issues as the feedback mechanism for content and replacing it with a new feedback system. For more information see: https://aka.ms/ContentUserFeedback.
Submit and view feedback for