Restore a backup to a new volume
Restoring a backup creates a new volume with the same protocol type. This article explains the restore operation.
Considerations
You can restore backups only within the same NetApp account. Restoring backups across NetApp accounts are not supported.
You can restore backups to a different capacity pool within the same NetApp account.
You can restore a backup only to a new volume. You cannot overwrite the existing volume with the backup.
The new volume created by the restore operation cannot be mounted until the restore completes.
You should trigger the restore operation when there are no baseline backups. Otherwise, the restore might increase the load on the Azure Blob account where your data is backed up.
For volumes greater than 10 TiB, it can take multiple hours to transfer all the data from the backup media.
Restoring a backup to a new volume is not dependent on the networking type used by the source volume. You can restore the backup of a volume configured with Basic networking to a volume configured with Standard networking and vice versa.
In the Volume overview page, refer to the Originated from field to see the name of the snapshot used to create the volume.
See Restoring volume backups from vaulted snapshots for more information.
Important
Running multiple concurrent volume restores using Azure NetApp Files backup may increase the time it takes for each individual, in-progress restore to complete. As such, if time is a factor to you, you should prioritize and sequentialize the most important volume restores and wait until the restores are complete before starting another, lower priority, volume restores.
See Requirements and considerations for Azure NetApp Files backup for more considerations about using Azure NetApp Files backup. See Resource limits for Azure NetApp Files for information about minimums and maximums.
Steps
Important
All backups must be migrated to backup vaults. You are unable to perform any operation on or with a backup until you have migrated the backup to a backup vault. For more information about this procedure, see Manage backup vaults.
- Select Backup Vault. Navigate to Backups.
From the backup list, select the backup to restore. Select the three dots (
…) to the right of the backup, then select Restore to new volume from the Action menu.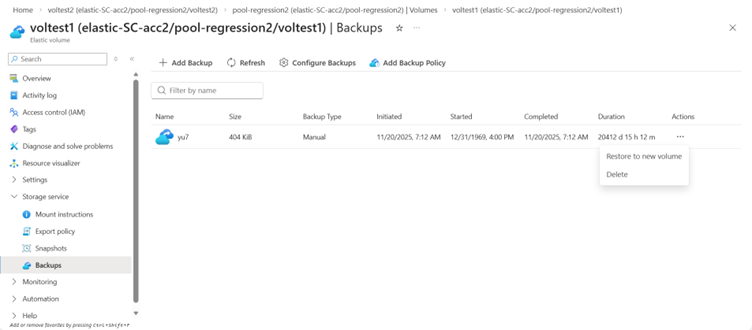
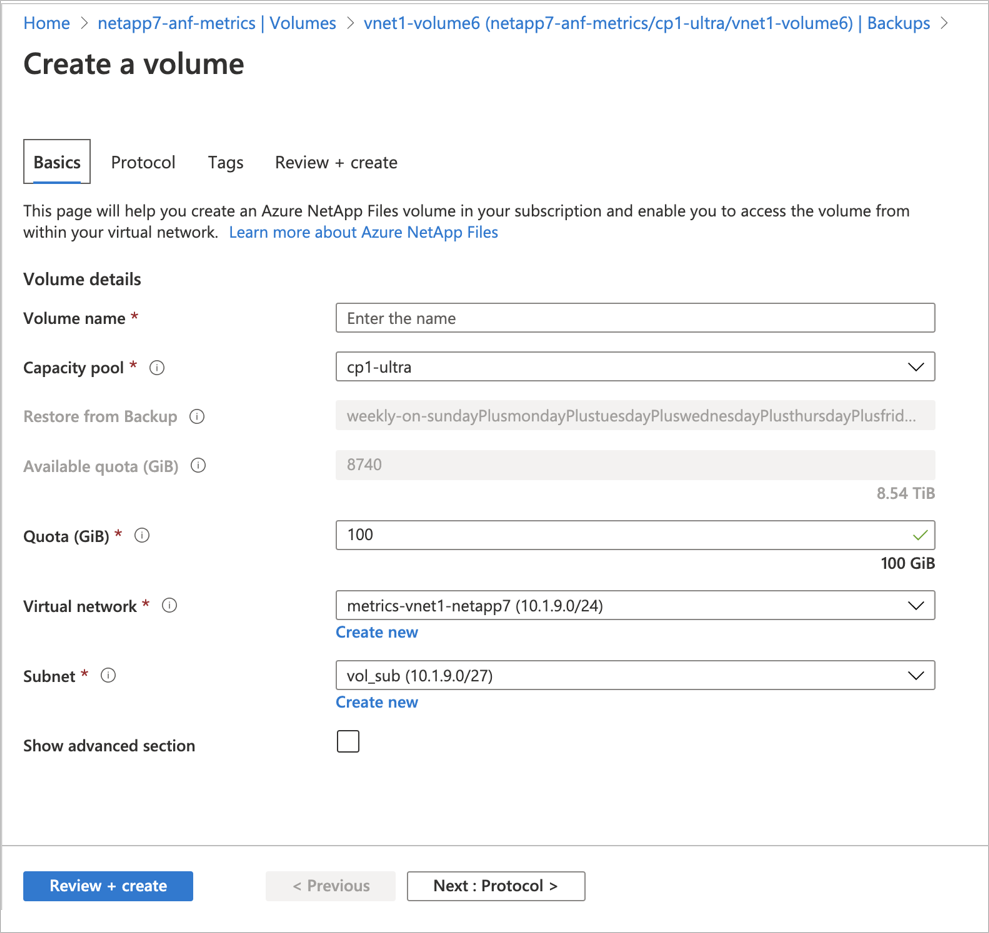
In the Create a Volume page that appears, provide information for the fields in the page as applicable, and select Review + Create to begin restoring the backup to a new volume.
The Protocol field is pre-populated from the original volume and cannot be changed.
However, if you restore a volume from the backup list at the NetApp account level, you need to specify the Protocol field. The Protocol field must match the protocol of the original volume. Otherwise, the restore operation fails with the following error:
Protocol Type value mismatch between input and source volume of backupId <backup-id of the selected backup>. Supported protocol type : <Protocol Type of the source volume>The Quota value must be at least 20% greater than the size of the backup from which the restore is triggered. Once the restore is complete, the volume can be resized depending on the size used.
The Capacity pool that the backup is restored into must have sufficient unused capacity to host the new restored volume. Otherwise, the restore operation fails.
The Volumes page displays the new volume. In the Volumes page, the Originated from field identifies the name of the snapshot used to create the volume.

Next steps
- Understand Azure NetApp Files backup
- Requirements and considerations for Azure NetApp Files backup
- Resource limits for Azure NetApp Files
- Configure policy-based backups
- Configure manual backups
- Manage backup policies
- Search backups
- Delete backups of a volume
- Volume backup metrics
- Azure NetApp Files backup FAQs
- How Azure NetApp Files snapshots work