Note
Access to this page requires authorization. You can try signing in or changing directories.
Access to this page requires authorization. You can try changing directories.
DHCP doesn't work for virtual machines (VMs) on the VMware HCX L2 stretched network when the DHCP server is in the on-premises data center because NSX, by default, blocks all DHCP requests from traversing the L2 stretch. Therefore, to send DHCP requests from your Azure VMware Solution VMs to a non-NSX DHCP server, you need to configure DHCP on L2 stretched VMware HCX networks.
Configuring DHCP Relay in NSX is unnecessary while the network is stretched. Implementing DHCP relay on an extended network may lead to unintended issues, resulting in clients not receiving the correct responses. Following a failover to Azure VMware Solution, DHCP Relay or NSX DHCP server configuration would be necessary to continue serving clients effectively.
(Optional) If you need to locate the segment name of the L2 extension:
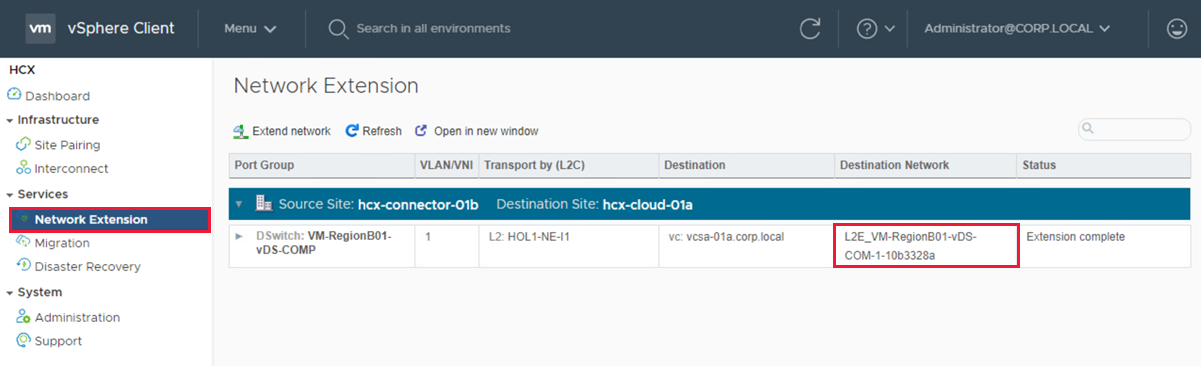
Sign in to your on-premises vCenter Server, and under Home, select HCX.
Select Network Extension under Services.
Select the network extension you want to support DHCP requests from Azure VMware Solution to on-premises.
Take note of the destination network name.
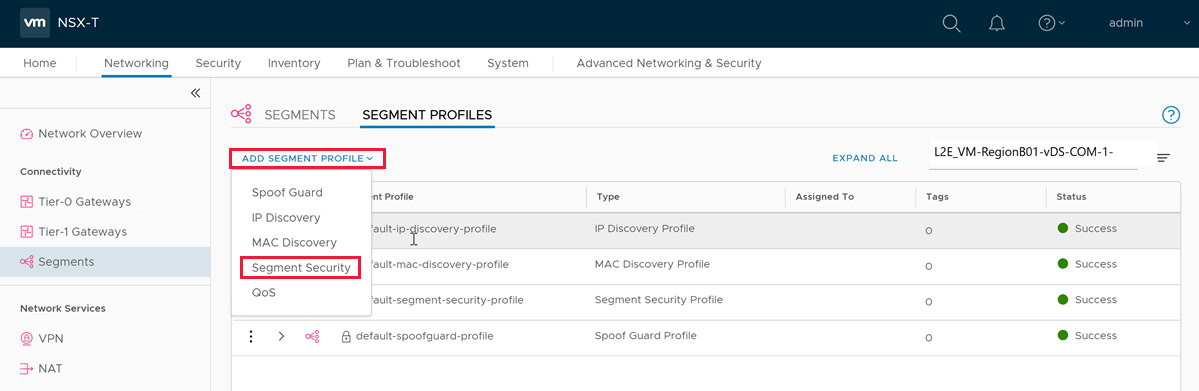
In NSX-T Manager, select Networking > Segments > Segment Profiles.
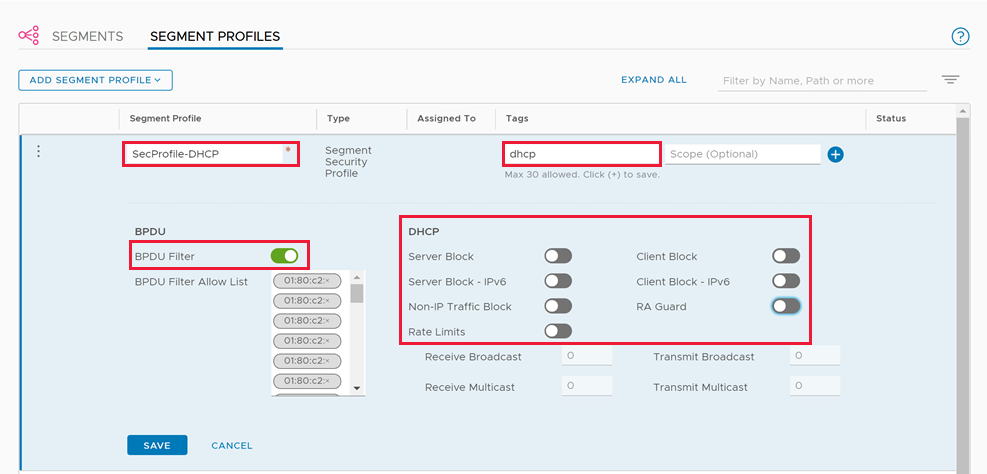
Select Add Segment Profile and then Segment Security.
Provide a name and a tag, and then set the BPDU Filter toggle to ON and all the DHCP toggles to OFF.