Note
Access to this page requires authorization. You can try signing in or changing directories.
Access to this page requires authorization. You can try changing directories.
After deploying Azure VMware Solution, you can configure an NSX network segment from NSX Manager or the Azure portal. Once configured, the segments are visible in Azure VMware Solution, NSX Manager, and vCenter Server. NSX comes pre-provisioned by default with an NSX Tier-0 gateway in Active/Active mode and a default NSX Tier-1 gateway in Active/Standby mode. These gateways let you connect the segments (logical switches) and provide East-West and North-South connectivity.
Tip
The Azure portal presents a simplified view of NSX operations a VMware administrator needs regularly and targeted at users not familiar with NSX Manager.
In this tutorial, you learn how to:
- Add network segments using either NSX Manager or the Azure portal
- Verify the new network segment
Prerequisites
An Azure VMware Solution private cloud with access to the vCenter Server and NSX Manager interfaces. For more information, see the Configure networking tutorial.
Use Azure portal to add an NSX network segment
Note
If you plan to use DHCP, you'll need to configure a DHCP server or DHCP relay before you can configure an NSX network segment.
In your Azure VMware Solution private cloud, under Workload Networking, select Segments > Add.
Provide the details for the new logical segment and select OK.
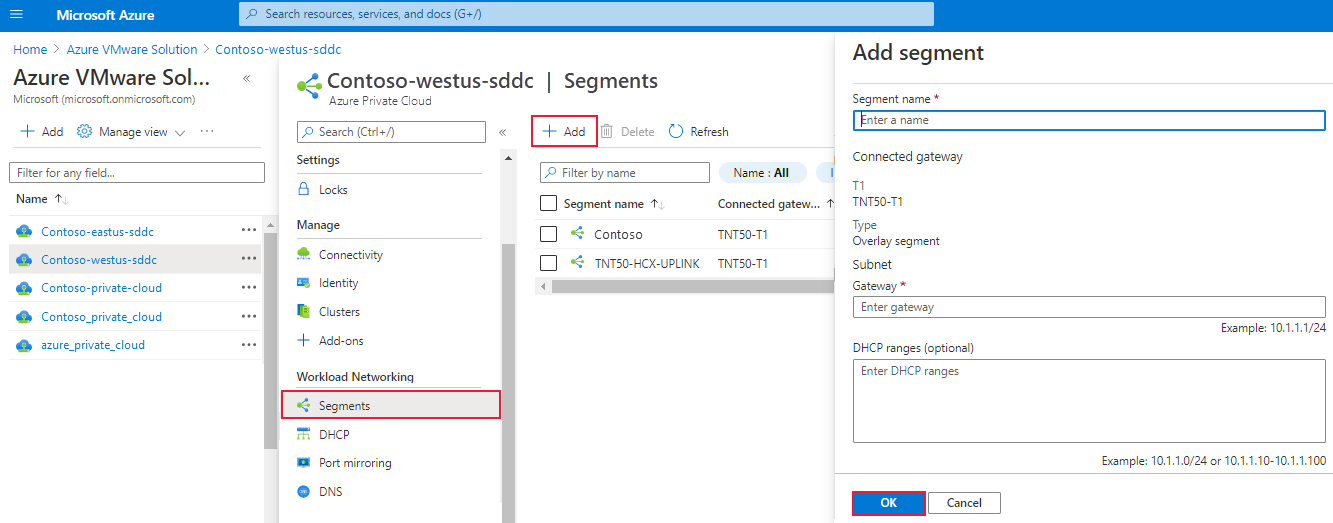
Segment name - Name of the segment that is visible in vCenter Server.
Subnet gateway - Gateway IP address for the segment's subnet with a subnet mask. VMs are attached to a logical segment, and all VMs connecting to this segment belong to the same subnet. Also, all VMs attached to this logical segment must carry an IP address from the same segment.
DHCP (optional) - DHCP ranges for a logical segment. You must configure a DHCP server or DHCP relay to consume DHCP on Segments.
Note
The Connected gateway is selected by default and is read-only. It shows Tier-1 Gateway and type of segment information.
T1 - Name of the Tier-1 Gateway in NSX Manager. A private cloud comes with an NSX Tier-0 Gateway in Active/Active mode and a default NSX Tier-1 Gateway in Active/Standby mode. Segments created through the Azure VMware Solution console only connect to the default Tier-1 Gateway, and the workloads of these segments get East-West and North-South connectivity. You can only create more Tier-1 Gateways through NSX Manager. Tier-1 Gateways created from the NSX Manager console are not visible in the Azure VMware Solution console.
Type - Overlay segment supported by Azure VMware Solution.
The segment is now visible in Azure VMware Solution, NSX Manager, and vCenter Server.
Use NSX Manager to add network segment
The virtual machines (VMs) created in vCenter Server are placed onto the network segments created in NSX and are visible in vCenter Server.
In NSX Manager, select Networking > Segments, and then select Add Segment.
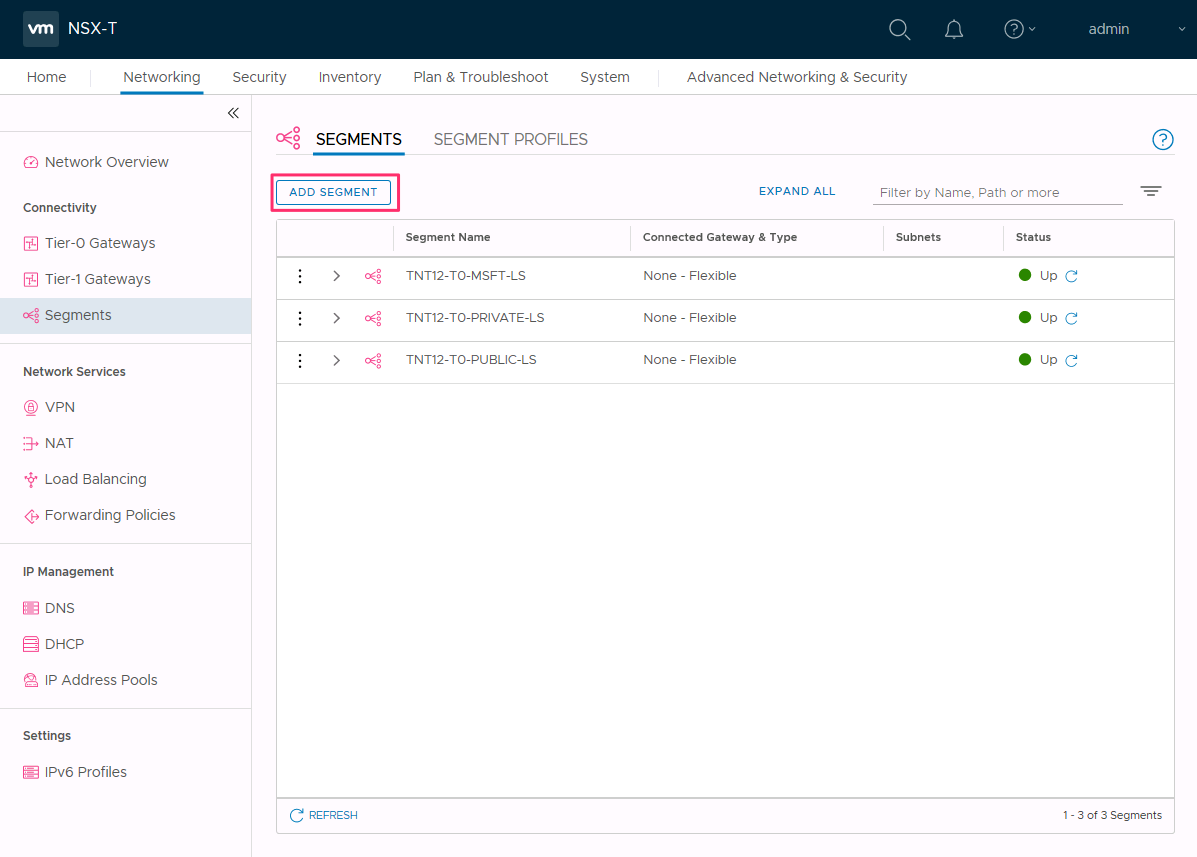
Enter a name for the segment.
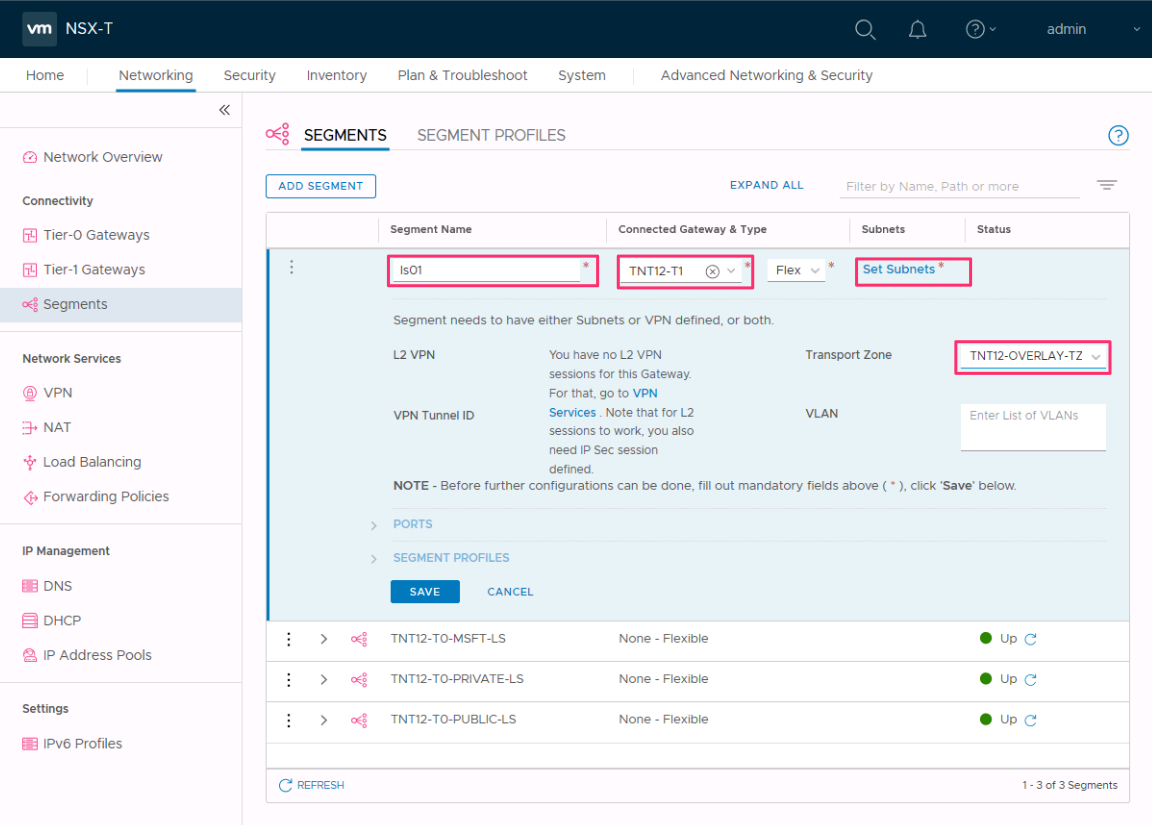
Select the Tier-1 Gateway (TNTxx-T1) as the Connected Gateway and leave the Type as Flexible.
Select the preconfigured overlay Transport Zone (TNTxx-OVERLAY-TZ) and then select Set Subnets.
Enter the gateway IP address and then select Add.
Important
The IP address needs to be on a non-overlapping RFC1918 address block, which ensures connection to the VMs on the new segment.
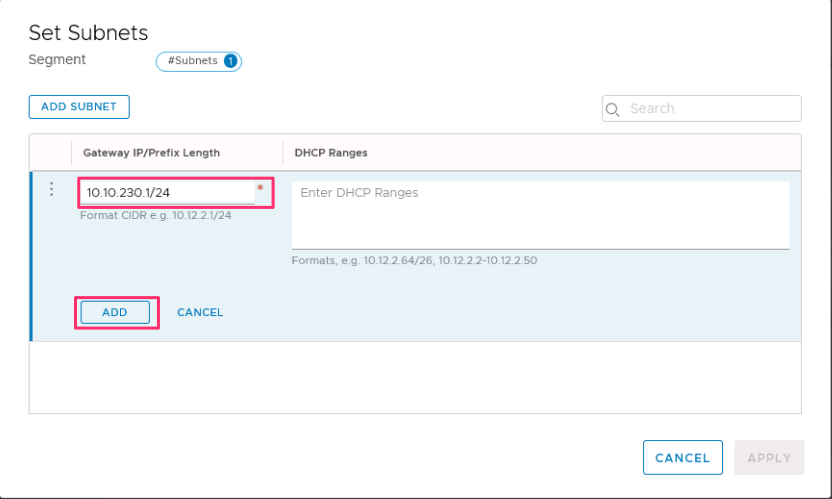
Select Apply and then Save.
Select No to decline the option to continue configuring the segment.
Verify the new network segment
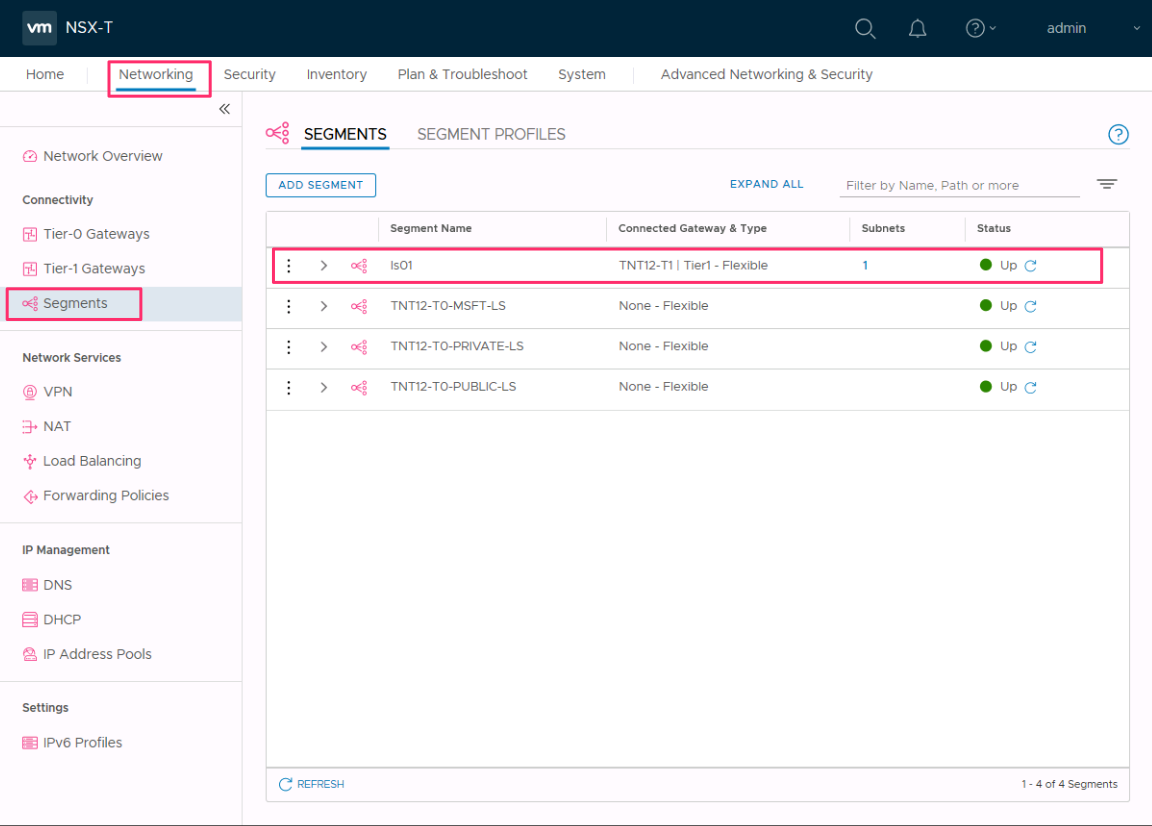
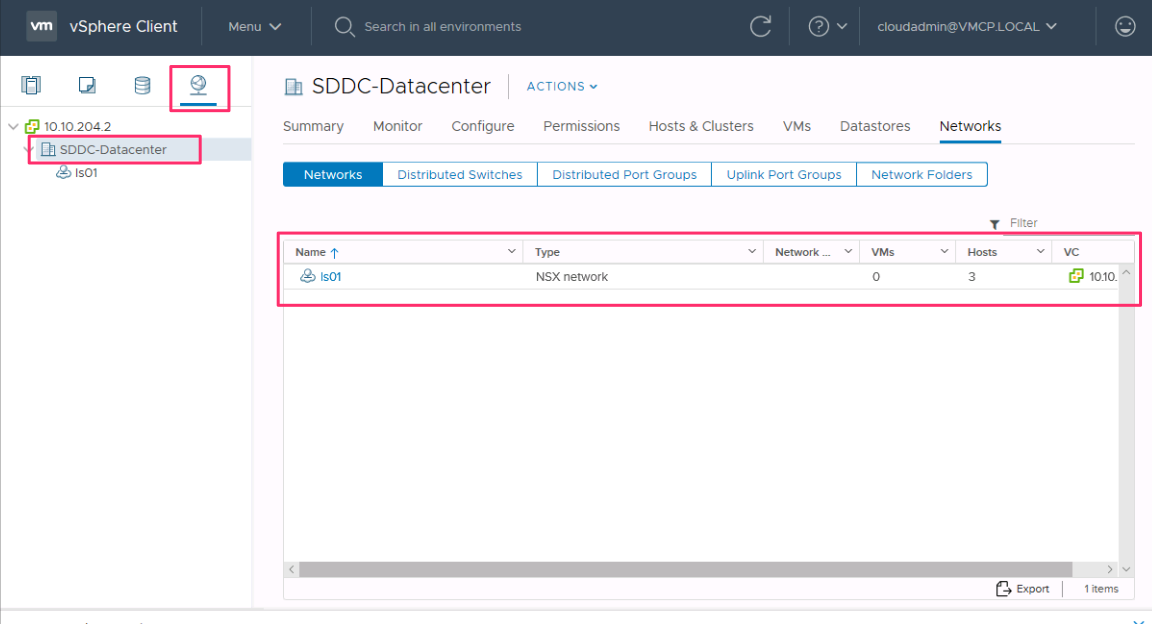
Verify the presence of the new network segment. In this example, ls01 is the new network segment.
In NSX Manager, select Networking > Segments.
In vCenter Server, select Networking > SDDC-Datacenter.
Next steps
In this tutorial, you created an NSX network segment to use for VMs in vCenter Server.
You can now: